How to Sew a Quarter Inch Seam That Measures Right Every Time

QuiltingEasy5:117 stepsPart of DIY Crafts for BeginnersBrowse more →
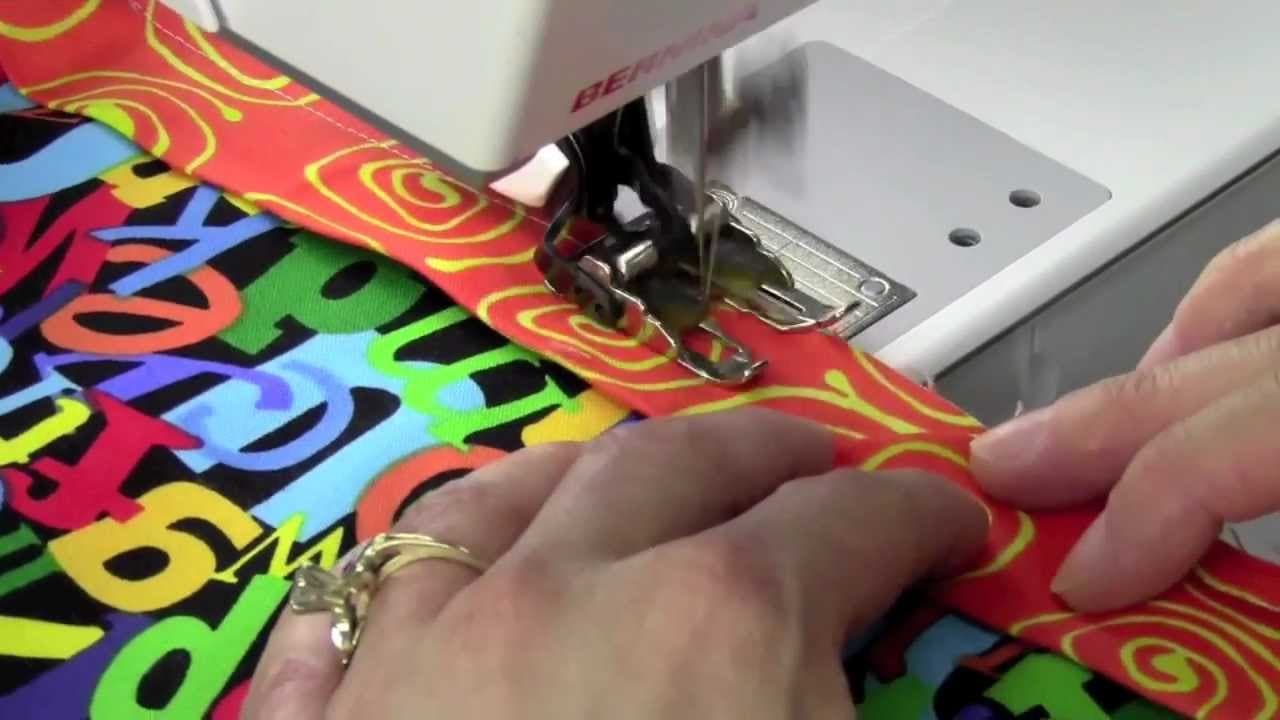
The finished result: How to Sew a Quarter Inch Seam That Measures Right Every Time
Also in:Sewing

By CraftingStepByStepPublished

Based on a video by Sugar Stitches Quilt Co..

A quarter inch is the unit quilting is built on. Every pattern assumes it, because the arithmetic only works if the seam takes a quarter inch off each piece. Sew a hair wide and a block that should finish at 12 1/2 inches comes off the machine at 12 1/4, and across a sampler nothing lines up.

Quilters do not want a true quarter inch. They want a scant quarter inch, about one thread width narrower. Ladine from Sugar Stitches Quilt Co. sets hers with a magnetic guide, sews a test seam, then measures it before trusting a quilt to it.

Why a scant quarter inch beats a true one

Press a seam and the fabric folds over the stitching. That fold and the thread under it take up room, and it comes off the finished size of every piece. Sew a true quarter inch and blocks finish small; sew a scant and the fold gives the difference back.

A scant is still a measurement, not permission to guess: one thread narrower than 1/4 inch, no more.

Foot, guide, or tape

A quarter-inch patchwork foot is the usual answer, and plenty are made a touch under a true quarter already. Do not assume yours is: measure it against a ruler.

A seam guide, magnetic or screwed to the bed, gives the fabric edge a wall to ride against and can be nudged a thread width at a time. Masking tape is free but shifts. If your machine moves the needle position, that is the finest control you own.

Two ways to test the seam

The test in this video takes two minutes. Sew two 2 1/2 inch squares together, lay a ruler across the pair with its edge on the raw edges, and see where the stitching falls. A scant quarter inch sits a whisker inside the 1/4 inch line.

The other test uses strips. Cut three 1 1/2 inch strips, sew them into a set, press, and measure the middle strip: it has to be 1 inch. At 15/16 the seam is too fat. Test in the fabric and thread you will piece with; both move the number.

Consistency beats accuracy

Between a seam that hits 1/4 inch half the time and one that is a consistent scant, take the consistent one. A quilt uniformly a shade small still goes together; one where every seam differs fights you at every intersection.

When the measurement comes out wrong

  • It reads wide, or too narrow. Move the guide a thread toward or away from the needle, or shift the needle position a step. Change one thing, then sew a fresh test pair.
  • It measures right but blocks come out small. The seam is fine and the pressing is not. An unpressed seam steals size the same way a fat one does.
  • It wanders along its length. You are pulling the fabric. Let the feed dogs move it and watch the guide, not the needle.

What an accurate quarter inch unlocks

This is the first rung. Pressing your quilt seams open or to the side moves the finished size as much as stitching does, and pressing to the side is what lets you nest the seams into a sharp intersection.

Squaring up a block is a trim, not a rescue: it needs a block that came off the machine near its unfinished size. Flying geese and half square triangles lose the point when the seam runs wide, and a log cabin block stacks the error every round.

Borders are where a drifting seam shows as a ripple. A finished top gets quilted with free motion quilting or straight-line walking foot quilting. A good seam cannot save a bad cut, so check how to cut quilt fabric if your squares come out uneven, or how to use a sewing machine if it is new to you.

What you'll need

Step-by-Step Guide

7 steps · about 5 minutes.Check off each step as you go and your progress saves automatically.

1

Set the Seam Guide a Measured 1/4 Inch From the Needle

1:36
Step 1: Set the Seam Guide a Measured 1/4 Inch From the Needle - How to Sew a Quarter Inch Seam That Measures Right Every Time

Drop the needle by hand so you can see exactly where it sits, then lay a quilting ruler flat on the machine bed with its edge touching the needle. Read across to the 1/4 inch line.

Bring your seam guide up to that line and lock it down. The markings engraved on the needle plate are a starting point, not gospel. Plates are stamped for the machine, not for your foot, your fabric or your thread. Measuring takes ten seconds and settles it.

Tip

Measure to the needle itself, not to the hole in the plate. The hole is wider than the needle, and at this scale that difference is most of a scant.

2

Slide the Guide One Thread Width In for a Scant Quarter Inch

2:00
Step 2: Slide the Guide One Thread Width In for a Scant Quarter Inch - How to Sew a Quarter Inch Seam That Measures Right Every Time

Move the guide toward the needle by about the thickness of a sewing thread. On a magnetic guide that is a nudge with a fingernail, not a reposition. If your plate carries finer marks between the quarter inch and the eighth, park the guide on the one just short of 1/4.

That sliver is the whole idea of a scant. It looks like nothing sitting on the machine bed, and it adds up to a quarter inch of drift across a row of eight blocks.

Tip

If your machine can move the needle position, use that instead of moving the guide. One click of needle position is finer than anything you can push by hand.

3

Check the Quarter-Inch Presser Foot Against the Seam Guide

2:08
Step 3: Check the Quarter-Inch Presser Foot Against the Seam Guide - How to Sew a Quarter Inch Seam That Measures Right Every Time

Look at the gap between the right edge of the presser foot and the guide. Plenty of quarter-inch feet are made a touch under a true quarter already, so the two edges nearly meet with a sliver of daylight between them.

If your foot edge sits well inside the guide, the foot has been sewing narrower than you thought. If it sits outside, it has been sewing wide. Either way you now know which of the two to follow, and the guide wins, because the guide is the one you can adjust.

Tip

Feed the fabric against the guide rather than against the foot. The foot rides up over a thick seam allowance and lets the edge slip under it. The guide does not move.

Used in this stepquarter inch presser foot
4

Butt the Raw Edges of Two 2 1/2 Inch Squares Against the Guide

2:32
Step 4: Butt the Raw Edges of Two 2 1/2 Inch Squares Against the Guide - How to Sew a Quarter Inch Seam That Measures Right Every Time

Cut two squares at 2 1/2 inches, stack them right sides together, and line all four raw edges up. Slide the stack over so the right-hand edges sit flat against the guide along their whole length, not touching it at one end and drifting at the other.

Cut the test squares from the fabric you are about to piece with. A test sewn in a stiff quilting cotton tells you very little about how a soft shirting is going to behave under the same setting.

Tip

Give the two squares a quick press together before you sew. A bubble between the layers reads as a wandering seam afterwards and sends you chasing the wrong problem.

5

Sew the Test Seam With the Fabric Edge Riding the Guide

2:38
Step 5: Sew the Test Seam With the Fabric Edge Riding the Guide - How to Sew a Quarter Inch Seam That Measures Right Every Time

Stitch down the edge at a steady speed with the raw edges held against the guide for the full length of the seam. Do not pull the fabric through. The feed dogs move it, your fingers only steer.

Keep your eyes on the edge where it meets the guide rather than on the needle. The needle shows you where the stitching has already gone. The guide shows you where it is about to go, which is the half you can still do something about.

Tip

Sew the test at the speed you really piece at. A slow, careful test seam does not predict what happens when you are chain piecing forty units at full pedal.

6

Lay the Quilting Ruler on the Sewn Pair and Read the Seam Against the 1/4 Inch Line

3:20
Step 6: Lay the Quilting Ruler on the Sewn Pair and Read the Seam Against the 1/4 Inch Line - How to Sew a Quarter Inch Seam That Measures Right Every Time

Set the ruler on the sewn pair with its edge exactly on the raw edges, not a hair over and not a hair short. Then look at the stitching line against the printed 1/4 inch line on the ruler.

A scant quarter inch sits a whisker inside the line. Stitching sitting on the line is a true quarter inch, which will finish your blocks small. Stitching past the line means the seam is too wide, and the guide needs to move before you sew anything else.

Tip

If it is off, change one thing and sew a fresh test pair. Move the guide and the needle position together and you will have no idea which one fixed it.

7

Check the Pressed Test Unit in the Fabric and Thread You Will Piece With

4:08
Step 7: Check the Pressed Test Unit in the Fabric and Thread You Will Piece With - How to Sew a Quarter Inch Seam That Measures Right Every Time

Press the seam and look at the unit flat. The squares should still read as squares, the seam should run straight, and the whole piece should lie dead flat instead of bowing along the stitching.

Ladine presses her seams open, pieces with a 50 wt cotton thread, and runs the test in the same prints she is about to cut into. Thread weight and fabric thickness both move the measurement, so a setting proved on scrap poplin is not proved on the quilt.

Tip

Write the setting down: guide position, needle position, thread weight, machine. Next time you sit down to piece you can set up in thirty seconds instead of testing from scratch.

Used in this steprowenta focus steam iron

Keep going

How to Add Borders to a Quilt Top So They Lie Flat

Products Used

The Checklist

How to Sew a Quarter Inch Seam That Measures Right Every Time

Tools
8
Materials
2
Steps
7
Video
5 min

Tools we recommend

Your Guide

Sugar Stitches Quilt Co.

As an Amazon Associate we earn from qualifying purchases. Links on this page may be affiliate links - clicking them and buying doesn't change your price, but helps support CraftingStepByStep.

Tags

Sunday How-To

New quilting tutorials, every Sunday

One short email with the week's best step-by-step guides. Free, no spam, unsubscribe anytime.

Did this work for you?

What's next

Related collections

Curated theme pages that include this tutorial.

Weekly Digest

Liked this quilting tutorial?

Pick the categories you want to hear about. Weekly digest of new step-by-step tutorials. No spam, easy unsubscribe.

Send me tutorials about

We only email about new tutorials. Easy unsubscribe anytime.