How to Press Quilt Seams So They Lie Dead Flat

QuiltingEasy17:2010 stepsPart of DIY Crafts for BeginnersBrowse more →
The finished result: How to Press Quilt Seams So They Lie Dead Flat

By CraftingStepByStepPublished

Based on a video by Mary B.

Pressing is the half of piecing nobody films. You sew a seam in twelve seconds, then spend a minute at the iron, and that minute decides whether the block lies flat or rocks on the table. Most blocks that finish the wrong size were pressed badly, not sewn badly.

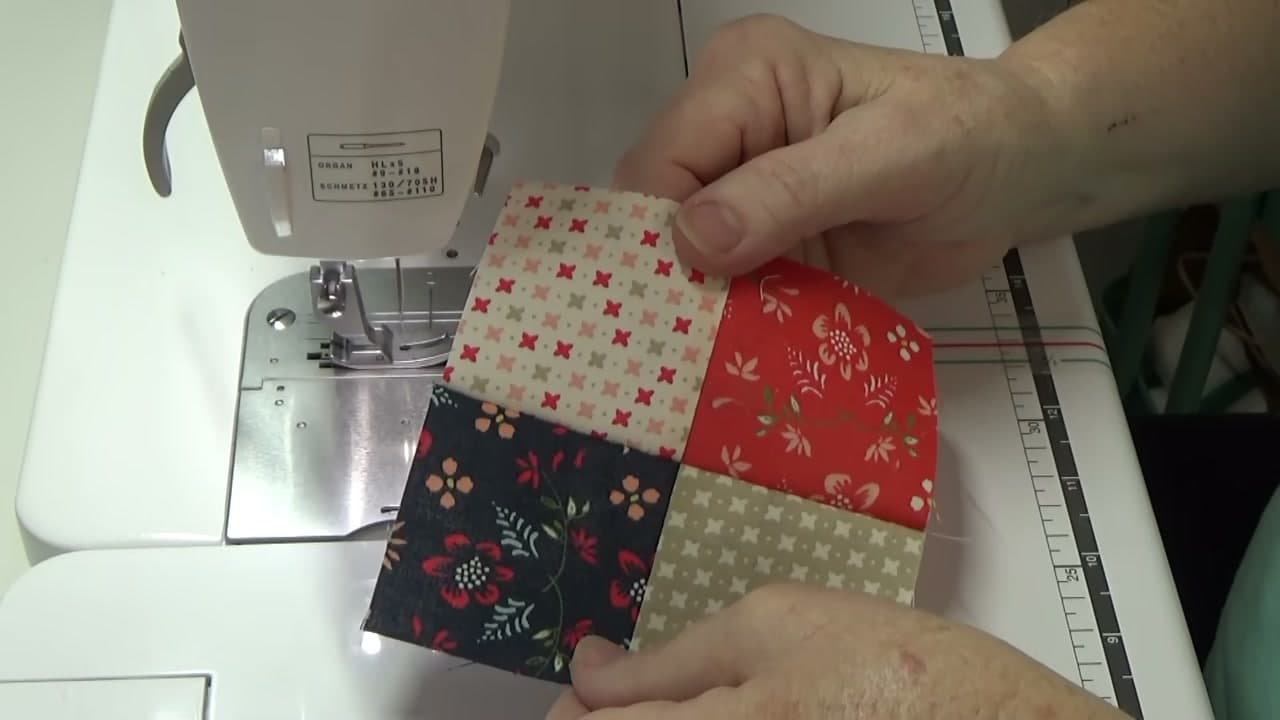
This one follows Mary from Joyful and Merry Quilting, who builds a nine patch and presses every seam a different way to see which lies flattest. Her answer involves a wool mat, a wooden pressing bar and a starch-filled marker pen. The rules underneath hold whichever direction you press.

Press means press. It does not mean iron.

Ironing is what you do to a shirt. The plate slides, the cloth travels under it, creases come out. Do that to a quilt seam and the cut edge stretches, because patchwork is full of bias and bias grows the moment heat and sideways pressure arrive together.

Pressing is lift, set down, hold, lift again. Ten seconds with the plate sitting still beats thirty seconds of scrubbing, and the row leaves the mat the same length it arrived.

Open or to the side?

Both are right, and quilters have argued about it for a century. To the side is the stronger seam, because the stitching never gets pushed apart from behind. It also leaves a ridge on one row and a groove on the next, and those opposing ridges are what let you nest seams at an intersection. Nesting is the easiest way to get points to match, and it only works if the two rows went in opposite directions. Press to the side and nesting is available. Press open and it is not. That is the trade.

Open lies flatter. No double thickness anywhere, so the surface stays even and the quilting needle never climbs a bump. If your piecing is dense, or you mean to quilt across the intersections rather than in the ditch, open is the better call. It is slower work, which is why Mary reaches for the marker and the bar. Whichever you choose, choose it per project and not per seam.

Press toward the darker fabric

Pressing to the side leaves one more decision. Send the allowance under the darker of the two squares. A dark allowance behind a pale square shows as a grey shadow once the quilt is washed, and nothing fixes it. Where both fabrics are the same value, press whichever way lets the next seam nest.

Dry iron, steam or starch

Steam is the fastest way to stretch a block. Water relaxes cotton, the plate bears down, and a square cut at three and a half inches leaves the mat bigger. Press dry and your units come out more consistent.

Starch does the opposite job. It stiffens the cloth so the seam stays where you put it. Spray your yardage before you cut the pieces and everything downstream behaves better. Mary skips the pre-spray so her test stays fair, then applies solution seam by seam with a refillable marker.

When a seam will not lie flat

Check the seam allowance first. If it came out wider than a scant quarter inch, there is more fabric folded behind the block than the block can absorb, and no amount of heat flattens it. Re-sew before you re-press.

A lump at an intersection usually means four layers of allowance stacked the same way. Open that seam, work the allowances apart with a wooden tool, and press it over a rounded bar so the bulk falls away from the seam line.

A block that rocks on the table has one allowance folded back on itself. Turn it over and look along the back. Fix it now, because once the block is sewn into a row that fold sits under a second seam.

Flat seams are what make everything after this possible. Trim with confidence when you square up the block, build a strip block like a log cabin without the centre going lumpy, keep the points on your half square triangles, and lay a quilt sandwich flat when you machine quilt it.

What you'll need

Step-by-Step Guide

10 steps · about 17 minutes.Check off each step as you go and your progress saves automatically.

1

Lay the Sewn Row on a Wool Pressing Mat With Its Seams Still Closed

1:16
Step 1: Lay the Sewn Row on a Wool Pressing Mat With Its Seams Still Closed - How to Press Quilt Seams So They Lie Dead Flat

Carry the row straight from the machine to the mat while the fabric is still warm from sewing. Warm cotton takes a press better than cold cotton that has sat in a pile all afternoon.

Mary works on a wool pressing mat. Wool holds heat and throws it back up through the cloth, so the seam gets pressed from underneath at the same time as from above. A folded towel on the table does not do that. Set the row down, find your two seam lines, and leave the iron where it is for now.

Tip

Set the seam before you open it. Press the row flat exactly as it came off the machine, seam still closed, for a few seconds. That sinks the stitches into the fabric and the seam opens cleaner afterwards.

2

Work the Seam Allowance Apart With a Chopstick or Point Turner

2:58
Step 2: Work the Seam Allowance Apart With a Chopstick or Point Turner - How to Press Quilt Seams So They Lie Dead Flat

Slide a chopstick, a stiletto or a wooden point turner down the seam and walk the two allowances away from each other. Fingers do the same job, but the iron is about to sit within an inch of them and that stops being funny quickly.

Watch the allowances as you go. They spring back up the second you let go, and those little standing points are exactly what stops a block lying flat later. Getting them properly apart now is most of the work.

Tip

A wooden tool beats a metal one here. Wood grips the fabric enough to drag the allowance over, and it will not scratch the sole plate if it ends up under the iron.

3

Draw Pressing Solution Down the Open Seam With a Refillable Marker

3:55
Step 3: Draw Pressing Solution Down the Open Seam With a Refillable Marker - How to Press Quilt Seams So They Lie Dead Flat

Mary fills an empty applicator pen with liquid pressing solution and draws a line straight down the middle of the open seam. A spray bottle soaks the whole patch. The marker puts starch only on the seam line, which is the only part that needs it.

If the tip has dried out, push down on it once to release the solution before you start. You need far less than you think. The fabric should darken slightly along the seam and no further. Solution soaking through onto the wool mat means you used too much or moved too slowly.

Tip

No marker pen? Spray a little pressing solution into a bowl and paint it along the seam with a small brush. Same result, one more thing to wash up.

4

Set the Sole Plate Down on the Seam and Hold It Still

4:12
Step 4: Set the Sole Plate Down on the Seam and Hold It Still - How to Press Quilt Seams So They Lie Dead Flat

Put the iron down flat on the seam and leave it. Ten seconds is not too long, and it will not hurt quilting cotton. Then lift it straight up, move along, and set it down again.

Do not slide it back and forth. Pushing a hot plate along a cut edge stretches the bias and the row grows, which is how a nine patch ends up long on one side and out of square. Every pressing rule in quilting comes back to this one.

Tip

Keep one hand clear of the plate. If you find yourself holding the seam open with a fingertip while the iron comes down, that is the moment to reach for the pressing bar instead.

Used in this stepsteam iron
5

Run a Fingertip Along the Seam to Feel Whether It Opened All the Way

4:30
Step 5: Run a Fingertip Along the Seam to Feel Whether It Opened All the Way - How to Press Quilt Seams So They Lie Dead Flat

Lift the iron and run a fingertip down the seam while the cloth is still warm. It should read as one flat surface with no ridge under your finger.

If a corner of the allowance has flipped back on itself, open it now and press it again. Once the fabric cools that fold is set, and the next seam gets sewn straight over the top of it. Ten seconds of checking here saves a seam ripper later.

Tip

Look at the seam from the side as well as from above. A seam that reads flat from directly overhead can still have both allowances standing up at an angle, and the side view is the only one that shows it.

6

Drape the Seam Over a Wool Pressing Bar So It Falls Open

6:28
Step 6: Drape the Seam Over a Wool Pressing Bar So It Falls Open - How to Press Quilt Seams So They Lie Dead Flat

A pressing bar is a length of wood with a wool-covered curve on top. Lay the row over it and the two allowances fall away from each other under their own weight. The bar opens the seam for you and keeps your hands away from the plate.

Line the seam up along the top of the curve, not down one side. The sole plate is flat, so it only meets the fabric squarely if the seam is sitting at the highest point.

Tip

A rolled-up towel or a wooden dowel wrapped in a scrap of wool does the same job for nothing. The shape is what matters, not the product.

Used in this steptailor's clapper
7

Press Along the Top of the Bar With the Flat of the Sole Plate

6:40
Step 7: Press Along the Top of the Bar With the Flat of the Sole Plate - How to Press Quilt Seams So They Lie Dead Flat

Bring the iron down square on the seam where it crosses the top of the bar. Hold ten seconds, lift, slide the fabric along, set down again. Work the whole length that way.

The curve means only the seam takes the heat. The squares either side hang down off the bar and stay untouched, so you are not flattening print or driving creases into fabric that did not need pressing at all.

Tip

Let the tip of the iron overhang the end of the bar rather than trying to keep it all on. Chasing the plate around the bar is how you start sliding again.

Used in this stepsteam iron
8

Lay the Wooden Clapper on the Seam Until the Fabric Goes Cold

9:30
Step 8: Lay the Wooden Clapper on the Seam Until the Fabric Goes Cold - How to Press Quilt Seams So They Lie Dead Flat

Turn the bar over and put the flat wooden face down on the seam the second the iron lifts. The underside of Mary's pressing bar is a clapper, which is a tool tailors have used for centuries on wool suiting.

Wood pulls heat and moisture out of the cloth while it cools, and cooling is the part that sets a seam. Heat only makes cotton moveable. Leave the clapper there until the fabric is cold to the touch, then lift it and the seam stays exactly where the iron left it.

Tip

Any flat, heavy piece of hardwood works. A small cutting board or a plain block of maple does the job. What it must not be is anything that insulates, so no folded towels here.

Used in this steptailor's clapper
9

Mark the Long Joining Seam Where the Row Seams Cross

13:25
Step 9: Mark the Long Joining Seam Where the Row Seams Cross - How to Press Quilt Seams So They Lie Dead Flat

Sew the three rows together, then bring the block back to the bar and drape the long joining seam over the curve. This seam is the real test. It crosses every row seam you have already pressed.

Draw the marker down it and give the tip an extra push at each crossing point. Four layers of seam allowance are stacked up there and the solution has to reach the bottom one. Skip that and the intersection stays proud no matter how long you hold the iron on it.

Tip

Press the long seam in shorter runs than you think. Doing a whole row in one pass means the far end has cooled before you get the clapper onto it.

10

Turn the Block Over and Check Every Seam Intersection Lies Flat

14:56
Step 10: Turn the Block Over and Check Every Seam Intersection Lies Flat - How to Press Quilt Seams So They Lie Dead Flat

Flip the block and look at the back. Every seam should read as a flat grid with no bulk where the lines cross. Run your whole hand across it rather than only looking, because a fold under one allowance is easier to feel than to see.

Find a lump and you open that seam, mark it, and press it once more. Deal with it now, while the block is still a block. Once it is sewn into a row you are unpicking two seams to reach one.

Tip

Hold the block up to a window. Light coming through shows you where the allowances sit, and a dark allowance shadowing behind a pale square shows up immediately.

Keep going

How to Nest Seams so Every Quilt Intersection Matches

Products Used

The Checklist

How to Press Quilt Seams So They Lie Dead Flat

Tools
6
Materials
3
Steps
10
Video
17 min

Tools we recommend

Your Guide

Mary B

As an Amazon Associate we earn from qualifying purchases. Links on this page may be affiliate links - clicking them and buying doesn't change your price, but helps support CraftingStepByStep.

Tags

Sunday How-To

New quilting tutorials, every Sunday

One short email with the week's best step-by-step guides. Free, no spam, unsubscribe anytime.

Did this work for you?

What's next

Related collections

Curated theme pages that include this tutorial.

Weekly Digest

Liked this quilting tutorial?

Pick the categories you want to hear about. Weekly digest of new step-by-step tutorials. No spam, easy unsubscribe.

Send me tutorials about

We only email about new tutorials. Easy unsubscribe anytime.