How to Free Motion Quilt on a Home Sewing Machine

QuiltingMedium16:139 stepsPart of DIY Crafts for BeginnersBrowse more →
The finished result: How to Free Motion Quilt on a Home Sewing Machine

By CraftingStepByStepPublished

Based on a video by Leah Day Quilting.

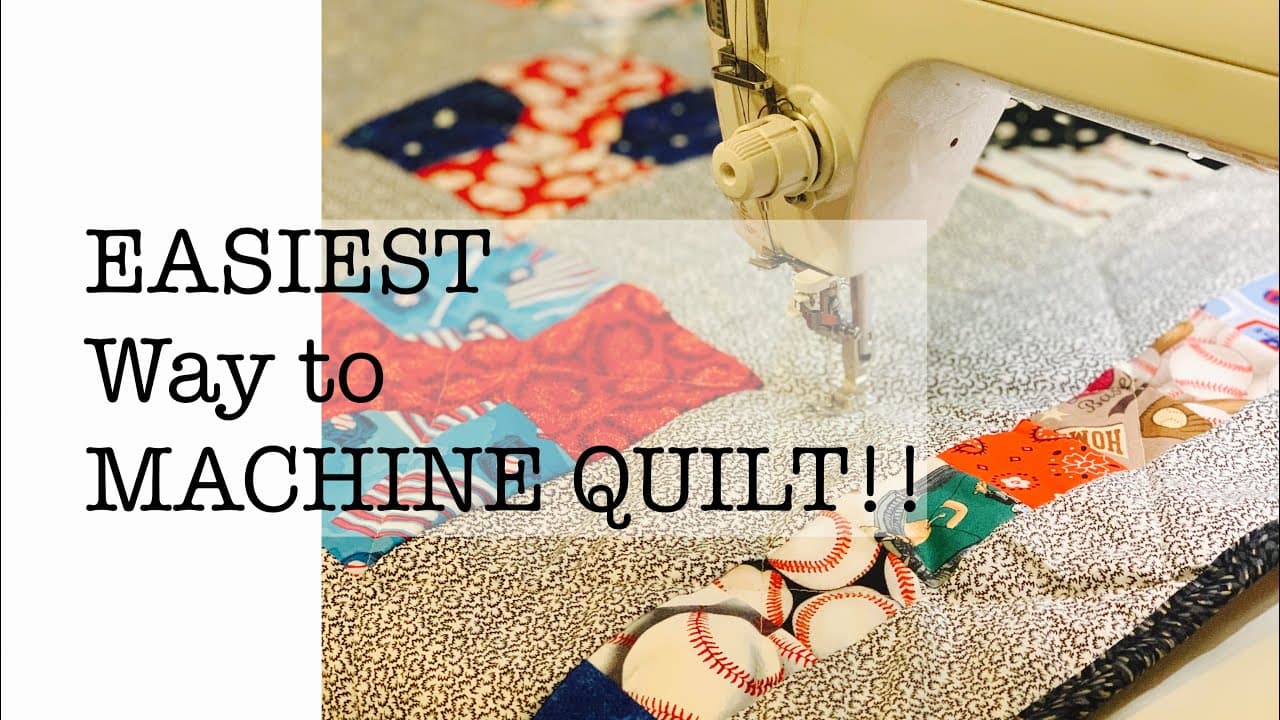
Free motion quilting is the one thing you do on a sewing machine where the machine stops helping. The feed dogs stop pulling, and from that point every stitch is exactly as long as your hands decided it would be. That is why it looks intimidating, and why it gives you loops and swirls a straight stitch cannot reach.

This one follows Leah Day, who teaches it on an ordinary domestic machine rather than a longarm and is blunt about the first hour looking terrible. She starts with stippling: one wandering line that curves back on itself and never crosses over. None of it works unless the three layers are held flat, so if your sandwich is not pinned or sprayed yet, baste the quilt first. Quilting a loose sandwich pleats the backing, and you will not see it until you turn the quilt over.

Feed dogs down, or stitch length at zero

The feed dogs are the little teeth under the needle plate that walk fabric away from you at a fixed rate. Free motion means taking them out of the job. Most machines have a lever that drops them below the plate; some older ones came with a cover plate instead.

There is a third route that gets skipped in most tutorials: turn the stitch length dial down to zero. The teeth still sit up but they stop travelling, so they hold the fabric without carrying it anywhere. Leah quilts this way on purpose and reckons the stitch looks better for it. Either route is right, as long as the machine has stopped deciding where the fabric goes.

Why your stitches come out uneven

Stitch length is now a ratio between two speeds: how fast the needle goes up and down, and how fast your hands slide the quilt under it. Quick hands over a slow needle stretch the stitches long. Barely moving hands at the same speed make them microscopic. The wobble in your first practice block is that ratio drifting, not a fault in the machine.

The fix is dull and it works. Pick one machine speed and stay on it, let your hands do all the varying until the line looks right, then hold that hand speed. Do not take a ruler to your stitches. Look at the line and decide if you like it.

Gloves and a slider sheet

Two cheap things carry most of the difficulty. Quilting gloves with grippy fingertips stop your palms skating over the cotton, which is the real reason a quilt feels out of control. A slider sheet is a thin slippery mat that lies across the machine bed with a hole cut for the needle, and it drops the drag under a heavy quilt to almost nothing.

Free motion or walking foot?

These are the two ways to quilt a finished top and they do different work. A walking foot feeds all three layers at the same rate and gives you straight lines, grids and long gentle curves with the feed dogs still running. That is straight line machine quilting, the easier of the two to pick up. Free motion gives you stippling, loops and feathers no walking foot can be steered into. Most quilters use both on one quilt.

Where this sits in the order of things: piece the top with a true quarter inch seam, add the borders, baste the layers, quilt them, then bind the edges.

What goes wrong, and what to do about it

A knot on the back where you stopped. Your hands paused while the needle kept going. Any time the quilt is not moving, lift your foot off the pedal.

Jerky stitches, or plain ugly ones. Usually hand speed. Slow your hands and let the curves come out bigger before you try to make them small. Everyone's first blocks are ugly, and hands take mileage.

Stranded in a corner. Filling at random leaves a bare patch ringed by finished quilting with no way in. Work in rows, the way you fill a page of writing.

The bobbin thread snarls at the start. Pull the bobbin loop up through the quilt before the first stitch, every time. A bobbin wound evenly helps, and small washers that sit under the bobbin stop it spinning backwards.

What you'll need

Step-by-Step Guide

9 steps · about 16 minutes.Check off each step as you go and your progress saves automatically.

1

Fit the Free Motion Foot and Take the Feed Dogs Out of the Job

4:42
Step 1: Fit the Free Motion Foot and Take the Feed Dogs Out of the Job - How to Free Motion Quilt on a Home Sewing Machine

Swap the regular presser foot for a free motion foot, sometimes sold as a darning foot. It hovers a hair above the quilt instead of clamping it down, so the fabric can travel in any direction. Some hop with the needle, others float. Either is fine.

Then stop the feed dogs from pulling. Drop them if your machine has the lever, or turn the stitch length dial all the way down to zero so the teeth grip but no longer travel. Leah leaves hers up at zero length and prefers the stitch it gives. Pick one and check that a scrap does not creep forward on its own.

Tip

Fit a fresh quilting needle at the same time. Free motion drags thread through three layers at odd angles and a dull needle shreds it.

2

Pull the Bobbin Thread Up Through the Quilt Before the First Stitch

0:36
Step 2: Pull the Bobbin Thread Up Through the Quilt Before the First Stitch - How to Free Motion Quilt on a Home Sewing Machine

Lower the needle into the quilt and bring it back up, then give the top thread a small tug. A loop of bobbin thread comes up through the fabric with it. Pull the loop clear, hold both tails off to the side behind the foot, and start quilting.

Skip this and the bobbin thread has nowhere to go but underneath, where it balls into a nest on the back of the quilt. You will not see it happen. Do it at the start of every single line, walking foot quilting included.

Tip

Hold the two tails for the first three or four stitches, then snip them close to the surface later. Letting them flap means they get quilted over.

3

Rest Both Gloved Hands Flat on the Quilt Sandwich

1:48
Step 3: Rest Both Gloved Hands Flat on the Quilt Sandwich - How to Free Motion Quilt on a Home Sewing Machine

Put a glove on each hand and lay both palms flat on the quilt, one either side of the needle, close enough to steer but clear of it. Your hands are the feed dogs now. Push the sandwich forward, draw it back, swing it sideways, and the stitching follows wherever you take it.

Take your hands off and the quilt stops dead. That is the whole idea, and it is also the thing that catches beginners out: the machine will happily keep stitching into one spot while you sit and think about where to go next.

Tip

Bare hands slide over cotton. Gloves with grippy fingertips do more for your control than any machine setting, and a slider sheet on the bed takes the drag out from underneath.

4

Move Your Hands Slowly Against a Steady Machine Speed

2:44
Step 4: Move Your Hands Slowly Against a Steady Machine Speed - How to Free Motion Quilt on a Home Sewing Machine

Hold the machine at one speed and change only how fast your hands move. Quick hands against a slow needle give you long stitches. Slow hands at the same needle speed give you tiny ones, so small you would hate to unpick them.

There is no dial for this and no correct number. Quilt a few inches, look at the line, and adjust your hands until the size looks right to you. Expect it to wander anyway. Hand-guided stitching fluctuates, and some days your stitches run big and some days they run small for no reason you can name.

Tip

Keep the seam ripper out of reach for the first few blocks. Unpicking free motion stitching is slow, thankless work and practice squares are not meant to be perfect.

Used in this stepsewing seam ripper
5

Quilt a Wandering Stipple Line That Never Crosses Itself

5:56
Step 5: Quilt a Wandering Stipple Line That Never Crosses Itself - How to Free Motion Quilt on a Home Sewing Machine

Stippling is one continuous line that curves back on itself in soft puzzle-piece lobes and fills the space as it goes. It has exactly one rule: do not cross a line you already stitched. Everything else about the shape is yours.

Watch the rhythm rather than the shape. Ease off through the tight curves where you cannot see far ahead, and let the machine run a little on the open stretches. Keep the lobes roughly the same size across the block and the texture stays even once it is washed.

Tip

Leave a gap about as wide as one lobe between passes. Crowd them and the block goes stiff. Spread them out and the batting puffs up in patches.

6

Warm Up With Rows of Simple U Shapes

6:52
Step 6: Warm Up With Rows of Simple U Shapes - How to Free Motion Quilt on a Home Sewing Machine

Before you try to wander, quilt rows of plain U shapes across a practice block. Up and over, down and over, like a row of the letter U tipped on its side. It builds the hand rhythm without asking you to invent a route at the same moment.

Stitch a few rows of that until it feels automatic and dull. Then curl one U higher than the last, bend it round, tuck a smaller one underneath. That is stippling, and you arrived at it without ever having to think about the design.

Tip

Boredom is the signal to move on. If the U shapes have stopped taking any attention, your hands have learned the movement and you are ready to bend them.

7

Draw the Quilting Design on the Fabric With a Water Soluble Pen

8:10
Step 7: Draw the Quilting Design on the Fabric With a Water Soluble Pen - How to Free Motion Quilt on a Home Sewing Machine

Mark the design on the quilt before you sit down at the machine. You are already steering the fabric and working the pedal, and route planning is the third job that tips it over. Marking hands that job to a pen.

Quilt near the line rather than exactly along it. The marks wash out, so the moments you drift off them vanish with the ink and nobody ever knows where you meant the stitching to go.

Tip

Test the marker on a scrap of the same fabric and wash it out before you trust it on a quilt. Heat sets some inks permanently, so keep the iron off a marked top.

8

Fill the Block in Rows Instead of Wandering at Random

9:56
Step 8: Fill the Block in Rows Instead of Wandering at Random - How to Free Motion Quilt on a Home Sewing Machine

Fill the block the way you fill a page of writing. Quilt left to right across the top, drop down a row, work back right to left, drop down again. Rotate the whole block if that suits your reach better.

Quilting at random feels freer for about four minutes. Then you look down and there is a bare patch in a corner with finished quilting on every side of it, and the only way in is to drag the whole quilt back through the machine. Rows mean you always know where you are and where you are going next.

Tip

On a full quilt, start in the middle and work outward in rows rather than starting at an edge. It pushes any excess fabric out to the borders instead of trapping it.

9

Quilt One Nine Inch Practice Sandwich Every Day

14:31
Step 9: Quilt One Nine Inch Practice Sandwich Every Day - How to Free Motion Quilt on a Home Sewing Machine

Cut a stack of nine inch squares, layer each one with batting and a backing square, and mark a seven inch box in the middle. That box is the target. The extra inch all round gives your hands somewhere to hold.

Quilt one a day. A month of these will do more for your stitch line than any tool you can buy, because the thing that needs training is your hand speed and the only input it takes is mileage. Keep them in order and look back at the first one after a few weeks.

Tip

Cut the squares in one go with a rotary cutter so the stack is ready to grab. Anything that adds a setup step to daily practice is the reason the practice stops.

Keep going

How to Add Borders to a Quilt Top So They Lie Flat

Products Used

The Checklist

How to Free Motion Quilt on a Home Sewing Machine

Tools
7
Materials
6
Steps
9
Video
16 min

Tools we recommend

Your Guide

Leah Day Quilting

As an Amazon Associate we earn from qualifying purchases. Links on this page may be affiliate links - clicking them and buying doesn't change your price, but helps support CraftingStepByStep.

Tags

Sunday How-To

New quilting tutorials, every Sunday

One short email with the week's best step-by-step guides. Free, no spam, unsubscribe anytime.

Did this work for you?

What's next

Related collections

Curated theme pages that include this tutorial.

Weekly Digest

Liked this quilting tutorial?

Pick the categories you want to hear about. Weekly digest of new step-by-step tutorials. No spam, easy unsubscribe.

Send me tutorials about

We only email about new tutorials. Easy unsubscribe anytime.