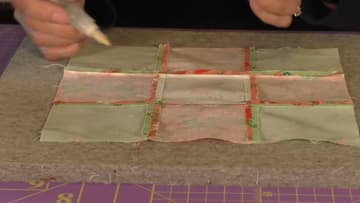
How to Press Quilt Seams So They Lie Dead Flat
Source: Mary B • Full tutorial: www.craftingstepbystep.com/quilting/how-to-press-quilt-seams
- Difficulty
- Easy
- Hands-on time
- About 30 minutes
- Cost
- About $6 to $10

Tools
- Iron
- Wool pressing mat
- Wool pressing bar or tailor's clapper
- Chopstick, stiletto or wooden point turner
- Refillable pressing marker pen
- Sewing machine
Materials
- Cotton quilting fabric cut into 3 1/2-inch squares
- 50 wt cotton piecing thread
- Liquid pressing solution or spray starch
Steps
1. Lay the Sewn Row on a Wool Pressing Mat With Its Seams Still Closed
Carry the row straight from the machine to the mat while the fabric is still warm from sewing. Warm cotton takes a press better than cold cotton that has sat in a pile all afternoon.
Tip: Set the seam before you open it. Press the row flat exactly as it came off the machine, seam still closed, for a few seconds.
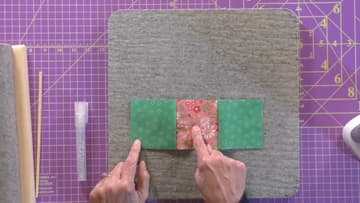
2. Work the Seam Allowance Apart With a Chopstick or Point Turner
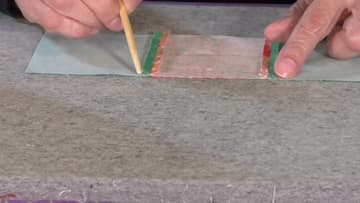
Slide a chopstick, a stiletto or a wooden point turner down the seam and walk the two allowances away from each other. Fingers do the same job, but the iron is about to sit within an inch of them and that stops being funny quickly.
Tip: A wooden tool beats a metal one here. Wood grips the fabric enough to drag the allowance over, and it will not scratch the sole plate if it ends up under the iron.
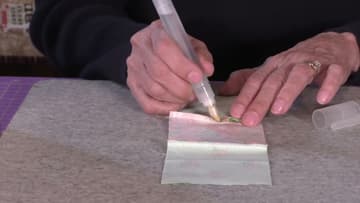
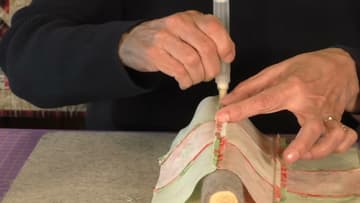
3. Draw Pressing Solution Down the Open Seam With a Refillable Marker
Mary fills an empty applicator pen with liquid pressing solution and draws a line straight down the middle of the open seam. A spray bottle soaks the whole patch.
Tip: No marker pen? Spray a little pressing solution into a bowl and paint it along the seam with a small brush. Same result, one more thing to wash up.
4. Set the Sole Plate Down on the Seam and Hold It Still
Put the iron down flat on the seam and leave it. Ten seconds is not too long, and it will not hurt quilting cotton.
Tip: Keep one hand clear of the plate. If you find yourself holding the seam open with a fingertip while the iron comes down, that is the moment to reach for the pressing bar instead.
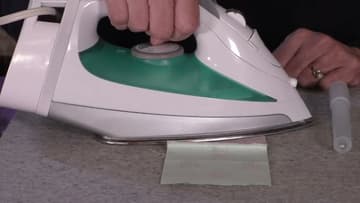
5. Run a Fingertip Along the Seam to Feel Whether It Opened All the Way
Lift the iron and run a fingertip down the seam while the cloth is still warm. It should read as one flat surface with no ridge under your finger.
Tip: Look at the seam from the side as well as from above.
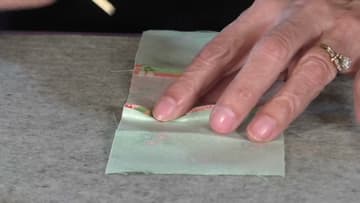
6. Drape the Seam Over a Wool Pressing Bar So It Falls Open
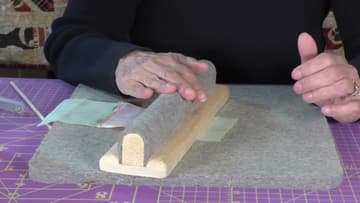
A pressing bar is a length of wood with a wool-covered curve on top. Lay the row over it and the two allowances fall away from each other under their own weight.
Tip: A rolled-up towel or a wooden dowel wrapped in a scrap of wool does the same job for nothing. The shape is what matters, not the product.
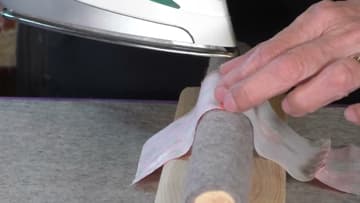
7. Press Along the Top of the Bar With the Flat of the Sole Plate
Bring the iron down square on the seam where it crosses the top of the bar. Hold ten seconds, lift, slide the fabric along, set down again.
Tip: Let the tip of the iron overhang the end of the bar rather than trying to keep it all on. Chasing the plate around the bar is how you start sliding again.
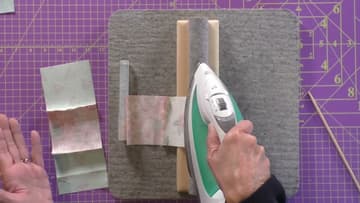
8. Lay the Wooden Clapper on the Seam Until the Fabric Goes Cold
Turn the bar over and put the flat wooden face down on the seam the second the iron lifts. The underside of Mary's pressing bar is a clapper, which is a tool tailors have used for centuries on wool suiting.
Tip: Any flat, heavy piece of hardwood works. A small cutting board or a plain block of maple does the job. What it must not be is anything that insulates, so no folded towels here.
9. Mark the Long Joining Seam Where the Row Seams Cross
Sew the three rows together, then bring the block back to the bar and drape the long joining seam over the curve. This seam is the real test.
Tip: Press the long seam in shorter runs than you think. Doing a whole row in one pass means the far end has cooled before you get the clapper onto it.
10. Turn the Block Over and Check Every Seam Intersection Lies Flat
Flip the block and look at the back. Every seam should read as a flat grid with no bulk where the lines cross.
Tip: Hold the block up to a window. Light coming through shows you where the allowances sit, and a dark allowance shadowing behind a pale square shows up immediately.