How to Make Concrete Pavers in Any Size

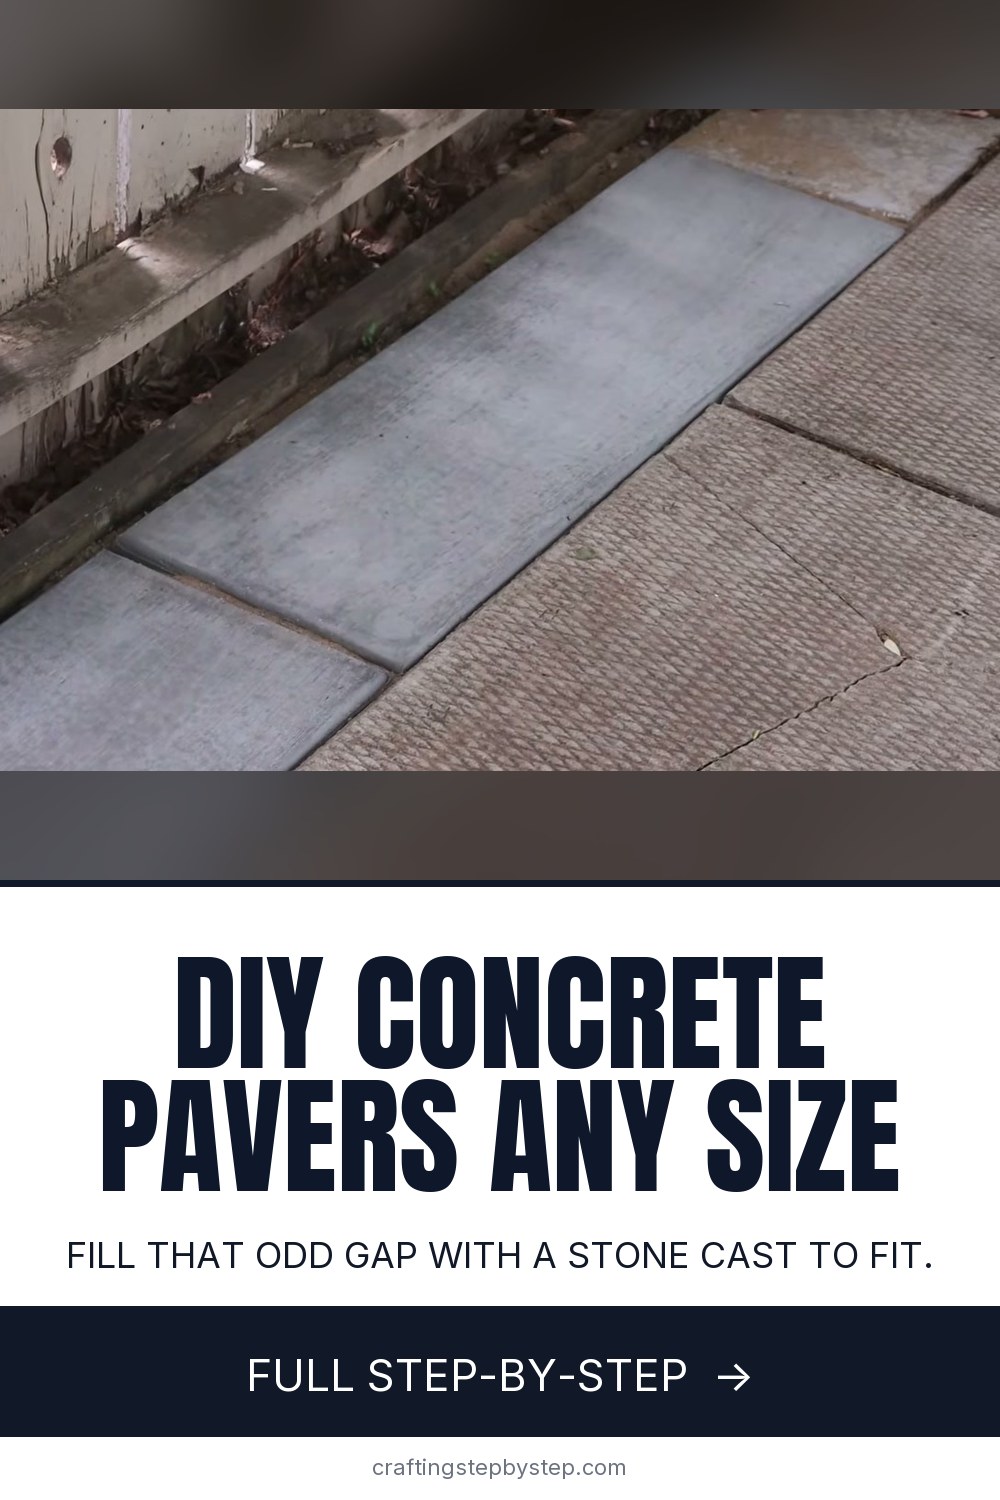
The finished result: How to Make Concrete Pavers in Any Size
  • Difficulty: Medium
  • About 1 hour 30 minutes, plus 24 hours to dry or set
  • 10 steps

You tapped Save

Save this project for later

We'll email you a link, no password.

How to Make Concrete Pavers in Any Size

  • Your saved projects in one list
  • Your ticked steps on any device

Check your inbox for an email from us. Not there? Look in your spam folder.

Print

Steps written out by Crafting Step by Step from Jesse does DIY's video (opens YouTube) (8:30). Published .

Store-bought patio stones come in a handful of sizes. If you have an odd gap by a fence, a fire pit or a shed, you can cast pavers to fit it exactly. Jesse of Jesse does DIY needed two long narrow stones to fill a corner of his fire pit patio. He built simple wood forms, poured them in an afternoon and laid them the next day. It is a cheap, satisfying first concrete project.

How to make concrete pavers: the short version

  • Build a wood form to the size you need from 1x3 boards.
  • Set it on plastic, mix concrete to pancake batter thickness and fill the form.
  • Level with a float or 2x4, then round the edges and trowel the top.
  • Brush on a non-slip texture, cover and cure for a day before demolding.

Sizing and thickness

Measure the gap and take off about a quarter inch each way so the stone drops in easily. For foot traffic, aim for at least 2 inches thick. That is why Jesse recommends 1x3 boards at minimum, which are about 2.5 inches tall. Stones longer than about 3 feet are heavy and can crack when you lift them, so make two shorter ones instead of one long one.

How much concrete you need

Multiply length by width by depth in inches, then divide by 1,728 to get cubic feet. An 80 pound bag makes about 0.6 cubic feet. A 12 by 36 inch stone 2.5 inches thick needs a little over one bag. An online concrete calculator does the math for you.

Timing the finish

Concrete finishing is all about timing, and the weather changes it. On a warm day, everything happens faster. Edge it once the shine is gone from the surface, usually about 30 minutes after pouring. Brush it when a fingertip leaves only the faintest print. Jesse brushed late on a 22 C day and got less texture than he wanted. Twenty to 30 minutes sooner would have been better.

Which mix to buy

A standard bagged concrete mix with gravel is the strongest choice for stones you walk on. For a smoother face with fewer pits, a sand mix or a mix sold for countertops gives a finer finish but costs more. Avoid fast-setting post mix. It hardens before you have time to edge and trowel.

Safety

Wet concrete is caustic and can burn skin. Wear gloves, long sleeves and eye protection, and a dust mask when you tip in dry mix. Rinse any splashes off right away. Mixing two bags by hand is a real workout, so lift with your legs.

Make it your own

  • Press leaves or ferns into the wet top for a fossil pattern.
  • Add concrete colorant to the mix water for a tinted stone.
  • Let grandkids press handprints in before it sets.
  • Oil the forms with cooking spray and reuse them for a matching set.

More concrete garden projects

Want something more decorative? Try a mosaic stepping stone or a concrete leaf casting. A concrete bird bath or a concrete planter finishes the garden, and you can learn to make concrete molds from household items for smaller pieces.

Free printable

Print the steps and supply list for this project

One page you can take to the table. Free with a free account, no password.

Get the free printable

What you'll need

Free, for this project

Get this checklist by email

  • All 15 tools and materials, with tick boxes
  • A link to print all 10 steps on paper, to keep by you while you craft

No password. The whole tutorial stays free on this page.

Quick answer

How to make concrete pavers with a simple wood form. A medium project: about 1 hour 30 minutes, plus 24 hours to dry or set. Materials cost about $15 to $30. You need 15 things, including pine 1x3 boards, 1-1/2 inch deck screws and concrete mix. The 10 steps start with cut 1x3 Boards to Size for the Concrete Paver Form, screw the Corners of the Paver Form Together and set the Paver Forms on a Plastic Sheet.

Step-by-step guide

10 steps, about 9 minutes. Tap a picture to jump to that step. Your progress saves automatically.

Tick each step off as you go.

  1. Step 1: Cut 1x3 Boards to Size for the Concrete Paver Form

    Watch this step · 0:58

    Measure the spot where your paver will go and decide on its final size. Cut four pieces of pine 1x3 to make a rectangle that size on the inside. Two pieces are the full length, and two are the width plus the thickness of both boards. Use 1x3 or 2x3 for anything people will walk on. Thinner 1x2 is only fine for decorative stones.

    Tip:

    Measure the inside of the form, not the outside. That is your paver size.

    Back to all steps

  2. Step 2: Screw the Corners of the Paver Form Together

    Watch this step · 1:06

    Butt the boards together at each corner and drive one 1-1/2 inch deck screw through the long side into the end of the short side. Do not overtighten, or the wood can split. A single screw per corner is enough. It holds the shape while you pour and comes out easily when you take the form apart.

    Tip:

    Check that the form is square by measuring both diagonals. They should match.

    Back to all steps

  3. Step 3: Set the Paver Forms on a Plastic Sheet

    Watch this step · 1:26

    Pick a flat, level spot such as a patio or garage floor. Lay down a sheet of plastic or an opened garbage bag to catch spills and stop the concrete sticking to the ground. Place the forms on top. The plastic also gives the bottom of each paver a smooth face. Spray the inside of the forms with cooking oil if you plan to reuse them.

    Tip:

    A level surface matters. A tilted form makes a paver thicker at one end.

    Back to all steps

  4. Step 4: Mix the Concrete for the Pavers in a Tub

    Watch this step · 1:58

    Pour one bag of concrete mix into a mixing tub and add water a little at a time, following the bag. Mix with a hoe or shovel until it is about the thickness of pancake batter. Scrape the sides and corners of the tub so no dry pockets are left. Then add the second bag and repeat. Wear gloves.

    Tip:

    Mix one bag at a time. Two at once is too hard to blend by hand.

    Back to all steps

  5. Step 5: Shovel the Concrete Into the Paver Form

    Watch this step · 2:16

    Shovel the wet concrete into the form. Start at one end and work toward the other, piling it slightly higher than the top of the boards. Do not worry about the surface yet. The goal is to get enough concrete in to fill every corner, with a little extra on top to scrape off when you level it.

    Tip:

    Tap the sides of the form with a hammer to shake air bubbles out.

    Back to all steps

  6. Step 6: Level the Concrete Paver With a Float or 2x4

    Watch this step · 2:56

    Use a wooden float, a 2x4 or a trowel to push concrete into all the corners. Fill it as close to level with the form as you can, maybe a touch over. For longer stones, drag a straight 2x4 across the top edges of the form in a sawing motion. Push the extra off the end and drop some into any low spots.

    Tip:

    Tamp high spots gently with the float. It helps the concrete settle and self-level.

    Back to all steps

  7. Step 7: Round the Paver Edges With an Edging Tool

    Watch this step · 3:48

    Wait about half an hour, until the shine has left the surface. Run an edging tool along the inside of the form all the way around. Make several passes, going a little deeper each time, and lift the leading edge of the tool so it does not dig in. Rounded edges are less likely to chip and feel nicer underfoot.

    Tip:

    Clean your tools and dump leftover concrete while you wait. Do not rinse it down a drain.

    Back to all steps

  8. Step 8: Smooth the Paver Face With a Steel Trowel

    Watch this step · 4:20

    After edging, sweep a steel trowel lightly across the face of the paver. You do not need much pressure. Hold the front edge of the trowel slightly raised and use long, overlapping strokes. This smooths out float marks and the ridges left by the edger. Go back over the edges once more if you want a crisper line.

    Tip:

    For a slick trowel finish, come back again after about an hour and a half.

    Back to all steps

  9. Step 9: Brush a Non-Slip Finish Onto the Concrete Paver

    Watch this step · 6:35

    A smooth paver gets slippery when wet. Drag a stiff concrete brush across the surface in long, straight lines for a broom finish. Timing is tricky. Brush when a fingertip leaves only the faintest print. Too soon and you tear up the surface. Too late and you get very little texture. Brush across or along the stone.

    Tip:

    Do a test stroke in one corner first. If it gouges, wait 10 minutes.

    Back to all steps

  10. Step 10: Cure, Demold and Lay the Concrete Pavers

    Watch this step · 7:30

    Cover the pavers with plastic and leave them overnight. After about 24 hours, unscrew the forms and lift them away. Set the pavers into place, tapping them level. Mist them with water every few hours for the first couple of days to help them cure strong. Full strength takes about four weeks, so go gently with heavy loads.

    Tip:

    Lay a bed of sand under each paver so it sits flat and does not rock.

    Back to all steps

How to Make a Mosaic House Number Plaque

Keep going

How to Make a Mosaic House Number Plaque

Keep going with crafts

More on this topic, picked for this project.

You reached the last step

Save this project to come back to it

Your ticked steps, the free printable and your other saved makes, together in My Projects. Free, no password.

You tapped Save

Save this project for later

We'll email you a link, no password.

How to Make Concrete Pavers in Any Size

  • Your saved projects in one list
  • Your ticked steps on any device

Check your inbox for an email from us. Not there? Look in your spam folder.

Free printable

Printable sheet and shopping list for this project

The bonus is hidden until you sign up.

Free with a free account, no password. Every step above stays open to everyone.

Products Used

The Checklist

How to Make Concrete Pavers in Any Size

Tools
9
Materials
6
Steps
10
Video
9 min

Tools we recommend

As an Amazon Associate we earn from qualifying purchases. Links on this page may be affiliate links - clicking them and buying doesn't change your price, but helps support Crafting Step by Step.

Tags

The Crafter's Weekly

New crafts tutorials, every Sunday

One short email with the week's best step-by-step guides. Free, no spam, unsubscribe anytime.

Did this work for you?

What's next

Related collections

Curated theme pages that include this tutorial.

Similar tutorials

Hand-picked next reads based on the one you just finished.

Liked this crafts tutorial?

Pick the crafts you want to hear about. One email every Sunday with new step-by-step tutorials. No spam, easy to unsubscribe.

Get more like this in your inbox

Weekly digest. Pick the categories you want. Unsubscribe anytime.

Send me tutorials about

We only email about new tutorials. Easy unsubscribe anytime.