How to Make a Concrete Planter

Save it for later. We'll email you a link, no password.

Find it again on your phone or computer, with your finished steps ticked.

You tapped Save

Save this project for later

We'll email you a link, no password.

How to Make a Concrete Planter

  • Your saved projects in one list
  • Your ticked steps on any device

Check your inbox for an email from us. Not there? Look in your spam folder.

  • 10 steps
  • 18:34 video
  • Difficulty: Easy
  • About 1 hour 15 minutes, plus 48 hours to dry or set
  • Materials about $15 to $25
  • Crafts

Based on a video by Paradise Builders - Planter Skool

Opens their YouTube channel

Steps written out by Crafting Step by Step · Published · Updated

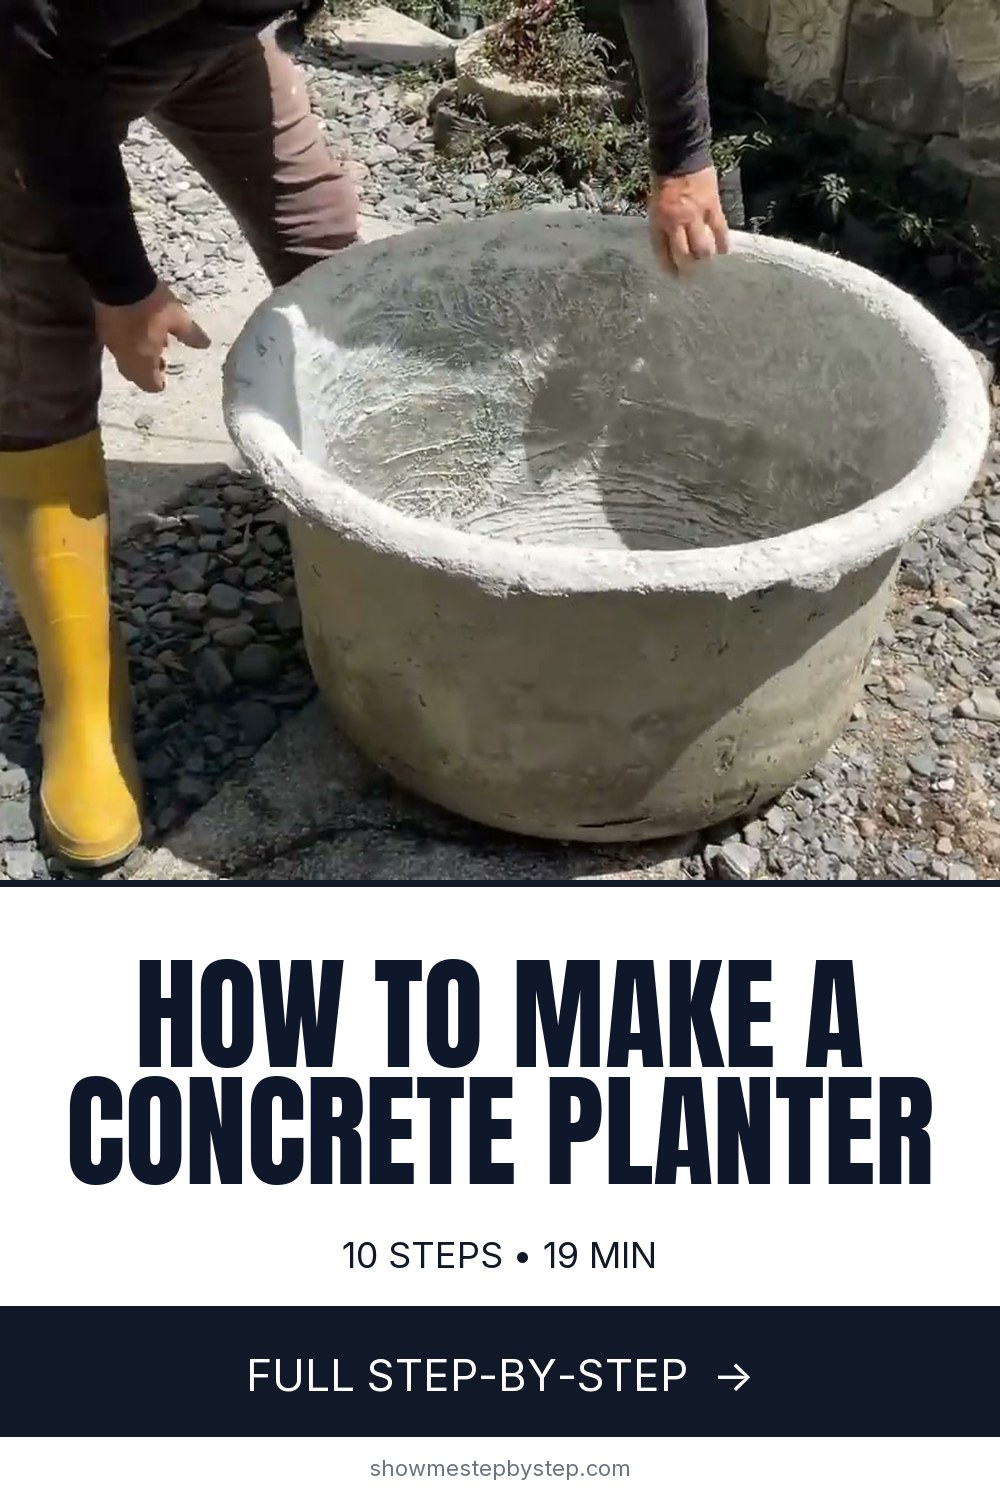
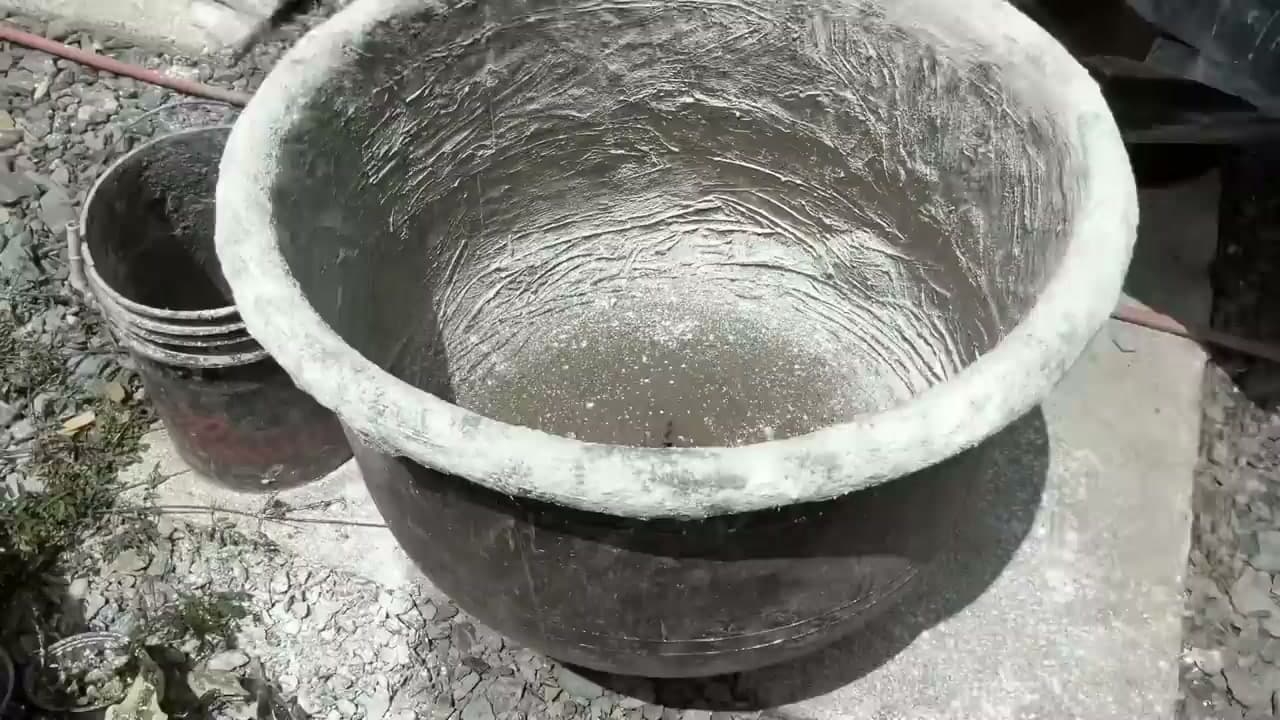
The finished result: How to Make a Concrete Planter

You don't need a pottery wheel or an expensive mold to make a serious concrete planter. This build uses a recycled plastic container as the form and three layers of cement cloth pressed against the inside. The pot comes out light enough to carry and tough enough to winter outside.

It follows Paradise Builders - Planter Skool, who refined the technique on big outdoor planters. Materials run about $20. Wear gloves and a dust mask, and give yourself two days before you demold.

What you need

  • Cement cloth, also sold as cement fabric or concrete canvas
  • Grey Portland cement, plus white Portland for the rim
  • A plastic container in the shape you want
  • Dish soap as a release agent
  • Putty knife, bucket, gloves, dust mask
  • A tire valve and a compressor for the demold
  • Exterior concrete sealer

Is this the cement cloth method or a poured mold?

Cement cloth, and nothing here gets poured. You cut the fabric into squares, butter both faces with cement paste, and lay them against the inside of a soaped container the way a plaster cast goes on an arm. The container shapes the piece, it is not a cavity you fill, which is why the walls finish a quarter inch thick.

For the draped look, where the cloth hangs over an upturned bucket in folds, lay the soaked fabric over the outside of the form instead. A hypertufa planter is the other lightweight route.

Choosing the mix

Bagged concrete has gravel in it, and stones cannot pass through a fabric weave or sit in a quarter-inch wall. Plain Portland cement at a thick yogurt consistency soaks into the cloth and laminates one layer to the next. Craft mixes carry sand and a polymer for flex, which suits cast pots. Ratios are in how to mix concrete for crafts. White Portland earns its price on the rim, where it sets harder and finishes cleaner.

Curing, and why demolding early cracks it

Cement does not dry, it reacts. Water and cement grow crystals that knit the wall together, and most of the strength arrives in 48 hours. Pull it at six hours because the surface feels hard and you get a hairline crack up the side. Two days under loose plastic, which holds moisture against a wall that would otherwise dry chalky.

Cold slows it down. Under about 50F the reaction crawls, and below freezing it stops while the water in the wall expands. A planter built in an unheated garage in October wants three or four days.

Drainage holes and sealing

Drill the drainage hole, do not cast one. A masonry bit through the cured base, run slow with the hammer off, gives a clean hole. One does a small pot, three or four a big one. With no drainage, water sits against the roots and in the wall, and a hard freeze splits the pot.

Seal the outside once cured. These walls are thin and porous, so a penetrating sealer soaks in and stops water wicking through and blooming white efflorescence. Glossy topicals belong indoors. Sealing concrete crafts compares them.

Common mistakes

  • Not enough soap. That film is all that stands between a clean release and an hour of prying.
  • Air behind the first layer. Bubbles against the plastic become craters on the show face. Press each square out from the center; fixing air bubbles covers repairs.
  • Seams stacked on each other. Stagger them so a weak line sits behind solid cloth in the next layer.
  • Paste mixed too thin. Runny cement slides off and leaves the weave showing.

The technique scales up and down: a concrete hanging planter, a concrete bird bath, or a concrete pumpkin for the fall porch, all in crafts.
Free printable

Print the steps and supply list for this project

One page you can take to the table. Free with a free account, no password.

Get the free printable

What you'll need

Free, for this project

Get this checklist by email

  • All 13 tools and materials, with tick boxes
  • A link to print all 10 steps on paper, to keep by you while you craft

No password. The whole tutorial stays free on this page.

Quick answer

Make a lightweight concrete planter from cement cloth and a recycled container. An easy project: about 1 hour 15 minutes, plus 48 hours to dry or set. Materials cost about $15 to $25. You need 13 things, including Portland cement, Cement fabric and Dish soap. The 10 steps start with cut Your Cement Fabric Into Squares, soap Up the Plastic Container Mold, mix Portland Cement and Paste Both Sides of Each Square and install an Air-Release Valve.

Step-by-step guide

10 steps, about 19 minutes. Tap a picture to jump to that step. Your progress saves automatically.

Tick each step off as you go.

  1. Step 1: Cut Your Cement Fabric Into Squares

    Watch this step · 2:55

    Cut your cement-impregnated fabric into roughly 1 foot by 1 foot squares. For a full-size planter you want about 40 squares; a small desk planter needs maybe 10 to 15. Small squares are far easier to wrap around a curved mold than wrestling with one big sheet.

    The fabric is a polypropylene-and-cement composite (Sika is the common brand). Plain landscape fabric works in a pinch, but a true cement fabric gives you the strongest finished planter.

    Tip:

    Lay your squares flat in a stack so they're ready to grab when your hands are covered in wet cement.

    Back to all steps

  2. Step 2: Soap Up the Plastic Container Mold

    Watch this step · 3:04

    Pick a plastic container with the shape you want your planter to take. A round tub gives you a classic flowerpot profile; a square one gives you a planter box. Whatever you choose, soap up the entire inside surface generously with dish soap.

    The soap is your release agent. Without it the cement will bond to the plastic and you'll never get the finished planter out cleanly. Coat every inch, including the bottom corners.

    Tip:

    Wax also works as a release agent if you have it. Don't skip this step - even cheap dish soap is enough.

    Back to all steps

  3. Step 3: Mix Portland Cement and Paste Both Sides of Each Square

    Watch this step · 5:05

    Mix plain Portland cement with water to a thick yogurt consistency. No additives, no modifiers - straight cement is enough. Half a bag will do the whole planter.

    Take a soaked fabric square and use a putty knife to spread cement on both faces. Coating both sides means each layer laminates to the next, which is where the planter gets its strength. The fabric is so absorbent the cement pulls right through.

    Tip:

    Wear gloves. Cement is alkaline and dries skin out fast. A dust mask helps while you're dry-mixing.

    Back to all steps

  4. Step 4: Install an Air-Release Valve

    Watch this step · 5:50

    Before you start layering fabric into the mold, push a small air fitting (a tire valve or compressor coupling) into a pinched fold of cement-pasted fabric and place it at the bottom inside of the planter. This becomes your demold trick.

    Once the planter cures you'll hook a compressor to this valve and blast air between the cured cement and the plastic mold. The pressure pops the planter out cleanly. Skipping this means hours of prying.

    Tip:

    Tape the valve stem so cement doesn't clog the opening. You only need the air channel, not a watertight seal.

    Back to all steps

  5. Step 5: Press the First Fabric Layer Against the Mold

    Watch this step · 6:12

    Press your first cement-pasted square against the inside of the soaped plastic container. The cement-rich side faces in, against the plastic - the smoother side - so when you demold, that's the surface that shows.

    Smooth it flat with gloved fingers. Overlap each new square by a couple of inches so there are no gaps. Wrap the squares up over the rim of the mold so the planter has a finished edge when you flip it out.

    Tip:

    Push hard. Air bubbles between the fabric and the plastic become weak spots in the finished planter.

    Back to all steps

  6. Step 6: Push Out Every Trapped Air Bubble

    Watch this step · 8:33

    Work your way around the inside of the mold, smoothing every seam with your hands. Press from the center of each square outward to drive trapped air toward the edge where it can escape.

    You're looking for a fully covered surface with no white fabric showing through, no lifted corners, and no bubbles popping under the cement. Take five extra minutes here - it's the difference between a planter that lasts five winters and one that cracks in the first frost.

    Tip:

    A small roller or the back of a spoon helps in tight corners where your fingers won't reach.

    Back to all steps

  7. Step 7: Add a Second and Third Layer

    Watch this step · 11:04

    Repeat the same paste-and-press process for two more layers. Three layers is the sweet spot for a strong, lightweight planter. Stagger your seams so no two layers crack along the same line.

    The layered fabric works exactly like a plaster cast on a broken arm - thin, light, but rigid once it cures. A round planter gets bonus strength because the pressure of the soil pushes equally against every part of the wall.

    Tip:

    Don't rush between layers. Each one needs a few minutes to firm up before you press the next one down hard.

    Back to all steps

  8. Step 8: Paste Leftover Cement Across the Entire Inside

    Watch this step · 13:41

    Take whatever cement you have left in your bucket and paste it across the inside surface of the planter in one final coat. This seals any white fabric showing through, hides the seam lines, and adds a strength layer that catches any spot you missed.

    Use the putty knife to push the cement into every fold and corner. Look for tiny air pockets where the cement skin lifts and press them flat. Nothing has to go to waste - leftover cement is exactly what this coat is for.

    Tip:

    Spray a light mist of water if the cement is drying too fast in the bucket. Workable cement spreads better than crumbly cement.

    Back to all steps

  9. Step 9: Finish the Rim With White Portland

    Watch this step · 15:35

    While the cement is still workable, mix a small batch of white Portland cement and shape a smooth band around the top edge of the planter. White Portland sticks like crazy to the wet base layer and gives you a clean, decorative rim.

    Bring the rim inward an inch or so. When you fill the planter with soil later, that lip keeps the dirt from spilling over the very top edge. Smooth the lines with wet fingers until it looks like a single curved band.

    Tip:

    White Portland cures harder and lighter than grey. It's worth buying the small bag for the finished look alone.

    Back to all steps

  10. Step 10: Cure Two Days, Then Pop It Out With Air

    Watch this step · 16:30

    Cover the mold loosely with plastic and let the planter cure undisturbed for two full days. Cement hardens slowly, and rushing this step means cracked walls or a stuck planter.

    When it's dry, hook your air compressor to the release valve and fire a steady blast of air between the cement and the plastic. The planter lifts straight out. Sand any rough spots, seal the outside with an exterior sealant, drop in a drainage layer and soil, and plant it up.

    Tip:

    If the planter doesn't release on the first try, add water around the rim to break the surface tension between the cement and the soap film.

    Back to all steps

How to Draw a Dreidel

Keep going

How to Draw a Dreidel

You reached the last step

Save this project to come back to it

Your ticked steps, the free printable and your other saved makes, together in My Projects. Free, no password.

You tapped Save

Save this project for later

We'll email you a link, no password.

How to Make a Concrete Planter

  • Your saved projects in one list
  • Your ticked steps on any device

Check your inbox for an email from us. Not there? Look in your spam folder.

Free printable

Printable sheet for this project

The bonus is hidden until you sign up.

Free with a free account, no password. Every step above stays open to everyone.

Products Used

The Checklist

How to Make a Concrete Planter

Tools
7
Materials
6
Steps
10
Video
19 min

Tools we recommend

As an Amazon Associate we earn from qualifying purchases. Links on this page may be affiliate links - clicking them and buying doesn't change your price, but helps support Crafting Step by Step.

Tags

The Crafter's Weekly

New crafts tutorials, every Sunday

One short email with the week's best step-by-step guides. Free, no spam, unsubscribe anytime.

Test your knowledge

Did the lesson stick? Start with this one.

5 questions covering what you just read. No signup, no score saved, and you can stop after this one.

Question 1 of 5

Why soap the inside of the plastic mold before adding cement?

Quick reference

Key takeaways from How to Make a Concrete Planter

5 questions, answers, and one-line explanations. Tap to expand.

  1. 1.Why soap the inside of the plastic mold before adding cement?

    Answer: So the planter releases cleanly from the mold

    Soap is the release agent; without it the cement bonds to the plastic and won't come out.

  2. 2.What consistency should the Portland cement be mixed to?

    Answer: Thick yogurt

    Aim for a thick yogurt consistency so it soaks through the fabric and still holds.

  3. 3.What is the air-release valve embedded in the bottom for?

    Answer: Popping the planter out of the mold with air

    After curing, compressed air through the valve breaks the seal so the planter lifts straight out.

  4. 4.Why coat both faces of each fabric square with cement?

    Answer: So each layer laminates to the next for strength

    Coating both sides bonds the layers together, which is where the planter gets its strength.

  5. 5.When building up the layers, why stagger the seams between them?

    Answer: So no two layers crack along the same line

    Staggered seams mean a weak point in one layer is backed by solid fabric in the next.

Did this work for you?

What's next

Similar tutorials

Hand-picked next reads based on the one you just finished.

Liked this crafts tutorial?

Pick the crafts you want to hear about. One email every Sunday with new step-by-step tutorials. No spam, easy to unsubscribe.

Get more like this in your inbox

Weekly digest. Pick the categories you want. Unsubscribe anytime.

Send me tutorials about

We only email about new tutorials. Easy unsubscribe anytime.