How to Make Concrete Molds from Household Items

CraftsEasy7:309 stepsBrowse more →

By CraftingStepByStepPublished

Based on a video by Timber Ridge Gifts.

A small silicone mold kit runs $30 to $60, which is hard to swallow when you only want to test an idea. Tim at Timber Ridge Gifts shows a version that costs pocket change: a tube of 100% silicone caulk, a box of corn starch, and a plastic food container off the recycling pile. Mix it, knead it, press your shape in, and you have a flexible rubber mold you can pour concrete into.

He molds LEGO bricks and wax shapes in the video because the detail shows up clearly on camera. The method does not care what you are copying. Once the rubber cures it becomes the tool: mix a batch of concrete, fill the cavity, and pull the piece out the next day. If you have never cast anything before, the concrete planter build walks a full pour end to end.

Two things catch people out on a first home-made mold. Air trapped against the rubber leaves pits in the casting, and a rushed demold leaves a surface that needs work. Both have fixes: here is how to deal with air bubbles and how to sand and polish the finished piece. When the surface looks right, seal it so it stops drinking up water.

Step-by-Step Guide

9 steps · about 8 minutes.Check off each step as you go and your progress saves automatically.

1

Step 1: Pick Your Container and Set Out the Two Ingredients

0:50
Step 1: Step 1: Pick Your Container and Set Out the Two Ingredients

Almost anything that holds a shape can work as a mold box. Plastic food tubs, deli containers, yogurt cups and takeout trays all do the job because the plastic flexes when you pull the casting out. Glass and metal have no give at all, so a concrete piece tends to lock in and chip on the way out. Cardboard boxes and offcuts of PVC pipe work too, as long as you tape the seams and line them.

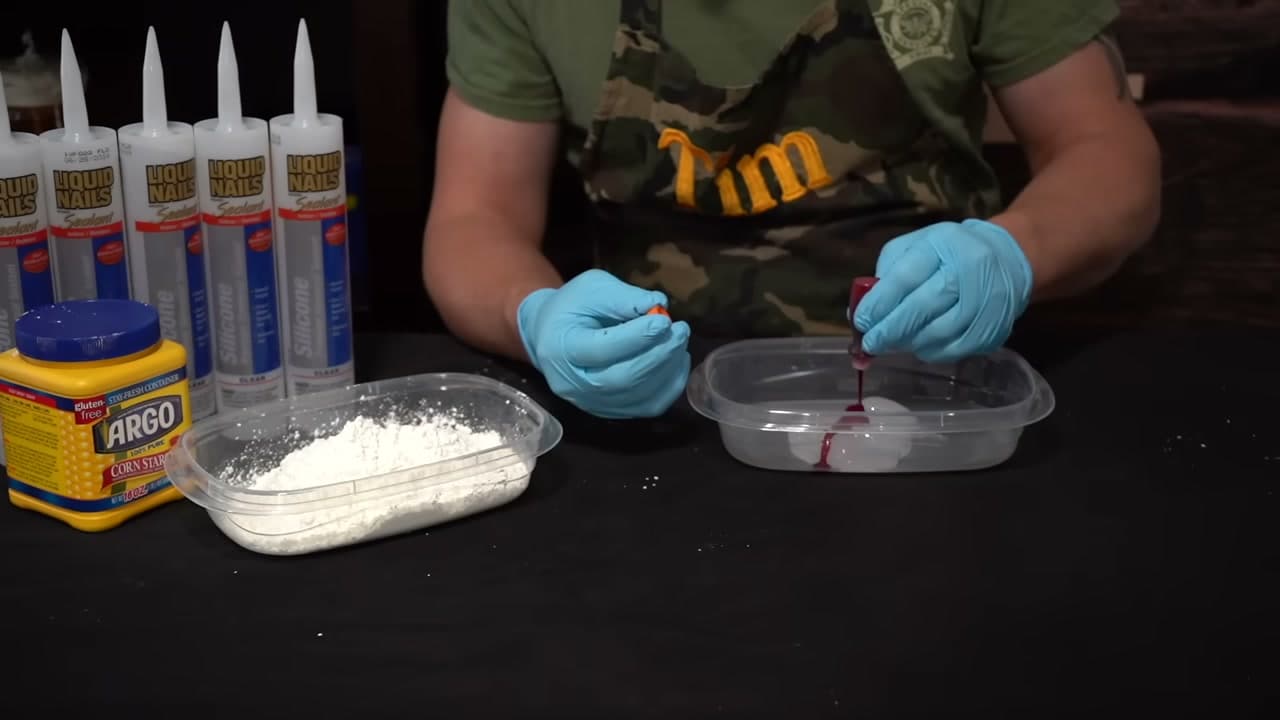
Two containers get you started here. One shallow tub holds corn starch, the other stays empty as a mixing bowl. Add a caulking gun, a tube of 100% silicone caulk and a box of corn starch and that is the entire shopping list.

Tip

Save yogurt pots, sour cream tubs and clamshell produce packs for a week and you will have a mold library for free. Watch this step

2

Step 2: Squeeze the Silicone Caulk Into the Tub

1:03
Step 2: Step 2: Squeeze the Silicone Caulk Into the Tub

Load the tube into the caulking gun, cut the nozzle, and run the whole tube into the empty plastic container. Check the label before you buy: you want 100% silicone. Siliconized latex and paintable sealants never cure into rubber, and you will not find that out until the batch is ruined.

One standard 10-ounce tube makes a slab large enough for coasters, planter feet or a set of small press molds. Open a window while you work. Curing silicone gives off a sharp vinegar smell that lingers in a closed room.

Tip

Cut the nozzle wide rather than narrow. You are dumping the tube out, not laying a bead, and a fat opening saves your hand. Watch this step

3

Step 3: Drop In Some Colorant

1:43
Step 3: Step 3: Drop In Some Colorant

A few drops of pigment turn the clear caulk opaque. That matters more than it sounds. Once the corn starch goes in, color is the only way to read whether the mix is done - streaks of clear silicone mean you have more kneading ahead of you.

Silicone pigment works, and so does a dab of acrylic craft paint. The water in acrylic paint speeds the cure a little, which is handy on a small batch and a nuisance on a large one.

Tip

Pick a color that contrasts with your concrete. Grey pigment in a grey mold makes it hard to spot a torn edge later. Watch this step

4

Step 4: Stir Until the Color Runs Even

2:00
Step 4: Step 4: Stir Until the Color Runs Even

Work a wooden stir stick through the caulk until no clear ribbons are left. Scrape the walls and get into the bottom corners of the tub, which is where the unmixed stuff hides. Give it a minute or two of steady folding.

Sort the color out now. As soon as corn starch touches the silicone you have five to ten minutes of working time, and you do not want to spend any of it chasing streaks.

Tip

Paint stirrers from the hardware store are free and stiffer than craft sticks. Grab a handful next time you are there. Watch this step

Products used in this step

5

Step 5: Turn It Out Into the Corn Starch

2:26
Step 5: Step 5: Turn It Out Into the Corn Starch

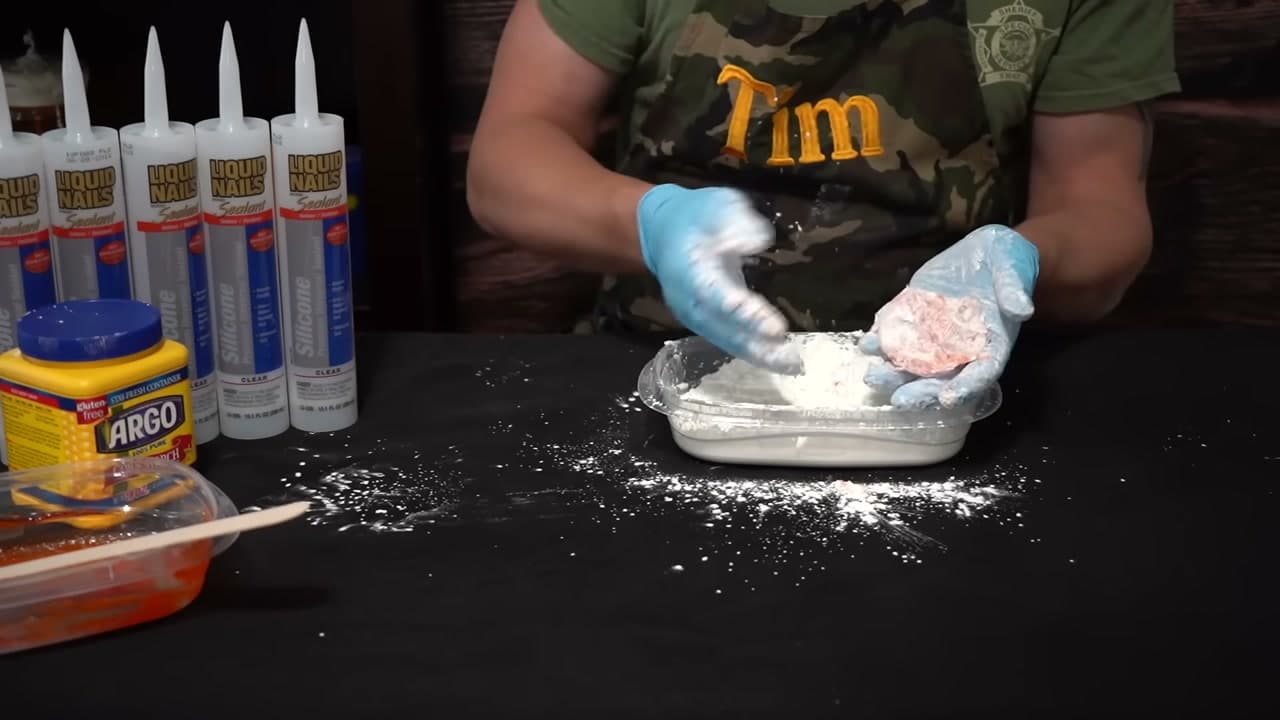
Scrape the blob out of the mixing tub and drop it into the shallow tray of corn starch. The corn starch is doing real chemistry here, not sitting there as a dusting powder. It drives the cure and takes the caulk from sticky paste to firm rubber in a couple of minutes.

Bury the blob. A heavy coat on every surface is what stops it grabbing your gloves before you get a chance to work it.

Tip

Use far more corn starch than you think you need. A whole box in a shallow tray costs about a dollar and leftovers go back on the shelf. Watch this step

Products used in this step

6

Step 6: Knead It Until It Stops Sticking

2:53
Step 6: Step 6: Knead It Until It Stops Sticking

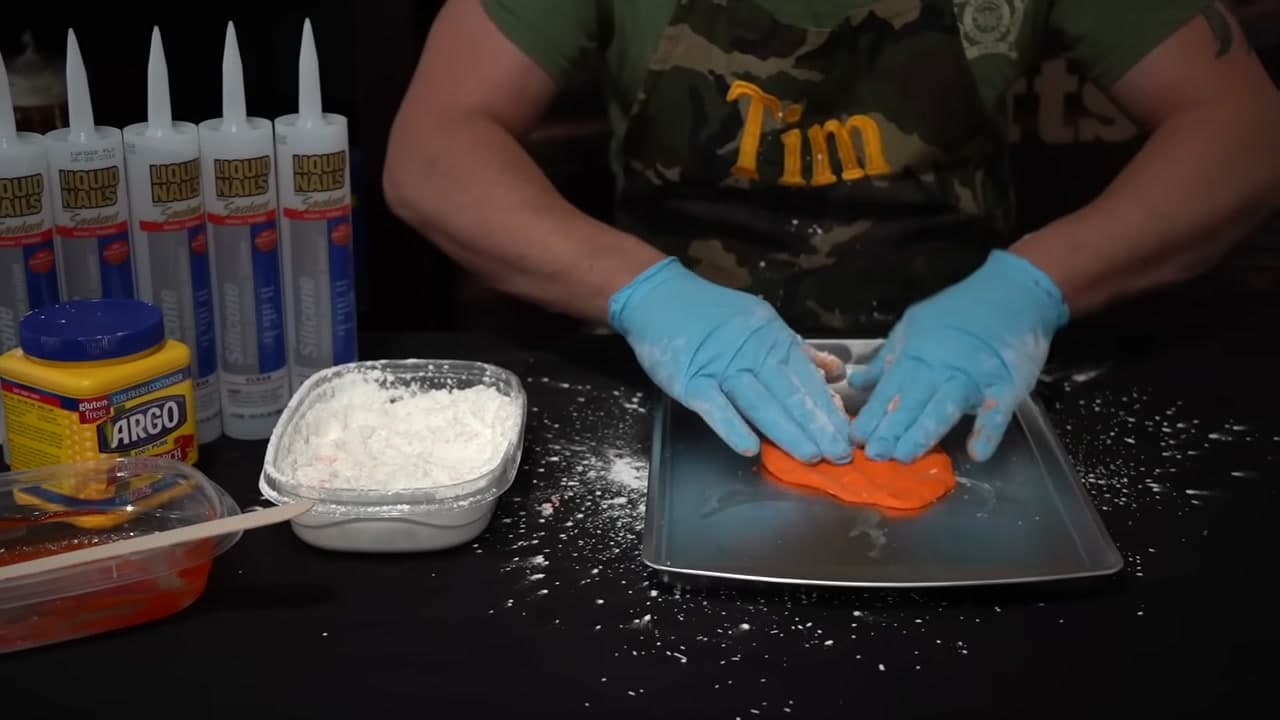
Push, fold and press the blob down into the powder, then do it again as the corn starch keeps disappearing into it. The texture shifts from tacky goo to something close to modeling clay, and the change happens quickly once it starts.

Wear the gloves. Uncured silicone bonds to skin and soap will not shift it. The rough ratio is a few tablespoons of corn starch per tube of caulk, but ignore the numbers and keep working powder in until the surface goes dry to the touch.

Tip

Nitrile beats latex for this. Latex gloves tear at the fingertips halfway through the kneading. Watch this step

Products used in this step

7

Step 7: Press the Putty Into a Slab

3:38
Step 7: Step 7: Press the Putty Into a Slab

Flatten the putty onto a baking tray or down into the base of a plastic tub. Go at least half an inch thicker than the deepest part of the object you want to copy, so the rubber has enough body to hold its shape when wet concrete pushes against it.

A flat tray gives you a true, level base and an open press mold. If you would rather have a mold with walls, line the inside of a food container instead and work the putty up the sides with your thumbs.

Tip

Want deeper cavities or a full two-part mold? That is where a proper pourable rubber earns its price, because putty this stiff will not flow around a complex shape. Watch this step

8

Step 8: Push Your Master Object In and Let It Set

3:52
Step 8: Step 8: Push Your Master Object In and Let It Set

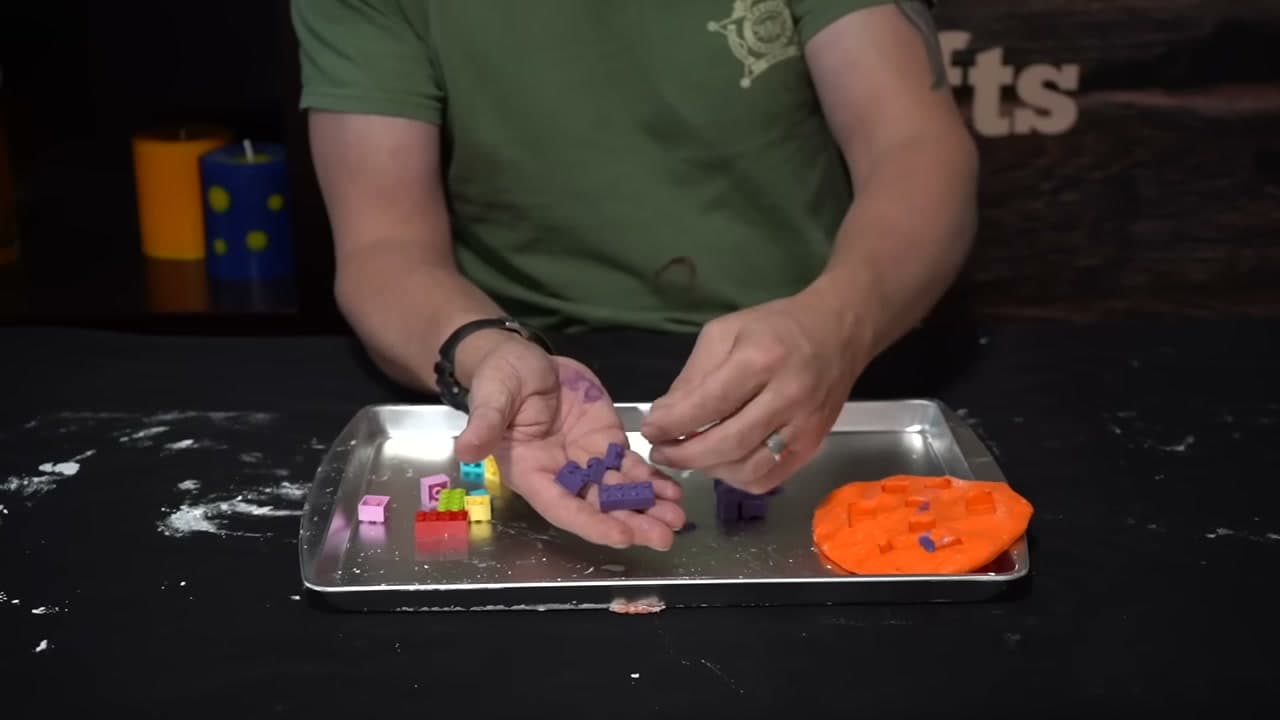
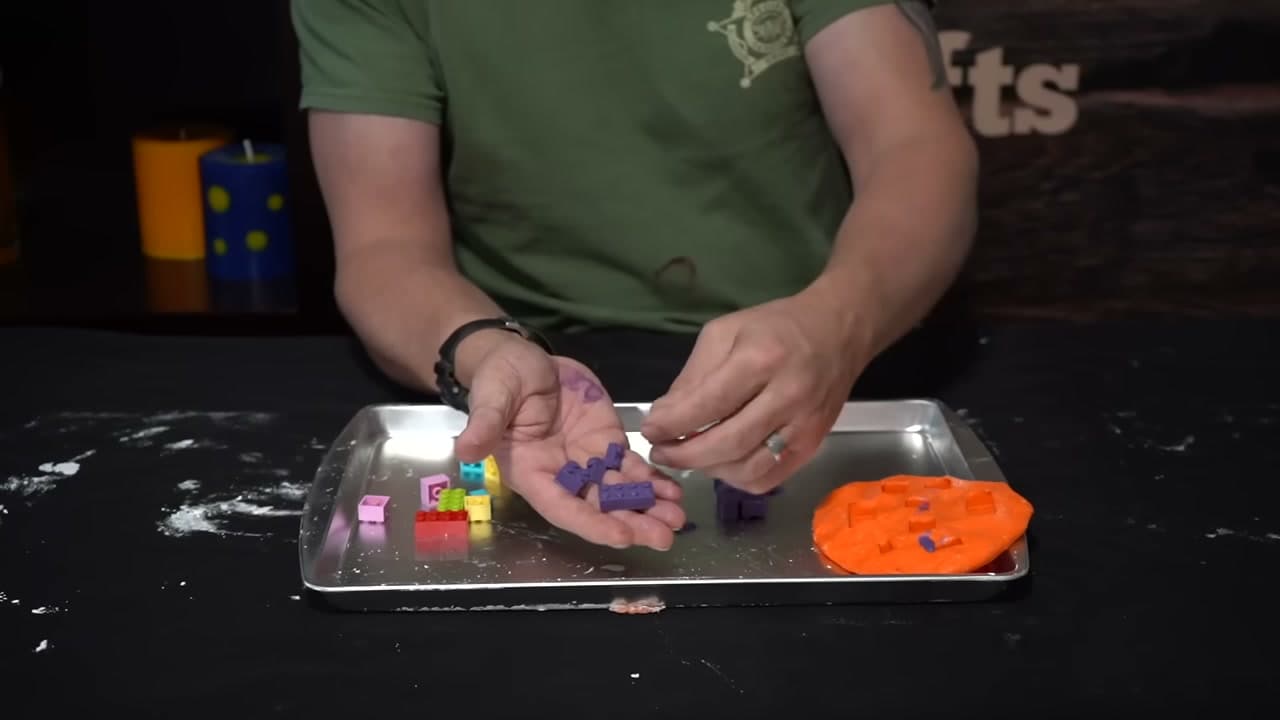
Press the shape you want to copy down into the slab until the rubber wraps every face that needs to show. The LEGO bricks and wax pieces here are just handy props. A shell, a leaf, a drawer knob, a cookie cutter or a carved wooden shape all leave a clean impression.

Smear a thin film of cooking spray or petroleum jelly on the master if it has deep undercuts or a porous surface. Then walk away. A shallow press mold is set in ten to twenty minutes. Anything thick wants a couple of hours before you touch it.

Tip

Press straight down, never at an angle. A master that rocks on the way in leaves a sloppy edge that shows on every casting you pull. Watch this step

9

Step 9: Peel the Mold Off and Start Casting

4:57
Step 9: Step 9: Peel the Mold Off and Start Casting

Bend the rubber back and the master drops loose. That flex is the entire reason to make a mold in the first place - concrete has no give, so the mold has to be the part that moves. What is left is a clean cavity with every detail of the original in it.

Now use it. Mix your concrete on the loose side, fill the cavity, tap the tray on the bench to float the air out, and pull a finished piece the next day. Rinse the mold in warm water between pours and one batch of putty will carry you through dozens of castings.

Tip

Store finished molds flat with a dusting of corn starch between them. Stacked under weight they take a set and never sit true again. Watch this step

Products used in this step

Products Used

☐ The Checklist

How to Make Concrete Molds from Household Items

Tools
7
Materials
8
Steps
9
Video
8 min

Tools we recommend

Your Guide

Timber Ridge Gifts

As an Amazon Associate we earn from qualifying purchases. Links on this page may be affiliate links - clicking them and buying doesn't change your price, but helps support ShowMeStepByStep.

Tags

Sunday How-To

New crafts tutorials, every Sunday

One short email with the week's best step-by-step guides. Free, no spam, unsubscribe anytime.

Did this work for you?

What's next

Related collections

Curated theme pages that include this tutorial.

Weekly Digest

Liked this crafts tutorial?

Pick the categories you want to hear about. Weekly digest of new step-by-step tutorials. No spam, easy unsubscribe.

Send me tutorials about

We only email about new tutorials. Easy unsubscribe anytime.