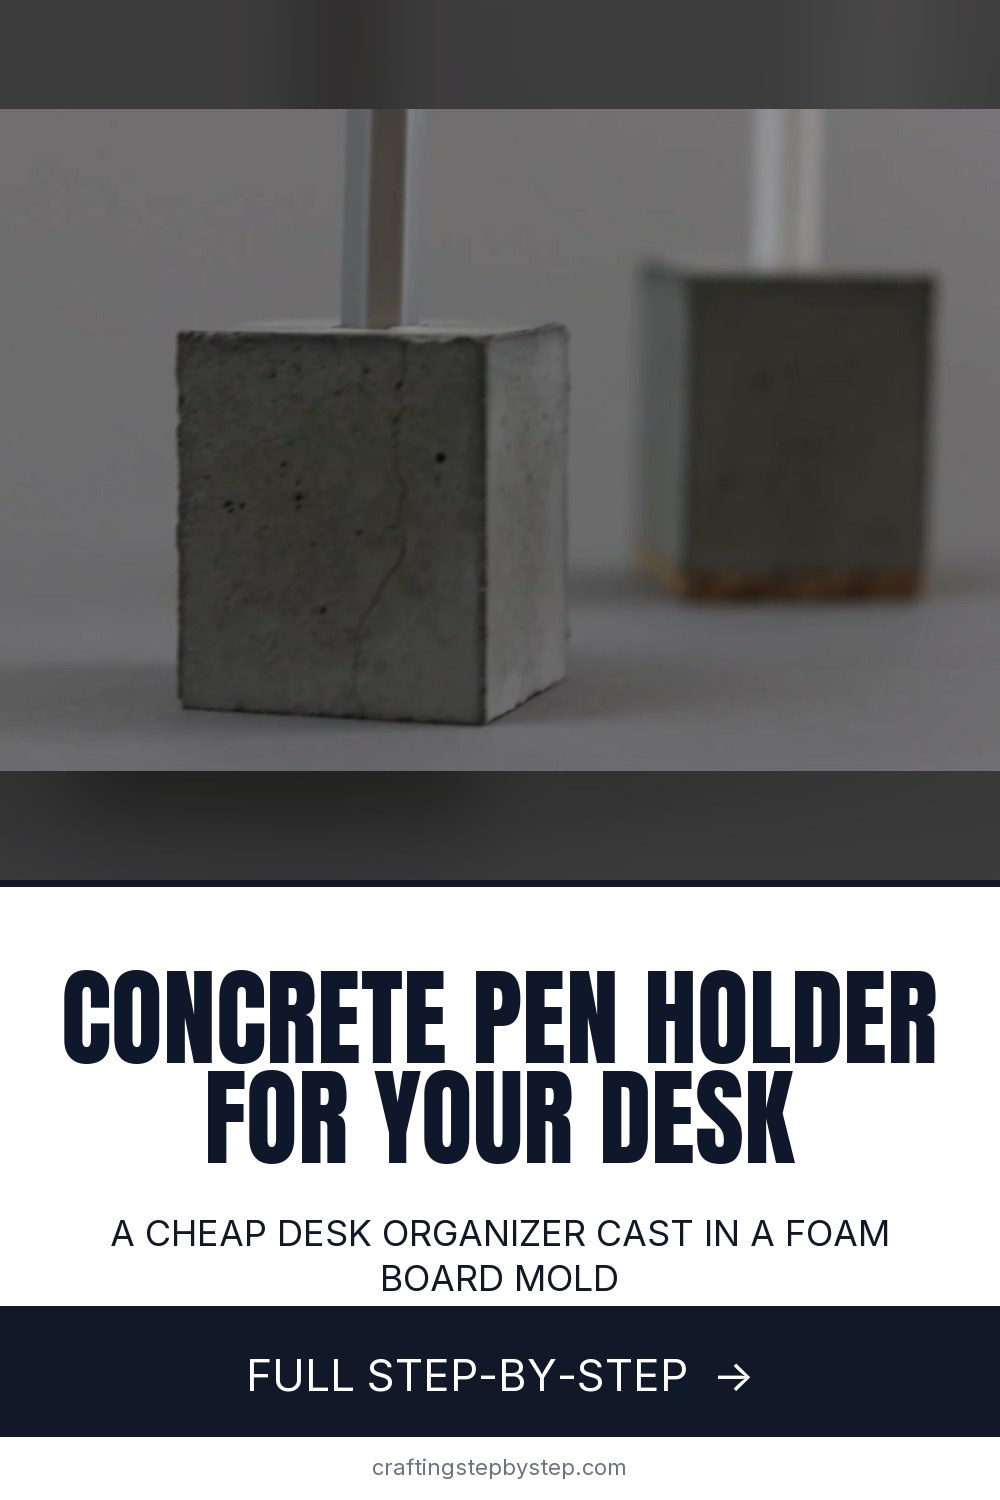
How to Make a Concrete Pen Holder for Your Desk

The finished result: How to Make a Concrete Pen Holder for Your Desk
  • Difficulty: Easy
  • About 1 hour, plus 24 hours to dry or set
  • 9 steps

You tapped Save

Save this project for later

We'll email you a link, no password.

How to Make a Concrete Pen Holder for Your Desk

  • Your saved projects in one list
  • Your ticked steps on any device

Check your inbox for an email from us. Not there? Look in your spam folder.

Print

Steps written out by Crafting Step by Step from Sam Bucciferro's video (opens YouTube) (9:55). Published .

A concrete pen holder is a small, heavy desk organizer that keeps your favorite pen standing upright and always where you left it. It costs a few dollars to make. Sam Bucciferro of Fizzy Brick shows the whole process, including the first mold that failed and the changes that fixed it. You build a little foam board box, stand a pen in it, fill it with concrete and peel the mold away a day later.

How to make a concrete desk organizer: the short version

  • Cut a base and four walls from foam board using a template.
  • Cover the pieces in packing tape and hot glue them into a box.
  • Push a taped, greased pen through a hole in the base.
  • Sift the gravel out of the concrete mix, add water and fill the mold.
  • Let it cure, pull the pen and peel off the foam board.

Why foam board makes a good mold

Pros cast countertops in melamine, but that is overkill for a cube this size. Foam board is cheap, cuts with a craft knife and glues in seconds. Its weak spot is the paper skin. Paper soaks up water, and concrete needs that water to cure hard. Sam's untaped mold lost so much moisture that the glue let go and the walls drifted apart. A layer of clear packing tape fixed it and gave a glossier, smoother face.

Getting the pen hole right

The pen itself makes the hole, so it fits your pen exactly. That is also the risk. On the first try the pen set solid in the concrete and never came back out. Wrap the end of the pen in a few turns of packing tape and wipe on a thin coat of petroleum jelly. The tape makes the hole a touch bigger, and the jelly lets the pen slide free. Use a cheap pen for casting, then swap in a nicer one.

Which concrete to buy

The cheapest bag of basic concrete mix at the hardware store works. Most of those mixes contain gravel, which is great for a patio and bad for a two-inch cube. Stones jam between the pen and the mold wall. Rub the dry mix over a screen or a sheet of cardboard punched with holes and keep only what falls through. A sand mix or countertop mix skips this step and gives a smoother finish.

Safety with dry concrete

Concrete dust is caustic. Wear gloves and a dust mask when you sift and mix, and work outside or near an open door. Rinse wet concrete off skin right away. Never wash leftover concrete down a sink drain.

Ideas to make it your own

  • Glue a square of cork to the bottom so it will not scratch your desk.
  • Make the mold taller or wider and cast holes for two or three pens.
  • Tint the mix with a little pigment before you pour.
  • Seal the cube so ink and coffee rings wipe off.

Common problems

  • Pen stuck for good. Not enough tape or jelly. Add both next time.
  • Walls separated. The paper soaked up water. Tape every inside face.
  • Wobbly mold. Use a flat base and rest the mold on a can or cup while it cures.
  • Pitted faces. Tap the mold after filling to release trapped air.

More concrete crafts

For more mold ideas, see concrete molds from household items. Learn how to fix air bubbles in concrete crafts and how to seal concrete crafts, then make a matching concrete catchall tray for the rest of your desk.

Free printable

Print the steps and supply list for this project

One page you can take to the table. Free with a free account, no password.

Get the free printable

What you'll need

Free, for this project

Get this checklist by email

  • All 16 tools and materials, with tick boxes
  • A link to print all 9 steps on paper, to keep by you while you craft

No password. The whole tutorial stays free on this page.

Quick answer

Make a concrete pen holder in a foam board mold. An easy project: about 1 hour, plus 24 hours to dry or set. Materials cost about $3 to $8. You need 16 things, including foam board, printed mold template and spray adhesive. The 9 steps start with attach the Pen Holder Template to Foam Board, cut the Foam Board Mold Pieces Along a Ruler and seal the Foam Board Mold Pieces With Packing Tape.

Step-by-step guide

9 steps, about 10 minutes. Tap a picture to jump to that step. Your progress saves automatically.

Tick each step off as you go.

  1. Step 1: Attach the Pen Holder Template to Foam Board

    Watch this step · 3:26

    Print a template with the outlines of the base and four walls. Sam shares his on the Fizzy Brick website, or you can draw one with a ruler. Mist the back of the paper with spray adhesive and smooth it flat onto a sheet of foam board. The printed lines save you from measuring every piece, and they keep all four walls the same height.

    Tip:

    Make the walls a little taller than your cube so you have room to fill to the top.

    Back to all steps

  2. Step 2: Cut the Foam Board Mold Pieces Along a Ruler

    Watch this step · 3:34

    Hold a steel ruler firmly on each line and draw a sharp craft knife along it. Take two or three light passes instead of forcing one deep cut. Clean edges matter here. If the walls are not square, the mold leans and the finished cube comes out crooked. Cut the base square and the four wall pieces, then poke a small hole in the center of the base for the pen.

    Tip:

    Snap off a fresh blade before you start. A dull blade tears the foam.

    Back to all steps

  3. Step 3: Seal the Foam Board Mold Pieces With Packing Tape

    Watch this step · 6:15

    Cover every face that will touch concrete with clear packing tape. Smooth it down so there are no wrinkles or bubbles, since every crease shows up on the cast. The tape keeps the paper skin of the foam board from soaking up water. Without it, Sam's first mold went soft and the walls pulled apart.

    Tip:

    Trim the tape flush with the edges so the walls still sit tight.

    Back to all steps

  4. Step 4: Hot Glue the Foam Board Walls to the Mold Base

    Watch this step · 6:20

    Stand the first wall on its line on the base and tack it with small dots of hot glue. Dots set faster than a long bead, so you can build the box quickly. Add the other three walls the same way. Then run glue along every inside seam so the box is watertight. Use a flat base rather than legs. It is steadier and easier to glue.

    Tip:

    A mini glue gun fits inside the small box much better than a full-size one.

    Back to all steps

  5. Step 5: Push the Pen Through the Hole in the Mold Base

    Watch this step · 4:26

    Feed the pen up through the hole in the base so it stands straight in the middle of the box. The pen is the mold for the hole, so it will fit that pen exactly. Seal around it with a little hot glue underneath. Turn the mold over and stand it on a can or cup, so the pen hangs down inside the can and the box sits level.

    Tip:

    Check the pen is straight from two sides. A tilted pen gives a tilted hole.

    Back to all steps

  6. Step 6: Tape and Grease the Pen So It Slides Out of the Concrete

    Watch this step · 7:35

    Wrap a few layers of packing tape around the end of the pen that sits in the concrete. Then wipe a thin coat of petroleum jelly over the tape with a paper towel. On the first try the pen set solid in the concrete. With tape and jelly it slid right out, and the hole was a hair bigger than the pen, so it fit well.

    Tip:

    Use a spare pen for casting. It may get scuffed.

    Back to all steps

  7. Step 7: Sift the Gravel Out of the Concrete Mix

    Watch this step · 5:50

    Most bagged concrete has large gravel mixed in. That is fine for steps or a patio, but the stones jam in the tight gap around the pen. Rub the dry mix across a screen or a piece of cardboard punched full of holes over a tray. Keep the fine powder that falls through and toss the stones. Wear gloves and a dust mask for this part.

    Tip:

    Sift a little more than you think you need. A small cube still takes a full cup.

    Back to all steps

  8. Step 8: Fill the Foam Board Mold With Wet Concrete

    Watch this step · 7:24

    Stir water into the sifted mix a little at a time until it is like thick oatmeal. Spoon it into the mold and push it down around the pen. Tap the sides of the mold to bring air bubbles up, then fill right to the rim and smooth the top. Leave it on the can, out of direct sun, for at least 24 hours.

    Tip:

    Cover the top loosely with plastic so it does not dry out too fast.

    Back to all steps

  9. Step 9: Peel the Foam Board Mold Off the Concrete Pen Holder

    Watch this step · 7:37

    Once the concrete is hard, twist the pen and pull it out. Then tear the foam board walls away from the cube. The tape side lets go cleanly and leaves a smooth face. Brush off any loose bits and let the cube dry for a few more days. Glue a square of cork underneath, drop in a good pen and put it on your desk.

    Tip:

    Sand any sharp edges lightly with fine sandpaper once it is fully dry.

    Back to all steps

How to Apply Mosaic Tile Adhesive (Weldbond and E6000)

Keep going

How to Apply Mosaic Tile Adhesive (Weldbond and E6000)

Keep going with crafts

More on this topic, picked for this concrete pen holder for your desk.

You reached the last step

Save this project to come back to it

Your ticked steps, the free printable and your other saved makes, together in My Projects. Free, no password.

You tapped Save

Save this project for later

We'll email you a link, no password.

How to Make a Concrete Pen Holder for Your Desk

  • Your saved projects in one list
  • Your ticked steps on any device

Check your inbox for an email from us. Not there? Look in your spam folder.

Free printable

Printable sheet for this project

The bonus is hidden until you sign up.

Free with a free account, no password. Every step above stays open to everyone.

Products Used

The Checklist

How to Make a Concrete Pen Holder for Your Desk

Tools
7
Materials
9
Steps
9
Video
10 min

Tools we recommend

As an Amazon Associate we earn from qualifying purchases. Links on this page may be affiliate links - clicking them and buying doesn't change your price, but helps support Crafting Step by Step.

Tags

The Crafter's Weekly

New crafts tutorials, every Sunday

One short email with the week's best step-by-step guides. Free, no spam, unsubscribe anytime.

Did this work for you?

What's next

Related collections

Curated theme pages that include this tutorial.

Similar tutorials

Hand-picked next reads based on the one you just finished.

Liked this crafts tutorial?

Pick the crafts you want to hear about. One email every Sunday with new step-by-step tutorials. No spam, easy to unsubscribe.

Get more like this in your inbox

Weekly digest. Pick the categories you want. Unsubscribe anytime.

Send me tutorials about

We only email about new tutorials. Easy unsubscribe anytime.