How to Make a Concrete Catchall Tray with White Cement

CraftsMedium8:097 stepsBrowse more →

By CraftingStepByStepPublished

Based on a video by Colourslia | Clay & Concrete Artist ౨ৎ.

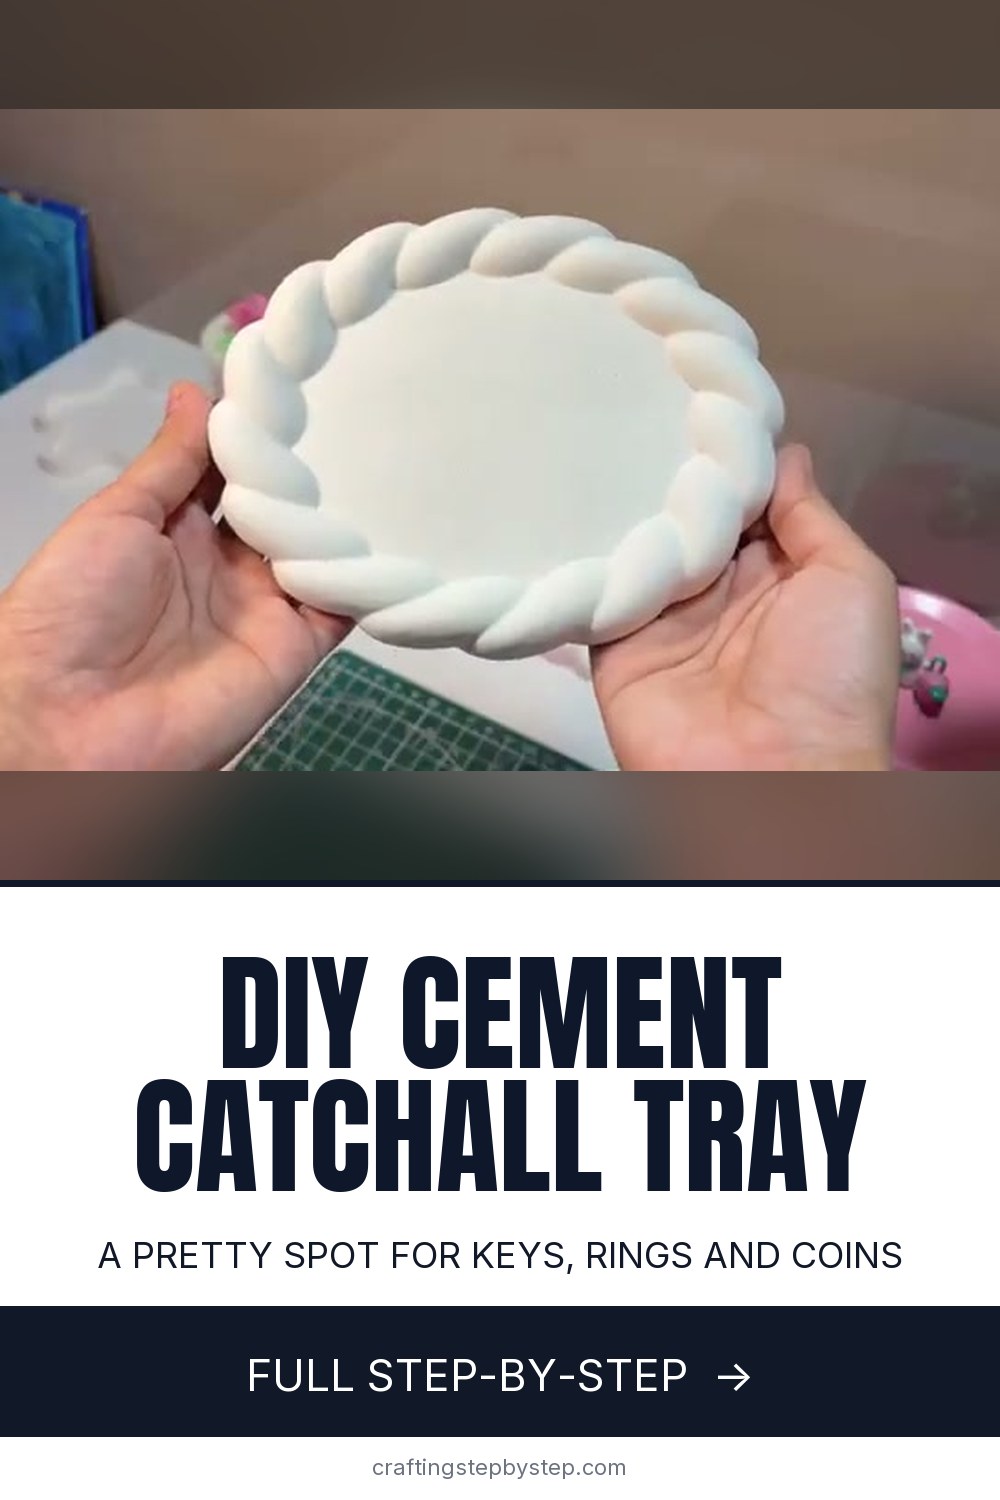
A concrete catchall tray is the perfect landing spot for the stuff that piles up by the door - keys, coins, spare change, a stray ring. This one comes out of a single kilo of white cement, so it's cheap to make and heavy enough to stay put on a shelf. Colourslia walks through the whole thing in her white cement tutorial, and the method is beginner-friendly once you learn the one rule that matters: the mix ratio.

You measure two parts white cement to one part water, stir it into a flowy paste, and pour it into a silicone mold. Tap out the air bubbles, walk away for 24 hours, then pop out a smooth tray with a braided rope edge. A quick sand and an optional sealer and it's done. The flat, shallow shape is what makes it a catchall rather than a deep dish - it holds a small pile of everyday things without hiding them.

If you catch the concrete bug, there's plenty more to pour. Try a concrete planter for a succulent, a deeper concrete trinket dish for rings and earrings, or a pair of concrete bookends to hold up your favorites. Same basic mix, different molds.

Step-by-Step Guide

7 steps · about 8 minutes.Check off each step as you go and your progress saves automatically.

1

Step 1: Gather Your Materials

2:18
Step 1: Step 1: Gather Your Materials

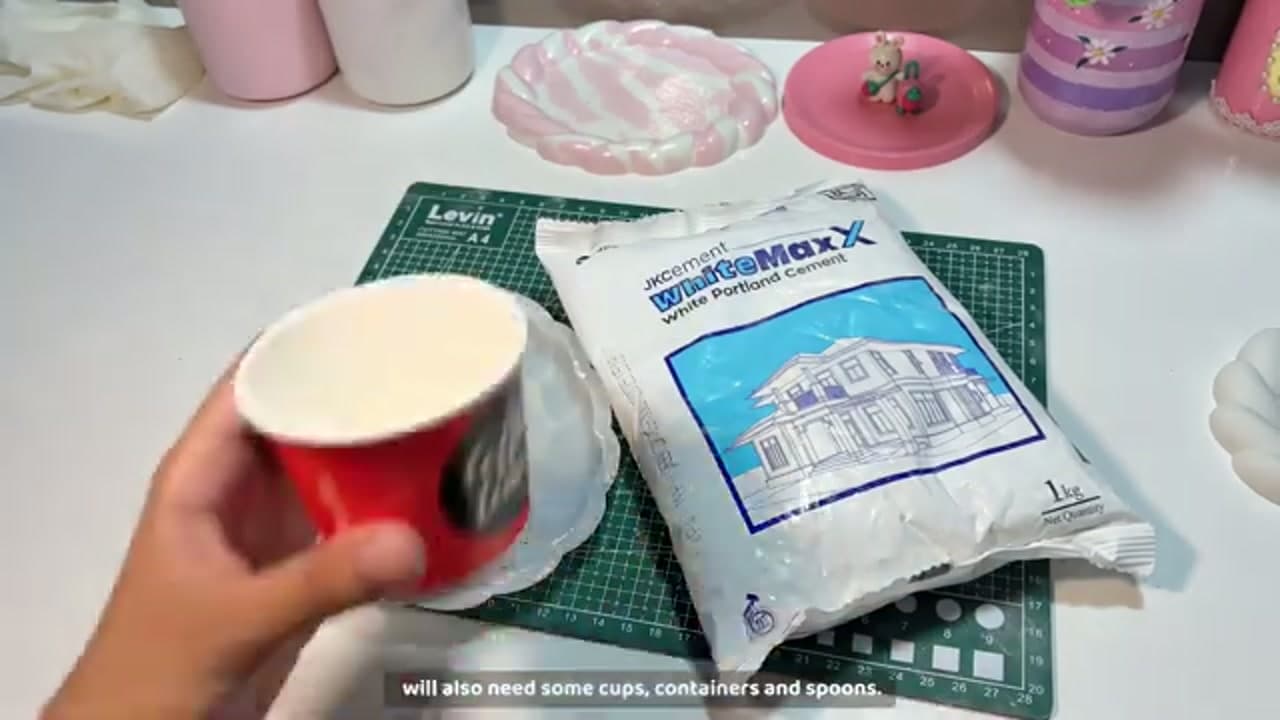
Set out everything before you start. You want your white cement, a silicone tray mold, two matching cups for measuring, a mixing container, a stir stick and a pair of gloves. A single kilo of white cement runs a couple of dollars and makes five or six trays, so this is a cheap craft to get into.

Pull the gloves on before you open the bag. Wet cement is drying and a little caustic on bare skin, and once it's mixed you won't want to stop to hunt for supplies.

Tip

Watch this step Any small silicone resin or soap mold with a flat bottom works as a tray mold. A shallow, wide shape gives you a catchall rather than a deep dish.
2

Step 2: Measure Two Parts Cement to One Part Water

3:24
Step 2: Step 2: Measure Two Parts Cement to One Part Water

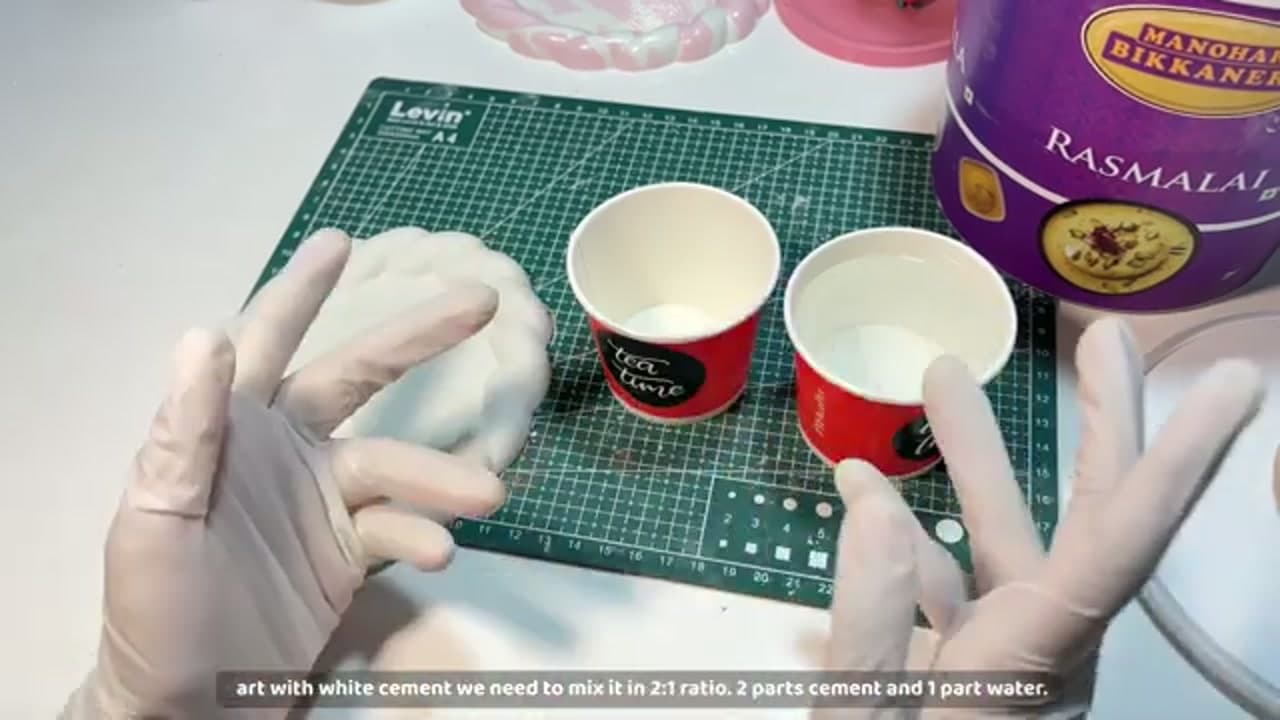
This ratio is the heart of the whole project. Fill one cup level with white cement, then fill a second cup the same way, and tip both into your mixing container. Now measure one matching cup of water and set it beside them.

Two parts cement to one part water gives you a paste that pours but still sets rock hard. Guess at it and you get either a soupy mix that won't hold shape or a stiff one that traps air. Use the same cup for all three scoops so the measure stays honest.

Tip

Watch this step Add the cement to the container first and the water second. It's easier to see and break up dry pockets when the water goes in on top.

3

Step 3: Mix Out the Lumps

4:30
Step 3: Step 3: Mix Out the Lumps

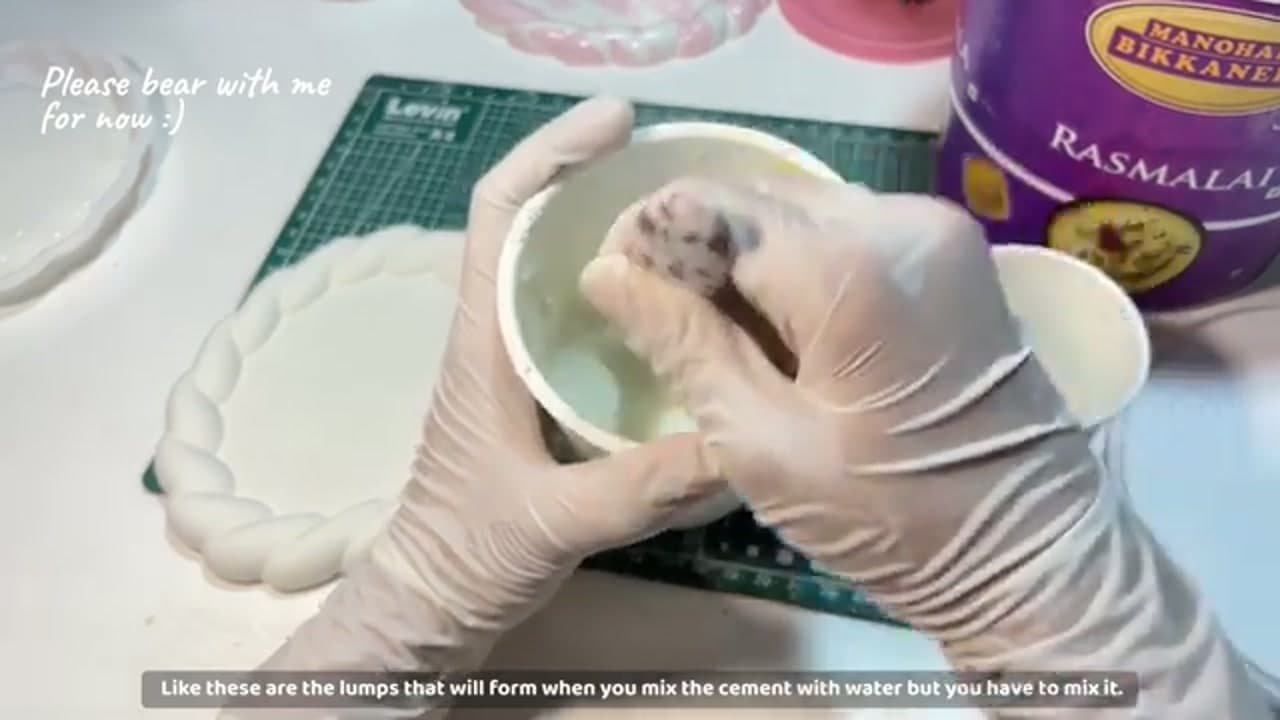
Pour the water into the cement and stir with real intent. Dry clumps show up right away, and that's expected. Keep working the stick around the container, pressing the lumps against the sides to crush them flat.

Don't stop until the mix is one even color with no gritty pockets at the bottom. A lump you leave in the batter becomes a weak spot in the finished tray, so this minute of hard stirring is worth it.

Tip

Watch this step A flat wooden stir stick or a sturdy spoon works better than a fork. You want to smear the lumps, not slosh air into the mix.

4

Step 4: Check the Consistency

5:00
Step 4: Step 4: Check the Consistency

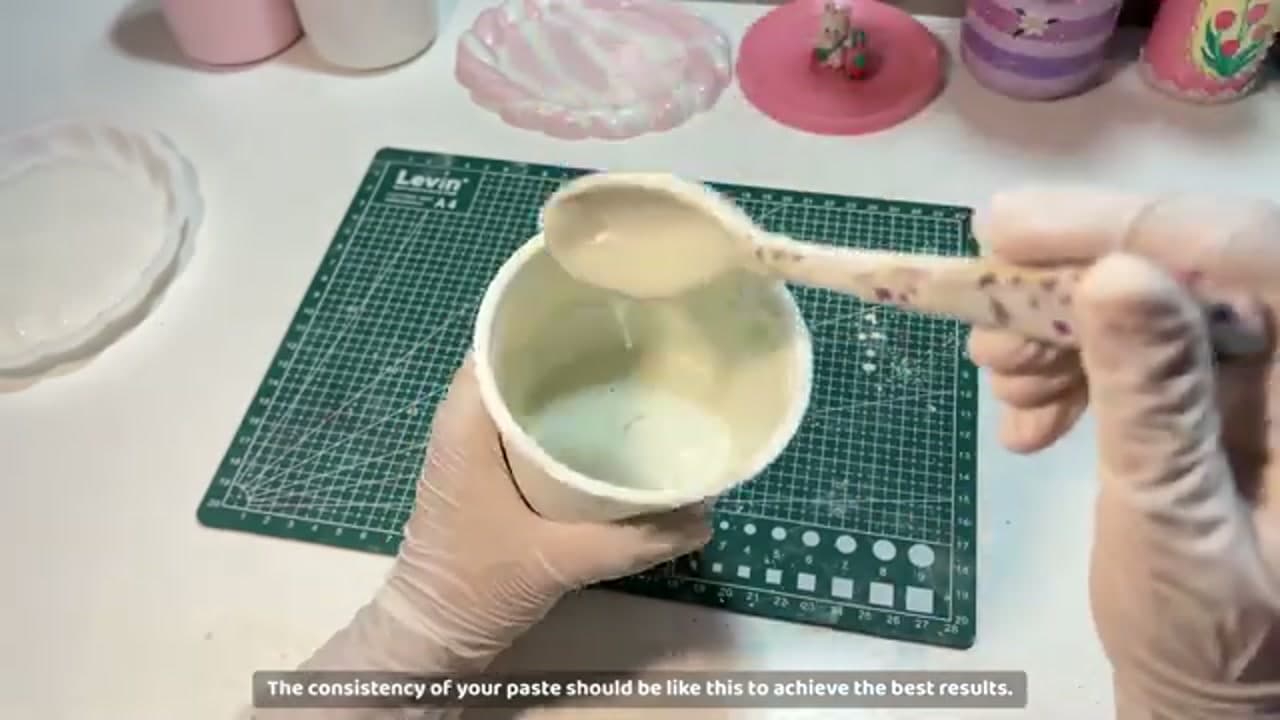
Lift a spoonful and let it drizzle back into the container. You're aiming for a paste that ribbons off slowly, somewhere between heavy cream and pancake batter. Too watery and it's weak. Too thick and it won't level or release air.

If it's stiffer than that, add water a small splash at a time and stir again until it flows. Get the texture right here and the tray practically pours itself flat.

Tip

Watch this step Once it's right, work fast. White cement has about a ten-minute window before it starts to firm up and stops pouring smoothly.

Products used in this step

5

Step 5: Pour It Into the Mold

5:30
Step 5: Step 5: Pour It Into the Mold

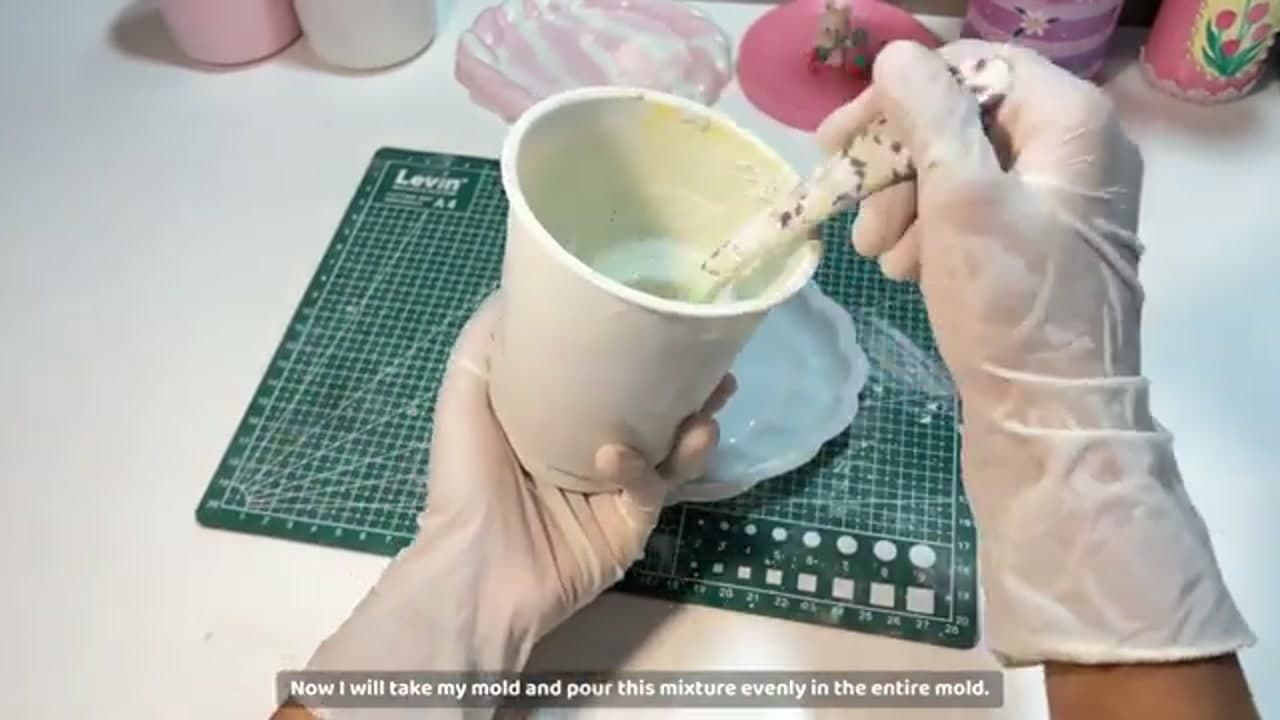
Pour the paste into the silicone mold in one steady stream. Start at the center and let it spread outward on its own toward the scalloped edge. Keep pouring until it fills to the top of the mold.

Work quickly and don't fuss. The flowy mix self-levels if you leave it, and the less you poke at it the fewer bubbles you drag in. A tray mold like this fills in seconds.

Tip

Watch this step Set the mold on a flat, level surface before you pour so the tray cures with an even thickness and doesn't come out lopsided.

6

Step 6: Tap Out Bubbles and Cure

6:06
Step 6: Step 6: Tap Out Bubbles and Cure

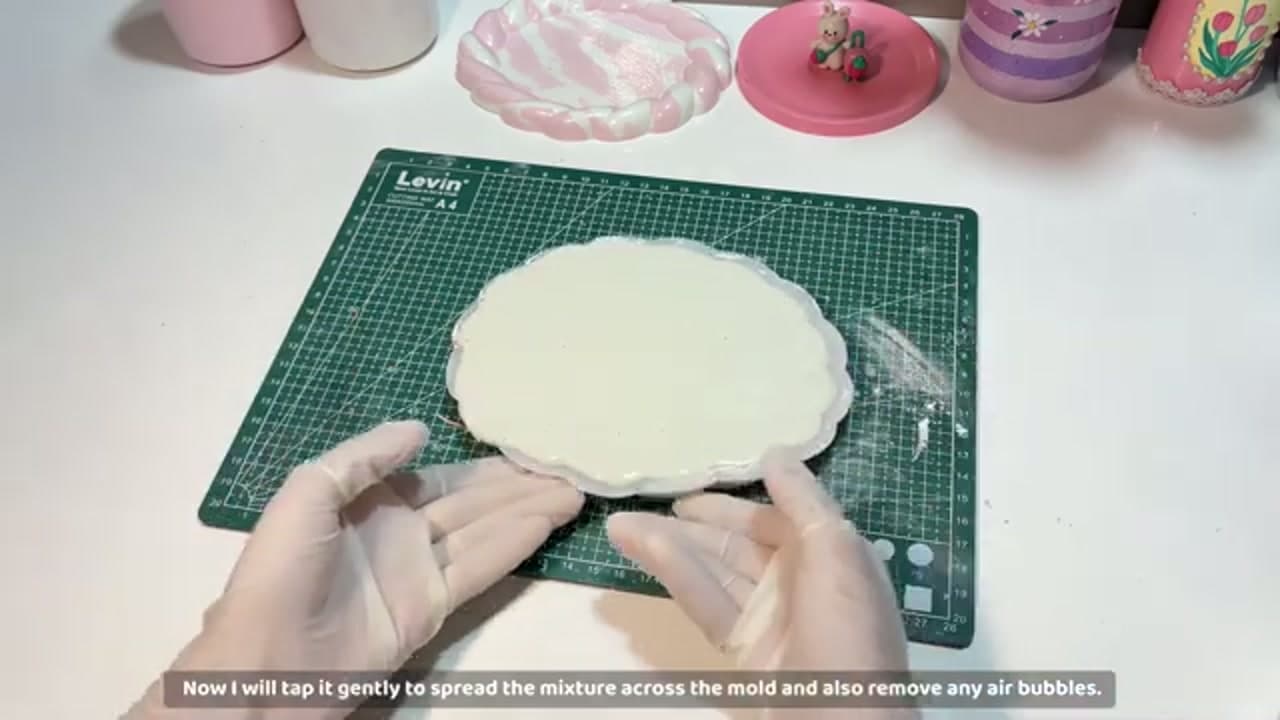
Give the filled mold a few firm taps flat against the table. Each knock brings trapped air up to the surface where it pops, and that's what leaves you with a smooth back instead of a pitted one. A dozen taps is plenty.

Now the hard part: leave it alone. Let the tray cure for a full 24 hours. When it's hard and cool to the touch it's ready to come out, not before.

Tip

Watch this step Rushing the de-mold is the number one way to crack a tray. In a cool room, give it the full day even if the top feels dry after a few hours.

Products used in this step

7

Step 7: De-Mold, Sand, and Style

6:36
Step 7: Step 7: De-Mold, Sand, and Style

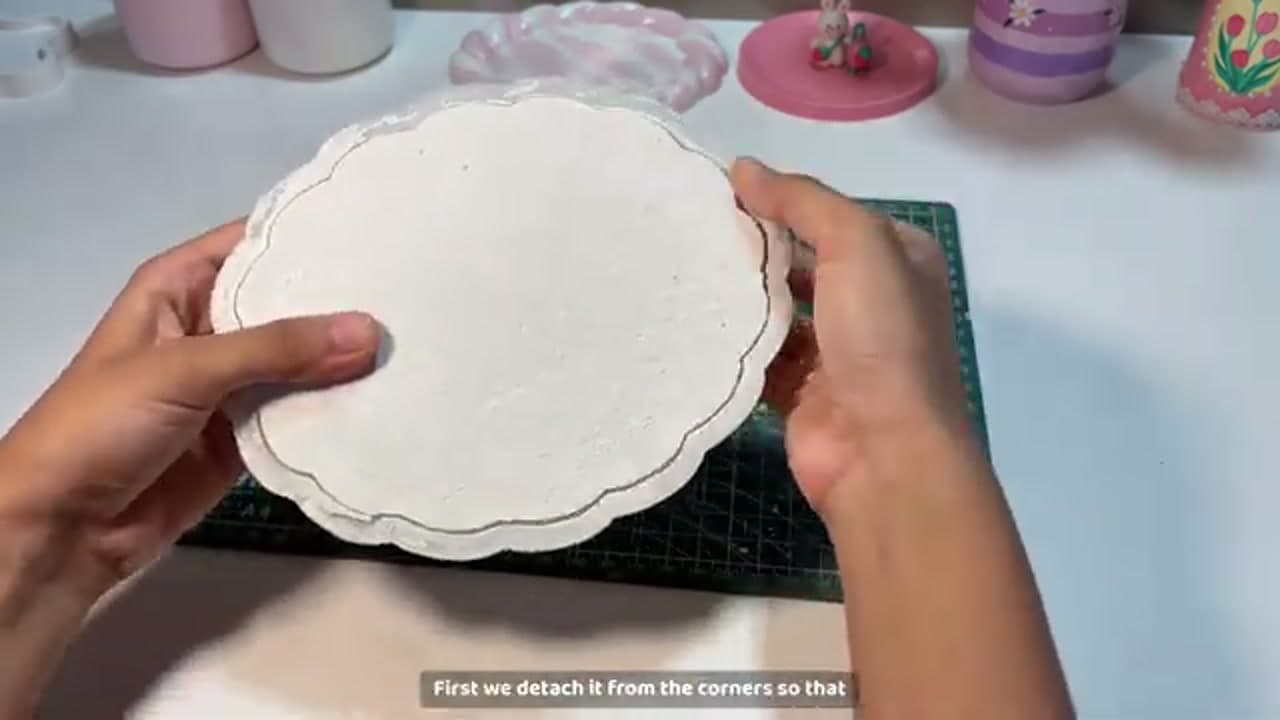
Peel the silicone back from the corners first, then work your way around the rim and ease the tray out. Go slow and let the flexible mold do the work so you don't chip the braided edge. You should get a smooth, crack-free tray.

Knock down any rough spots or stray edges with a bit of sandpaper. A coat of concrete sealer makes it water resistant, and stick-on felt feet keep it from scratching a shelf. Then drop in your keys, coins and rings and you're set.

Tip

Watch this step Sand outdoors or over a bin - cement dust is fine and messy. Wet sanding with a damp piece of fine grit keeps the dust down and leaves a silkier finish.

Products Used

☐ The Checklist

How to Make a Concrete Catchall Tray with White Cement

Tools
6
Materials
5
Steps
7
Video
8 min

Your Guide

Colourslia | Clay & Concrete Artist ౨ৎ

As an Amazon Associate we earn from qualifying purchases. Links on this page may be affiliate links - clicking them and buying doesn't change your price, but helps support ShowMeStepByStep.

Sunday How-To

New crafts tutorials, every Sunday

One short email with the week's best step-by-step guides. Free, no spam, unsubscribe anytime.

Did this work for you?

What's next

Related collections

Curated theme pages that include this tutorial.

Weekly Digest

Liked this crafts tutorial?

Pick the categories you want to hear about. Weekly digest of new step-by-step tutorials. No spam, easy unsubscribe.

Send me tutorials about

We only email about new tutorials. Easy unsubscribe anytime.