How to Knit - A Beginner's First Scarf

The finished result: How to Knit - A Beginner's First Scarf
  • Difficulty: Easy
  • About 2 hours 30 minutes
  • 7 steps

You tapped Save

Save this project for later

We'll email you a link, no password.

How to Knit - A Beginner's First Scarf

  • Your saved projects in one list
  • Your ticked steps on any device

Check your inbox for an email from us. Not there? Look in your spam folder.

Print

Steps written out by Crafting Step by Step from ExpressionFiberArts' video (opens YouTube) (14:52). Published .

Knitting is one motion repeated until you have fabric. You put a loop on a needle, pull a new loop through it, and slide the old one off. Do that a few hundred times and you have a scarf. Everything else in knitting is a variation on that single move.

Shandie from Expression Fiber Arts teaches this one for people who have never held a needle. She covers the slip knot through binding off, including what to do when you drop a stitch, which you will.

What to buy first

A pair of 8mm (US 11) straight needles and one skein of chunky, smooth, light-coloured yarn. Big needles and thick yarn make your stitches large enough to see what your hands are doing, and they make a scarf grow fast enough that you do not lose interest halfway through.

Wooden or bamboo needles grip the yarn slightly. Metal ones are slippery and let stitches slide off on their own. Start with wood.

The four things you need to know

Cast on. Getting the first row of stitches onto the needle. Long-tail is the method most knitters use forever, so learn that rather than the easier backward-loop version you would have to unlearn later. Leave a tail about three times the width of the finished piece.

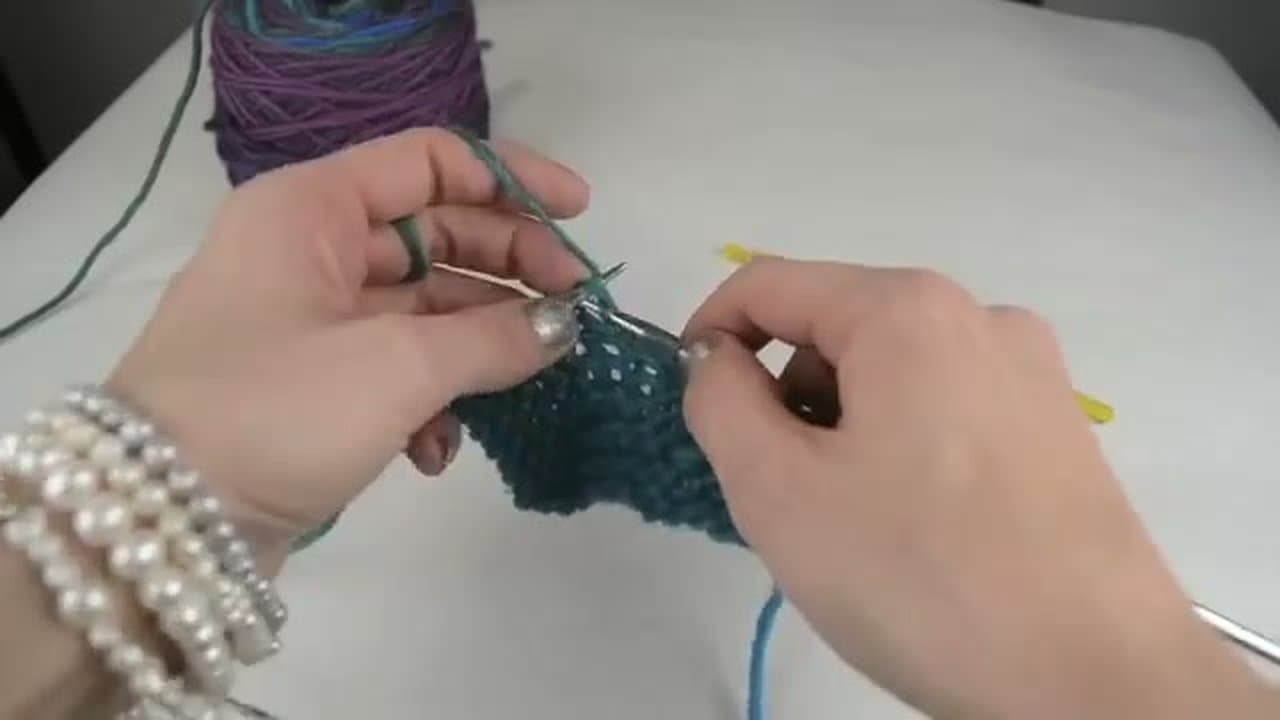
The knit stitch. Needle in, yarn around, pull through, slide off. In through the front of the loop, wrap counter-clockwise, draw the new loop out, drop the old stitch. Say it out loud for the first few rows. It helps more than it sounds like it will.

Dropped stitches. A stitch slips off the needle and starts unravelling down the fabric as a ladder. It is fixable with a crochet hook, and it happens to everyone at every skill level. Do not start over.

Bind off. Locking the stitches so the fabric stops being live. Knit two, lift the first over the second, repeat to the end. Bind off too tightly and the edge puckers and pulls in, so go looser than feels right.

Garter stitch is a real fabric, not a placeholder

Knit every row and you get garter stitch: bumpy, reversible, and it lies flat instead of curling at the edges. Beginners tend to treat it as the thing you do before you learn something proper. It makes a good scarf, dishcloth or blanket square with no other skill attached, and the flat edges are a genuine advantage that stockinette does not have.

Your edges will be uneven at first, usually from an accidental extra stitch picked up at the start of a row. Count at the end of every row for the first week. The count catches the mistake while it is one row old rather than twenty.

What to learn next

Add the purl stitch and you can work stockinette, ribbing and seed stitch, which covers most patterns you will meet. Then increases for shaping and knitting in the round for hats, socks and anything tube-shaped.

Two housekeeping skills change how finished work looks more than any stitch does: joining a new ball of yarn without a lumpy knot, and a clean cast on and bind off at each end of the work.

For a first project, a square-by-square blanket is forgiving because each square is small enough to redo without grief. When you are ready to follow written instructions, reading a knitting pattern decodes k, p, k2tog and the asterisk repeats.
Free printable

Print the steps and supply list for this project

One page you can take to the table. Free with a free account, no password.

Get the free printable

What you'll need

Materials

Free, for this project

Get this checklist by email

  • All 2 tools and materials, with tick boxes
  • A link to print all 7 steps on paper, to keep by you while you craft

No password. The whole tutorial stays free on this page.

Quick answer

Learn how to knit from zero. Slip knot, casting on, the knit stitch, rescuing a dropped stitch and binding off, with the beginner mistakes explained. An easy project: about 2 hours 30 minutes. Materials cost about $5 to $10. You need 2 things, including Yarn and Knitting needles. The 7 steps: grab Your Yarn and Needles, make a Slip Knot, cast On Your Stitches, work the Knit Stitch, keep Knitting Rows, fix a Dropped Stitch and bind Off and Finish.

Step-by-step guide

7 steps, about 15 minutes. Tap a picture to jump to that step. Your progress saves automatically.

Tick each step off as you go.

  1. Step 1: Grab Your Yarn and Needles

    Watch this step · 0:31

    You need two things to start: a ball of yarn and a pair of knitting needles. Size 9 needles are a solid starting point for beginners. Go with wooden or plastic needles at first because the yarn grips them and stays put. Metal needles are slippery and work better once you have the rhythm down.

    For yarn, pick something in a light color so you can see your stitches. Worsted weight is thick enough to be easy to work with.

    Back to all steps

  2. Step 2: Make a Slip Knot

    Watch this step · 1:12

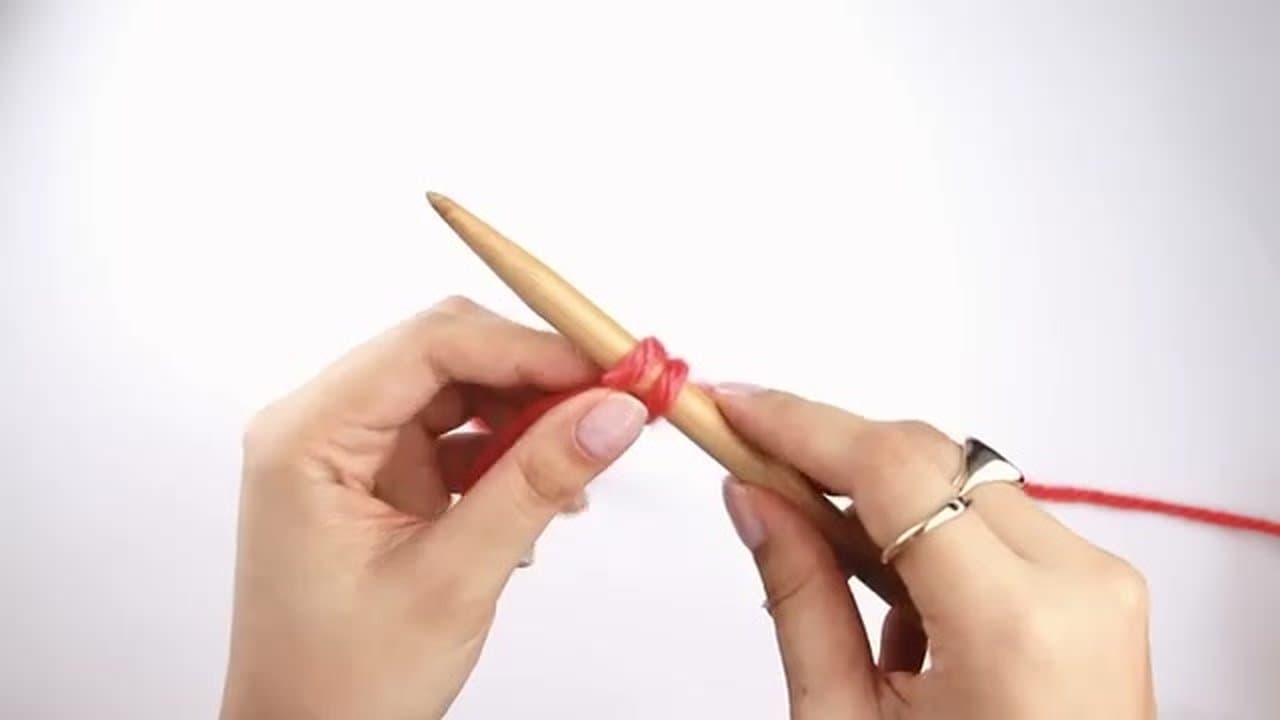
    Pull about 15 inches of yarn from the ball. Make a loop, reach through the loop, grab the yarn and pull up a new loop. That is your slip knot.

    Slide one needle through the loop and cinch it snug onto the needle. Not too tight - you need to be able to slide it along the needle later.

    Back to all steps

  3. Step 3: Cast On Your Stitches

    Watch this step · 1:50

    The long tail cast on is the standard beginner method. Hold both the working yarn and the tail with your bottom three fingers. Stick your thumb and pointer finger between the two strands and spread them apart.

    Take the right needle under the closest loop on your thumb, over the strand on your index finger, and back through the thumb loop. Pull it snug (not tight) on the needle. Repeat until you have 15 stitches. That is enough for a practice swatch.

    Tip:

    If your cast-on stitches are too tight, you will struggle to knit the first row. Keep them snug but loose enough to slide on the needle.

    Back to all steps

  4. Step 4: Work the Knit Stitch

    Watch this step · 3:42

    Turn your work so the needle with stitches is in your left hand. Insert the right needle into the first loop on the left needle from left to right. Wrap the working yarn under and over the right needle tip. Pull up a new loop through the stitch, then slide the old loop off the left needle.

    That is one knit stitch. Keep going across the row. It is the same motion every time.

    Back to all steps

  5. Step 5: Keep Knitting Rows

    Watch this step · 6:30

    When you reach the end of a row, flip the needle to your left hand and start the next row. Every row is the same knit stitch across. Use your left middle finger to hold the first stitch so it does not slide off the needle.

    It will feel clumsy at first. Your first swatch will probably look lumpy. That is normal. The muscle memory kicks in after a few rows and it gets smoother fast.

    Tip:

    You can hold the working yarn in your right hand (English style) or left hand (Continental style). Try both and see which feels more natural. Neither is wrong.

    Back to all steps

  6. Step 6: Fix a Dropped Stitch

    Watch this step · 10:00

    If a stitch slips off the needle, grab it before it unravels further. If it does drop a row or two, use a crochet hook to pick it back up. Insert the hook from behind the dropped stitch, catch the loose strand above it, and pull it through. Slip the rescued stitch back onto the left needle.

    Dropped stitches are not a crisis. They happen to everyone and they are always fixable.

    Back to all steps

  7. Step 7: Bind Off and Finish

    Watch this step · 11:11

    To get the stitches off the needle, knit two stitches onto the right needle. Insert the left needle into the first stitch on the right needle and pull it up and over the second stitch and off. Knit the next stitch and repeat all the way across.

    Keep the bind off loose so the edge is not pinched. When one stitch remains, pull the yarn tail through it. Weave in the tail with a darning needle and you are done.

    Back to all steps

How to Cast On Knitting: Long Tail Method for Beginners

Keep going

How to Cast On Knitting: Long Tail Method for Beginners

Keep going with crafts

More on this topic, picked for this project.

You reached the last step

Save this project to come back to it

Your ticked steps, the free printable and your other saved makes, together in My Projects. Free, no password.

You tapped Save

Save this project for later

We'll email you a link, no password.

How to Knit - A Beginner's First Scarf

  • Your saved projects in one list
  • Your ticked steps on any device

Check your inbox for an email from us. Not there? Look in your spam folder.

Free printable

Printable sheet and shopping list for this project

The bonus is hidden until you sign up.

Free with a free account, no password. Every step above stays open to everyone.

Products Used

The Checklist

How to Knit - A Beginner's First Scarf

Tools
1
Materials
1
Steps
7
Video
15 min

Tools

1 item

Materials

1 item

Tools we recommend

As an Amazon Associate we earn from qualifying purchases. Links on this page may be affiliate links - clicking them and buying doesn't change your price, but helps support Crafting Step by Step.

Tags

The Crafter's Weekly

New crafts tutorials, every Sunday

One short email with the week's best step-by-step guides. Free, no spam, unsubscribe anytime.

Test your knowledge

Did the lesson stick? Start with this one.

5 questions covering what you just read. No signup, no score saved, and you can stop after this one.

Question 1 of 5

Best needle SIZE for a complete beginner?

Quick reference

Key takeaways from How to Knit - A Beginner's First Scarf

5 questions, answers, and one-line explanations. Tap to expand.

  1. 1.Best needle SIZE for a complete beginner?

    Answer: Size 9 (medium-large, easy to maneuver)

    Size 9 with worsted-weight yarn = visible stitches that are big enough to fix when you mess up.

  2. 2.Why are wooden or plastic needles better than METAL for a beginner?

    Answer: Yarn GRIPS them so stitches do not slide off; metal is too slippery until you have rhythm

    Beginner hands drop stitches off slippery metal needles constantly. Wood/plastic forgive a looser grip.

  3. 3.What is the long tail cast on?

    Answer: The standard beginner cast-on method using both the working yarn and a tail to create your starting row of stitches

    Long tail = the standard cast-on most patterns assume. Pull about 15 inches before the slip knot to leave enough tail.

  4. 4.How do you fix a stitch that has slipped off the needle?

    Answer: Use a CROCHET HOOK to catch the loose strand above and pull it back through, then slip the rescued stitch onto the left needle

    Dropped stitches happen to everyone. A spare crochet hook is the rescue tool every knitter keeps on the table.

  5. 5.When binding off, why keep the stitches LOOSE?

    Answer: A tight bind-off pinches the edge of the finished piece; loose bind-off lets the edge lie flat

    Tight bind-offs ruin sweater hems and scarf ends. The bind-off edge should match the give of the body of the knit.

Did this work for you?

What's next

Related collections

Curated theme pages that include this tutorial.

Similar tutorials

Hand-picked next reads based on the one you just finished.

Liked this crafts tutorial?

Pick the crafts you want to hear about. One email every Sunday with new step-by-step tutorials. No spam, easy to unsubscribe.

Get more like this in your inbox

Weekly digest. Pick the categories you want. Unsubscribe anytime.

Send me tutorials about

We only email about new tutorials. Easy unsubscribe anytime.