How to Knit a Blanket

KnittingEasy12:386 steps
Also in:Crafts

By CraftingStepByStepPublished Updated

Based on a video by WOOLANDTHEGANG.

This is how Wool and the Gang teaches absolute beginners to knit a full blanket: square by square. Each square uses just one stitch (garter), measures roughly 8 inches when finished, and takes maybe 30 minutes to knit. Make 35 of them and you have a generous throw.

You'll only learn three things in this tutorial: how to cast on, how to knit (the basic knit stitch worked every row), and how to cast off. The video also walks through joining the squares so the seam stays invisible.

Materials list: a chunky merino yarn (Wool and the Gang sells the kit but any super bulky merino works), a pair of size 12mm or 15mm knitting needles, scissors, and a tapestry needle for the finishing. Each square uses about 50g of yarn, so plan for 35 squares × 50g = about 1.75 kg total.

Step-by-Step Guide

1

Step 1: Make a slip knot

1:20
Step 1: Step 1: Make a slip knot

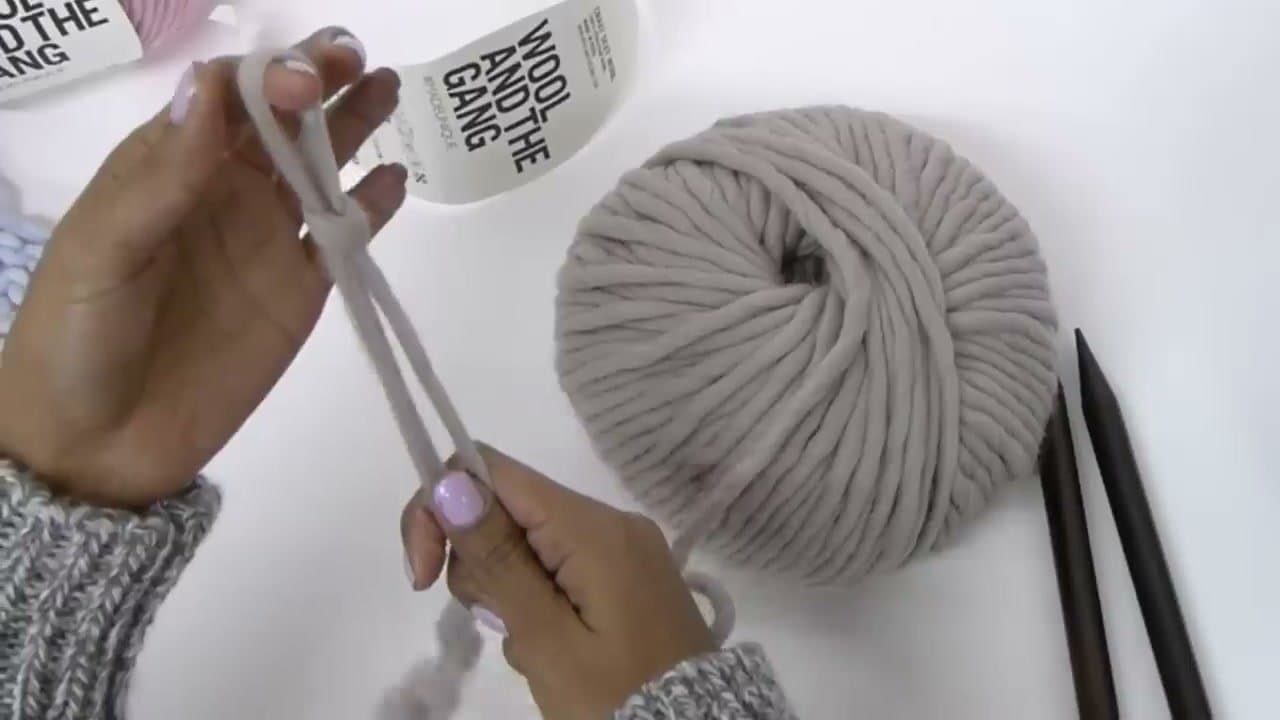
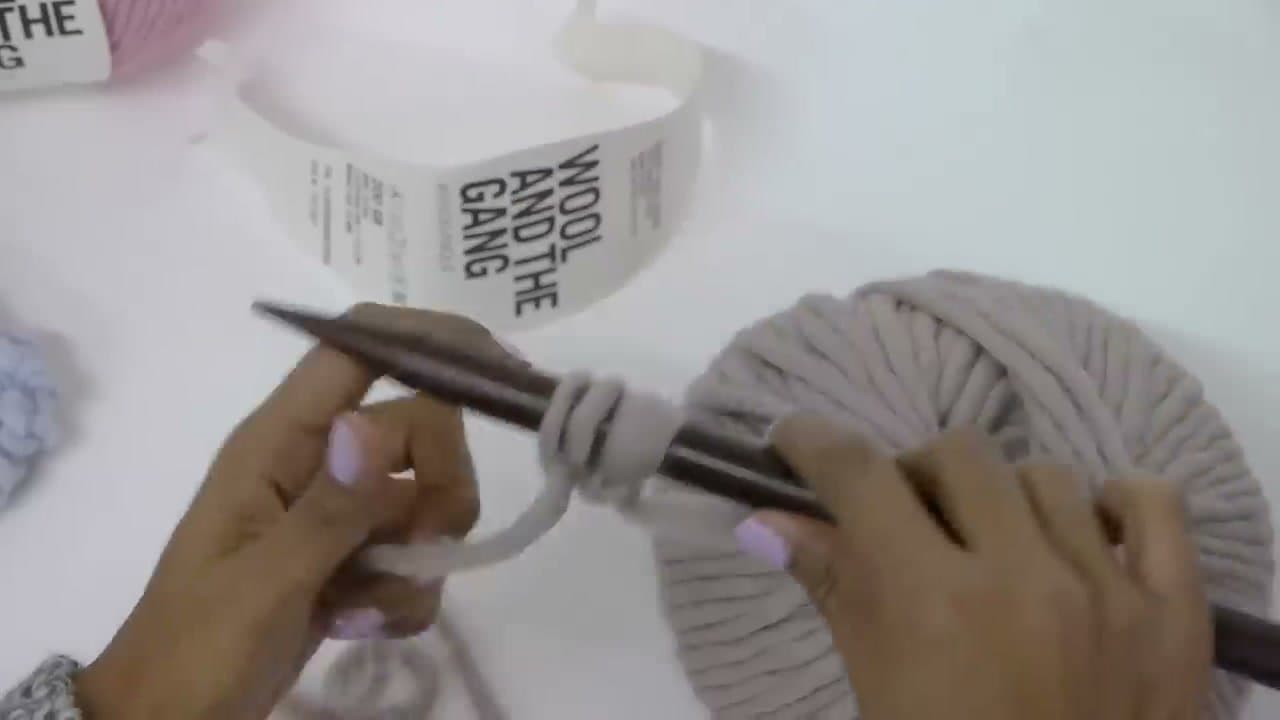
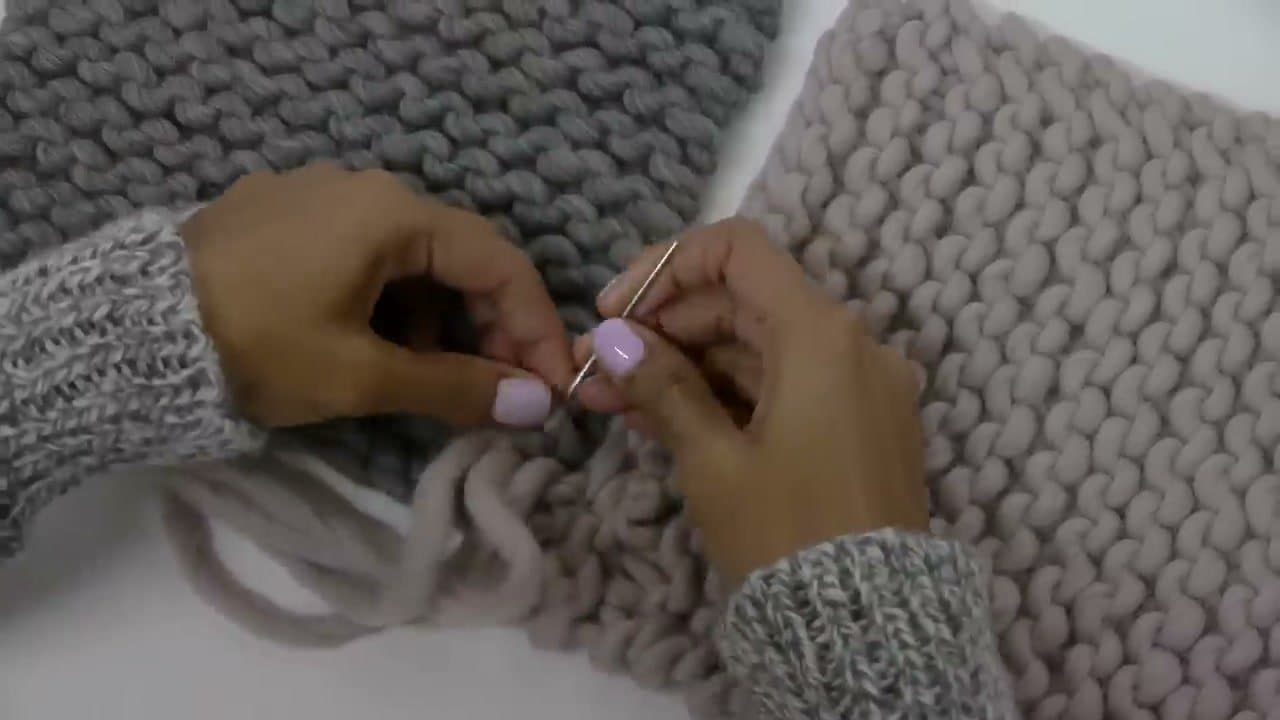
Pull about a six-inch tail of yarn off the ball. Loop the yarn around two fingers to form a small cross, then pull the working yarn through the loop you just made. Tighten by pulling on both ends.

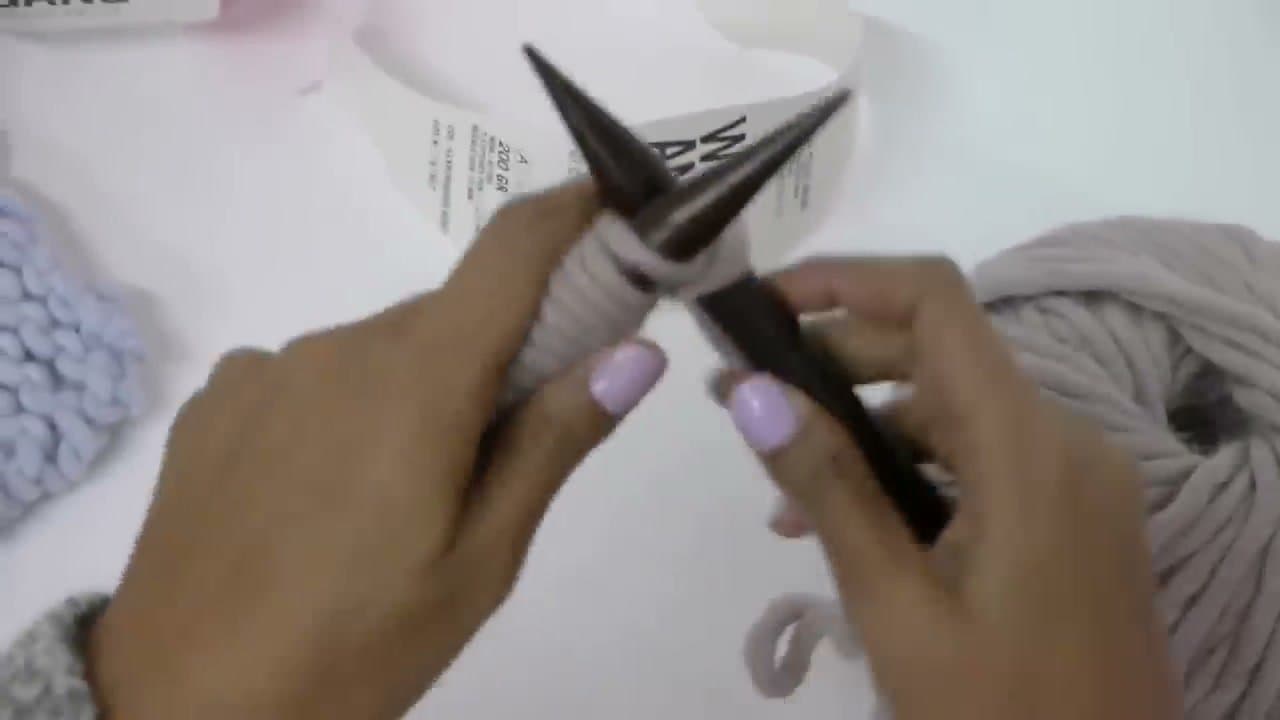
Slide the slip knot onto your knitting needle and pull snug - tight enough to stay on the hook, loose enough to slide along it. That's your first stitch.

Tip

Your slip knot should slide along the needle without being so tight it can't move. Too tight and you'll fight every stitch; too loose and it falls off.

2

Step 2: Cast on 14 stitches

2:20
Step 2: Step 2: Cast on 14 stitches

Hold the working yarn in your hand and wrap it around your thumb so it forms a small loop sticking up like a pointer. Slide the empty needle under the loop, then lift the needle straight up to slip the loop onto the needle. That's one cast-on stitch.

Repeat 13 more times until you have 14 stitches on the needle. Fourteen makes a square about 7.5 inches wide; if you want bigger or smaller squares, adjust the count.

Products used in this step

3

Step 3: Knit the first row in garter stitch

4:00
Step 3: Step 3: Knit the first row in garter stitch

Hold the cast-on needle in your left hand and the empty needle in your right. Insert the right needle into the front of the first stitch on the left needle, going from front to back. The needles should cross like an X.

Wrap the working yarn under and over the right needle, then pull that loop through the stitch and slip the old stitch off the left needle. That's one knit stitch. Repeat across the whole row - 14 stitches total.

Tip

Stay near the tapered tip of the needle when you knit. If your stitches are too far down the shaft, they'll feel tight and the loops can slip off.

Products used in this step

4

Step 4: Knit every row until the square is 20cm

6:40
Step 4: Step 4: Knit every row until the square is 20cm

Turn the work, swap the needles between hands, and knit the next row exactly the same way. The fabric you're making is called garter stitch - every row is a knit row. The little bumps you see at the top of each row are the previous row's tops; knit into the V-shape below them, not into the bumps.

Keep going until your square measures about 20 cm (8 inches) tall. The fabric will look uneven for the first few rows but evens out as it grows.

Tip

If you lose count, lay the square flat and measure with a ruler. The point is to get a roughly square shape - exact stitch count doesn't matter as long as you started with 14 and didn't accidentally drop or add any.

5

Step 5: Cast off the stitches

8:40
Step 5: Step 5: Cast off the stitches

Knit two stitches as normal so they sit on the right needle. Use the tip of the left needle to lift the first stitch up and over the second one and off the needle. You've cast off one stitch and one stitch remains on the right needle.

Knit one more so two stitches are on the right needle again, then lift the previous stitch over the new one. Continue across the row. When one stitch remains, cut the yarn six inches from the needle, pull the tail through that last loop, and tighten.

Tip

Keep the tension loose during cast-off. Tight cast-off rows curl and look pinched compared to the rest of the square.

Products used in this step

6

Step 6: Sew the squares together

11:20
Step 6: Step 6: Sew the squares together

Lay two finished squares side by side. Rotate one of them 90 degrees so the garter ridges run vertical on one square and horizontal on the other. Alternating like this is what hides the seam.

Thread a long yarn tail onto a tapestry needle. Stitch through the small bumps along each square's edge, alternating between squares - one bump from the left square, one from the right, repeat. Tie off and weave the ends back through the fabric. Repeat for every seam in the blanket.

Tip

Use the same yarn you knit with for the seams. A different color shows up; matching yarn disappears between the ridges.

Products Used

Your Guide

WOOLANDTHEGANG

As an Amazon Associate we earn from qualifying purchases. Links on this page may be affiliate links - clicking them and buying doesn't change your price, but helps support ShowMeStepByStep.

Tags

Related Tutorials