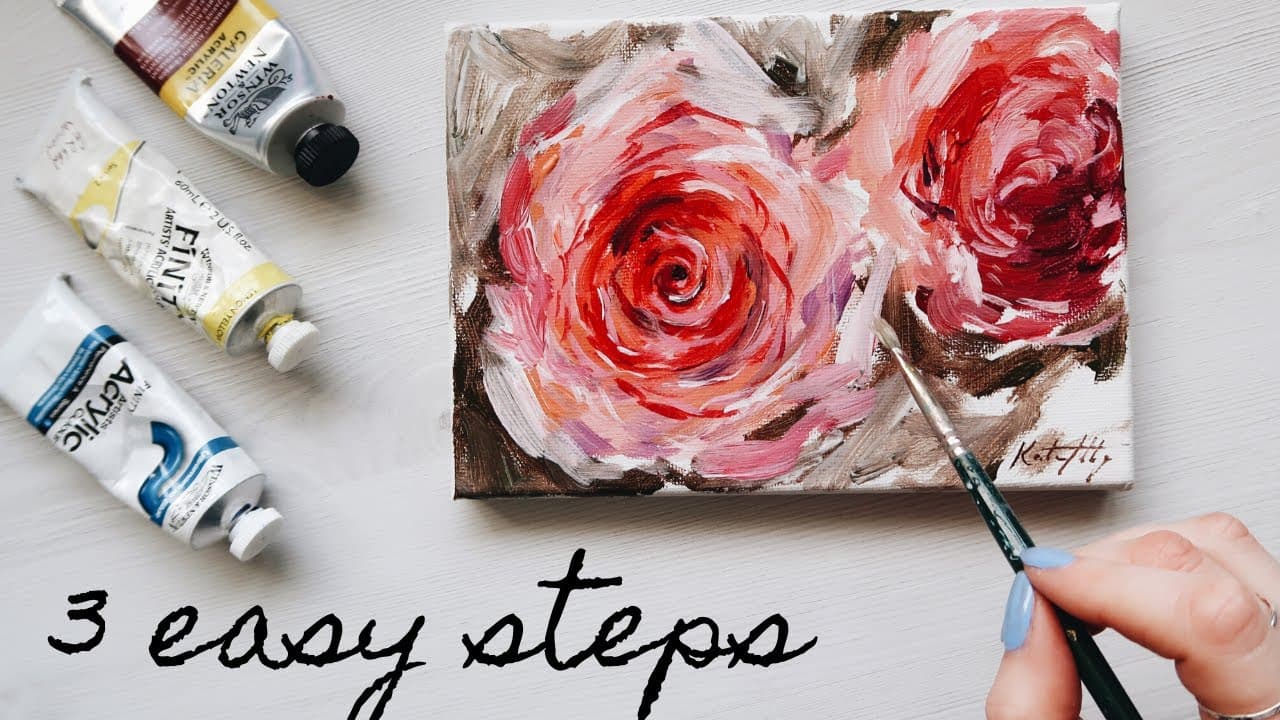
How to Paint Roses in Acrylic

Based on a video by Freedom of Acrylics with artist Jane Slivka

Opens their YouTube channel

Steps written out by CraftingStepByStep · Published · Updated

Watch the original video (opens YouTube)
The finished result: How to Paint Roses in Acrylic
Also in:Crafts

Painting roses freaks people out because real roses have dozens of curling petals and the brain wants to render every single one. Jane Slivka's teacup technique sidesteps that problem entirely. Instead of trying to paint a botanically accurate rose, you paint a teacup and saucer, then circle white petals around the cup. The cup gives you a structure to follow, and the result reads as a rose without any of the technical fussing.

Jane works in acrylic on a wet canvas, building dark to light. She blocks in dark base shapes first so the roses have something to sit on, then adds stems and leaves with hookers green deep hue, sketches teacups and saucers with titanium white, and finally circles petals around each cup. Cool tones go on the shaded side, warm cad red and yellow tap into the centers. The whole composition stays loose on purpose - over-blending kills the energy.

This is roughly an intermediate piece because you're juggling wet-into-wet layering and color mixing on the fly. If you've painted a few acrylic landscapes you'll be fine. Jane's mantra: relax, enjoy the process, it's only a painting.

Why the teacup shape works

Look down into a real rose. There is a tight cup of inner petals, wrapped by looser outer petals that open out like a saucer. The teacup is that structure cut down to two shapes. Tilt the cup and the whole rose turns with it: an oval rim for a rose facing you, a sideways cup for one in profile, only the base for a bud pointing away.

Once you see it that way, the dozens of petals stop mattering. You paint a cup, then dress it.

Light and shadow on petals

Decide where the light comes from before you load a brush, and stick with it. Petals facing the light get the cleanest white or pink. Petals turning away get the cool purple-blue from step 6. The inside of the cup is darkest of all, which is why letting the dark base peek through works so well.

Brushes and double-loading

A flat, bright or filbert does most of the work. Dip one corner in white and the other in pink or crimson, stroke it a few times on the palette so the colors meet in the middle, then pull a curved stroke. One pass gives you a petal with a light edge and a darker base. Turn the brush as you travel round the cup so the light side keeps facing the light. A size 4 round handles the centers.

Your palette is short: titanium white, alizarin crimson, cad red light, cad yellow medium, hookers green deep hue, a pink and a little black. For softer pinks and leaf greens, see how to mix acrylic paint colors.

Rose leaves

Rose leaves grow in sets of three or five along a stem, each a pointed oval with a serrated edge. Skip the teeth. Two curved strokes meeting at a tip make a leaf, and a darker line down the middle hints at the vein.

Other rose styles to try

  • One-stroke roses. A double-loaded flat, a C-stroke for the bowl, then comma petals around it. Fast, and good on cards.
  • A single realistic bloom. One rose, more layers, smooth transitions. Blending acrylic paint covers the gradients.
  • Draw it first. Sketching the spiral in how to draw a rose teaches you how the petals wrap.

Common rose painting mistakes

  • Every petal the same size. Keep inner petals small and tight, outer ones big and loose.
  • No darks. Cover the dark base completely and the rose goes flat.
  • Overblending. Lay a stroke and leave it. Fussing turns petals into pink mush.
  • Every rose facing you. Tilt the cups different ways.
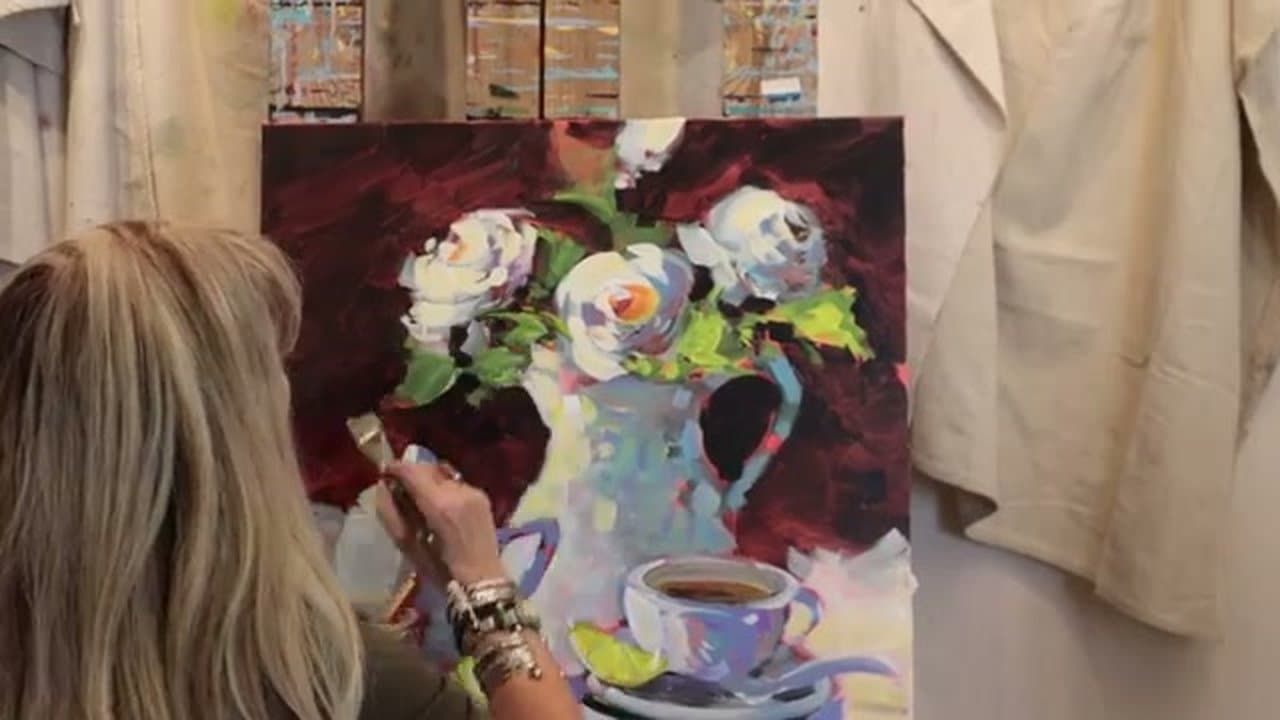
What you'll need

Step-by-step guide

7 steps, about 8 minutes. Tap a picture to jump to that step. Your progress saves automatically.

Tick each step off as you go.

  1. Step 1: Block Dark Base Blobs Where Each Rose Will Sit

    Watch this step · 0:30

    Pick up a dark mix on your flat brush and lay down a rough blob wherever you want a rose. Jane puts a big one center-stage, another off to the side, and a smaller bud-shaped one nearby. Don't worry about edges or precision - these blobs are scaffolding, not the finished flower.

    The reason you start dark is acrylic builds light over dark cleanly but never the other way around. The dark base also gives the white petals you'll add later something to push against, so the rose feels like it has weight and shadow instead of floating on the canvas.

    Tip:

    Vary the blob sizes and avoid balancing them symmetrically. Jane explicitly says she doesn't want anything to look too balanced - asymmetry reads as natural.

    Back to all steps

  2. Step 2: Paint Hookers Green Stems and Drippy Leaf Shapes

    Watch this step · 0:50

    Load your round brush with hookers green deep hue and pull stems up from each blob. Add a few rough leaf shapes branching off. If the paint drips, leave it - Jane loves the drips because they break up the rigidity of a planned composition.

    Hookers green deep hue is dark enough to read as foliage in shadow without going to pure black. That matters because pure black would flatten the painting. The deep green keeps the dark areas alive with color.

    Tip:

    Add an extra leaf coming in from the top of the canvas to balance the bottom-heavy stems. Leaves don't need to be attached to anything visible - the eye fills in the missing branch.

    Back to all steps

  3. Step 3: Sketch a White Teacup and Saucer Under Each Rose

    Watch this step · 2:15

    Switch to titanium white and sketch a small teacup-and-saucer shape over each dark blob. One cup faces left, one faces straight at you, one tilts right, the bud points away. The cups don't need to be detailed - just enough that you can see the rim and the saucer underneath.

    This is the trick that makes the whole technique work. The cups force each rose to point in a different direction, which kills the beginner habit of painting every flower facing the viewer. Real flowers in a vase tilt every which way, and the cups are just a memory aid to recreate that variety.

    Back to all steps

  4. Step 4: Circle White Petals Around Each Cup Center

    Watch this step · 3:15

    Find the center of each cup - that's the bottom of the saucer or the rim center, depending on the angle. Start circling petals around it with your white-loaded brush. One curved stroke, then another wrapping around it, then another, until the cup is buried under petal shapes.

    The petals don't need to look like petals up close. From two feet back, the circular motion plus the dark base showing through reads as a rose. Jane uses the edge of a Princeton bright brush for these strokes because the chisel edge gives you a tapered petal in one motion.

    Tip:

    Leave the dark base partially visible between petals. That darkness is the shadow inside the rose - completely covering it makes the flower look flat and posterized.

    Back to all steps

  5. Step 5: Add Green Leaves with Hookers Green and Cad Yellow

    Watch this step · 3:50

    Mix hookers green with cad yellow medium on your palette. The yellow lifts the green from the dark stem color into something that reads as fresh leaf. Brush this lighter green over your earlier stem-and-leaf shapes, focusing on the side of each leaf that would catch light.

    Don't fully mix the two colors. Leaving the green and yellow marbled on the brush gives each leaf natural color variation - some bits darker, some bits lighter, like real foliage. Fully mixed paint reads as flat plastic.

    Back to all steps

  6. Step 6: Brush Cool Purple-Blue Tones on Petal Edges

    Watch this step · 4:55

    Mix a cool tone on your palette - a touch of blue or purple knocked back with white. Brush this gently along the shaded side of each rose, just one drop, no more. You're not repainting the flower, you're hinting at shadow on the petals that face away from the light.

    Acrylic looks chalky if you push too much paint at this stage. Jane warns against overdoing it - one brushload, let it sit, move on. The cool tone needs to be subtle or the rose looks bruised instead of dimensional.

    Tip:

    If your mix turns brown by accident, leave it. Jane's did - she carried it around and it ended up reading as warm shadow on the back of the rose. Mistakes that stay in color harmony usually work.

    Back to all steps

  7. Step 7: Tap Cad Red and Yellow Into Rose Centers

    Watch this step · 6:00

    Mix cad red light with a touch of cad yellow medium. With a small round brush, tap this warm color into the very center of each rose. Just a few touches - you want a glow at the heart of the bloom, not a solid red dot.

    The warm centers do two things at once. They pull the eye into each flower so the composition has a focal point in every rose, and they balance the cool tones you added in step 6. Warm and cool together is what makes acrylic florals feel alive instead of decorative.

    Tip:

    Step back two feet and squint. If a rose looks dead, it usually needs more warmth in the center. If the painting looks too red, you've overdone it - dip a clean brush in white and knock back the brightest spots.

    Back to all steps

Keep going

How to Thin Acrylic Paint for Miniatures: 7 Step Guide

Products Used

The Checklist

How to Paint Roses in Acrylic

Tools
10
Materials
9
Steps
7
Video
8 min

Tools we recommend

As an Amazon Associate we earn from qualifying purchases. Links on this page may be affiliate links - clicking them and buying doesn't change your price, but helps support CraftingStepByStep.

Tags

The Crafter's Weekly

New painting tutorials, every Sunday

One short email with the week's best step-by-step guides. Free, no spam, unsubscribe anytime.

Test your knowledge

Did the lesson stick? Start with this one.

5 questions covering what you just read. No signup, no score saved, and you can stop after this one.

Question 1 of 5

Quick reference

Key takeaways from How to Paint Roses in Acrylic

5 questions, answers, and one-line explanations. Tap to expand.

  1. 1.

    Answer: A small teacup-and-saucer

    Jane Slivka's teacup technique uses a teacup-and-saucer silhouette as the structural scaffold — the saucer becomes the outer petals, the cup the center.

  2. 2.

    Answer: Hookers green deep hue

    Hookers green deep hue forms the rich dark base for stems and leaves; mixing it with cadmium yellow medium lifts it to a mid-value green for the leaf highlights.

  3. 3.

    Answer: Cool purple-blue tones

    Cool purple-blue on the petal edges creates shadow depth that makes the warmer, lighter centers visually pop forward.

  4. 4.

    Answer: Tapping cadmium red and cadmium yellow into the rose centers

    Tapping warm cad red and cad yellow into the centers is the final touch — it creates the glowing heart of each rose that pulls the painting together.

  5. 5.

    Answer: Dark value underneath lets lighter petal strokes build depth instead of looking flat

    Starting with dark values beneath the rose shapes gives subsequent lighter strokes something to push against, creating dimension and depth in the finished painting.

Did this work for you?

What's next

Related collections

Curated theme pages that include this tutorial.

Similar tutorials

Hand-picked next reads based on the one you just finished.

Liked this painting tutorial?

Pick the crafts you want to hear about. One email every Sunday with new step-by-step tutorials. No spam, easy to unsubscribe.

Get more like this in your inbox

Weekly digest. Pick the categories you want. Unsubscribe anytime.

Send me tutorials about

We only email about new tutorials. Easy unsubscribe anytime.