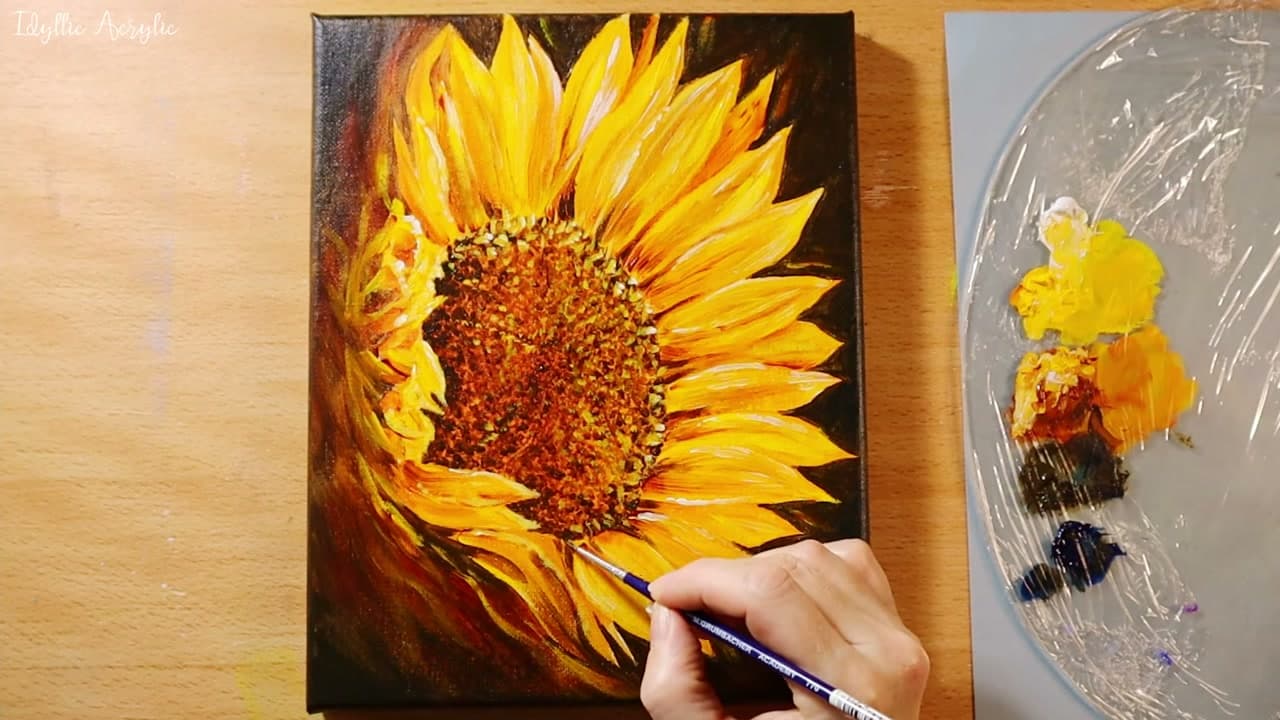
How to Paint Sunflowers in Acrylic (Step by Step for Beginners)

PaintingEasy6:216 stepsBrowse more →

By CraftingStepByStepPublished

Based on a video by Idyllic Acrylic Art.

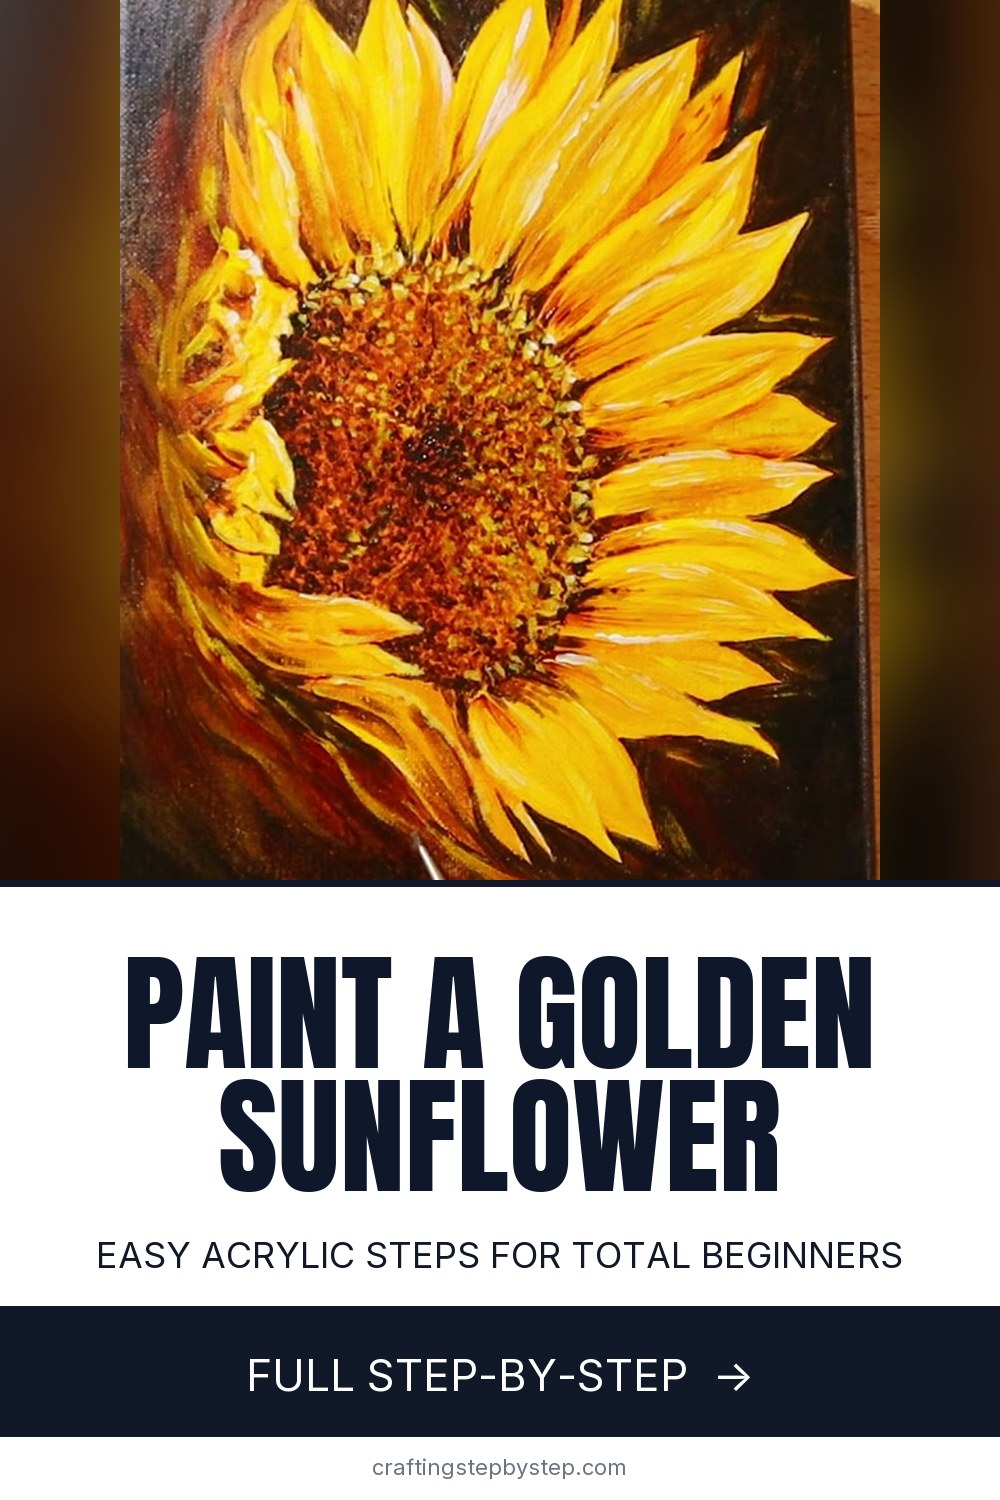
A single sunflower on a dark background is one of the most satisfying paintings a beginner can pull off, and it needs almost nothing on the palette. Idyllic Acrylic Art builds this one with five colors: medium yellow, burnt sienna, raw umber, white, and prussian blue. The whole thing sits on a small 8 by 10 inch canvas, so it stays quick and forgiving.

The trick that makes it work is order. You lay a warm golden underpainting down first so a glow comes through every layer on top, then block the petals with a flat filbert brush before you fuss over any detail. The seed center gets built from hundreds of little stippled dots rather than one flat circle, which is what makes it read as a real sunflower instead of a cartoon. The dark background goes on last, and that late contrast is what makes the yellow leap off the canvas.

If you want to keep going after this one, the same loose petal-and-highlight approach carries straight over to how to paint daisies and the broader how to paint a flower walkthrough. For a bolder pop of color on a similar dark ground, try how to paint poppies next.

Step-by-Step Guide

6 steps · about 6 minutes.Check off each step as you go and your progress saves automatically.

1

Step 1: Lay a Warm Golden Underpainting

0:30
Step 1: Step 1: Lay a Warm Golden Underpainting

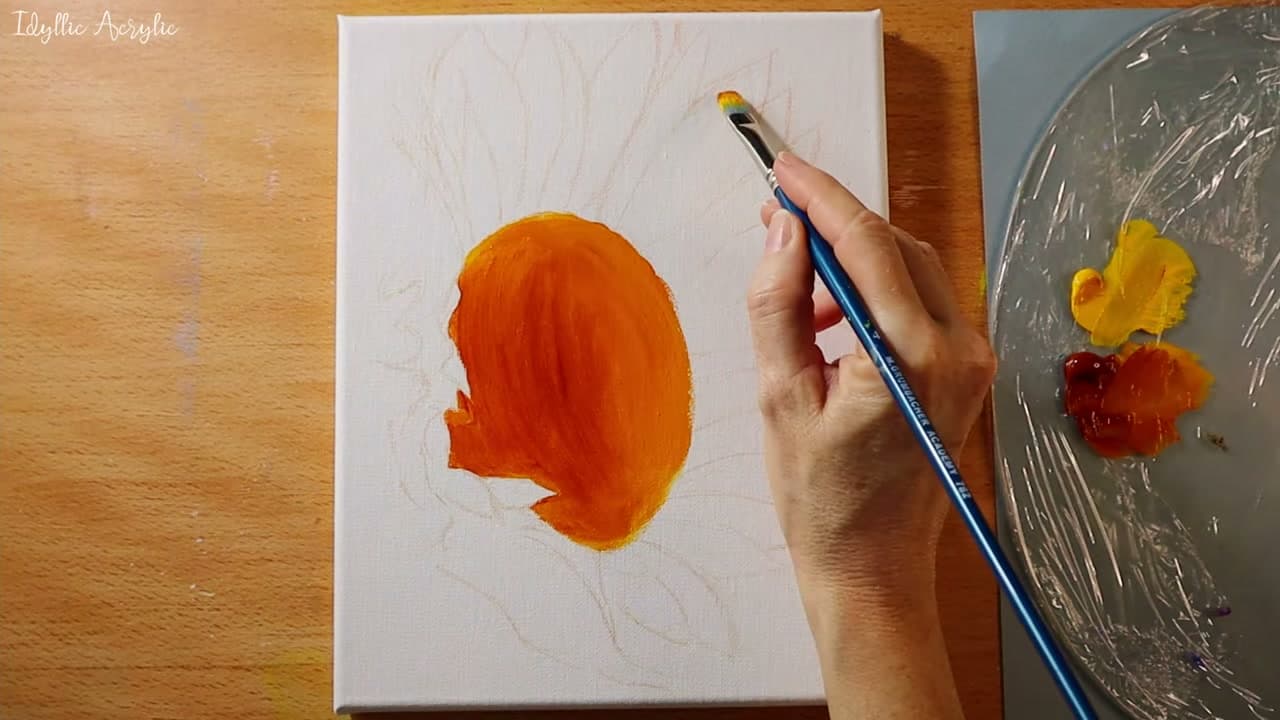
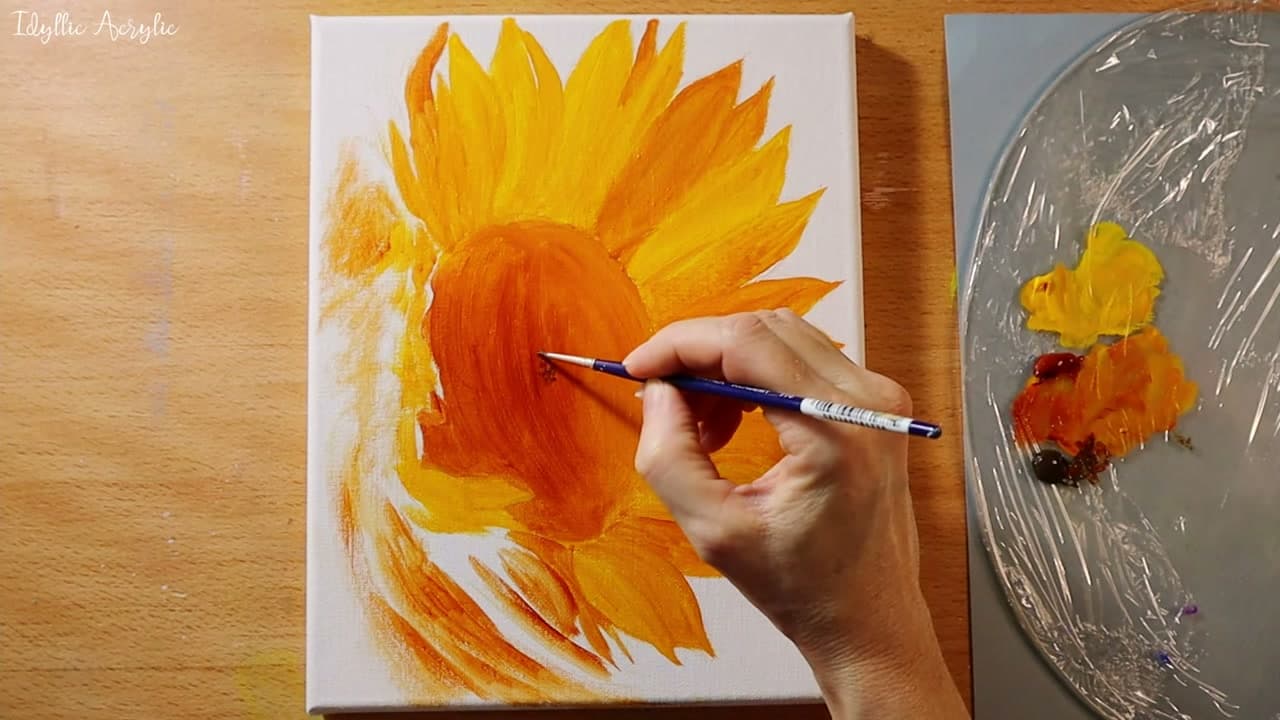
Start with a light pencil sketch of the sunflower on your canvas. Then mix medium yellow with a touch of burnt sienna and block the seed center in as a solid orange oval. Pull a rough first petal or two off the top edge while you are at it.

Do not worry about neatness here. This warm base coat is what gives the finished flower its golden glow, since it keeps peeking through every layer you paint over it.

Tip

Watch this step Keep the underpainting a little rough and streaky. A dead-flat base looks worse under the loose petal strokes that come next.
2

Step 2: Block In the Petals

0:50
Step 2: Step 2: Block In the Petals

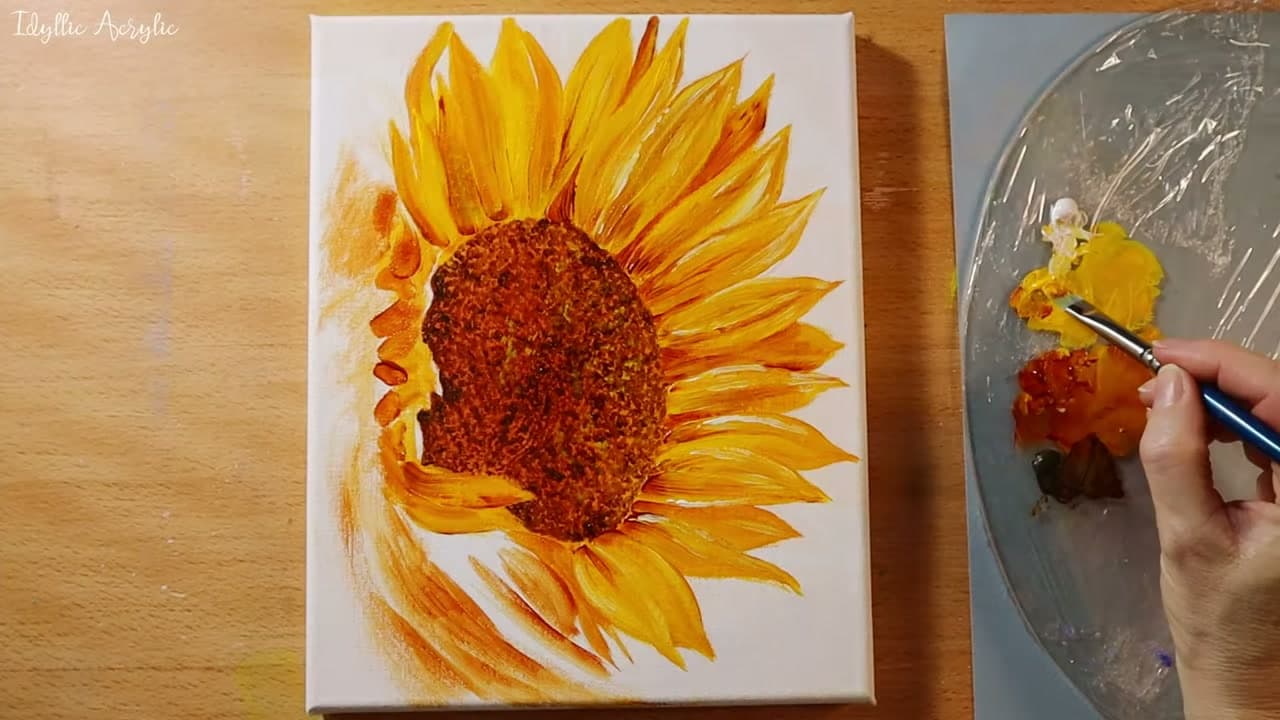
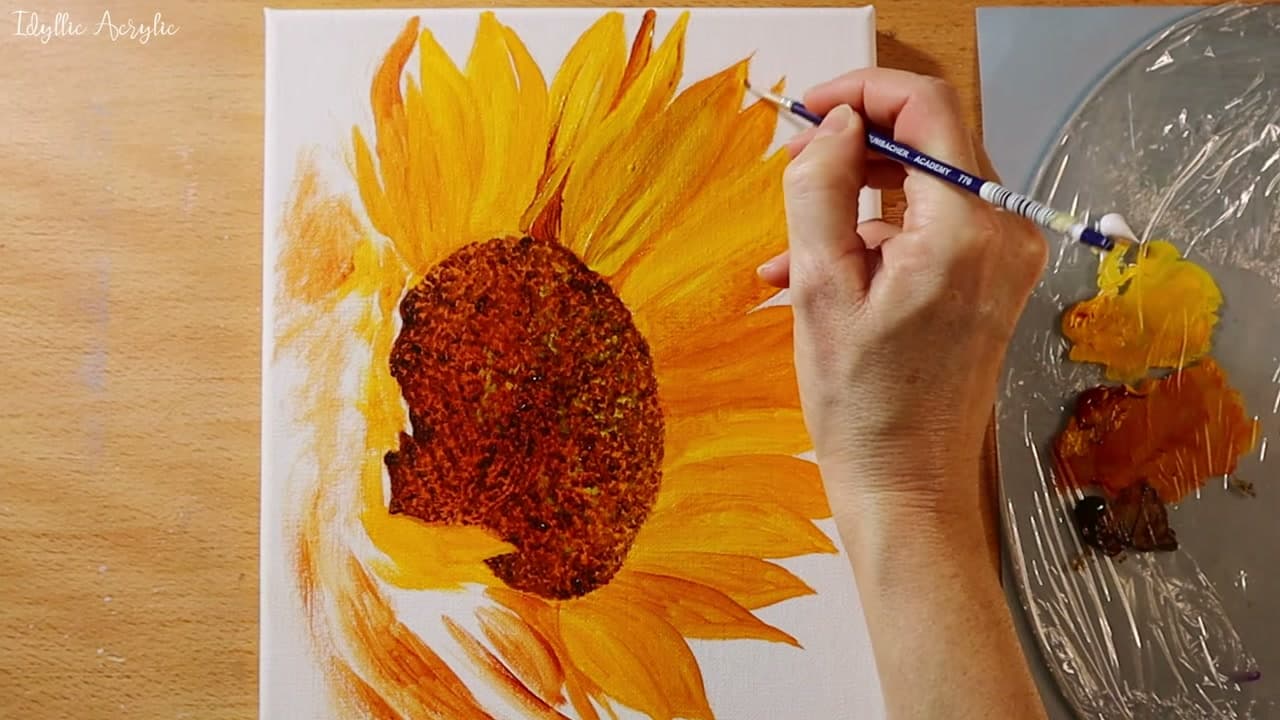
Load a flat filbert brush with medium yellow and burnt sienna together. Start each stroke near the center and sweep it out to the petal tip in one confident motion, then work your way around the whole flower so the petals fan out like spokes.

Let the two colors streak instead of blending them into one flat yellow. Those streaks of sienna running through the yellow are what give each petal its shape and movement.

Tip

Watch this step Lift the brush as you reach each tip so the petal ends in a point. Do not paint back into a stroke you already laid down or it turns muddy.

3

Step 3: Stipple the Seed Center

1:28
Step 3: Step 3: Stipple the Seed Center

Switch to a small round brush and go to work on the middle. Dab lots of tiny dots of burnt sienna and raw umber, keeping them close together so they clump into a rough, seedy texture rather than a smooth fill.

Push the dots a little darker toward the lower left and leave the upper right slightly lighter. That gentle shift is enough to make the center look round and full, like a head packed with seeds.

Tip

Watch this step Hold the brush almost upright and tap, do not drag. Dragging smears the dots into a blur and you lose that seed-packed look.

4

Step 4: Shape the Petals and Add White Highlights

2:20
Step 4: Step 4: Shape the Petals and Add White Highlights

Now go back over the petals and give them form. Work darker sienna into the recessed areas where petals overlap, then drag bright medium yellow along the outer edges to catch the light.

Pick up a little white on the tip of the brush and streak highlights down the front petals. Blend just enough that the strokes stay soft. This is the layer that turns a flat yellow shape into a petal with depth.

Tip

Watch this step Use white sparingly. One or two clean streaks per front petal reads as sunlight; painting every petal white flattens the whole flower.

5

Step 5: Paint the Dark Background

3:52
Step 5: Step 5: Paint the Dark Background

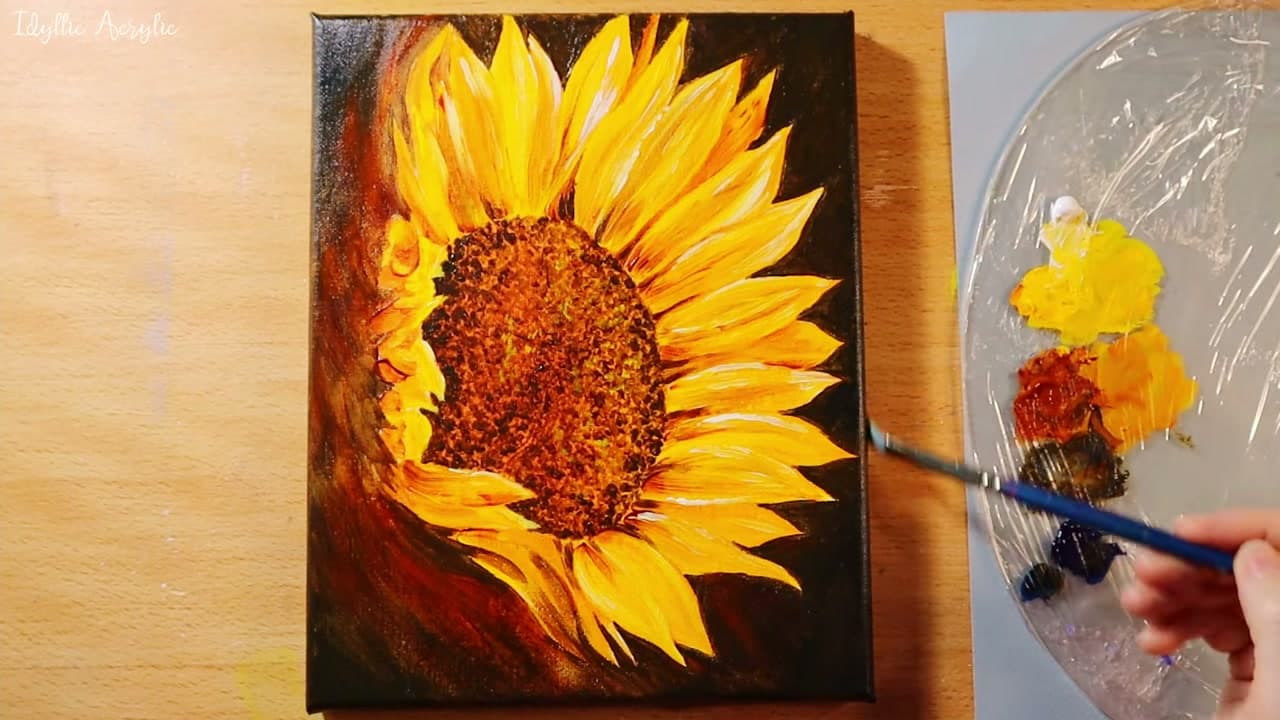
Time to make the flower pop. Mix prussian blue with burnt sienna until you get a rich, near-black brown, then cut in carefully around every petal to lock in its edge before you fill the rest of the canvas.

Plan on two or three coats, since a thin dark wash goes on patchy. Paint the sides of the canvas too so it looks finished from every angle when it hangs on the wall.

Tip

Watch this step Cut in around the petals with the tip of a small brush first, then switch to a bigger brush to fill the open areas fast. It keeps your petal edges crisp.

6

Step 6: Add the Final Details

5:36
Step 6: Step 6: Add the Final Details

With the dark background dry, add the last touches that bring it to life. Paint a slightly darker circle low in the center for depth, then flick a few fresh white highlights along the petals that would catch the light.

Clean up any soft petal edges against the dark background with a small brush, then step back and check the balance. Sign it, let it cure, and you have a framed-ready sunflower.

Tip

Watch this step Squint at the painting before you stop. Squinting hides the detail and shows you where the light and dark balance is off so you know exactly where a last highlight should go.

Products Used

☐ The Checklist

How to Paint Sunflowers in Acrylic (Step by Step for Beginners)

Tools
7
Materials
6
Steps
6
Video
6 min

Tools we recommend

Your Guide

Idyllic Acrylic Art

As an Amazon Associate we earn from qualifying purchases. Links on this page may be affiliate links - clicking them and buying doesn't change your price, but helps support ShowMeStepByStep.

Tags

Sunday How-To

New painting tutorials, every Sunday

One short email with the week's best step-by-step guides. Free, no spam, unsubscribe anytime.

Did this work for you?

What's next

Related collections

Curated theme pages that include this tutorial.

Weekly Digest

Liked this painting tutorial?

Pick the categories you want to hear about. Weekly digest of new step-by-step tutorials. No spam, easy unsubscribe.

Send me tutorials about

We only email about new tutorials. Easy unsubscribe anytime.