How to Fix Mistakes in an Acrylic Painting

The finished result: How to Fix Mistakes in an Acrylic Painting
  • Difficulty: Easy
  • About 15 minutes
  • 9 steps

You tapped Save

Save this project for later

We'll email you a link, no password.

How to Fix Mistakes in an Acrylic Painting

  • Your saved projects in one list
  • Your ticked steps on any device

Check your inbox for an email from us. Not there? Look in your spam folder.

Print

Steps written out by Crafting Step by Step from Heather Cash Art's video (opens YouTube) (12:11). Published .

Every acrylic painter makes mistakes. A stroke lands in the wrong spot, a ridge of paint sits too thick, or a colour you loved at the palette looks wrong on the canvas. The good news is that acrylic is forgiving if you know which fix to reach for. Heather Cash of Heather Cash Art walks through the methods on a blue and purple background, from a quick finger wipe to covering a dried mistake invisibly.

How to fix mistakes in an acrylic painting: the short version

  • Too much paint: wipe the ridge toward the same colour, then smooth it.
  • Fresh mistake: wipe it with a finger, scrub with a wet brush, lift with a dry one.
  • Half dry: turn it into something, like a leaf or a bird.
  • Fully dry: lift what you can, paint over it with matched background colour, and blend the edge with matte medium.

Speed matters most

Acrylic dries fast, often in minutes on a thin layer. A mistake caught while it is still wet comes off with water and almost no trace. Wait ten minutes and it is a covering job. Keep a cup of clean water, a flat brush and a paper towel within reach every time you paint. White and very thick paint dry fastest and stain the most, so watch those closely.

Why matte medium beats water for blending

Water thins paint but breaks down its binder, so a watery stroke over a damp area lifts the layer underneath and goes streaky. Matte medium thins the paint while keeping it acrylic. It lets a new colour feather into a dry background without lifting anything. It looks milky when wet and dries clear. A small jar lasts a long time.

Matching a background colour

Acrylic dries a shade darker than it looks wet. Mix your cover colour a touch lighter than the background, test a dab on the edge of the canvas, and let it dry before you commit. Heather admits this is the method most likely to send you round in circles, so try it last. Match your brushstrokes to the background too. A smooth patch on a streaky background stands out even when the colour is right.

Make it part of the painting

Sometimes the best fix is not a fix. A stray dot can become a falling leaf, a bird, a seed head or a sparkle. Repeated scrubbing roughs up the canvas and builds texture that shows through every later layer. If a mistake can become a detail, let it.

Common problems

  • Ghost outline after covering. The old paint was thick. Lift more of it first, or build the cover in two thin coats.
  • Green-tinted background. Your rinse water was dirty. Change it and clean the brush between every pass.
  • Cover patch too dark. Add white and blend the edge outward with matte medium.

New to acrylics? Start with acrylic painting for beginners. Then practise mixing acrylic colours, blending acrylic paint and thinning acrylic paint so fixes match the rest of your work.

Free printable

Print the steps and supply list for this project

One page you can take to the table. Free with a free account, no password.

Get the free printable

What you'll need

Free, for this project

Get this checklist by email

  • All 8 tools and materials, with tick boxes
  • A link to print all 9 steps on paper, to keep by you while you craft

No password. The whole tutorial stays free on this page.

Quick answer

How to fix mistakes in an acrylic painting: wipe ridges, lift wet paint with water, and hide dry mistakes with matched colour and matte medium. An easy project: about 15 minutes. You need 8 things, including matte medium, white acrylic paint and flat brush. The 9 steps start with spot a Ridge of Excess Acrylic Paint on the Canvas, wipe the Acrylic Paint Ridge Toward the Same Colour and smooth the Wiped Acrylic Patch With a Clean Brush.

Step-by-step guide

9 steps, about 12 minutes. Tap a picture to jump to that step. Your progress saves automatically.

Tick each step off as you go.

  1. Step 1: Spot a Ridge of Excess Acrylic Paint on the Canvas

    Watch this step · 2:20

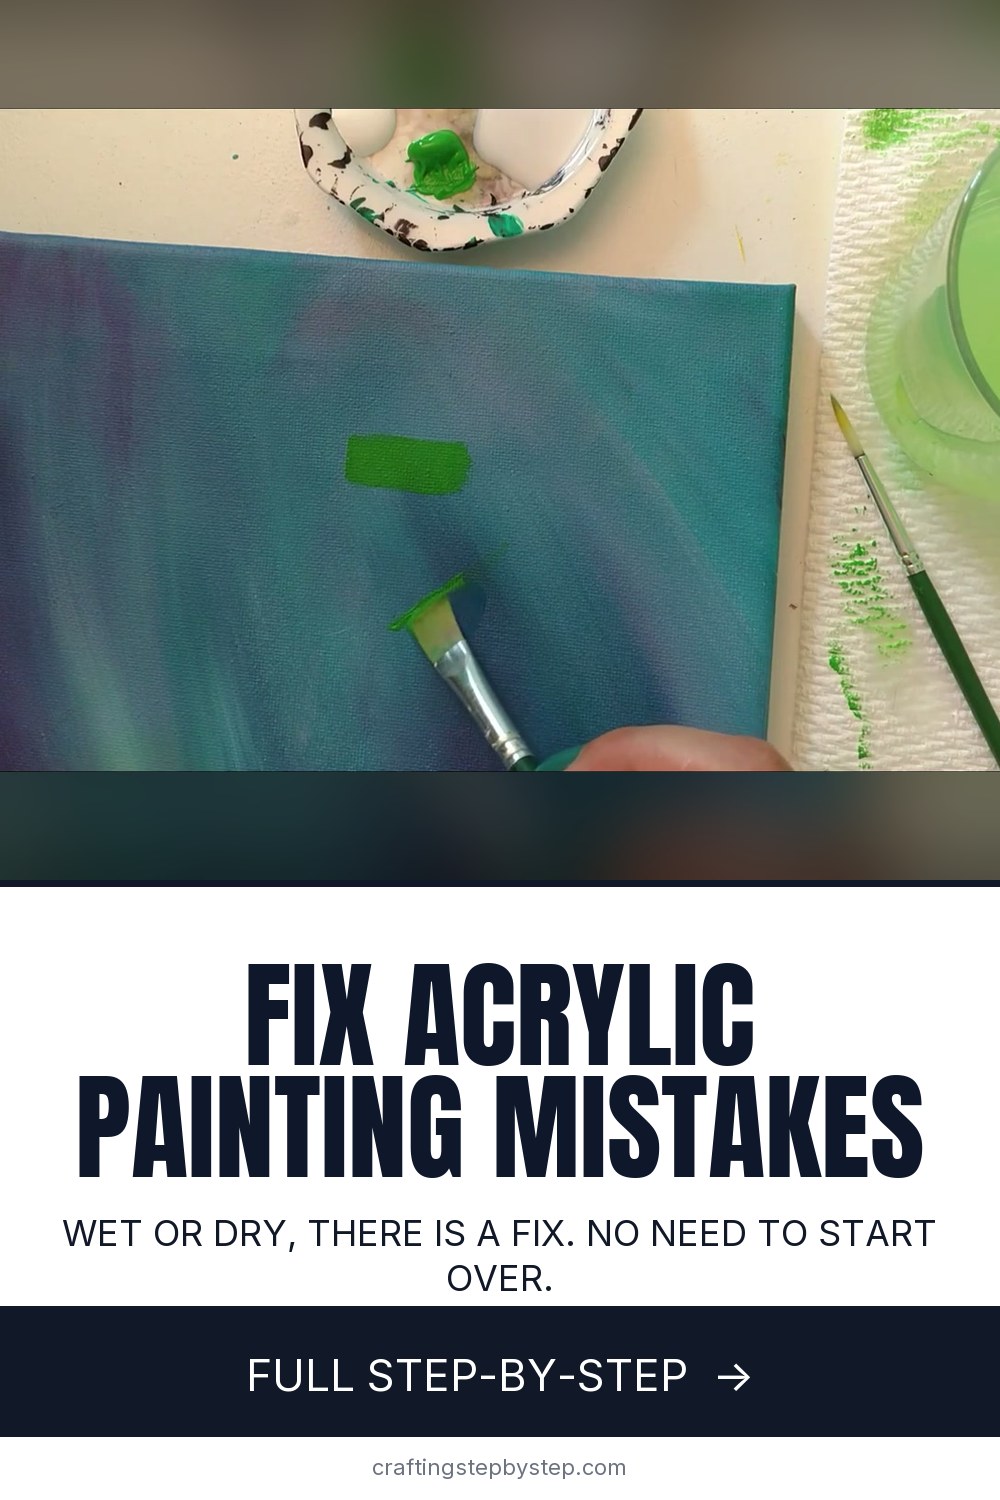
    Load a flat brush and paint a stroke the way you normally would. If you carry too much paint, a thick ridge builds up along the edge of the stroke. Heather shows this on purpose with bright green on a dry blue and purple background. Catch it while it is wet. A ridge left to dry becomes a raised line that shows through every later layer.

    Tip:

    Wipe a little paint off the brush on the palette edge before each stroke.

    Back to all steps

  2. Step 2: Wipe the Acrylic Paint Ridge Toward the Same Colour

    Watch this step · 2:48

    Use a fingertip to wipe the ridge away. The key is direction. Push the extra paint back toward the area that is already that colour, not outward onto the background. That way any smear lands where green belongs and disappears. Wipe your finger clean on a paper towel, then do any other bumps the same way.

    Tip:

    Keep a damp paper towel close so your finger stays clean between wipes.

    Back to all steps

  3. Step 3: Smooth the Wiped Acrylic Patch With a Clean Brush

    Watch this step · 3:08

    A finger wipe can leave an odd texture. Wipe most of the paint off your brush so it is almost dry, then stroke lightly over the patch to even it out. Follow the direction of the brushstrokes around it. The patch should now look like it was painted that way from the start, with no ridge and no fingerprint.

    Tip:

    Light pressure works best. Pressing hard pushes the paint back into a ridge.

    Back to all steps

  4. Step 4: Wipe a Fresh Acrylic Mistake Off With Your Finger

    Watch this step · 4:05

    When a whole stroke is wrong and you notice right away, wipe it hard with your finger. Most of the wet paint comes straight off the canvas. You will usually see a faint stain left behind, especially with strong colours like this green. That leftover is what the water method in the next step cleans up.

    Tip:

    Act fast. Thin acrylic can dry in a few minutes.

    Back to all steps

  5. Step 5: Scrub the Acrylic Mistake With a Wet Flat Brush

    Watch this step · 4:57

    Dip a clean flat brush in clear water and dab off the excess, leaving it quite wet. Scrub back and forth over the stain. The water breaks the paint down until it is little more than green water sitting on the canvas. Use a small brush for tiny areas, but a flat brush covers most mistakes faster.

    Tip:

    Check your rinse water. Muddy water puts colour back on the canvas.

    Back to all steps

  6. Step 6: Lift the Thinned Acrylic Paint With a Dry Brush

    Watch this step · 5:40

    Rinse the brush, then squeeze it completely dry on a paper towel. Press it onto the wet mark and it soaks up the thinned paint. Rinse, dry and repeat until nothing more comes up. If the area is still wet when you finish, blot it with a clean corner of the paper towel so you can keep painting.

    Tip:

    A thirsty dry brush lifts more than a paper towel does on its own.

    Back to all steps

  7. Step 7: Turn a Leftover Acrylic Mark Into a Leaf

    Watch this step · 7:20

    If the paint dried before you caught it, try making the mistake part of the picture. Heather turns a stubborn green mark into a little falling leaf with a fine brush. A bird, an insect or a seed head works too. This often looks better than a repaired patch, and it saves the canvas from being scrubbed over and over.

    Tip:

    Repeat the new shape once or twice elsewhere so it looks planned.

    Back to all steps

  8. Step 8: Paint Over the Dry Acrylic Mistake in Background Colour

    Watch this step · 9:50

    For a dry mistake you want gone, lift as much as you can with the water method first so no raised shape shows through. Then mix a colour to match the background. Heather uses white and blue. Remember acrylic dries a little darker than it looks, so mix it slightly light. Paint over the mistake, keeping your strokes like the ones around it.

    Tip:

    Test the mix on a hidden edge and let it dry before you paint the patch.

    Back to all steps

  9. Step 9: Blend the Acrylic Cover Patch With Matte Medium

    Watch this step · 11:02

    The cover patch will have a hard edge where it meets the dry background. Without rinsing, dip your brush into a little matte medium. Brush over the edge with light strokes in the same direction as the background. The medium thins the paint so it feathers into the dry colour. It looks milky now but dries clear and blended.

    Tip:

    Use only a little paint and medium on the brush. Less blends better.

    Back to all steps

How to Use Texture Paste

Keep going

How to Use Texture Paste

Keep going with painting

More on this topic, picked for this project.

You reached the last step

Save this project to come back to it

Your ticked steps, the free printable and your other saved makes, together in My Projects. Free, no password.

You tapped Save

Save this project for later

We'll email you a link, no password.

How to Fix Mistakes in an Acrylic Painting

  • Your saved projects in one list
  • Your ticked steps on any device

Check your inbox for an email from us. Not there? Look in your spam folder.

Free printable

Printable sheet for this project

The bonus is hidden until you sign up.

Free with a free account, no password. Every step above stays open to everyone.

Products Used

The Checklist

How to Fix Mistakes in an Acrylic Painting

Tools
5
Materials
3
Steps
9
Video
12 min

Tools we recommend

As an Amazon Associate we earn from qualifying purchases. Links on this page may be affiliate links - clicking them and buying doesn't change your price, but helps support Crafting Step by Step.

Tags

The Crafter's Weekly

New painting tutorials, every Sunday

One short email with the week's best step-by-step guides. Free, no spam, unsubscribe anytime.

Did this work for you?

What's next

Related collections

Curated theme pages that include this tutorial.

Similar tutorials

Hand-picked next reads based on the one you just finished.

Liked this painting tutorial?

Pick the crafts you want to hear about. One email every Sunday with new step-by-step tutorials. No spam, easy to unsubscribe.

Get more like this in your inbox

Weekly digest. Pick the categories you want. Unsubscribe anytime.

Send me tutorials about

We only email about new tutorials. Easy unsubscribe anytime.