How to Embroider a Rose (Easy Woven Wheel Stitch)

EmbroideryEasy10:537 stepsBrowse more →

By CraftingStepByStepPublished

Based on a video by Clever Poppy.

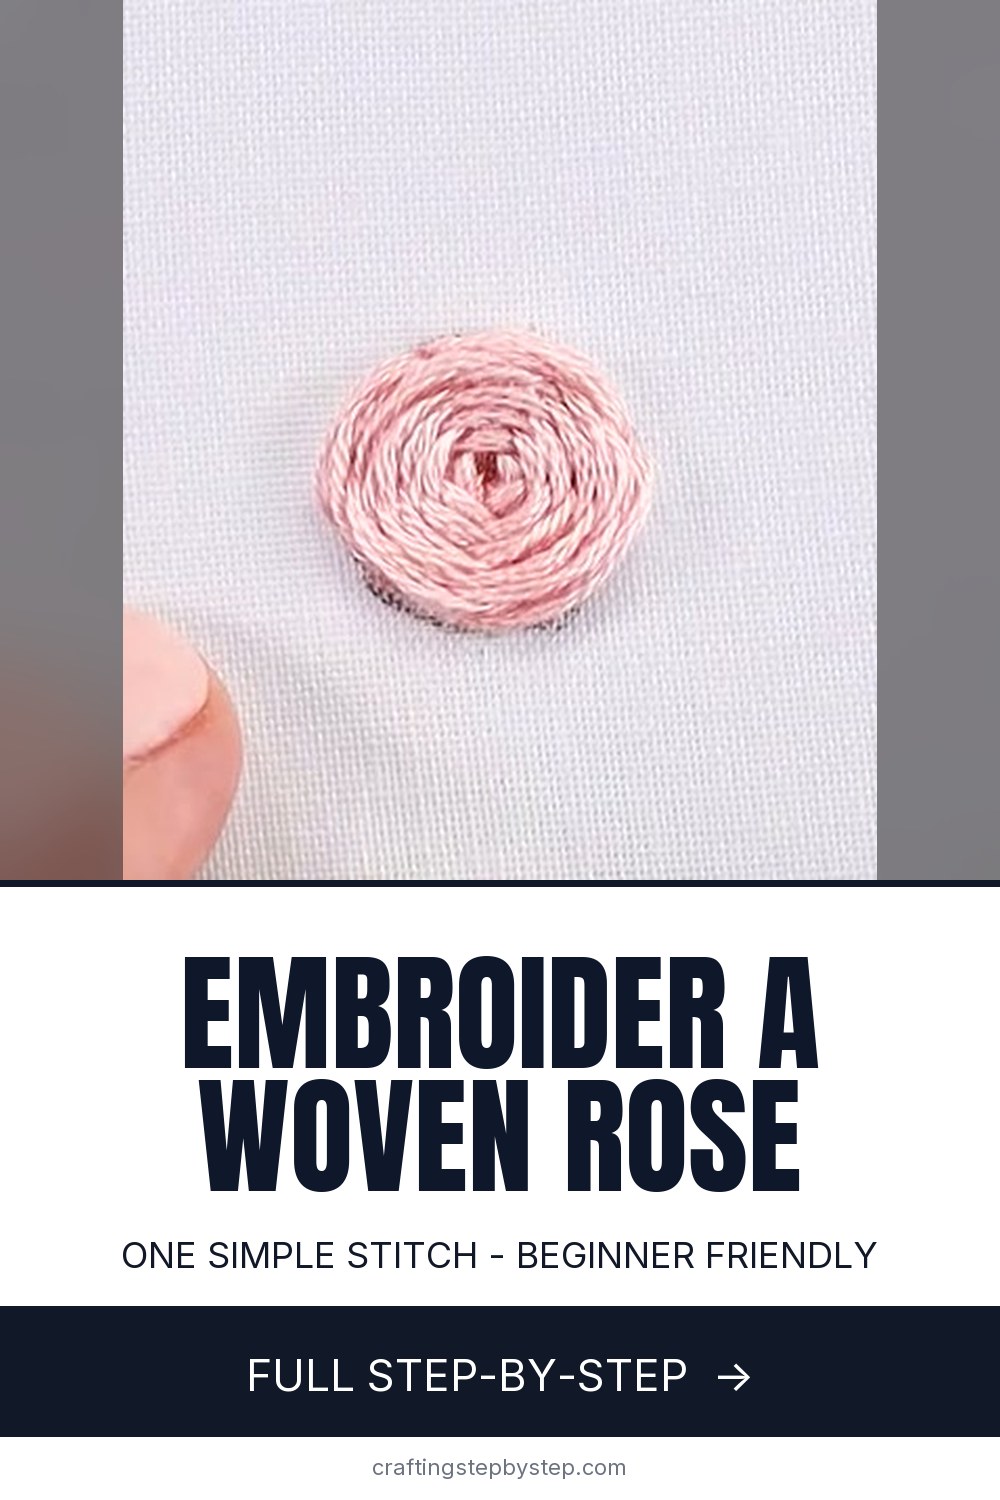
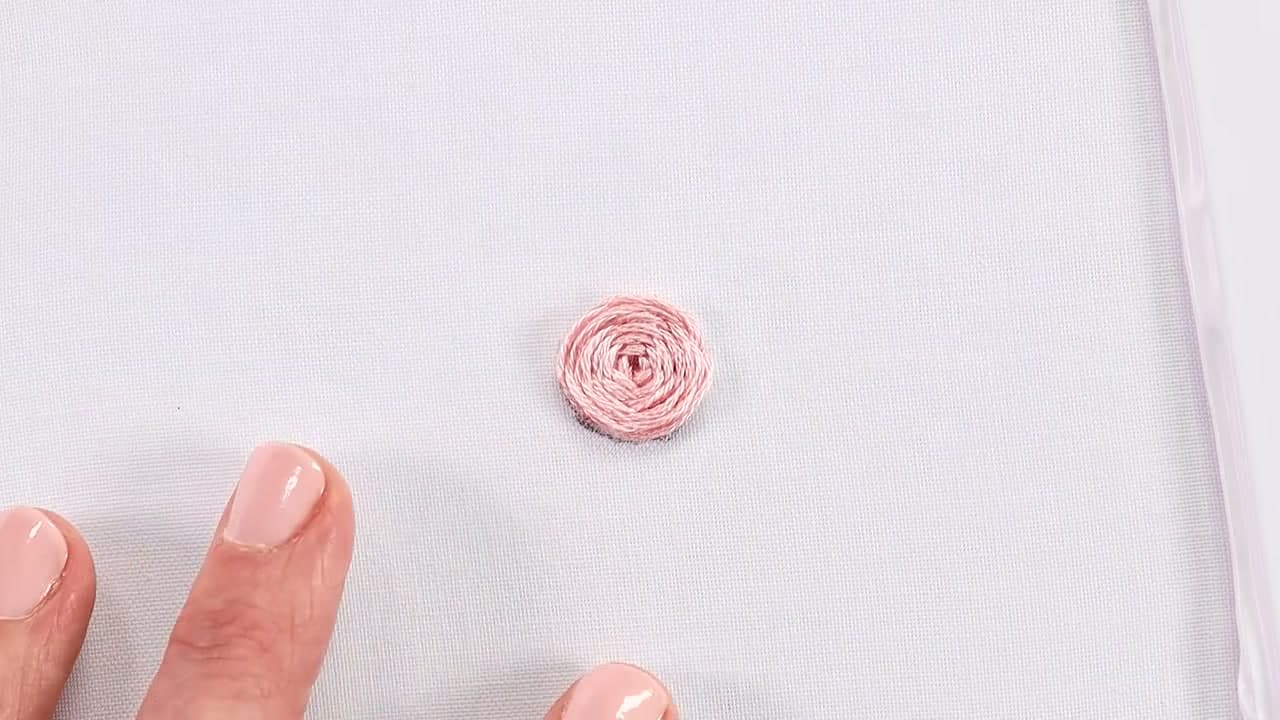
The woven wheel rose is the stitch that makes people think you have been embroidering for years, and it takes about five minutes to learn. You lay down five straight spokes, then weave your floss over and under them until a plump little rose builds up right before your eyes. No fancy tools, no complicated counting.

This walkthrough follows Clever Poppy, whose beginner embroidery series breaks the technique down into small, doable moves. The rose you see here uses a single shade of pink floss, but the same method works with any color, and you can vary the look by weaving tighter or looser as you go.

If you are just getting into hand embroidery, this is a great first flower. Once you have it down, pair it with a couple of leaves using a lazy daisy stitch or fill them in with a satin stitch. When your piece is done, here is how to finish an embroidery hoop so it hangs clean on the wall. Want another quick floral motif? Try stitching a sprig of lavender next.

Step-by-Step Guide

7 steps · about 11 minutes.Check off each step as you go and your progress saves automatically.

1

Step 1: Mark a Circle with Five Spokes

0:06
Step 1: Step 1: Mark a Circle with Five Spokes

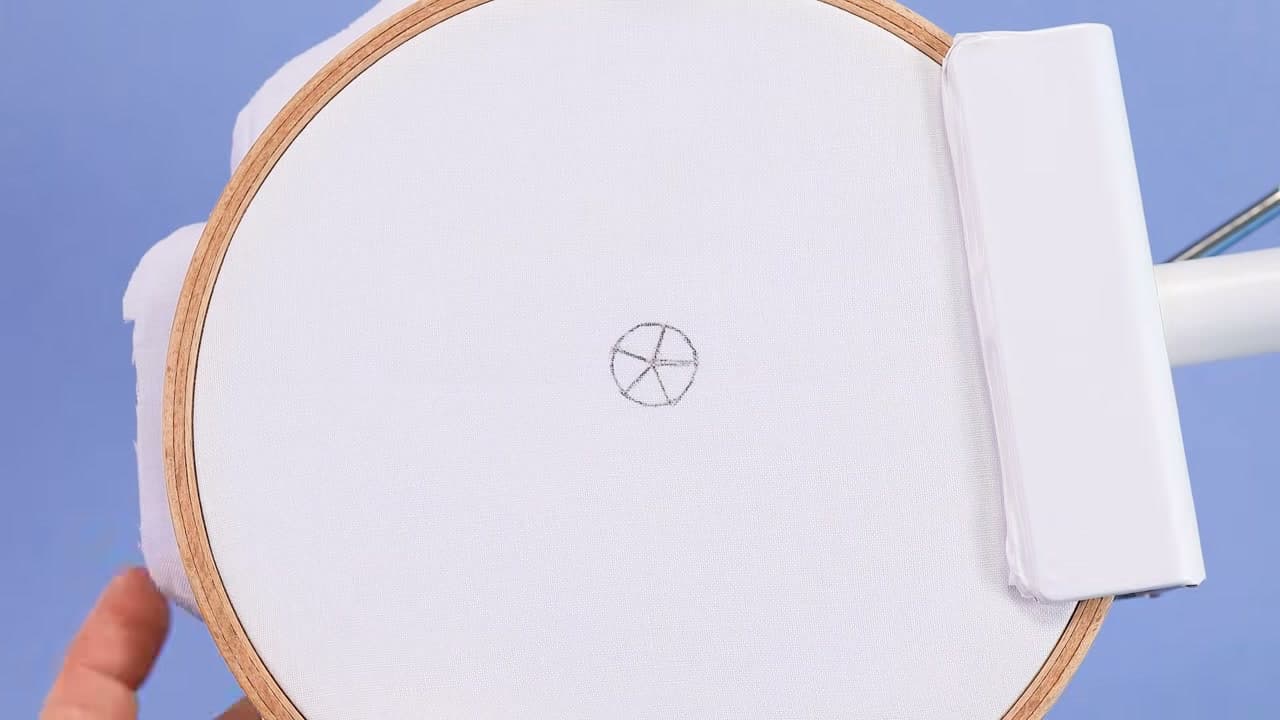
Start by drawing a small circle on your fabric with a fabric marker, then divide it into five even wedges, like slices of a pie. Those five lines are the skeleton your rose weaves around, so keep them roughly equal.

Pop the fabric into your hoop and pull it tight as a drum. Taut fabric keeps every stitch even and stops the rose from bunching. A drawn guide also keeps the finished flower round instead of lopsided.

Tip

Watch this step Use a water-soluble marker so any guide lines that peek out at the end rinse away with a dab of water.
2

Step 2: Lay the Five Anchor Spokes

1:12
Step 2: Step 2: Lay the Five Anchor Spokes

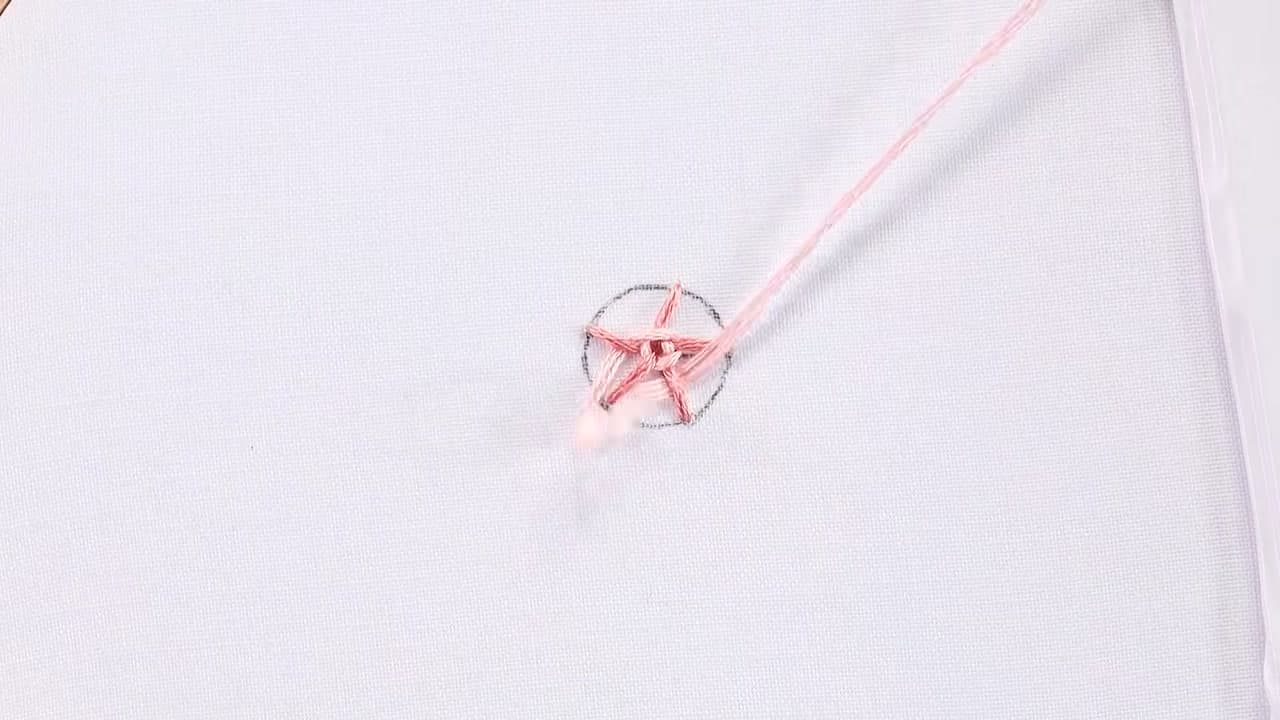
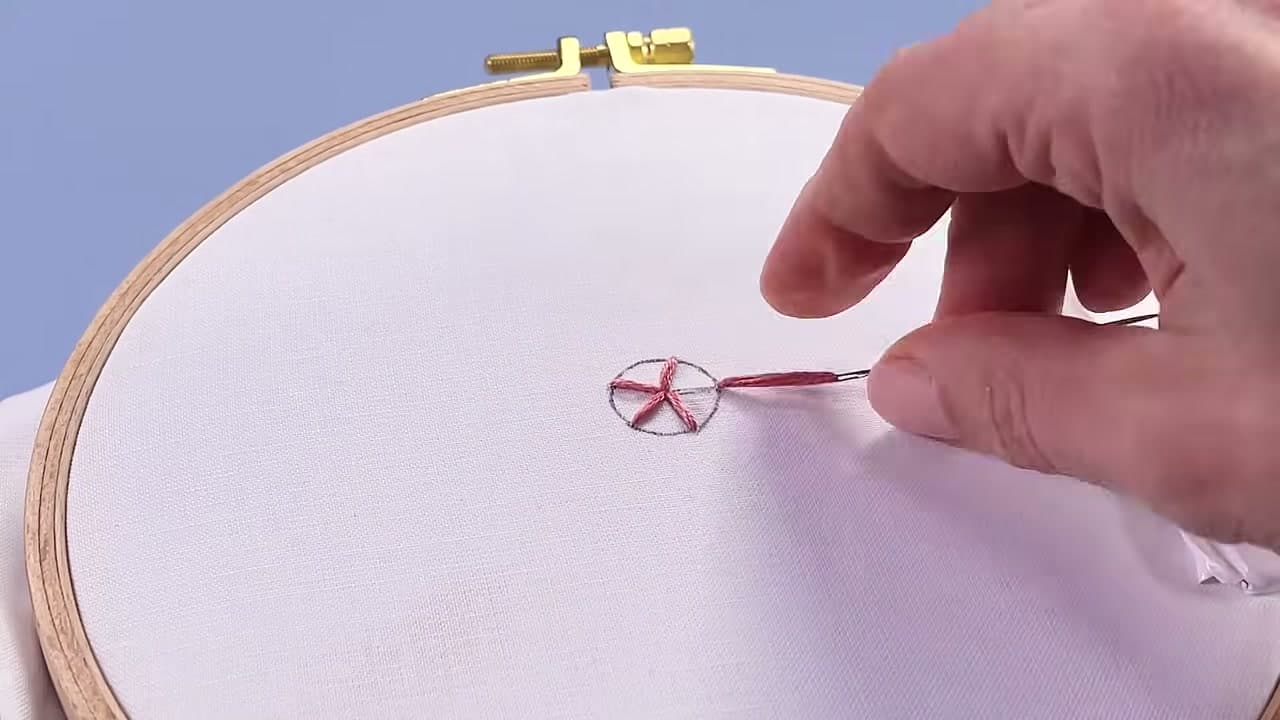
Thread your needle and bring it up at the outer edge of one guideline. Lay a straight stitch from the rim in toward the center, then work around the circle until all five spokes meet in the middle. You end up with a five-armed star.

Keep the floss taut as you go so each spoke sits crisp and flat against the fabric. These spokes carry the whole rose, so a little care here pays off later.

Tip

Watch this step Two or three strands of floss give a fuller rose. Six strands can get bulky and hide the woven texture.

3

Step 3: Check Your Star of Spokes

2:32
Step 3: Step 3: Check Your Star of Spokes

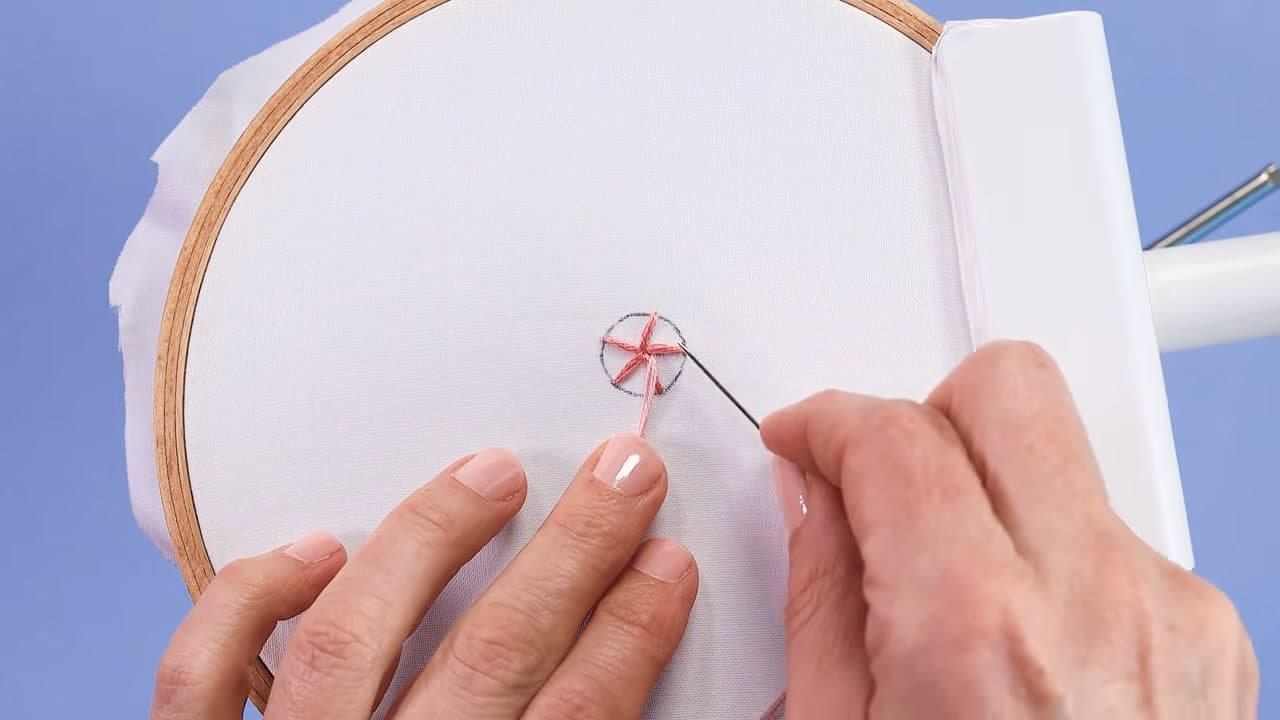
Before you weave, take a look at your star. You want five spokes anchored firmly and radiating out evenly from the center point. That odd number is not random - five spokes are what let the weave spiral without doubling back on itself.

Bring your needle up right beside the center, ready to start weaving. At this stage the whole thing looks like a small pink asterisk sitting inside your drawn circle.

Tip

Watch this step If a spoke looks loose, tug it gently from the back. A saggy spoke makes a messy petal once you weave over it.

4

Step 4: Start Weaving Over and Under

3:52
Step 4: Step 4: Start Weaving Over and Under

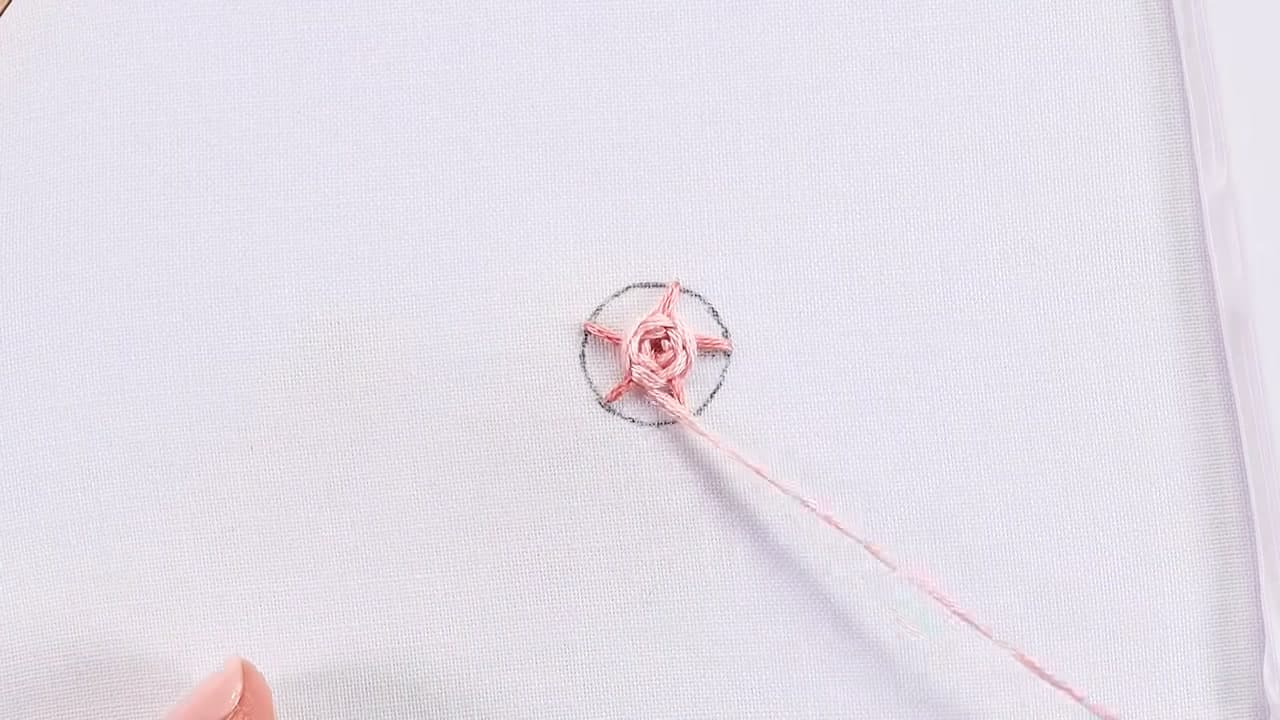
Now the fun part. Working from the center out, slide your needle over one spoke, then under the next, and keep circling in the same direction. This is where the flat star turns into a flower.

Do not pierce the fabric while you weave - your floss only rides over and under the spokes, never through the cloth. That over-under rhythm is exactly what builds the layered, petal-like look of a rose.

Tip

Watch this step Lead with the eye of the needle, not the point. The blunt end glides over the spokes without snagging or splitting your floss.

5

Step 5: Build Up the Petals

5:12
Step 5: Step 5: Build Up the Petals

Keep circling, letting the floss ride a little loosely so the petals stay soft and slightly raised instead of pulled flat. Each full pass covers a bit more of the spokes and the center starts to look like curled rose petals.

Watch the rows spiral outward. Every so often, nudge the floss inward with your needle so the rings sit snug against each other and there are no gaps showing through.

Tip

Watch this step Looser weaving reads as an open, blousy rose. Tighter weaving gives a neat rosebud. Pick the look you want and stay consistent.

6

Step 6: Fill the Rose and Hide the Spokes

9:04
Step 6: Step 6: Fill the Rose and Hide the Spokes

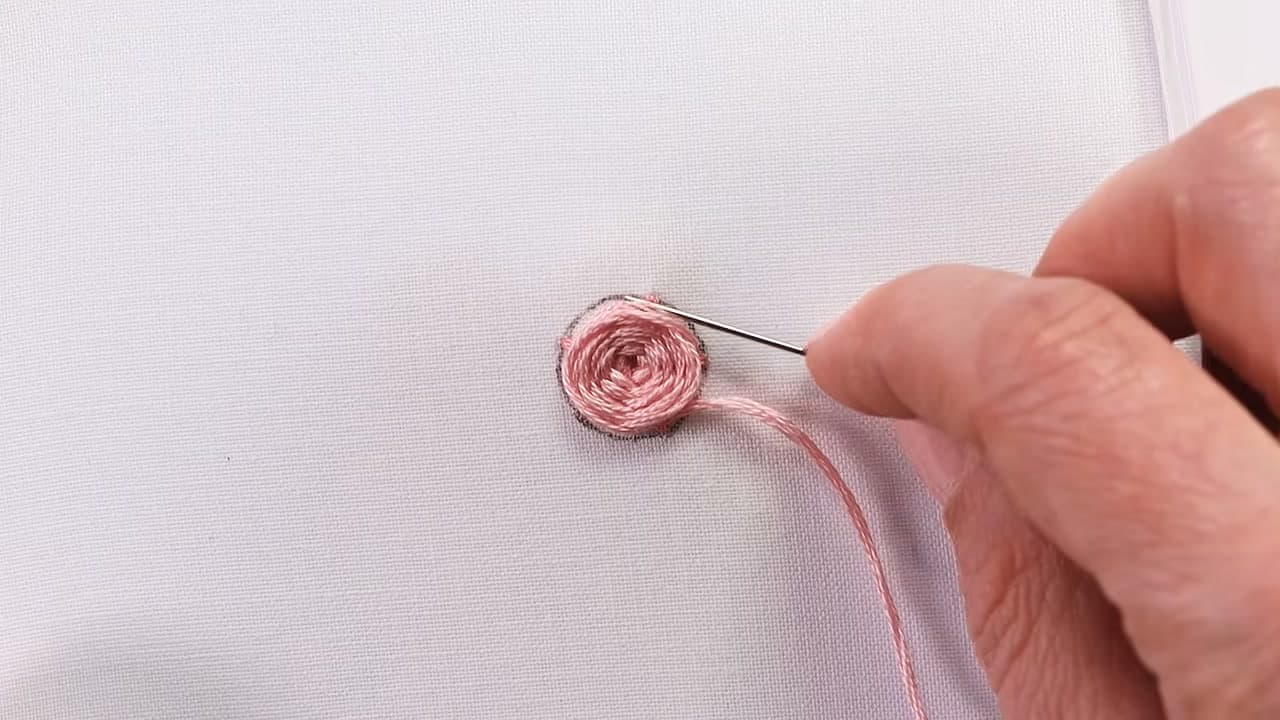
Keep weaving until the floss fills the whole circle and the spokes disappear under the layers of petals. The last few rounds should hug the outer rim of your drawn guide.

When the guideline is fully covered and the rose looks plump and round, you are done weaving. Take your needle back to one of the outer petals, ready to secure the tail.

Tip

Watch this step If a bit of the drawn circle still peeks out, add one more round or nudge the outer petals over it before you finish off.

7

Step 7: Finish Off and Add Leaves

10:04
Step 7: Step 7: Finish Off and Add Leaves

Press and fluff the finished rose gently with your fingertip so it sits full and round. Then take the needle down through the fabric at the outer edge, flip the hoop over, and weave the tail under a few stitches on the back to lock it in. Trim the excess floss close.

To round out the flower, add a leaf or two beside it in green floss. A lazy daisy stitch makes a quick leaf, or fill a leaf shape in with a satin stitch for something more solid.

Tip

Watch this step Cluster three roses in different sizes with a few leaves for a bouquet. Vary the floss color for a mix of blooms.

Products Used

☐ The Checklist

How to Embroider a Rose (Easy Woven Wheel Stitch)

Tools
3
Materials
4
Steps
7
Video
11 min

Tools we recommend

Your Guide

Clever Poppy

As an Amazon Associate we earn from qualifying purchases. Links on this page may be affiliate links - clicking them and buying doesn't change your price, but helps support ShowMeStepByStep.

Tags

Sunday How-To

New embroidery tutorials, every Sunday

One short email with the week's best step-by-step guides. Free, no spam, unsubscribe anytime.

Did this work for you?

What's next

Related collections

Curated theme pages that include this tutorial.

Weekly Digest

Liked this embroidery tutorial?

Pick the categories you want to hear about. Weekly digest of new step-by-step tutorials. No spam, easy unsubscribe.

Send me tutorials about

We only email about new tutorials. Easy unsubscribe anytime.