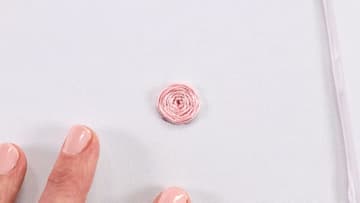
How to Embroider a Rose (Easy Woven Wheel Stitch)
Source: Clever Poppy • Full tutorial: www.craftingstepbystep.com/embroidery/how-to-embroider-a-rose
- Difficulty
- Easy
- Hands-on time
- About 45 minutes
- Cost
- About $3 to $6
- Makes
- 1 embroidered rose with leaves
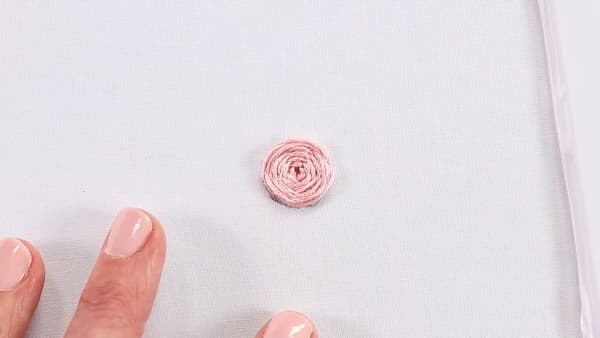
Tools
- embroidery hoop (4-6 inch)
- embroidery needle
- small scissors
Materials
- embroidery floss (rose or pink)
- green embroidery floss (for leaves)
- cotton or linen fabric
- water-soluble fabric marker
Steps
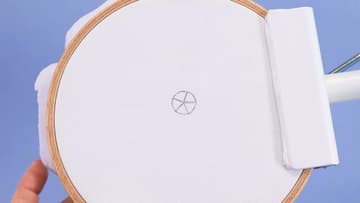
1. Mark a Circle with Five Spokes
Start by drawing a small circle on your fabric with a fabric marker, then divide it into five even wedges, like slices of a pie. Those five lines are the skeleton your rose weaves around, so keep them roughly equal.
Tip: Watch this step Use a water-soluble marker so any guide lines that peek out at the end rinse away with a dab of water.
2. Lay the Five Anchor Spokes
Thread your needle and bring it up at the outer edge of one guideline. Lay a straight stitch from the rim in toward the center, then work around the circle until all five spokes meet in the middle.
Tip: Watch this step Two or three strands of floss give a fuller rose. Six strands can get bulky and hide the woven texture.
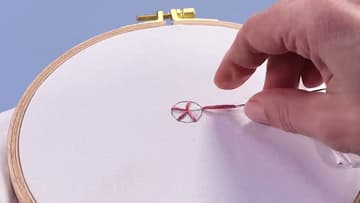
3. Check Your Star of Spokes
Before you weave, take a look at your star. You want five spokes anchored firmly and radiating out evenly from the center point.
Tip: Watch this step If a spoke looks loose, tug it gently from the back. A saggy spoke makes a messy petal once you weave over it.
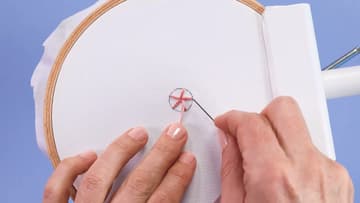
4. Start Weaving Over and Under
Now the fun part. Working from the center out, slide your needle over one spoke, then under the next, and keep circling in the same direction.
Tip: Watch this step Lead with the eye of the needle, not the point. The blunt end glides over the spokes without snagging or splitting your floss.
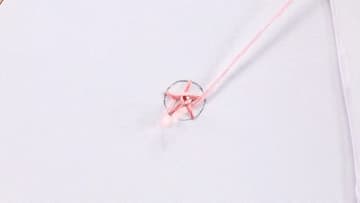
5. Build Up the Petals
Keep circling, letting the floss ride a little loosely so the petals stay soft and slightly raised instead of pulled flat. Each full pass covers a bit more of the spokes and the center starts to look like curled rose petals.
Tip: Watch this step Looser weaving reads as an open, blousy rose. Tighter weaving gives a neat rosebud. Pick the look you want and stay consistent.
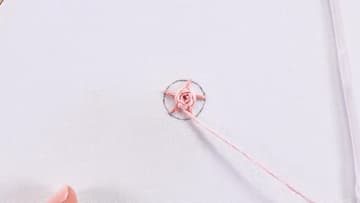
6. Fill the Rose and Hide the Spokes
Keep weaving until the floss fills the whole circle and the spokes disappear under the layers of petals. The last few rounds should hug the outer rim of your drawn guide.
Tip: Watch this step If a bit of the drawn circle still peeks out, add one more round or nudge the outer petals over it before you finish off.
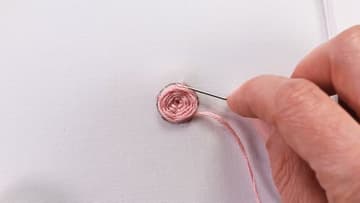
7. Finish Off and Add Leaves
Press and fluff the finished rose gently with your fingertip so it sits full and round. Then take the needle down through the fabric at the outer edge, flip the hoop over, and weave the tail under a few stitches on the back to lock it in.
Tip: Watch this step Cluster three roses in different sizes with a few leaves for a bouquet. Vary the floss color for a mix of blooms.