How to Choose Yarn for Amigurumi

Save it for later. We'll email you a link, no password.

Find it again on your phone or computer, with your finished steps ticked.

You tapped Save

Save this project for later

We'll email you a link, no password.

How to Choose Yarn for Amigurumi

  • Your saved projects in one list
  • Your ticked steps on any device

Check your inbox for an email from us. Not there? Look in your spam folder.

  • 10 steps
  • 17:17 video
  • Difficulty: Easy
  • About 20 minutes
  • Materials about $1 to $5
  • Crochet

Based on a video by Elise Rose Crochet

Opens their YouTube channel

Steps written out by Crafting Step by Step · Published

The finished result: How to Choose Yarn for Amigurumi
Also in:Fiber Arts

Standing in the yarn aisle wondering if a skein will make a good toy? Elise of Elise Rose Crochet, a certified crochet instructor, has a quick answer: crochet one small test ball before you commit. The ball uses every core amigurumi move, so it shows you how the yarn behaves in a real toy.

It takes about 15 minutes and a few yards of yarn.

Why a test ball beats squeezing the skein

You cannot judge toy yarn by feel. Softness on the shelf says little about how a yarn holds a tight stitch, hides stuffing or survives a hard pull during seaming. The ball runs the yarn through a magic ring, increases, even rounds, invisible decreases, stuffing and a cinched closure. If something will go wrong in a full toy, it usually shows up here.

What makes a good amigurumi yarn

  • Strength. Elise ranks this first. The yarn must not snap when you pull a magic ring closed or sew on a head. She once had a 100% wool yarn break in half while closing a ring.
  • Stitch definition. Smooth, tightly plied yarn shows each stitch and makes counting easy. Faux fur and eyelash yarns look cuddly but hide your stitches.
  • A colour you can see. Light colours are easier on the eyes. If you love a dark shade, work under a bright craft light.
  • Price is not the test. An expensive yarn is not automatically better for toys, and a budget acrylic can do very well.

Questions to ask before you buy

Smooth or fuzzy? Small, medium or large toy? Size comes from the weight: DK for small toys, worsted for medium, bulky for big huggable ones. Will it be washed? A toddler's toy gets grubby, so look for machine washable on the label. A shelf piece can be spot cleaned.

Synthetic, natural or a blend

Acrylic is affordable, easy to wash and comes in every colour. Cotton, wool and alpaca are lovely to work with but cost more and can be fussy to clean. Blends, like a merino and acrylic mix, give you some of both. Elise leans toward blends for that reason.

Yarns that passed her test

From the Premier range Elise tested, the keepers were Basix Worsted (a heavier worsted on a big budget skein), Anti-Pilling Everyday Worsted (good for toys that get hugged a lot), Stitch Please Superwash Worsted (her favourite, with crisp stitches), Basix DK, Anti-Pilling Everyday DK Merino Blend and Wool Select, a 75% acrylic, 25% wool blend that feels far pricier than it is.

Keep a test ball library

Tag every ball with brand, weight and hook size and keep them together in a jar or basket. Next time you plan a toy, grab two balls and compare them side by side instead of guessing.

Troubleshooting

Stuffing showing through? Go down a hook size or try a tighter twisted yarn. Yarn splitting on the hook? A rounded head hook or a more tightly plied yarn helps. Holes at the decreases? Work them through the front loops only.

New to toys? Start with our guide to crocheting amigurumi, then practise the magic ring, increases and decreases. Once your yarn passes, learn how to attach safety eyes.

What you'll need

Free, for this project

Get this checklist by email

  • All 10 tools and materials, with tick boxes
  • A link to print all 10 steps on paper, to keep by you while you craft

No password. The whole tutorial stays free on this page.

Step-by-step guide

10 steps, about 17 minutes. Tap a picture to jump to that step. Your progress saves automatically.

Tick each step off as you go.

  1. Step 1: Pick a Test Yarn and Check the Weight on the Label

    Watch this step · 1:53

    Grab the yarn you want to test, a crochet hook, scissors and a yarn needle. Elise uses Premier Basix Worsted with a 3.5 mm hook. That is smaller than the label suggests, and it is on purpose. Amigurumi needs tight stitches so stuffing never peeks through. Check the label for the weight number and the fiber so you know what you are testing.

    Tip:

    For worsted yarn, start with a 3.5 or 3.75 mm hook. For DK, try 2.5 to 3 mm.

    Back to all steps

  2. Step 2: Crochet 6 Single Crochet Into a Magic Ring

    Watch this step · 3:12

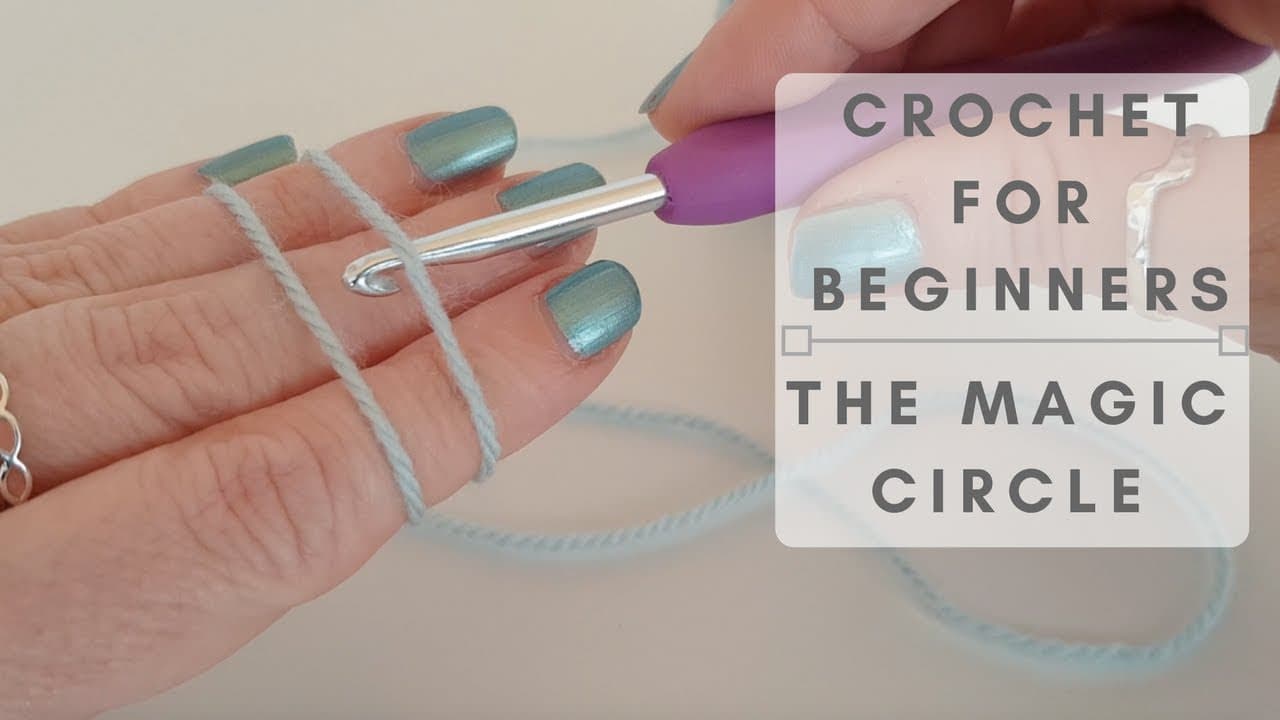
    Make a magic ring and work six single crochet into it. Pull the tail to close the ring tight. Watch the yarn here. Does it slide smoothly as you pull, or does it grab and fray? A good amigurumi yarn closes the ring snug with no gap in the middle and no strain on the strand. This is your first strength check.

    Tip:

    Leave a tail of a few inches so you can tug the ring closed with a firm grip.

    Back to all steps

  3. Step 3: Increase to 12 and 18 Stitches for the Test Ball

    Watch this step · 4:15

    For round 1, work two single crochet in every stitch for 12 stitches. Put a stitch marker in the first stitch so you can find the start of the round. For round 2, single crochet in one stitch, then increase in the next, all the way around. You end with 18 stitches. Count them. Clear stitch definition makes counting easy.

    Tip:

    If you struggle to see where the hook goes, the yarn may be too fuzzy or too dark for toys.

    Back to all steps

  4. Step 4: Work Even Rounds Until the Test Ball Forms a Cup

    Watch this step · 4:36

    For rounds 3, 4 and 5, work one single crochet in each stitch, 18 per round. The flat circle curves up into a little cup. Look at the fabric now. It should feel firm and dense, with no holes between stitches. If you can see light through it, the yarn is too loose for this hook, or it is not a good fit for toys.

    Tip:

    Keep the marker moving up each round so your count stays honest.

    Back to all steps

  5. Step 5: Shape the Top of the Ball With Invisible Decreases

    Watch this step · 5:05

    For round 6, single crochet in one stitch, then work an invisible decrease over the next two. Repeat around for 12 stitches. To decrease, insert the hook through the front loops of the next two stitches, yarn over, pull through both front loops, then finish the single crochet. Round 7 is six invisible decreases, leaving six stitches. Note any holes or puckers.

    Tip:

    Going through the front loops only is what makes the decrease disappear.

    Back to all steps

  6. Step 6: Stuff the Amigurumi Test Ball With Fiberfill

    Watch this step · 6:32

    Cut the yarn with a tail long enough to sew with and pull it through the last loop. Push in a little polyester fiberfill with a stuffing stick or the end of a pencil. It does not have to be packed hard. You want enough to see the shape and stretch the fabric. Does it hold a round shape? Do white wisps of stuffing show between the stitches?

    Tip:

    Pull off small tufts of fiberfill instead of one big wad for a smoother ball.

    Back to all steps

  7. Step 7: Close the Ball With a Yarn Needle to Test Seaming Strength

    Watch this step · 7:00

    Thread the tail onto a yarn needle and go through the front loop of each of the last six stitches. Pull tight to cinch the hole closed, then push the needle down through the middle and out the other side. Elise calls this the most important part of the test. Sewing on heads and arms puts the same strain on yarn. If it frays or snaps here, it will fail in a toy.

    Tip:

    Give the tail a firm, steady pull, the way you would when attaching a head.

    Back to all steps

  8. Step 8: Write the Yarn Brand, Weight and Hook Size on a Tag

    Watch this step · 7:45

    Cut out a small paper tag and write down the yarn brand, the weight and the hook size you used. Elise offers free printable tags on her website, but any gift tag or index card cut to size works. Add notes on the back about softness, splitting or how well it closed. You will not remember these details a month from now.

    Tip:

    Write the colour name too. Dark and light shades of one yarn can behave differently.

    Back to all steps

  9. Step 9: Tie the Yarn Tag to the Finished Test Ball

    Watch this step · 7:57

    Punch a hole in the tag if it does not have one, then tie it to the test ball with a short length of baker's twine or scrap yarn. Slip the twine under a stitch at the top of the ball so it stays put. Now the ball and its notes never get separated, even in a basket full of test balls from different yarns.

    Tip:

    Contrasting twine makes each tag easy to spot when you dig through the basket.

    Back to all steps

  10. Step 10: Judge the Finished Amigurumi Test Ball Before Buying More Yarn

    Watch this step · 15:32

    Hold the finished ball up and look hard. Are the stitches crisp and easy to count? Is the shape round and firm, with no stuffing showing? Did the yarn survive the cinch without fraying? If you can say yes to all three, buy enough for your toy. Elise made balls from several Premier yarns, then compared them side by side to pick her favourites.

    Tip:

    Squeeze the ball a few times. A good toy yarn springs back without going limp.

    Back to all steps

Keep going

How to Make a Fall Leaf Garland

Products Used

The Checklist

How to Choose Yarn for Amigurumi

Tools
6
Materials
4
Steps
10
Video
17 min

Tools we recommend

As an Amazon Associate we earn from qualifying purchases. Links on this page may be affiliate links - clicking them and buying doesn't change your price, but helps support Crafting Step by Step.

Tags

Free printable

Get the Crochet Cheat Sheet

Every basic stitch on one printable page. No spam, one-click unsubscribe.

Did this work for you?

What's next

Related collections

Curated theme pages that include this tutorial.

Similar tutorials

Hand-picked next reads based on the one you just finished.

Liked this crochet tutorial?

Pick the crafts you want to hear about. One email every Sunday with new step-by-step tutorials. No spam, easy to unsubscribe.

Get more like this in your inbox

Weekly digest. Pick the categories you want. Unsubscribe anytime.

Send me tutorials about

We only email about new tutorials. Easy unsubscribe anytime.