How to Crochet a Dragon (Pocket Dragon Amigurumi, Step by Step)

CrochetMedium13:137 stepsBrowse more →

By CraftingStepByStepPublished

Based on a video by Sweet Softies.

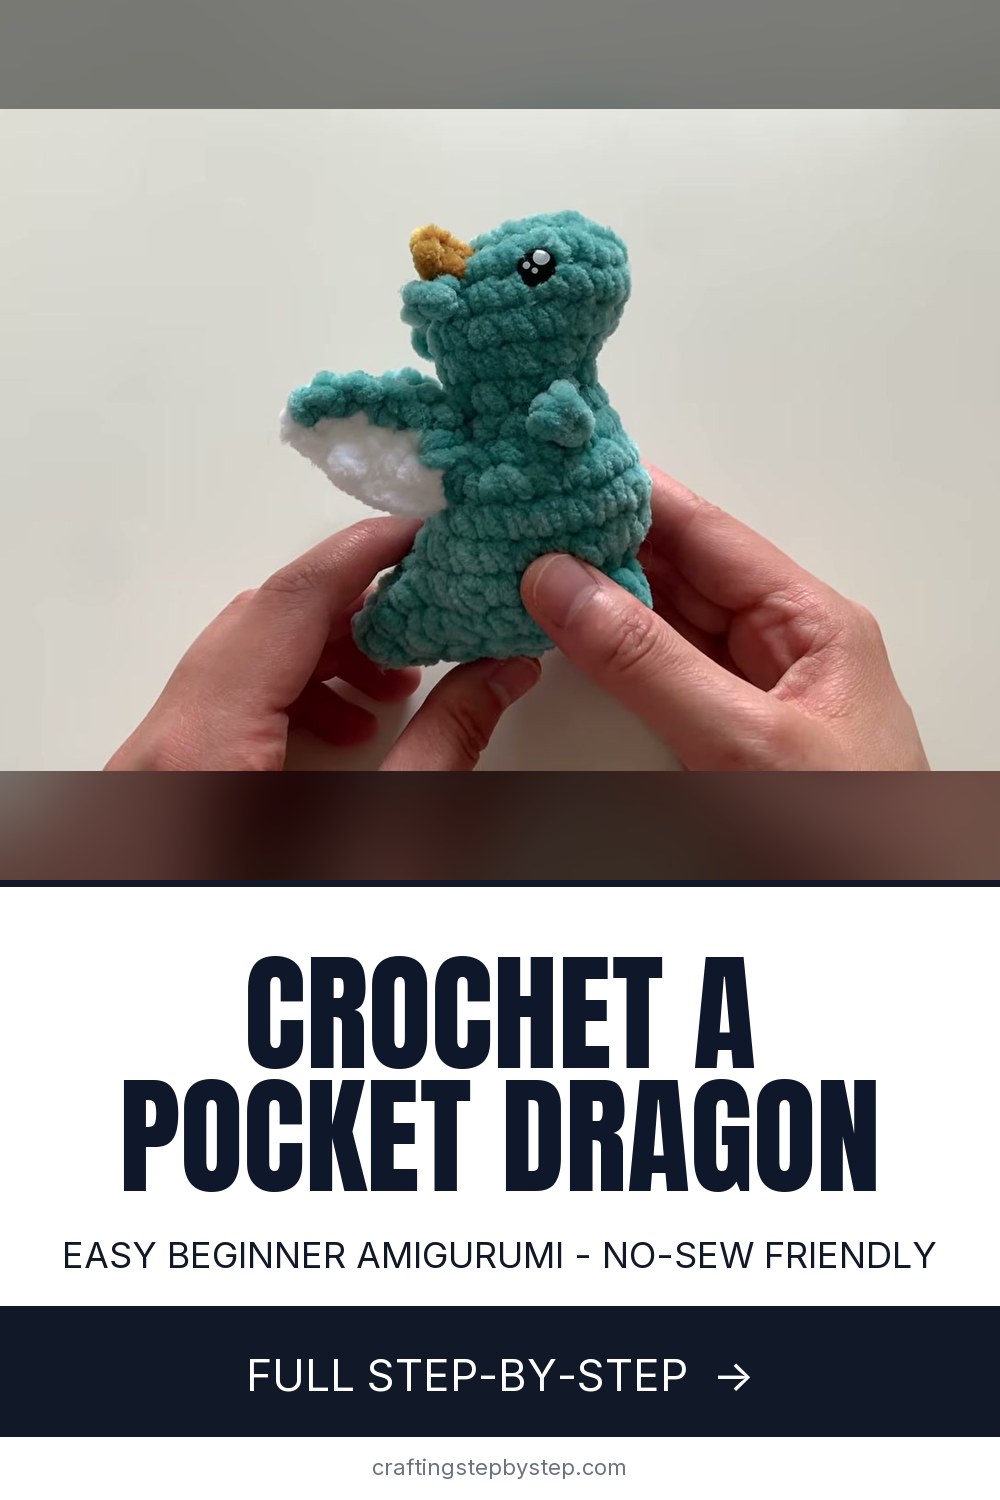
This pocket dragon is about as friendly as amigurumi gets. Sweet Softies designed it as a beginner project in super bulky chenille yarn, so the stitches are big, the whole thing works up in roughly half an hour, and it is almost entirely no-sew. The head, body and tail come off the hook as one piece, and the only real sewing is attaching the wings at the end.

The head, body and tail share the exact shape of Sweet Softies' Tiny Rex, so you make that base first from the linked video. This tutorial then covers the parts that turn a dino into a dragon: two little ears and two horns crocheted directly onto the finished head, plus a pair of two-tone wings. If you have never worked amigurumi before, it helps to start with how to crochet amigurumi and how to crochet a magic ring, since the body of this dragon begins the same way.

Two small touches give the dragon its face. The sparkly safety eyes go in while you shape the head - see how to attach safety eyes to amigurumi so the washers seat straight. And if you enjoy this build, the same chenille-and-safety-eye approach scales right up to a crochet dinosaur.

Step-by-Step Guide

7 steps · about 13 minutes.Check off each step as you go and your progress saves automatically.

1

Step 1: Gather Your Yarn, Hook and Eyes

2:48
Step 1: Step 1: Gather Your Yarn, Hook and Eyes

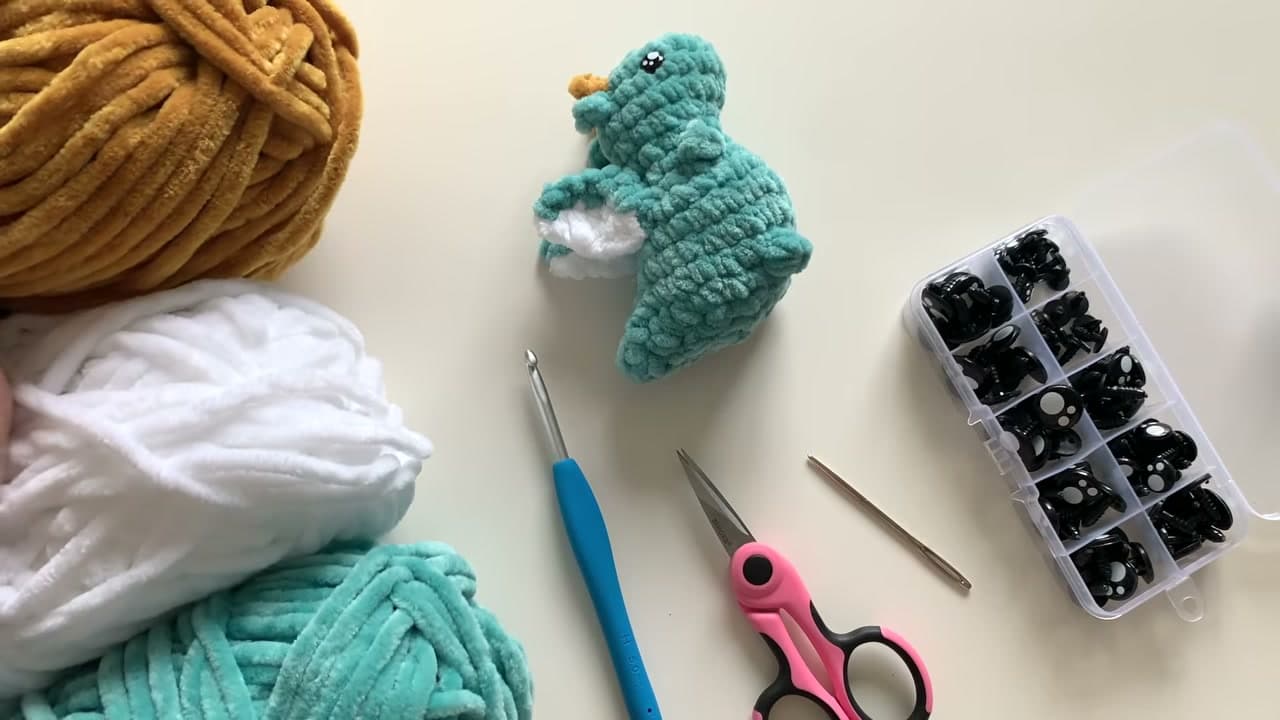
Grab your supplies before you start. You want super bulky chenille yarn in your main dragon color, plus white for the belly and inner wings and a little yellow for the horns. Add a 5mm hook, a pair of sparkly safety eyes, fiberfill, a yarn needle and scissors.

The head, body and tail are one continuous piece that you make first from Sweet Softies' Tiny Rex tutorial. Once that base is stuffed and closed with the eyes in place, you are ready for the dragon-only parts covered here.

Tip

Watch this step Chenille yarn hides stitches, so keep a stitch marker in the first stitch of each round to track where you are.
2

Step 2: Attach the First Ear

3:48
Step 2: Step 2: Attach the First Ear

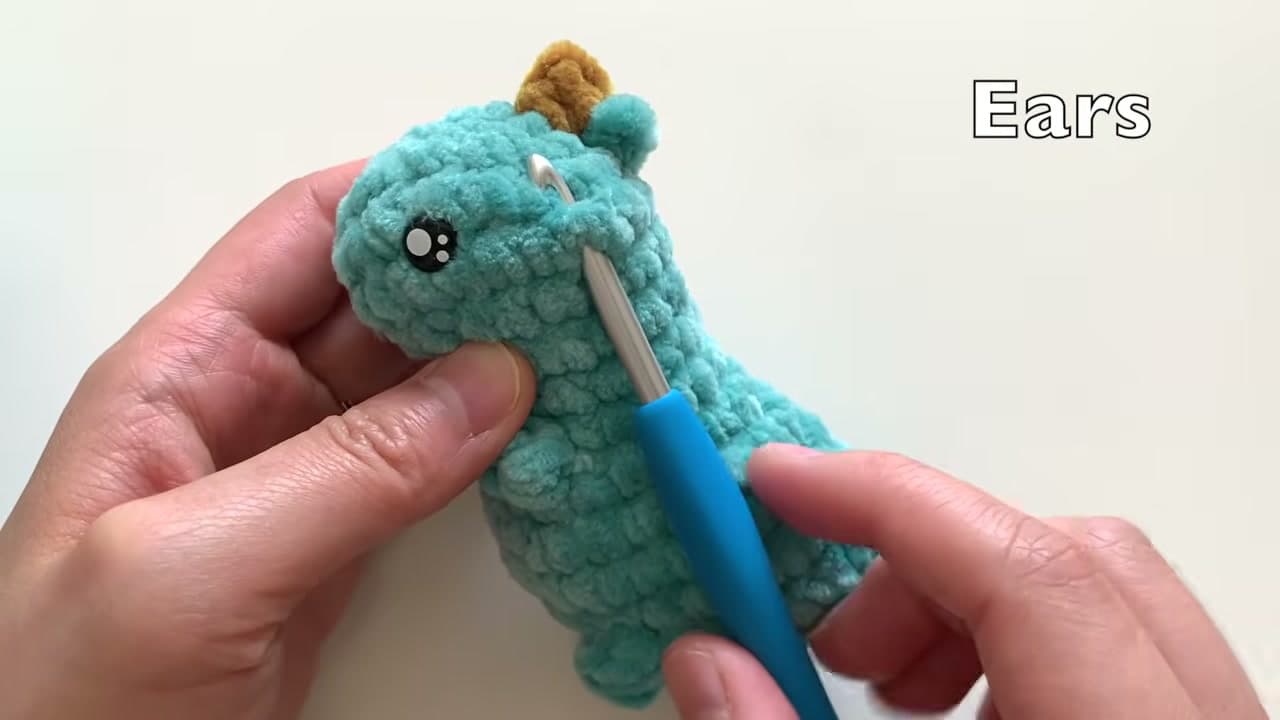
The ears go straight onto the finished head, no separate piece to sew. Insert your hook under a stitch in round three, toward the back of the head, and pull your yarn through. Leave a short tail to weave in later.

Chain two, then work a single crochet into the second chain from the hook. Go back into that same round-three stitch and finish with a slip stitch. That tiny loop is one whole ear. Keep them toward the back and balanced on both sides.

Tip

Watch this step If you cannot see the stitch under the fuzz, feel for it with the hook tip. Chenille is worked as much by touch as by sight.

3

Step 3: Make the Second Ear

5:48
Step 3: Step 3: Make the Second Ear

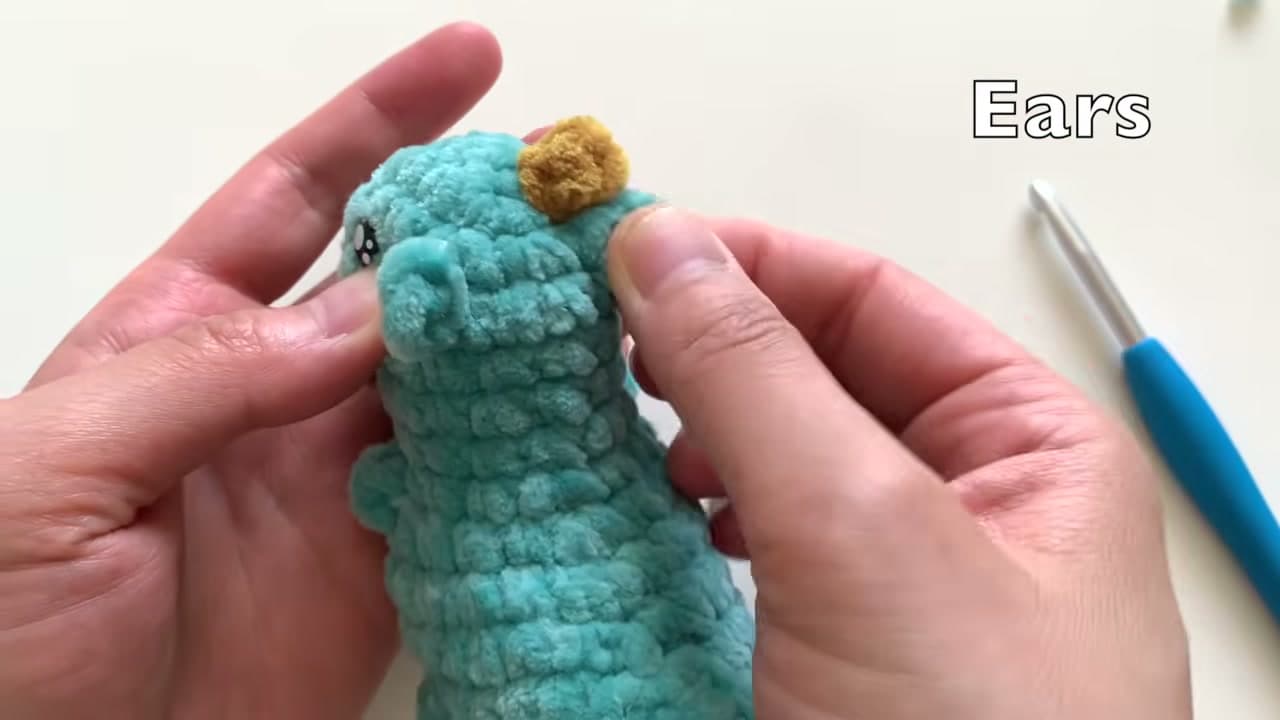
Repeat the same attach-chain-single-crochet-slip-stitch sequence on the other side of the head. Eyeball it against the first ear so the pair sits level and symmetrical. Small differences in placement change the whole expression, so take a second to compare before you fasten off.

Pull the starting tails through to the inside and weave them in with your hook or a needle. The head now has two soft little ears near the back, and the dragon face starts to come together.

Tip

Watch this step Line the second ear up with the first by counting stitches from the center, not by eye alone. It keeps them even.

4

Step 4: Crochet the Horns

6:48
Step 4: Step 4: Crochet the Horns

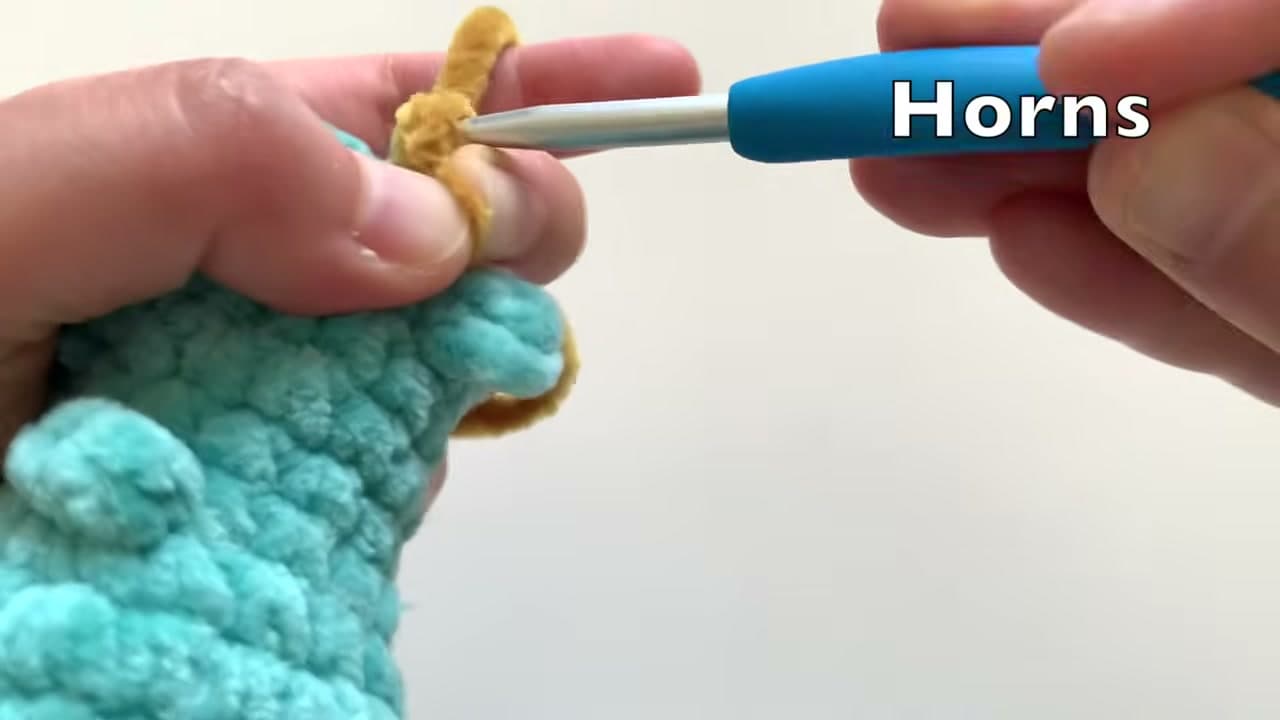
Switch to your yellow yarn for the horns. Work into round two, one round above the ears, and put each horn just above and in front of an ear. Pull the yarn through the stitch to start.

Chain two, slip stitch into the second chain from the hook, then slip stitch back into your starting stitch and fasten off with a short tail. Make a second horn to match on the other side. Pinch each one between your fingers so it stands up tall.

Tip

Watch this step A contrasting horn color pops against the body. Yellow or cream reads as a classic dragon horn, but any bright shade works.

5

Step 5: Start a Wing with White Yarn

9:24
Step 5: Step 5: Start a Wing with White Yarn

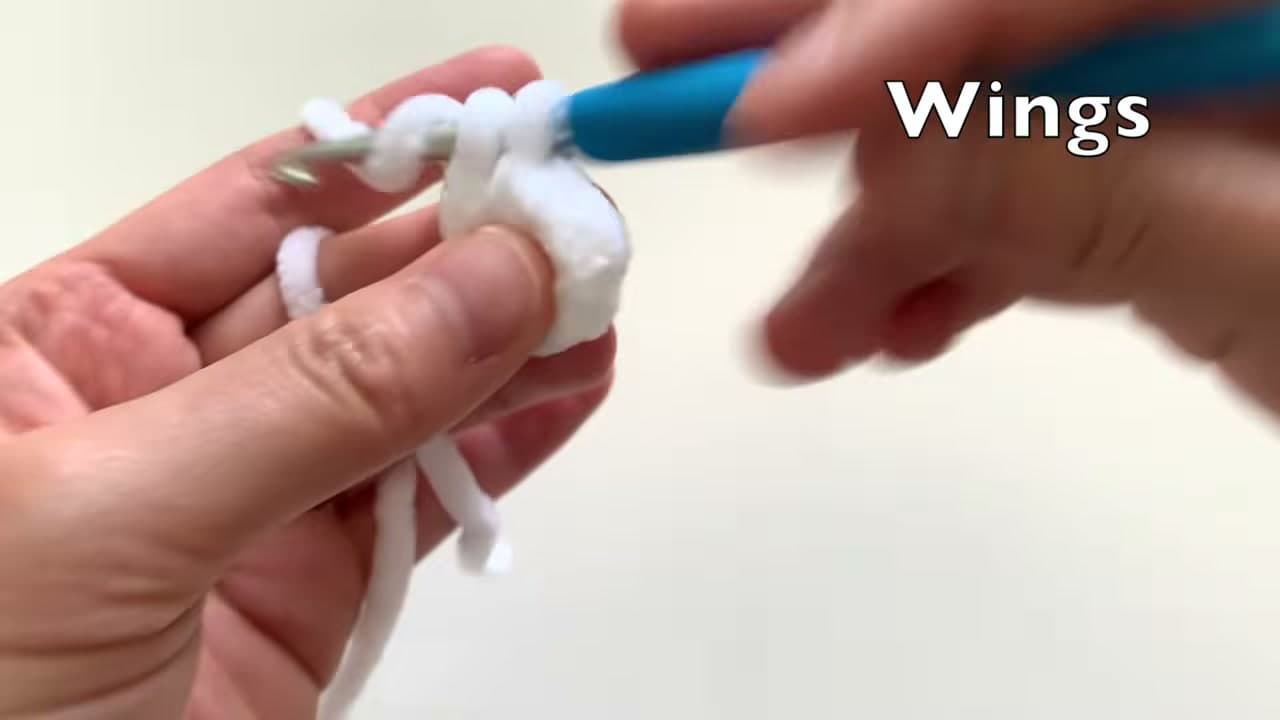
Each wing is worked in two colors, starting with white for the inner section. Make a slipknot and chain five. Then work back along that chain to build the pale center of the wing.

Put a half double crochet into the second chain from the hook. In the next chain, work a double crochet increase, which is two double crochets in the same stitch. Follow with one half double crochet, then a single crochet in the last stitch. You now have the white half of the wing.

Tip

Watch this step Keep your chain a little loose. A tight starting chain is hard to work back into, especially with fuzzy chenille.

6

Step 6: Finish the Wing in Turquoise

10:48
Step 6: Step 6: Finish the Wing in Turquoise

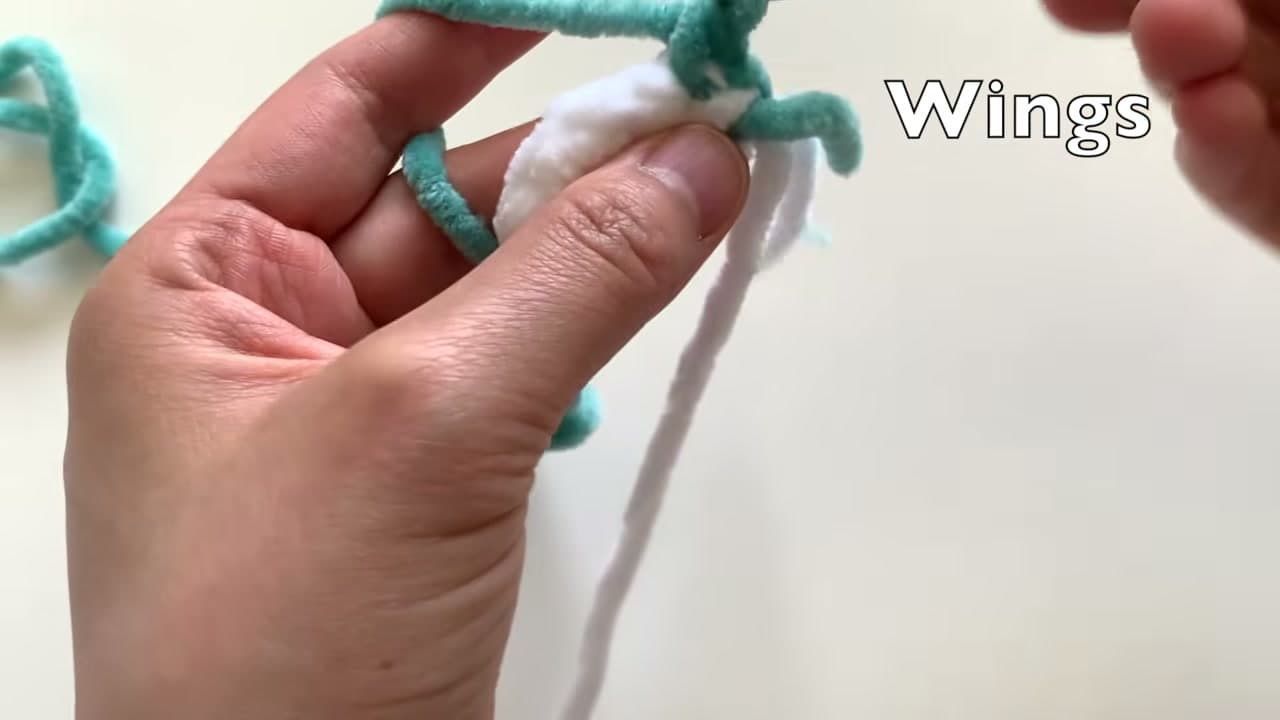
Switch to your dragon color for the outer edge of the wing. Slip stitch to join, then turn the piece and work back along the top of the stitches you just made. Skip the first slip stitch, then single crochet across, adding two single-crochet increases along the way to round the outer curve.

Fasten off with a long tail so you can sew the wing on later, and weave in the short ends. Make a second wing the same way so you have a matching pair.

Tip

Watch this step Leave the sewing tail longer than you think you need. It is easier to trim excess than to re-thread a short tail mid-seam.

7

Step 7: Sew On the Wings and Finish

12:12
Step 7: Step 7: Sew On the Wings and Finish

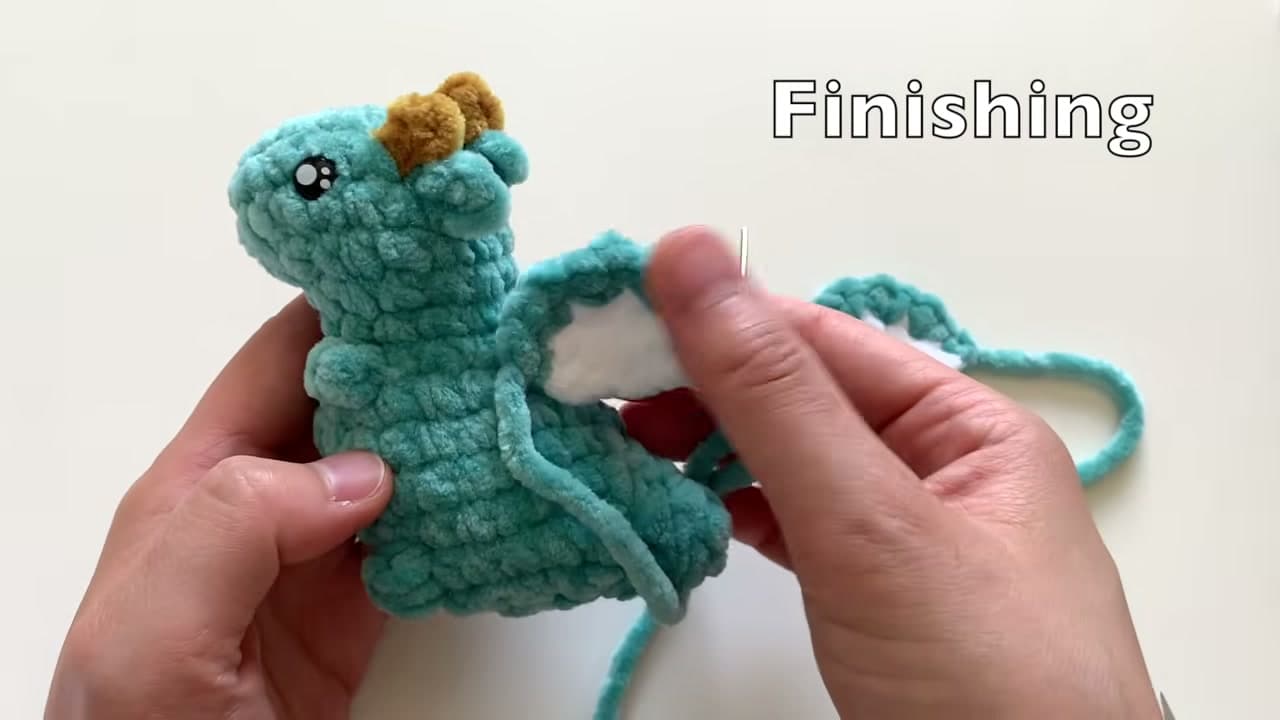
Thread the long turquoise tail onto your yarn needle and sew a wing to each side of the body. Position them around rounds seven and eight, roughly at arm level, and line them up with the ears so the dragon looks balanced from the front.

Weave in the last of the tails and hide them inside the body. That is your pocket dragon done. It is squishy, pocket-sized, and makes a great gift or fidget toy - and now you have the pattern to make a whole hoard of them.

Tip

Watch this step Pin the wings on before you sew. A couple of stitch markers hold them in place so you can check the look from every angle first.

Products Used

☐ The Checklist

How to Crochet a Dragon (Pocket Dragon Amigurumi, Step by Step)

Tools
4
Materials
3
Steps
7
Video
13 min

Tools we recommend

Your Guide

Sweet Softies

As an Amazon Associate we earn from qualifying purchases. Links on this page may be affiliate links - clicking them and buying doesn't change your price, but helps support ShowMeStepByStep.

Tags

Free printable

Get the Crochet Cheat Sheet

Every basic stitch on one printable page. No spam, one-click unsubscribe.

Did this work for you?

What's next

Related collections

Curated theme pages that include this tutorial.

Weekly Digest

Liked this crochet tutorial?

Pick the categories you want to hear about. Weekly digest of new step-by-step tutorials. No spam, easy unsubscribe.

Send me tutorials about

We only email about new tutorials. Easy unsubscribe anytime.