How to Make a Resin Ring

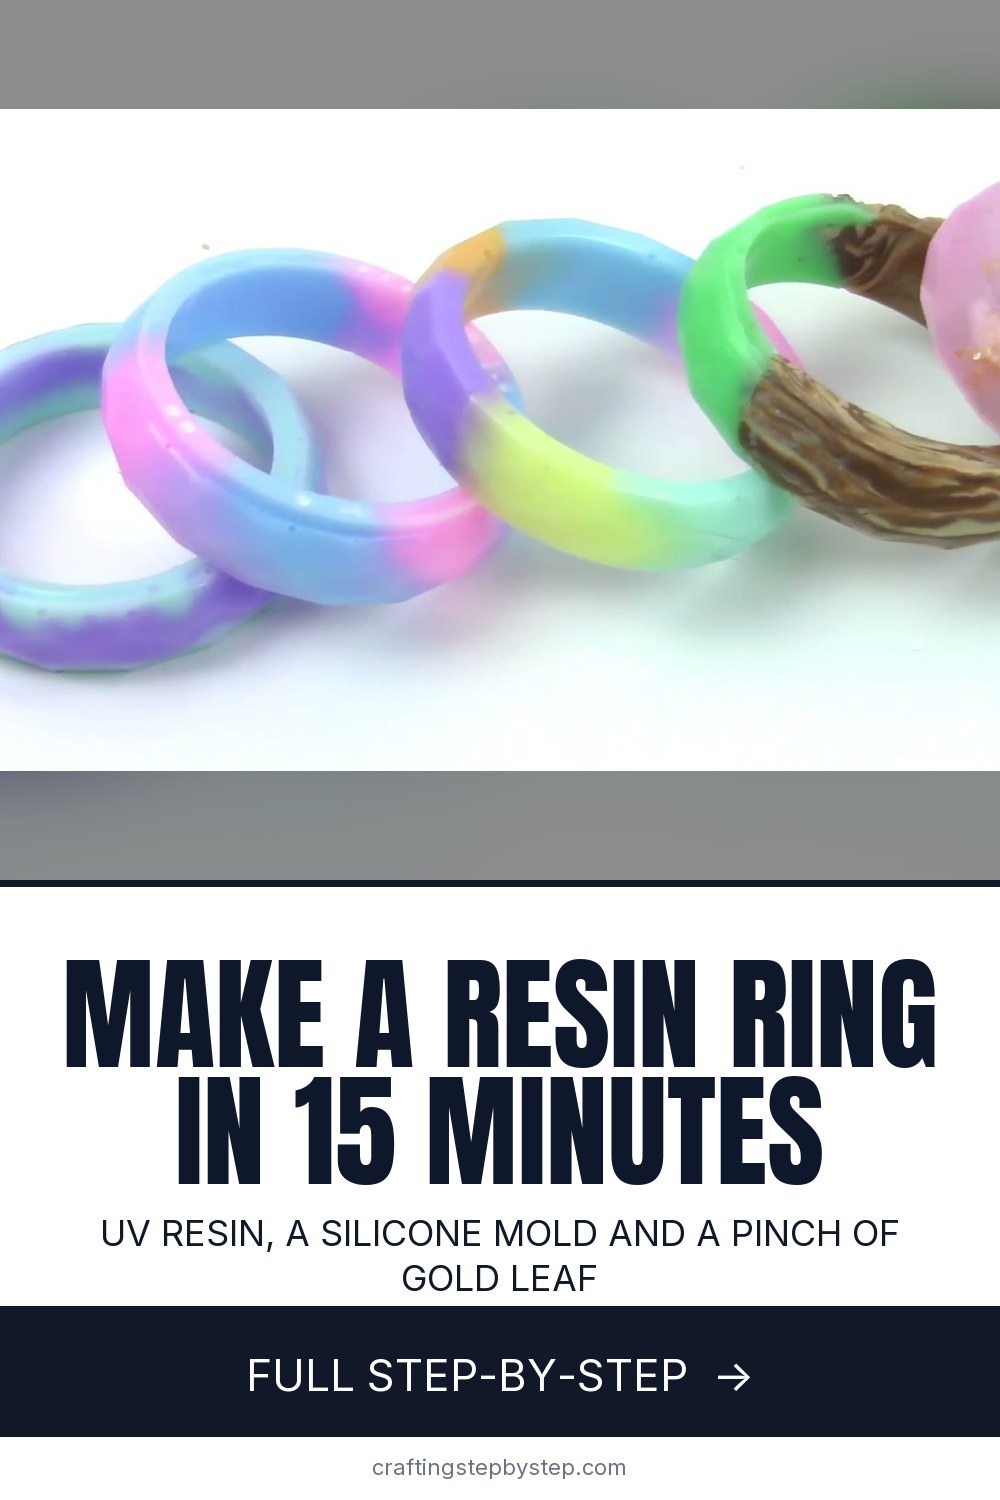
The finished result: How to Make a Resin Ring
  • Difficulty: Easy
  • About 20 minutes
  • 10 steps

You tapped Save

Save this project for later

We'll email you a link, no password.

How to Make a Resin Ring

  • Your saved projects in one list
  • Your ticked steps on any device

Check your inbox for an email from us. Not there? Look in your spam folder.

Print

Steps written out by Crafting Step by Step from NerdECrafter's video (opens YouTube) (10:57). Published .

A resin ring is one of the quickest resin projects you can make. With UV resin and a silicone ring mold, you can go from a clear cup of resin to a ring on your finger in about fifteen minutes. Jackie of NerdECrafter makes a whole row of them, from pastel swirls to gold leaf, and this tutorial follows her method for one ring, plus the tricks that apply to every design.

How to make a resin ring: the short version

  • Tint UV resin with a little pigment.
  • Push it into a silicone ring mold so there are no gaps at the bottom.
  • Pop bubbles, add gold leaf or glitter, and wipe the rim clean.
  • Cure it under a UV light, then pop it out.
  • Sand off any overfill and patch bubbles with a dab more resin.

UV resin or two-part epoxy?

UV resin comes ready to use from the bottle and cures in a couple of minutes under a UV lamp or flashlight. That makes it ideal for small pieces like rings, where you can cure in thin layers. Two-part epoxy is cheaper by the ounce but needs measuring, mixing and a day or more to cure. For a first ring, UV resin is far less fuss.

Getting the size right

Ring molds come in set sizes, so check the inner diameter against a ring you already wear. Many molds are sold as a set of several sizes. A mold labeled with US ring sizes saves guesswork. Remember the band is thicker than a metal ring, so a size up can feel more comfortable.

Do not overfill

Most ring molds have a fill line where the channel narrows. Fill past it and you get a lip on the ring that has to be sanded off, which is how Jackie's first ring went. Fill a little short, cure, and top up if you need to.

Safety

  • Wear nitrile gloves. Uncured resin can irritate skin.
  • Work in a ventilated room and cover your table with wax paper.
  • Keep the torch moving and well away from the silicone, and never leave it lit.
  • Sand resin wet or wear a dust mask. The dust is not good to breathe.

Common problems

  • Sticky surface. Not cured enough. Give it more time under the light, on every side.
  • Bubbles on the edge. Fill the gap with a drop of resin and cure again.
  • Cloudy finish. That is the mold texture. Brush on a thin coat of clear resin and cure it for shine.
  • Inclusions float up. Push them down with a toothpick before curing.

Design ideas

Try two or three pastel colors in one mold for a swirl, dried flowers in light blue resin, star glitter, crushed gems or holographic flakes. Layer colors one on top of another, curing between each, for stripes around the band. A matching stack makes a sweet gift for a granddaughter.

More resin projects

New to it? Start with how to use UV resin and how to use resin molds. Finish edges with how to sand resin, then try resin earrings or sealing flowers in resin.

Free printable

Print the steps and supply list for this project

One page you can take to the table. Free with a free account, no password.

Get the free printable

What you'll need

Free, for this project

Get this checklist by email

  • All 15 tools and materials, with tick boxes
  • A link to print all 10 steps on paper, to keep by you while you craft

No password. The whole tutorial stays free on this page.

Quick answer

Make a resin ring with UV resin and a silicone mold. An easy project: about 20 minutes. Materials cost about $1 to $3. You need 15 things, including UV resin, UV resin pigment and gold leaf flakes. The 10 steps start with tint the UV Resin for the Resin Ring, push the Resin Into the Silicone Ring Mold, pop Bubbles in the Resin Ring Mold With a Torch and add Gold Leaf Flakes to the Resin Ring.

Step-by-step guide

10 steps, about 11 minutes. Tap a picture to jump to that step. Your progress saves automatically.

Tick each step off as you go.

  1. Step 1: Tint the UV Resin for the Resin Ring

    Watch this step · 2:00

    Pour a small amount of clear UV resin into a plastic mixing cup. A ring takes very little, so start with about a teaspoon. Add a tiny dab of opaque UV pigment and stir it in with a wooden stick until the color is even. Go easy on the pigment. Too much can stop the light from reaching the middle, and the ring will not cure all the way through.

    Tip:

    Snip the bottle nozzle a little wider if the resin comes out too slowly.

    Back to all steps

  2. Step 2: Push the Resin Into the Silicone Ring Mold

    Watch this step · 2:14

    Lay wax paper on your table and set the silicone ring mold on it. Drip the tinted resin into the channel and use a toothpick to push it right down to the bottom and all the way around. Gaps at the bottom turn into holes in the ring. Stop below the fill line where the channel narrows, or you will be sanding off a lip later.

    Tip:

    Work around the mold slowly so the resin flows in rather than trapping air.

    Back to all steps

  3. Step 3: Pop Bubbles in the Resin Ring Mold With a Torch

    Watch this step · 2:22

    Look closely for tiny bubbles in the resin. A very quick pass of a small torch over the surface brings them up and pops them. Keep the flame moving and do not hold it on one spot, or you can scorch the resin or the silicone. A toothpick works for stubborn bubbles too. Lift them to the surface and pop them.

    Tip:

    No torch? Let the mold sit for a few minutes so bubbles can rise on their own.

    Back to all steps

  4. Step 4: Add Gold Leaf Flakes to the Resin Ring

    Watch this step · 2:32

    Tear small pieces of gold leaf over the mold and let them drop onto the resin. Gold leaf loves to stick to your fingers, so a toothpick or tweezers helps. Push the flakes down into the resin so they sit inside the ring rather than on the surface. A few flakes go a long way on something this small.

    Tip:

    Mix gold leaf with a pastel or clear resin. It glows against light colors.

    Back to all steps

  5. Step 5: Clean the Rim of the Ring Mold With Rubbing Alcohol

    Watch this step · 2:54

    Check the top of the mold. Any resin smeared on the rim will cure into a sharp ridge. Dip a cotton swab in rubbing alcohol and wipe the rim clean, along with any stray flakes. Keep the swab out of the filled channel. You only want to tidy the edges around it before you cure.

    Tip:

    A clean rim now saves a lot of sanding later.

    Back to all steps

  6. Step 6: Cure the Resin Ring Under a UV Light

    Watch this step · 3:00

    Shine a UV flashlight or lamp straight down onto the mold for about two minutes. Then turn the mold and shine it on the sides too, since silicone lets the light through. Thick or dark rings need longer. The resin is cured when the top feels hard and not tacky when you touch it lightly.

    Tip:

    Cure in two thinner layers if your ring is dark or packed with inclusions.

    Back to all steps

  7. Step 7: Pop the Cured Resin Ring Out of the Mold

    Watch this step · 3:04

    Flex the silicone gently and push the ring out from the back with your thumbs. Silicone is forgiving, so peel it away slowly rather than yanking. The surface may look a bit frosted from the mold texture. If any part still feels soft, put it back under the light for another minute.

    Tip:

    Cure the inside of the band too once it is out of the mold.

    Back to all steps

  8. Step 8: Sand the Edge of the Resin Ring Smooth

    Watch this step · 3:12

    If the resin went past the fill line, you will have a thin lip on one side. Rub that edge flat on sandpaper in small circles until it is smooth. Start with a coarser grit and finish with a fine one. Wipe away the dust when you are done. For shine, brush on a thin coat of clear UV resin and cure it again.

    Tip:

    Sand with a little water to keep the dust down.

    Back to all steps

  9. Step 9: Fill Air Bubbles on the Resin Ring Edge

    Watch this step · 5:14

    Spotted a bubble hole on the edge after unmolding? Squeeze a drop of the same colored resin into the gap so it sits level with the surface. Shine the UV light on it until it hardens. The patch blends in, and nobody will ever know. Use opaque resin for this on opaque rings so the repair does not show.

    Tip:

    Wipe off any excess before curing so the patch stays flush.

    Back to all steps

  10. Step 10: Add Glitter and Inclusions to a Resin Ring Mold

    Watch this step · 5:26

    The same method works for every design. Lay a thin layer of clear resin in the mold, then use a toothpick to place glitter stars, dried flowers or crushed gems into the channel. Fill the rest with resin and cure. Small pieces are fiddly in a narrow mold, so take your time and push each one under the surface before you shine the light.

    Tip:

    Snip dried flowers into tiny sprigs so they fit the band.

    Back to all steps

How to Fix Sticky UV Resin

Keep going

How to Fix Sticky UV Resin

10 steps · about 16 minutes

Keep going with resin art

More on this topic, picked for this resin ring.

You reached the last step

Save this project to come back to it

Your ticked steps, the free printable and your other saved makes, together in My Projects. Free, no password.

You tapped Save

Save this project for later

We'll email you a link, no password.

How to Make a Resin Ring

  • Your saved projects in one list
  • Your ticked steps on any device

Check your inbox for an email from us. Not there? Look in your spam folder.

Free printable

Printable sheet for this project

The bonus is hidden until you sign up.

Free with a free account, no password. Every step above stays open to everyone.

Products Used

The Checklist

How to Make a Resin Ring

Tools
9
Materials
6
Steps
10
Video
11 min

Tools we recommend

As an Amazon Associate we earn from qualifying purchases. Links on this page may be affiliate links - clicking them and buying doesn't change your price, but helps support Crafting Step by Step.

Tags

The Crafter's Weekly

New resin art tutorials, every Sunday

One short email with the week's best step-by-step guides. Free, no spam, unsubscribe anytime.

Did this work for you?

What's next

Related collections

Curated theme pages that include this tutorial.

Similar tutorials

Hand-picked next reads based on the one you just finished.

Liked this resin art tutorial?

Pick the crafts you want to hear about. One email every Sunday with new step-by-step tutorials. No spam, easy to unsubscribe.

Get more like this in your inbox

Weekly digest. Pick the categories you want. Unsubscribe anytime.

Send me tutorials about

We only email about new tutorials. Easy unsubscribe anytime.