How to Make Resin Earrings: Beginner DIY in 9 Easy Steps

Resin ArtEasy13:329 stepsBrowse more →

By CraftingStepByStepPublished Updated

Based on a video by Dezy Jewelry.

Resin earrings are one of those craft projects that look intimidating from the outside but come down to a tiny handful of moves: mix the resin, tint a cup, drop in some inclusions, pour into a mold, and wait. Once you do it once, you can spin off a dozen color stories without buying anything new. Dezy Butler from Dess Butler Jewelry takes a coaster-style swirl design and shrinks it into earring-sized teardrops and squares - white epoxy on one side, clear with gold foil on the other, with a thin gold mica line dividing them. The result is the kind of pair you would expect to find at a boutique price.

This walkthrough breaks the technique into nine steps so you can swap colors, mold shapes, and inclusions on your second batch. Try it once with the white-and-gold combo, then go rogue: pressed flowers, glitter, mica swirls, alcohol ink drops. Same nine moves, different look every time.

If you are new to resin, start here first

Resin can feel chemistry-heavy on the first project. These shorter resin tutorials cover the foundational mechanics on their own and pair well with this earring project.

Spin-off projects with the same supplies

The white-clear-foil-mica combination you mix for this project also works for keychains, coasters, flower jewelry, and pendants. Once your kit is open and you have gloves on, batch a few different pieces at the same time.

4 ways to vary the design

Once the technique clicks, swap out one ingredient at a time to get a new look without changing the moves:

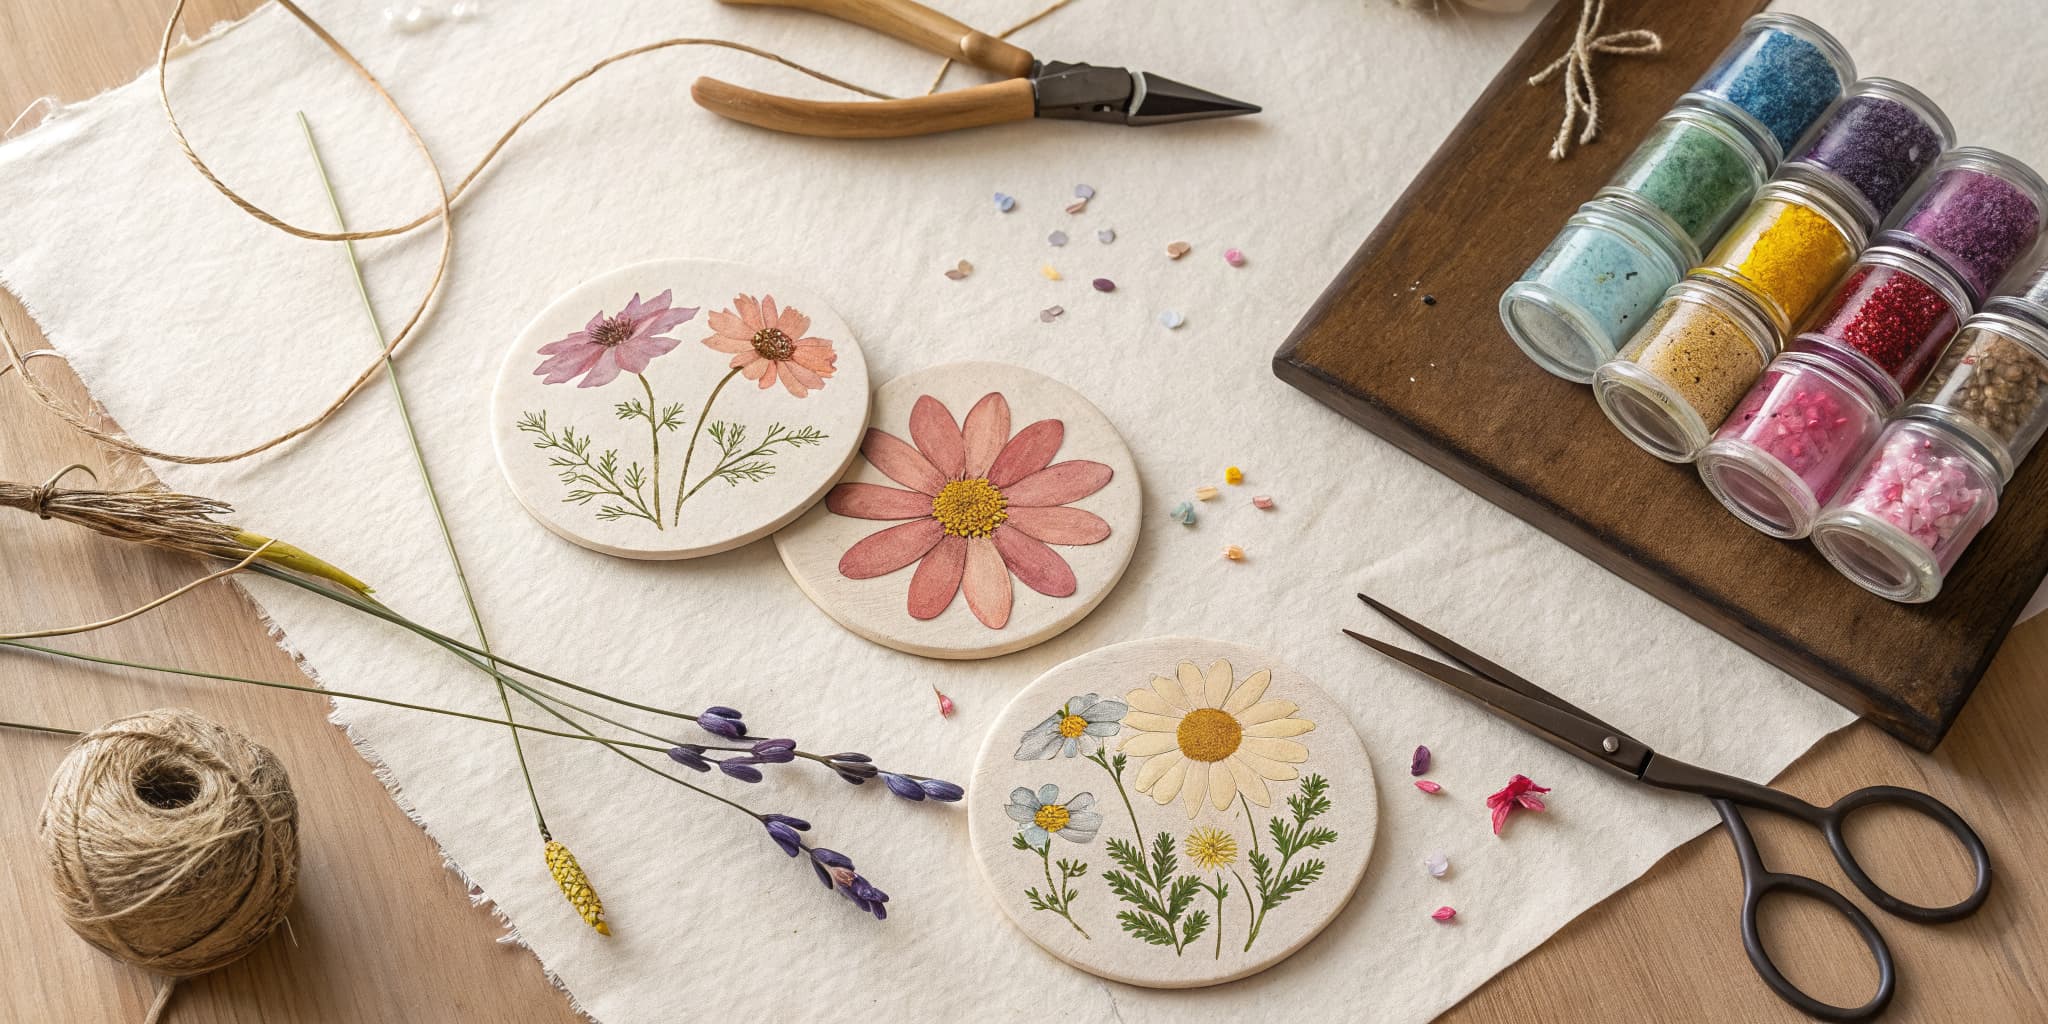
  1. Pressed dried flowers instead of gold foil - sub in real botanicals between layers for a delicate, garden-pretty piece.
  2. Mica swirl instead of solid colors - drop two or three mica colors into clear resin and pull a toothpick through them.
  3. Glitter mix instead of foil - holographic or chunky glitter floats the same way foil does and shifts in light.
  4. Alcohol ink drops instead of paint tint - a single drop of alcohol ink in clear resin makes ink-cloud watercolor effects.

The mold shapes can also rotate without touching the technique: teardrops, squares, diamonds, monstera leaves, circles - all sold as multi-cavity silicone earring molds on Amazon. Keep your favorite five molds in rotation and you have a year of earring colors at your fingertips.

Step-by-Step Guide

1

Step 1: Gather Materials and Set Up Safely

2:15
Step 1: Step 1: Gather Materials and Set Up Safely

Lay everything out on a newspaper or parchment-covered surface before you mix. You need two-part epoxy resin (parts A and B), silicone earring molds in your favorite shapes, white acrylic paint, gold mica powder, loose gold foil flakes, mixing cups, wooden stir sticks, jewelry pliers, earring hooks, and jump rings. A small heat torch or lighter helps clear bubbles later.

Resin is genuinely toxic until cured. Put on nitrile gloves, a respirator mask with chemical filters (not a paper dust mask), and wear clothes you don't mind ruining. Open a window for cross-ventilation, and ideally run a small fan to pull fumes away from your face. Skipping the mask is the most common rookie mistake and it adds up over time.

Tip

If your mask irritates your face, buy a full silicone respirator with replaceable cartridges. The disposable paper N95 does not filter out organic vapors and gives a false sense of safety.

2

Step 2: Mix the Epoxy Resin

1:55
Step 2: Step 2: Mix the Epoxy Resin

Measure equal parts of resin A (the resin itself) and resin B (the hardener) into a clean mixing cup. The 1:1 ratio is what makes the chemistry work. Off-ratio mixes either stay sticky forever or cure brittle. Most beginner-friendly resins like JDiction are marked clearly so you can pour by volume without a scale.

Stir slowly and steadily for about two minutes, scraping down the sides and bottom of the cup. Fast stirring whips in bubbles. Once it looks fully mixed and clear, let the cup rest for one to two minutes so trapped air can rise to the surface and pop on its own.

Tip

Warm both bottles in a bowl of warm tap water for five minutes before measuring. Warm resin pours thinner, mixes faster, and releases bubbles more easily than cold resin.

3

Step 3: Divide Resin Into Color Cups

2:35
Step 3: Step 3: Divide Resin Into Color Cups

Split the mixed resin into three smaller cups. You want roughly 50 percent of the batch in one cup for the white side, 50 percent in a second cup for the clear-with-foil side, and a very small amount - less than 1 percent - in a third tiny cup for the gold accent line that divides the two halves.

This is not a precise science. Eyeball it. The gold accent only needs enough to dribble one thin line per earring, so a teaspoon-sized pour into the third cup is plenty. The other two should look about evenly split.

Tip

Use tiny silicone cups instead of paper. Cured resin pops out of silicone with a flex, so you can rinse and reuse the cups for the next pour instead of throwing them away.

4

Step 4: Tint the White Cup

4:05
Step 4: Step 4: Tint the White Cup

Shake your acrylic paint bottle thoroughly before opening - settled paint gives uneven color. Drop two or three drops into the first cup of resin and stir gently. Pull the stir stick up vertically and watch how the resin runs off. If you can still see through it, add another drop. You want fully opaque, milky white with no see-through.

Don't go overboard on paint. Too much acrylic in resin makes the mix thick like cold honey and stops it from self-leveling in the mold. A few drops at a time, stirring between, gets you to opaque without overloading the chemistry.

Tip

Acrylic-based paint mixes cleanly with epoxy. Avoid oil paints and water-based craft inks - the water content can wreck the cure.

5

Step 5: Add Gold Foil to the Clear Cup

4:50
Step 5: Step 5: Add Gold Foil to the Clear Cup

Drop a small pinch of loose gold foil flakes into the second cup of clear resin. Tease them apart with the stir stick if they came out in clumps. You want the foil suspended in the clear resin with plenty of clear space between flakes so light still passes through.

The instinct on the first pour is to pile in too much foil and end up with a solid gold patch. Resist it. Fewer flakes spread further once the resin pours into the mold, and a sparse spray of foil looks more delicate and expensive than a dense brick of metal.

Tip

Save the leftover foil flakes - they keep indefinitely in a sealed jar. The same jar will outlast three or four earring projects.

6

Step 6: Mix the Gold Mica Accent

5:50
Step 6: Step 6: Mix the Gold Mica Accent

Sprinkle a pinch of gold mica powder into the tiny third cup. Stir until the resin looks like solid liquid metal - no clear epoxy showing through, no streaks of mica. You only need enough to draw one thin line per earring, so the cup should look like a teaspoon of melted gold paint by the time you finish stirring.

Mica gives a metallic shimmer that flat acrylic paint can't match. The light catches the suspended pigment particles and gives the gold a depth that flat-color resin doesn't have. It is the single ingredient that makes the finished earrings read as expensive.

Tip

Buy a rainbow mica powder set the first time you shop. It costs a few dollars more than a single jar and unlocks every color story you want to try next month.

7

Step 7: Pour the Layered Design Into the Mold

6:35
Step 7: Step 7: Pour the Layered Design Into the Mold

Pour the clear-with-foil resin into the bottom of each mold cavity at a diagonal angle - covering about a third to half of the cavity. Then pour the white resin to fill most of the rest of the cavity, leaving a small ribbon of empty space between the white and the foil section. Don't fill the mold all the way - the gold accent in the next move will fill in the rest and raise the level.

This is also where you batch your variants. Pour foil-at-bottom in one mold and foil-at-top in the next. Try a straight horizontal split in one and a diagonal in another. Same materials, four different looks coming out of the same pour session.

Tip

Keep the mold flat on the table. Tilting the mold while pouring lets the colors run together and lose their crisp border.

8

Step 8: Drop the Gold Accent Line and Pop Bubbles

7:55
Step 8: Step 8: Drop the Gold Accent Line and Pop Bubbles

Take the tiny cup of gold mica resin and dribble one thin line across the border between the white and the clear-foil halves. The line spreads on its own as the resin settles - you don't need to drag it. The gold creates a clean visual divider and adds a metallic shimmer right at the heart of the design.

Now check for bubbles, especially near the molded hole at the top of each earring. Pass a small heat torch quickly over the surface (two or three seconds, kept moving) to release trapped air. If a stubborn bubble sits right next to the hole, drop a tiny dab of clear resin on top of it and torch again.

Tip

Hold the torch six inches above the surface and keep it moving. Holding the flame in one spot scorches the resin yellow.

9

Step 9: Cure, Demold, and Attach Hooks

9:55
Step 9: Step 9: Cure, Demold, and Attach Hooks

Leave the mold flat on a clean, level surface, dust-free, for the full cure time on your resin's instructions. Fast-cure resins like JDiction demold in four hours, but a full 24-hour cure gives a harder, glossier finish. Cover the mold lightly with a cardboard box to keep dust off the wet surface.

Once cured, gently flex the silicone mold and pop each earring out. Pick whichever side you like best as the front - resin earrings have no "wrong" side, so the prettier swirl is the front. Open a jump ring with pliers, thread it through the molded hole and the earring hook, then close the ring. Repeat for the matching earring and you have a finished, store-shelf-quality pair ready to wear or gift.

Tip

If demolded edges feel slightly sharp, run them lightly across fine sandpaper (600 grit or higher) for a smooth finish. Less than 30 seconds per earring.

Products Used

☐ The Checklist

How to Make Resin Earrings: Beginner DIY in 9 Easy Steps

Tools
7
Materials
7
Steps
9
Video
14 min

Your Guide

Dezy Jewelry

As an Amazon Associate we earn from qualifying purchases. Links on this page may be affiliate links - clicking them and buying doesn't change your price, but helps support ShowMeStepByStep.

Tags

What's next

Related collections

Curated theme pages that include this tutorial.

Weekly Digest

Liked this resin art tutorial?

Pick the categories you want to hear about. Weekly digest of new step-by-step tutorials. No spam, easy unsubscribe.

Send me tutorials about

We only email about new tutorials. Easy unsubscribe anytime.