How to Use Resin Molds (Beginner Casting Guide)

Also in:Crafts

By CraftingStepByStepPublished Updated

Based on a video by LET'S RESIN.

This is LET'S RESIN's complete beginner walkthrough for casting with silicone molds, and it covers the part most tutorials skip: everything you do before and after the pour. Resin molds make it easy to turn liquid epoxy into coasters, figures, jewelry, and trinkets, but a clean casting comes down to a handful of small habits that beginners usually learn the hard way.

You start by measuring exactly how much resin your mold needs (a simple water trick), then test and prep the silicone so the piece releases cleanly. The pour itself is about going slow and tilting the mold into every detail, then clearing out bubbles with a tap, a stir stick, or a quick pass of heat. The last two steps - confirming a full cure and demolding gently - are where most pieces are won or lost.

Get these fundamentals down once and they carry over to any mold you pick up: deep geometric shapes, delicate jewelry bezels, big tray molds. Master the basics here and you can cast just about anything.

Step-by-Step Guide

1

Step 1: Measure How Much Resin Your Mold Needs

0:47
Step 1: Step 1: Measure How Much Resin Your Mold Needs

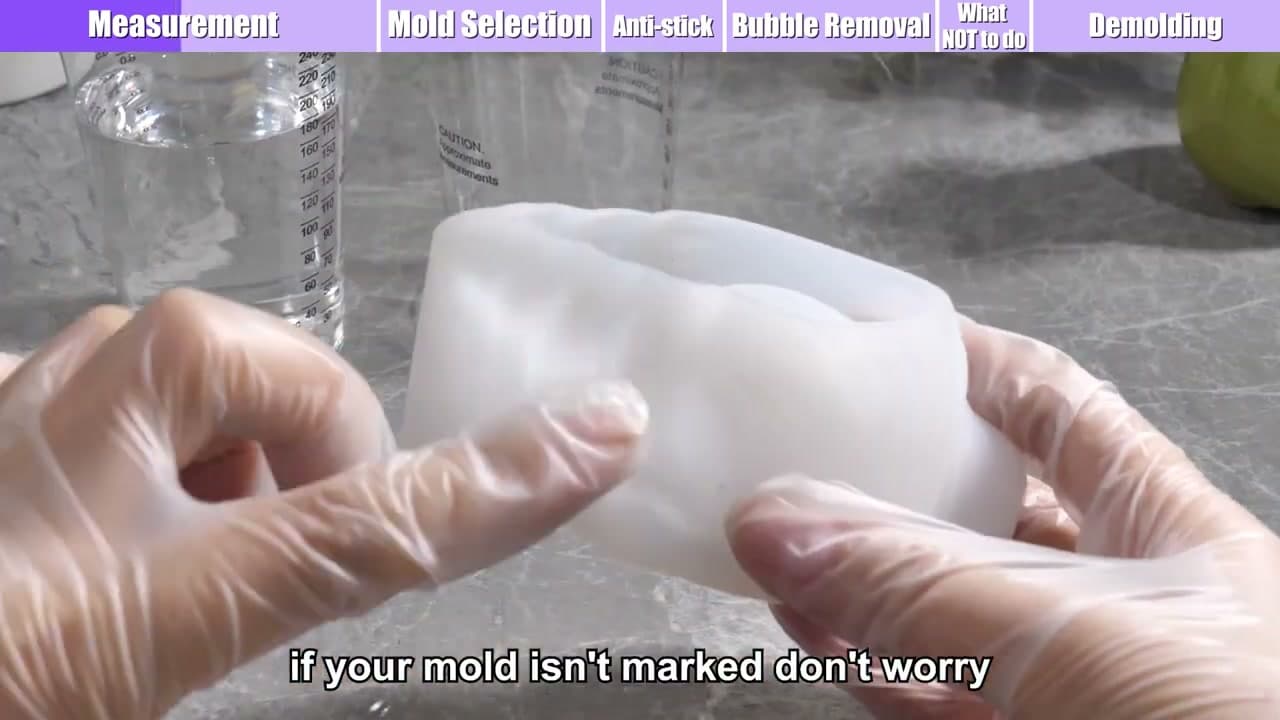
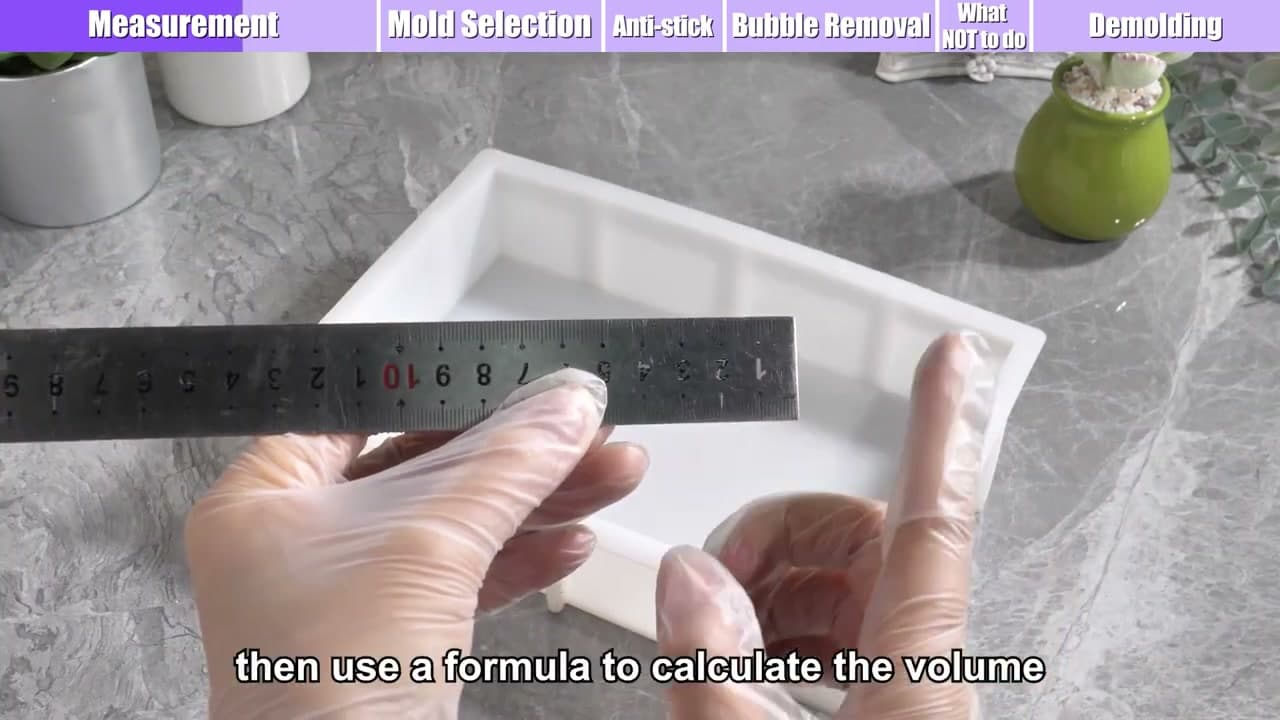
Before you mix a drop of resin, figure out how much the mold actually holds. Fill the empty mold with water right up to the top, then pour that water into a measuring cup and read the amount. That's almost exactly how much resin you'll need to mix.

This one trick saves you from the two most common beginner mistakes: mixing way too much (expensive waste) or too little (a half-filled piece you can't save). Dry the mold completely afterward, since any leftover water will cloud the resin.

Tip

Watch this step Knowing your exact volume also lets you measure pigment proportionally, so the color comes out the same every time you pour that mold.

2

Step 2: Calculate Volume for Large Molds

1:03
Step 2: Step 2: Calculate Volume for Large Molds

For a big or oddly shaped mold where the water trick is awkward, measure it instead. Take the length, width, and height with a ruler and multiply them together to get the volume in cubic units.

It doesn't have to be perfect. A rough number tells you whether you're mixing an ounce or half a cup, which is exactly the kind of ballpark that keeps you from over- or under-pouring on a large casting.

Tip

Watch this step Mix a little extra for large pours. It's better to have a small amount left over than to run short halfway through filling a deep mold.

3

Step 3: Test the Mold Quality

1:47
Step 3: Step 3: Test the Mold Quality

Check the mold before you trust it with a pour. Bend it back on itself, all the way to 180 degrees. Good silicone flexes easily and springs right back to its original shape with no cracks or white stress marks.

A quality mold is what gives you a glassy, detailed casting and an easy release. A stiff or brittle mold fights you on demolding and can tear, so it's worth knowing what you've got before resin is involved.

Tip

Watch this step Store your molds flat or loosely stacked, not crushed under heavy items. Silicone takes a set over time and a warped mold casts a warped piece.

4

Step 4: Prep a Foggy or Sticky Mold

2:52
Step 4: Step 4: Prep a Foggy or Sticky Mold

If a mold looks foggy or feels tacky inside, give it a light coat of mold release spray and let it dry for a few minutes before pouring. This is common on older molds or ones that have been used a lot.

The release spray puts a thin barrier between the resin and the silicone so your finished piece pops out clean instead of grabbing. A brand-new clear mold usually doesn't need this, so skip it unless the surface tells you otherwise.

Tip

Watch this step Don't overdo the spray. A heavy coat can leave a dull or textured film on the surface of your casting. A quick light mist is all it takes.

5

Step 5: Pour the Resin Slowly

3:25
Step 5: Step 5: Pour the Resin Slowly

With your resin mixed and ready, pour it into the mold a little at a time. Tilt and rotate the mold as you go so the resin creeps into every corner and detail instead of trapping air against the silicone.

Pouring slowly in a thin stream from a few inches up actually helps break bubbles as they form. Take your time here, especially with molds that have fine details or narrow points.

Tip

Watch this step For deep molds, pour in layers and let each one start to set before adding the next. Thick single pours can overheat, yellow, or crack as they cure.

6

Step 6: Remove the Bubbles

3:48
Step 6: Step 6: Remove the Bubbles

Once the mold is full, get the bubbles out. Tap the mold firmly on the table and give it a little shake to float them up to the surface. For stubborn ones, pop them with the tip of a popsicle stick or pass a heat gun quickly over the top.

Keep the heat gun moving and a few inches away. A couple of fast passes warms the surface enough to burst the bubbles without scorching the resin or melting the mold.

Tip

Watch this step Hold the heat source at an angle, not straight down, so you don't blow dust or push the resin around. The bubbles will rise and pop on their own with a little warmth.

7

Step 7: Confirm the Resin Is Fully Cured

4:35
Step 7: Step 7: Confirm the Resin Is Fully Cured

Resist the urge to demold early. Press a gloved finger or a stir stick against the top of the piece. If it's hard with no give, no tackiness, and no dent, it's cured and ready. If it dimples or feels soft, it needs more time.

Cure times vary by resin brand and pour depth, anywhere from a few hours to a full day. Demolding too soon is the number one way to ruin an otherwise perfect casting, so let it finish.

Tip

Watch this step Cure in a warm room. Resin sets faster and harder around 75 to 80F. A cold space slows the cure way down and can leave the surface permanently sticky.

8

Step 8: Demold Your Finished Piece

4:55
Step 8: Step 8: Demold Your Finished Piece

Now for the satisfying part. Flex the mold gently from the edges to break the seal, then push from the back to ease the piece out. Don't yank on the casting itself.

If it's being stubborn, you've got options: a little soapy water or rubbing alcohol around the edge helps it slide, or pop the whole mold in the fridge for about 20 minutes. The silicone contracts slightly when cold and lets go of the piece. Then sand or polish any rough spots and your casting is done.

Tip

Watch this step The fridge trick is the gentlest release for detailed or delicate pieces. Twenty minutes is plenty, and the cold won't hurt a fully cured casting.

Products Used

☐ The Checklist

How to Use Resin Molds (Beginner Casting Guide)

Tools
7
Materials
6
Steps
8
Video
6 min

Your Guide

LET'S RESIN

As an Amazon Associate we earn from qualifying purchases. Links on this page may be affiliate links - clicking them and buying doesn't change your price, but helps support ShowMeStepByStep.

Tags

Test your knowledge

Did the lesson stick? Find out in 2 minutes.

5 quick questions covering what you just read. No signup, no score saved — just a gut check.

Quick reference

Key takeaways from How to Use Resin Molds (Beginner Casting Guide)

5 questions, answers, and one-line explanations. Tap to expand.

  1. 1.Why fill the empty mold with water before mixing any resin?

    Answer: Tells you how much to mix

    Pour the water into a measuring cup and you have the exact resin volume. Saves the two beginner mistakes: way too much (waste) or too little (half-filled piece).

  2. 2.How do you test whether a silicone mold is good quality?

    Answer: Bend it back 180 degrees

    Quality silicone bends 180 degrees and springs back with no cracks or white stress marks. A stiff or brittle mold fights you on demolding and can tear.

  3. 3.A mold looks foggy or feels tacky inside. What's the fix?

    Answer: A light mist of mold release

    A light coat of mold release spray puts a thin barrier between resin and silicone so your finished piece pops out clean. Don't overspray or it leaves a dull film.

  4. 4.Why pour the resin slowly, tilting and rotating the mold?

    Answer: Resin creeps into every detail

    Slow, tilted pouring gets resin into every corner without trapping air against the silicone. Pouring in a thin stream from a few inches up also breaks bubbles as they form.

  5. 5.A cured casting refuses to release. What's the gentlest fix?

    Answer: Pop the whole mold in the fridge

    Twenty minutes in the fridge. The silicone contracts slightly when cold and releases its grip without any prying or pressure on a delicate piece.

What's next

Related collections

Curated theme pages that include this tutorial.

Weekly Digest

Liked this resin art tutorial?

Pick the categories you want to hear about. Weekly digest of new step-by-step tutorials. No spam, easy unsubscribe.

Send me tutorials about

We only email about new tutorials. Easy unsubscribe anytime.