How to Paint Shadows and Highlights in Acrylics With Color Theory

The finished result: How to Paint Shadows and Highlights in Acrylics With Color Theory
  • Difficulty: Easy
  • About 45 minutes
  • 9 steps

You tapped Save

Save this project for later

We'll email you a link, no password.

How to Paint Shadows and Highlights in Acrylics With Color Theory

  • Your saved projects in one list
  • Your ticked steps on any device

Check your inbox for an email from us. Not there? Look in your spam folder.

Print

Steps written out by Crafting Step by Step from Saena Fine Art's video (opens YouTube) (4:57). Published .

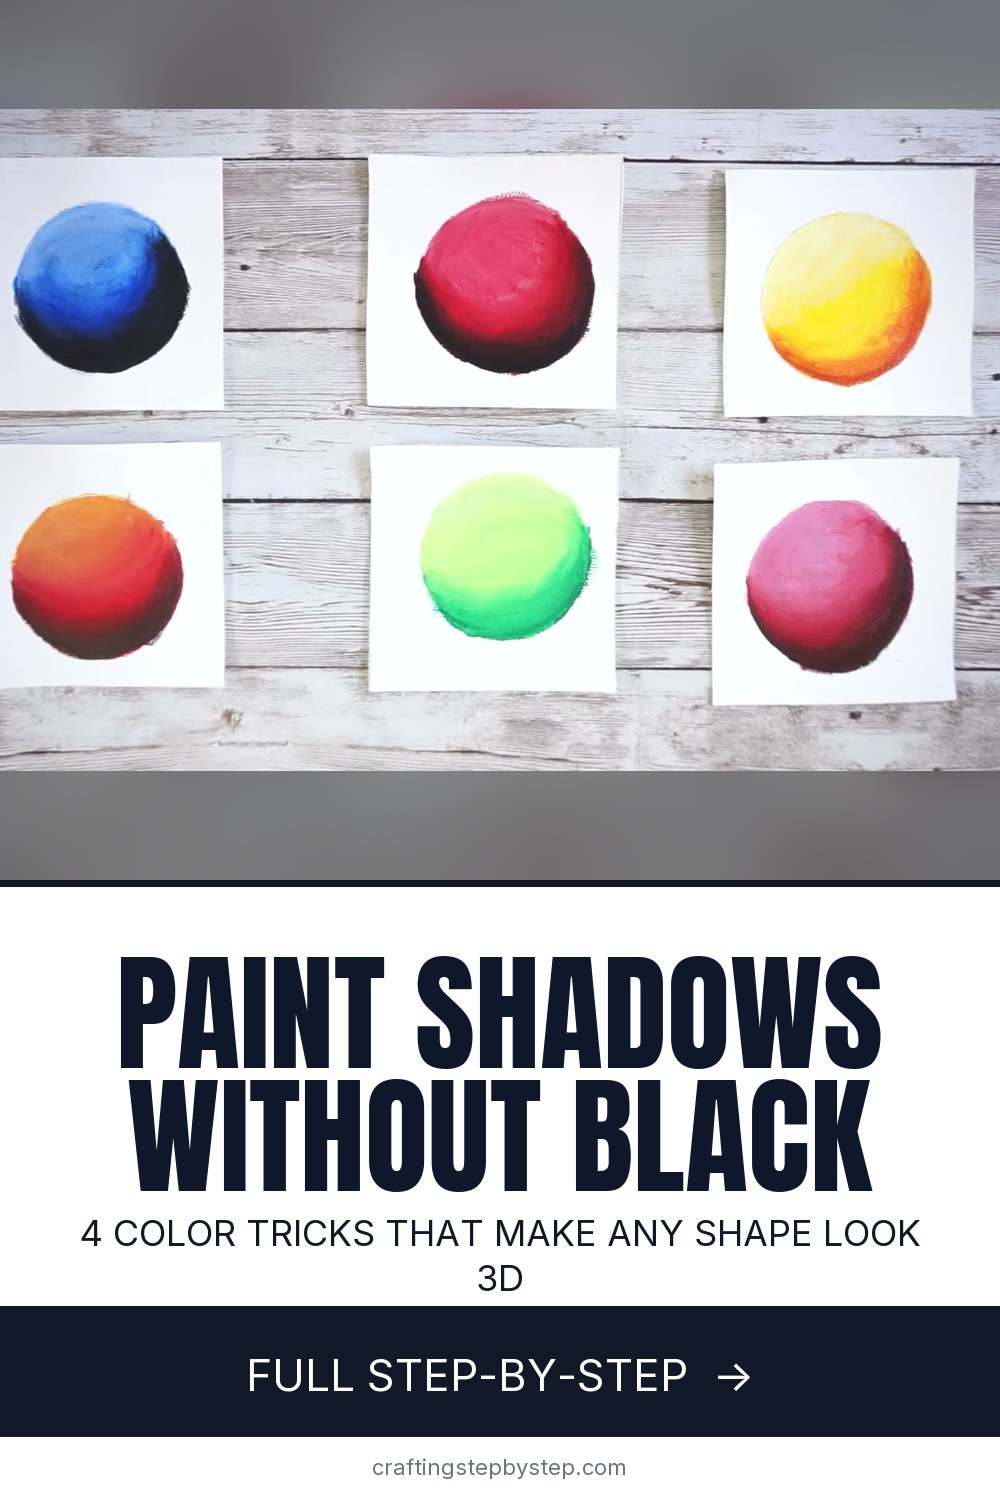
Shadows and highlights are what turn a flat circle into a ball you could pick up. Most of us reach for black and white first. It works, but it can leave the color muddy and dull. Saena from Saena Fine Art paints the same red sphere four different ways to show how color theory gives you livelier shadows and highlights. Every ball starts with the same pyrrole red base, so the only thing that changes is the colors you shade with.

How to paint shadows and highlights in acrylics: four color schemes

  • Black and white. Simple and safe, but greyish.
  • Complementary. Darken with the color opposite on the wheel.
  • Warm or cool. Shade with oranges and light with yellows, or the reverse with blues and purples.
  • Analogous. Use the neighbours on the color wheel.

Why black makes shadows look dead

Black does more than darken. It dulls the color and can shift it, so a red shadow made with black can go brown or even a little green. White cools and chalks a color as it lightens it. Real shadows are rarely grey. They pick up color from the sky, the table and the objects nearby. Mixing your darks and lights from other colors keeps the painting rich.

Find the light source first

Before you mix anything, decide where the light comes from. Saena lights every sphere from the upper left. The highlight sits on that side. The core shadow wraps around the opposite, lower right edge. Keep the same light direction across a whole painting, or the objects will look pasted in.

Complementary pairs to remember

Base colorMix in for shadow
RedGreen
BlueOrange
YellowPurple

Add the complement a little at a time. A touch darkens and softens. Too much turns the mix to mud.

Warm versus cool lighting

Warm shadows and highlights feel sunny and full of energy. Cool ones feel calm, quiet or wintry. You can also mix them on purpose: warm light with cool shadows is the classic look of a sunny afternoon. Pick a scheme that fits the mood you want before you start.

Practice ideas

Paint a row of the same colored circles on scrap cards, like Saena did, and shade each one a different way. Pin them up as a reference chart. Then try the same idea on an apple, an orange or a cup. It is a cheap, low pressure way to learn what each mix does.

Common problems

  • Muddy shadow. Too much complement. Add more of the base color back.
  • Harsh edge between light and dark. Mix a middle value and blend it over the line.
  • Highlight disappears. Acrylic dries darker. Go a little lighter than you think.

Keep learning

Pair this with mixing acrylic paint colors and blending acrylic paint. For deeper shadows, layer thin glazes. The same light and shadow ideas apply in pencil too: see how to shade.

Free printable

Print the steps and supply list for this project

One page you can take to the table. Free with a free account, no password.

Get the free printable

What you'll need

Free, for this project

Get this checklist by email

  • All 7 tools and materials, with tick boxes
  • A link to print all 9 steps on paper, to keep by you while you craft

No password. The whole tutorial stays free on this page.

Quick answer

How to paint shadows and highlights in acrylics without black and white. An easy project: about 45 minutes. You need 7 things, including acrylic paints, synthetic flat or round brushes and palette paper. The 9 steps start with paint Flat Base Circles to Practice Shadows and Highlights, mix Black and White Into the Red for a Basic Shadow and Highlight, shade the First Sphere With Black and White Acrylics and find the Complementary Color on the Color Wheel.

Step-by-step guide

9 steps, about 5 minutes. Tap a picture to jump to that step. Your progress saves automatically.

Tick each step off as you go.

  1. Step 1: Paint Flat Base Circles to Practice Shadows and Highlights

    Watch this step · 0:28

    Start with a few circles on scrap paper or small cards, all in the same base color. Saena uses pyrrole red for every sphere. Using one base color means the only difference between them will be the shadow and highlight colors, so you can compare the results side by side. Two coats give a solid, even base. Let it dry before you shade.

    Tip:

    Lightly pencil a small arrow in the corner to remind you where the light comes from.

    Back to all steps

  2. Step 2: Mix Black and White Into the Red for a Basic Shadow and Highlight

    Watch this step · 0:47

    For the first sphere, squeeze out black and white on your palette paper next to the red. Mix a little black into some red for the shadow, and a little white into red for the highlight. Saena mixes them into the base color rather than painting them straight on. That gives better control, and you can always add more black or white later.

    Tip:

    Add black a tiny bit at a time. It overpowers red very fast.

    Back to all steps

  3. Step 3: Shade the First Sphere With Black and White Acrylics

    Watch this step · 1:01

    Paint the dark red mix around the lower right edge of the circle, following its curve. Blend it toward the middle. Then add the light mix to the upper left where the light hits. The ball looks round, and that is the point of comparison. Notice how the shadow looks a little grey and the highlight a little chalky.

    Tip:

    Curve your brush strokes around the form. Straight strokes flatten a sphere.

    Back to all steps

  4. Step 4: Find the Complementary Color on the Color Wheel

    Watch this step · 1:40

    Look at a color wheel. Complementary colors sit directly across from each other: blue and orange, yellow and purple, red and green. When you mix a color with its complement, they cancel each other out a little. The mix gets darker and less saturated without turning grey the way black does. For a red sphere, the complement is green.

    Tip:

    Keep a small printed color wheel by your palette until the pairs are second nature.

    Back to all steps

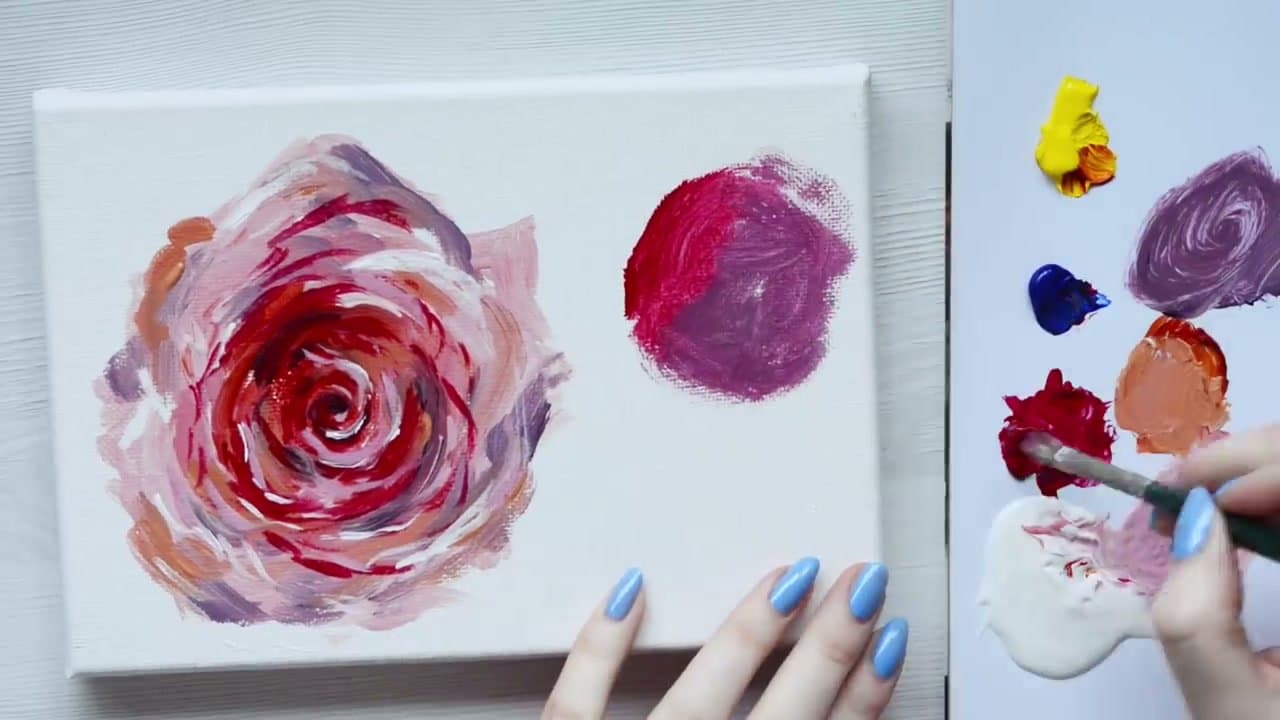
  5. Step 5: Mix a Complementary Shadow Color With Phthalo Green

    Watch this step · 2:11

    Pull a small amount of phthalo green blue shade into some red on your palette. It makes a much deeper, richer red. Saena chose the blue shade on purpose. Its blue undertone nudges the shadow slightly toward purple, which adds depth. Add the green slowly and test the mix until it is dark enough for the shadow side.

    Tip:

    Phthalo green is very strong. Start with a speck on the tip of the brush.

    Back to all steps

  6. Step 6: Paint a Pink Highlight on the Complementary Sphere

    Watch this step · 2:29

    Shade the second sphere with the green red mix on the lower right. For the highlight, Saena uses a ready made light magenta instead of red plus white. It is made from a different red, so it adds an extra layer of color to the lit side. Blend it into the upper left in soft, curved strokes.

    Tip:

    Let the shadow dry a few minutes first so the highlight does not turn muddy.

    Back to all steps

  7. Step 7: Mix Warm Orange Shadows and Yellow Highlights

    Watch this step · 3:06

    Split the color wheel in half and you get warm colors (reds, oranges, yellows) and cool colors (greens, blues, purples). For a warm scheme, Saena mixes Van Dyke brown with a little quinacridone nickel azo gold for an orange brown shadow. Hansa yellow medium is the highlight. A red mixed into yellow makes a red orange in between color.

    Tip:

    Any warm brown and gold you own will work for this exercise.

    Back to all steps

  8. Step 8: Paint the Warm Sphere From Shadow to Highlight

    Watch this step · 3:17

    Lay the brown orange shadow around the lower edge of the third sphere. Blend the red orange into the middle, then brush the yellow highlight onto the upper left. The same red ball now glows like it sits in sunlight. Warm schemes feel lively and energetic. A cool scheme with blues and purples would feel calm and quiet instead.

    Tip:

    Work from dark to light so the yellow stays clean and bright.

    Back to all steps

  9. Step 9: Shade a Sphere With an Analogous Color Scheme

    Watch this step · 3:58

    Analogous colors sit next to each other on the wheel. For this green sphere, Saena uses a dark green for the shadow, a mid green for the body and yellow for the highlight. The shading stays smooth and harmonious. Line all your spheres up when they are dry. They started out the same and now look completely different.

    Tip:

    Try a yellow ball shaded with oranges next. It is the same idea in a warm range.

    Back to all steps

How to Use Texture Paste

Keep going

How to Use Texture Paste

Keep going with painting

More on this topic, picked for this project.

You reached the last step

Save this project to come back to it

Your ticked steps, the free printable and your other saved makes, together in My Projects. Free, no password.

You tapped Save

Save this project for later

We'll email you a link, no password.

How to Paint Shadows and Highlights in Acrylics With Color Theory

  • Your saved projects in one list
  • Your ticked steps on any device

Check your inbox for an email from us. Not there? Look in your spam folder.

Free printable

Printable sheet and shopping list for this project

The bonus is hidden until you sign up.

Free with a free account, no password. Every step above stays open to everyone.

Products Used

The Checklist

How to Paint Shadows and Highlights in Acrylics With Color Theory

Tools
5
Materials
2
Steps
9
Video
5 min

Tools we recommend

As an Amazon Associate we earn from qualifying purchases. Links on this page may be affiliate links - clicking them and buying doesn't change your price, but helps support Crafting Step by Step.

Tags

The Crafter's Weekly

New painting tutorials, every Sunday

One short email with the week's best step-by-step guides. Free, no spam, unsubscribe anytime.

Did this work for you?

What's next

Related collections

Curated theme pages that include this tutorial.

Similar tutorials

Hand-picked next reads based on the one you just finished.

Liked this painting tutorial?

Pick the crafts you want to hear about. One email every Sunday with new step-by-step tutorials. No spam, easy to unsubscribe.

Get more like this in your inbox

Weekly digest. Pick the categories you want. Unsubscribe anytime.

Send me tutorials about

We only email about new tutorials. Easy unsubscribe anytime.