How to Do Dot Mandala Painting for Beginners

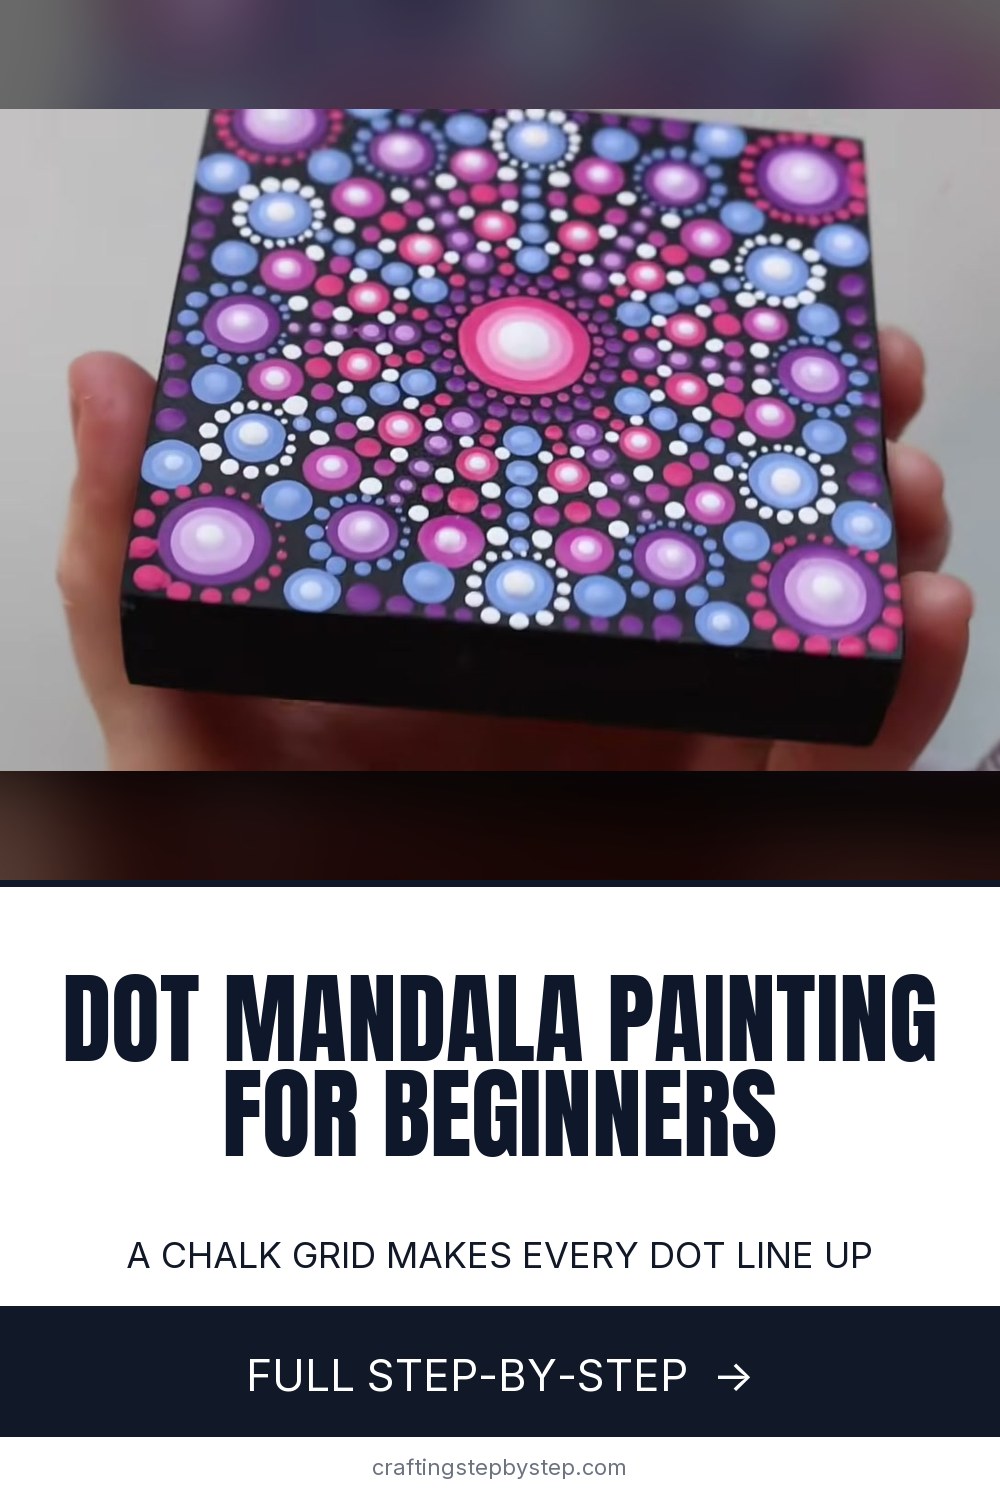
The finished result: How to Do Dot Mandala Painting for Beginners
  • Difficulty: Easy
  • About 2 hours, plus 12 hours to dry or set
  • 10 steps

You tapped Save

Save this project for later

We'll email you a link, no password.

How to Do Dot Mandala Painting for Beginners

  • Your saved projects in one list
  • Your ticked steps on any device

Check your inbox for an email from us. Not there? Look in your spam folder.

Print

Steps written out by Crafting Step by Step from The Dotting Center's video (opens YouTube) (17:13). Published .

Also in:Crafts

Dot mandala painting builds a glowing, symmetrical design out of nothing but dots. It looks complicated, but every dot follows a simple grid. Rachel Keough of The Dotting Center walks through a beginner mandala on a small black block with four colors plus white. She shows the stencil grid that keeps everything even, the tools that make each dot size, and how to fill in the spaces as you go.

How to do dot mandala painting: the short version

  • Base coat your surface black with chalky paint.
  • Chalk a 12-line grid and a few circles as guides.
  • Dot the center, then build rings of dots outward along the lines.
  • Fill the gaps with smaller dots, borders and lighter top dots.
  • Let it dry overnight, wipe off the chalk and varnish.

Dotting tools in plain words

A stylus is a pen-shaped tool with a small metal ball on each end. It makes the tiny dots. Dotting rods are flat-ended acrylic rods in graded sizes for the big dots. You can start with household stand-ins: a pencil eraser, a cotton swab, a toothpick and the back of a paintbrush all make round dots. A kit makes the sizes consistent, and that is what makes a mandala look tidy.

What to paint on

Rachel uses a wood block, but the same pattern works on a canvas, a smooth rock, a coaster or heavy card stock. A dark base makes colors glow. Chalky finish paint is the smart choice because a chalk pencil shows up on it and wipes off clean at the end.

Getting the paint right

Acrylic paint should be like heavy cream. Too thick and the dots form peaks. Too thin and they spread flat. Load the tool fresh for every dot when you want the same size. Wipe the tip between colors. Acrylics skin over fast, so a wet palette or a light mist of water keeps your colors usable for the whole session.

Walking the dots

Load the tool once and press dot after dot without reloading. Each dot comes out a bit smaller than the last, so you get a line that tapers from big to small. It is the easiest way to make petals, rays and star points.

Fixing mistakes

Stop every 15 minutes or so and let the paint dry. Then a misplaced dot on top wipes off with a damp cotton swab without dragging the wet dots around it. Rachel also uses a flat silicone tool to lift a bad dot before re-dotting it. Leaving a little bare space is fine, too. It gives the eye a place to rest.

Ideas for your first few

Paint a set of four on coasters, try one on a garden rock, or make a small block as a gift. Change only the color palette and the same grid looks brand new.

More painting to try

New to acrylics? Start with acrylic painting for beginners and how to mix acrylic paint colors. Put your mandala on stone with how to paint rocks. Learn how to fix mistakes in an acrylic painting and how to clean acrylic paint brushes.

Free printable

Print the steps and supply list for this project

One page you can take to the table. Free with a free account, no password.

Get the free printable

What you'll need

Free, for this project

Get this checklist by email

  • All 11 tools and materials, with tick boxes
  • A link to print all 10 steps on paper, to keep by you while you craft

No password. The whole tutorial stays free on this page.

Quick answer

Paint a dot mandala step by step: chalk a stencil grid, build rings with dotting tools, walk the dots and add glowing top dots. An easy project: about 2 hours, plus 12 hours to dry or set. Materials cost about $3 to $10. You need 11 things, including black chalky finish paint, matte varnish and dotting tools. The 10 steps start with chalk the Dot Mandala Grid With a Divider Stencil and draw Chalk Circles for the Dot Mandala Rings.

Step-by-step guide

10 steps, about 17 minutes. Tap a picture to jump to that step. Your progress saves automatically.

Tick each step off as you go.

  1. Step 1: Chalk the Dot Mandala Grid With a Divider Stencil

    Watch this step · 1:00

    Base coat your block black with chalky finish paint and let it dry. Lay a 12-line divider stencil over it and nudge it until the overhang is even on every side, so the center sits in the middle. Trace each slot with a white chalk pencil. You now have twelve even segments, the backbone of every ring you paint.

    Tip:

    No stencil? Fold a paper circle in half three times and use the creases as guides.

    Back to all steps

  2. Step 2: Draw Chalk Circles for the Dot Mandala Rings

    Watch this step · 1:26

    Set a compass point in the center and draw three circles about half an inch apart. These rings are guides, not rules. They help you keep each row of dots the same distance from the center all the way around. Then brush away the loose chalk dust so the paint grips the base coat instead of the powder.

    Tip:

    Chalk dust under a dot makes it bead up and slide. Dust well.

    Back to all steps

  3. Step 3: Paint the Center Dot of the Dot Mandala

    Watch this step · 2:18

    Pick four colors you like plus white, and pour a little of each on a palette. Dip the end of your largest dotting rod into the first color. Press it straight down into the center of the grid and lift straight up. You get one big round dot. Wipe the rod clean before you switch tools or colors.

    Tip:

    Hold the rod upright. Tilting it makes an oval dot.

    Back to all steps

  4. Step 4: Add the First Ring of Small Dots Around the Center

    Watch this step · 2:45

    Switch to the small end of a stylus. Place one tiny dot on each chalk line where it meets the center dot. Then add one more dot of the same size between each of those, so the center is fully ringed. Turn to the larger end of the stylus and add a slightly bigger dot in a new color between each pair.

    Tip:

    Turn the block as you go instead of reaching across your work.

    Back to all steps

  5. Step 5: Dot Every Other Line for the Next Mandala Ring

    Watch this step · 3:56

    This is where the stencil earns its keep. Take the smallest clear rod and place a dot on every other chalk line, a little farther out. Then switch color and dot the remaining lines. This ring does not have to match the rows inside it. Fill the spaces between with a stylus that fits two dots per gap.

    Tip:

    Choose tools by the space left, not by a set size.

    Back to all steps

  6. Step 6: Walk the Dots Out Into a Star Shape

    Watch this step · 5:15

    Load the largest stylus once and press four dots in a line straight out along a chalk line, without reloading. Each dot comes out a little smaller than the last. That is called walking the dots. Repeat on every other line in one color, then the remaining lines in a second color. The mandala turns into a star.

    Tip:

    Start the first dot touching the ring so the ray looks connected.

    Back to all steps

  7. Step 7: Ring the Large Dots With Small Border Dots

    Watch this step · 7:25

    Place big dots with a rod where the outer circle meets every other line. Then frame each one. Load a small stylus, start at the bottom center of a big dot and work dots up one side to the top. Repeat on the other side so the dots meet. Use a contrasting color for the next set of borders.

    Tip:

    Let the dots shrink as the paint runs low. It looks intentional.

    Back to all steps

  8. Step 8: Fill the Negative Space Around the Dot Mandala

    Watch this step · 10:02

    Look for the empty spots. Find a tool that fits each gap and add a dot there, keeping each new dot on the same circle as its neighbors. Put large dots in the corners, then border them too. Triangle-shaped gaps are perfect for walking the dots. Leave a bit of black showing if you like. The eye needs somewhere to rest.

    Tip:

    Let the painting dry every 15 minutes so mistakes wipe off cleanly.

    Back to all steps

  9. Step 9: Add Lighter Top Dots to Finish the Dot Mandala

    Watch this step · 12:45

    Mix a little white into each of your colors to make lighter tints. Use a smaller stylus to set a tint dot on top of each large dot, then a smaller white dot on top of that. The stacked dots give the mandala a glowing, raised look. Finish the center the same way with lighter and lighter rings.

    Tip:

    Let the first layer dry before you add top dots, or they sink in.

    Back to all steps

  10. Step 10: Wipe Off the Chalk and Varnish the Dot Mandala

    Watch this step · 16:18

    Let the painting dry overnight so the thick dots are hard all the way through. Wipe the chalk lines away with a damp cloth. Chalk pencil comes off with no scrubbing, so nobody will know there was a grid. Brush a thin, even coat of matte varnish over the top to protect the paint and even out the sheen.

    Tip:

    Varnish too soon and the brush flattens soft dots. Wait the full night.

    Back to all steps

How to Transfer a Sketch to Canvas (2 Easy Ways)

Keep going

How to Transfer a Sketch to Canvas (2 Easy Ways)

Keep going with painting

More on this topic, picked for this project.

You reached the last step

Save this project to come back to it

Your ticked steps, the free printable and your other saved makes, together in My Projects. Free, no password.

You tapped Save

Save this project for later

We'll email you a link, no password.

How to Do Dot Mandala Painting for Beginners

  • Your saved projects in one list
  • Your ticked steps on any device

Check your inbox for an email from us. Not there? Look in your spam folder.

Free printable

Printable sheet and shopping list for this project

The bonus is hidden until you sign up.

Free with a free account, no password. Every step above stays open to everyone.

Products Used

The Checklist

How to Do Dot Mandala Painting for Beginners

Tools
7
Materials
4
Steps
10
Video
17 min

Tools we recommend

As an Amazon Associate we earn from qualifying purchases. Links on this page may be affiliate links - clicking them and buying doesn't change your price, but helps support Crafting Step by Step.

Tags

The Crafter's Weekly

New painting tutorials, every Sunday

One short email with the week's best step-by-step guides. Free, no spam, unsubscribe anytime.

Did this work for you?

What's next

Related collections

Curated theme pages that include this tutorial.

Similar tutorials

Hand-picked next reads based on the one you just finished.

Liked this painting tutorial?

Pick the crafts you want to hear about. One email every Sunday with new step-by-step tutorials. No spam, easy to unsubscribe.

Get more like this in your inbox

Weekly digest. Pick the categories you want. Unsubscribe anytime.

Send me tutorials about

We only email about new tutorials. Easy unsubscribe anytime.