How to Embroider a Christmas Tree (Easy Hoop Ornament)

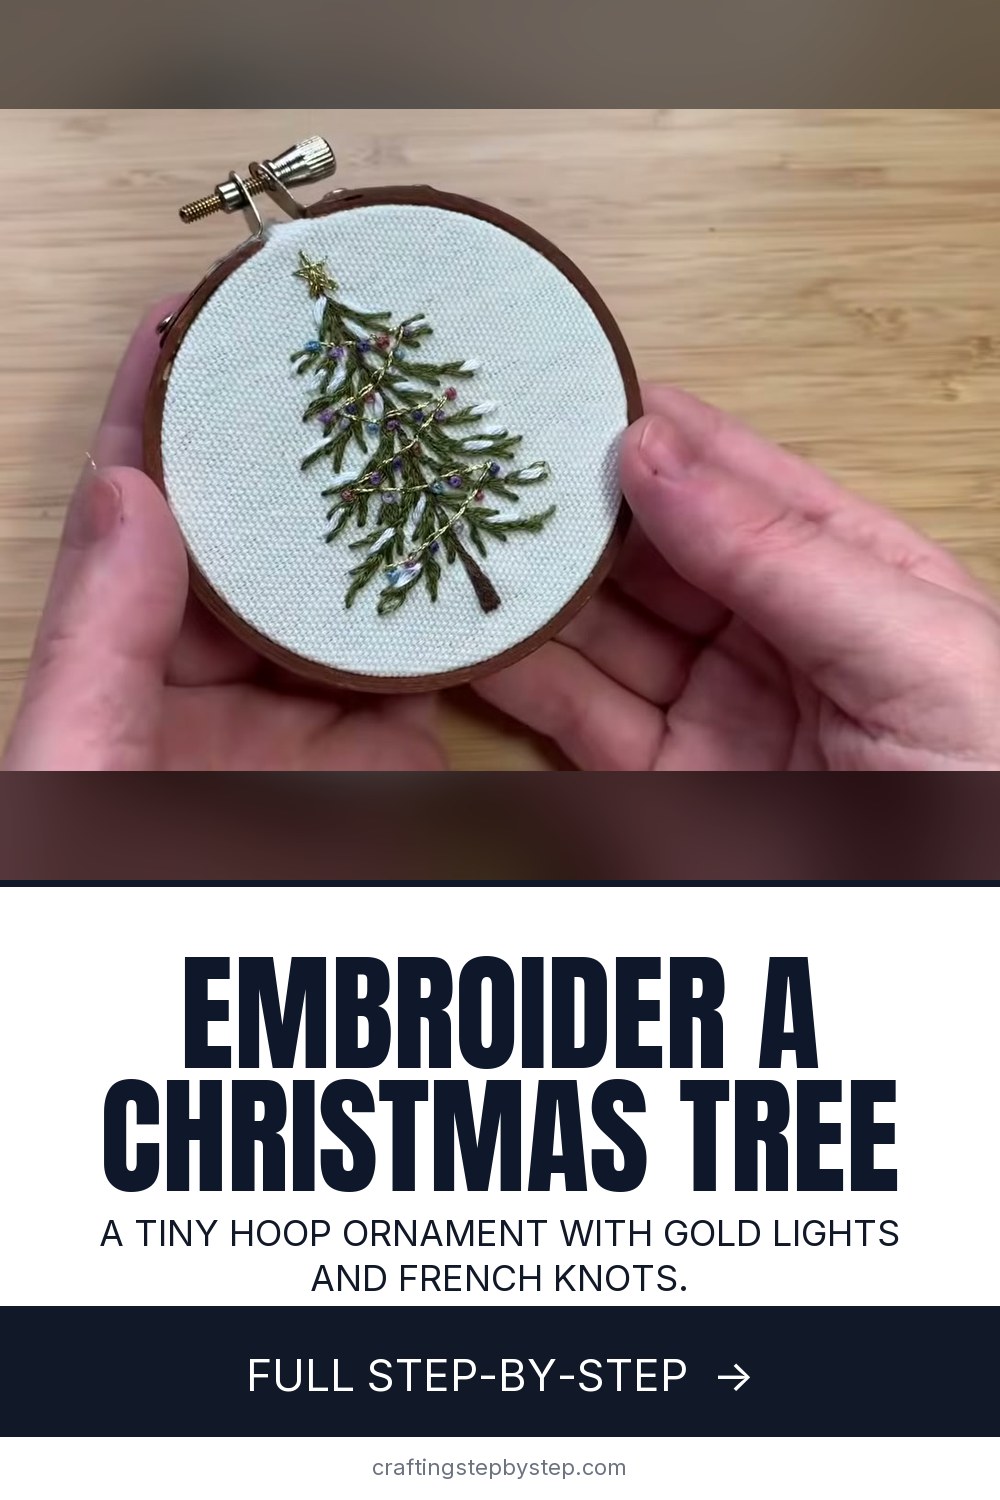
The finished result: How to Embroider a Christmas Tree (Easy Hoop Ornament)
  • Difficulty: Easy
  • About 2 hours, plus 1 hour to dry or set
  • 10 steps

You tapped Save

Save this project for later

We'll email you a link, no password.

How to Embroider a Christmas Tree (Easy Hoop Ornament)

  • Your saved projects in one list
  • Your ticked steps on any device

Check your inbox for an email from us. Not there? Look in your spam folder.

Print

Steps written out by Crafting Step by Step from River Birch Threads' video (opens YouTube) (9:15). Published .

A stitched Christmas tree in a tiny hoop makes one of the sweetest handmade ornaments you can give. River Birch Threads walks through this one in a 3 inch hoop: a brown trunk, soft green branches, strings of gold lights, colorful French knot bulbs, a gold star and a touch of snow. It uses three easy stitches, so it is a good first holiday project if you are new to embroidery.

How to embroider a Christmas tree: the short version

  • Hoop your fabric and add the tree pattern.
  • Backstitch the trunk and fill its base with satin stitch.
  • Backstitch the branches in green.
  • Add gold light strings, French knot lights, a star and snow.
  • Paint the hoop, trim the fabric and glue felt on the back.

The stitches you need

The whole tree is three stitches. The backstitch makes the trunk, branches and light strings. A short patch of satin stitch fills the wide base of the trunk. French knots become the round bulbs. If French knots are new to you, practice a few on scrap fabric first. They take a couple of tries for everyone.

Getting the pattern on the fabric

The creator uses a peel and stick stabilizer printed with the tree. You press it on, stitch through it and rinse it away in water when you finish. You can also draw your own tree with a washable marker: a center line, angled branch lines, a star on top. More options are in how to transfer an embroidery pattern.

Floss and colors

The trunk uses two strands of brown floss and the branches use three strands of green. DMC Light Effects metallic floss gives the light strings their shine. It tangles more than cotton floss, so work with shorter lengths, about 12 inches. Any bright colors work for the bulbs. For snow, the creator uses all six strands of white. Try a red and white palette for a candy cane tree, or all gold for a classic look.

Turning it into an ornament

The hoop doubles as the frame. Paint the outer ring before you put it back on, rinse off any stabilizer and let everything dry. Trim the fabric close to the hoop and glue a felt circle over the back to hide the stitches. Tie a ribbon through the hoop screw for hanging. See how to finish an embroidery hoop for other ways to back it.

How long it takes

Plan on about two hours of hands-on time for the whole ornament. The branches take the longest. Painting, trimming and gluing take a short while at the end, plus drying time, so you can stitch one evening and finish the ornament the next morning.

Common problems

  • Puckered fabric. Tighten the hoop until the fabric sounds like a drum when you tap it.
  • French knots pull through. Go back down right beside where you came up, not in the same hole, and do not yank the thread.
  • Metallic floss frays. Use shorter lengths and a needle with a bigger eye.

Give it as a gift tag, tie it on a present or make one for every grandchild's first Christmas.

Free printable

Print the steps and supply list for this project

One page you can take to the table. Free with a free account, no password.

Get the free printable

What you'll need

Free, for this project

Get this checklist by email

  • All 16 tools and materials, with tick boxes
  • A link to print all 10 steps on paper, to keep by you while you craft

No password. The whole tutorial stays free on this page.

Quick answer

Embroider a Christmas tree ornament in a small hoop: backstitch branches, gold lights, French knot bulbs and a felt back. An easy project: about 2 hours, plus 1 hour to dry or set. Materials cost about $5 to $12. You need 16 things, including cotton fabric, brown floss and green floss. The 10 steps start with hoop the Fabric for the Christmas Tree Embroidery, press the Christmas Tree Pattern Onto the Hooped Fabric and backstitch the Christmas Tree Trunk in Brown Floss.

Step-by-step guide

10 steps, about 9 minutes. Tap a picture to jump to that step. Your progress saves automatically.

Tick each step off as you go.

  1. Step 1: Hoop the Fabric for the Christmas Tree Embroidery

    Watch this step · 0:46

    Unscrew a 3 inch wooden hoop and take out the smaller inner ring. Lay a small square of fabric over it, then push the outer ring down on top and tighten the screw. Work around the edge, pulling the fabric a little at a time until it is smooth and taut. You will know it is tight enough when it sounds like a drum when you tap it.

    Tip:

    Leave an inch or two of fabric around the hoop so you have something to hold.

    Back to all steps

  2. Step 2: Press the Christmas Tree Pattern Onto the Hooped Fabric

    Watch this step · 1:20

    Add the tree design. The creator uses a stick and stitch pattern: peel the mesh backing off the top and press the sticker down onto the fabric. Rub it firmly so it fuses to the weave and does not lift as you stitch. If you would rather draw your own, sketch a center trunk, slanted branches and a small star with a washable fabric marker.

    Tip:

    An embroidery stand frees both hands and makes the small stitches easier.

    Back to all steps

  3. Step 3: Backstitch the Christmas Tree Trunk in Brown Floss

    Watch this step · 2:40

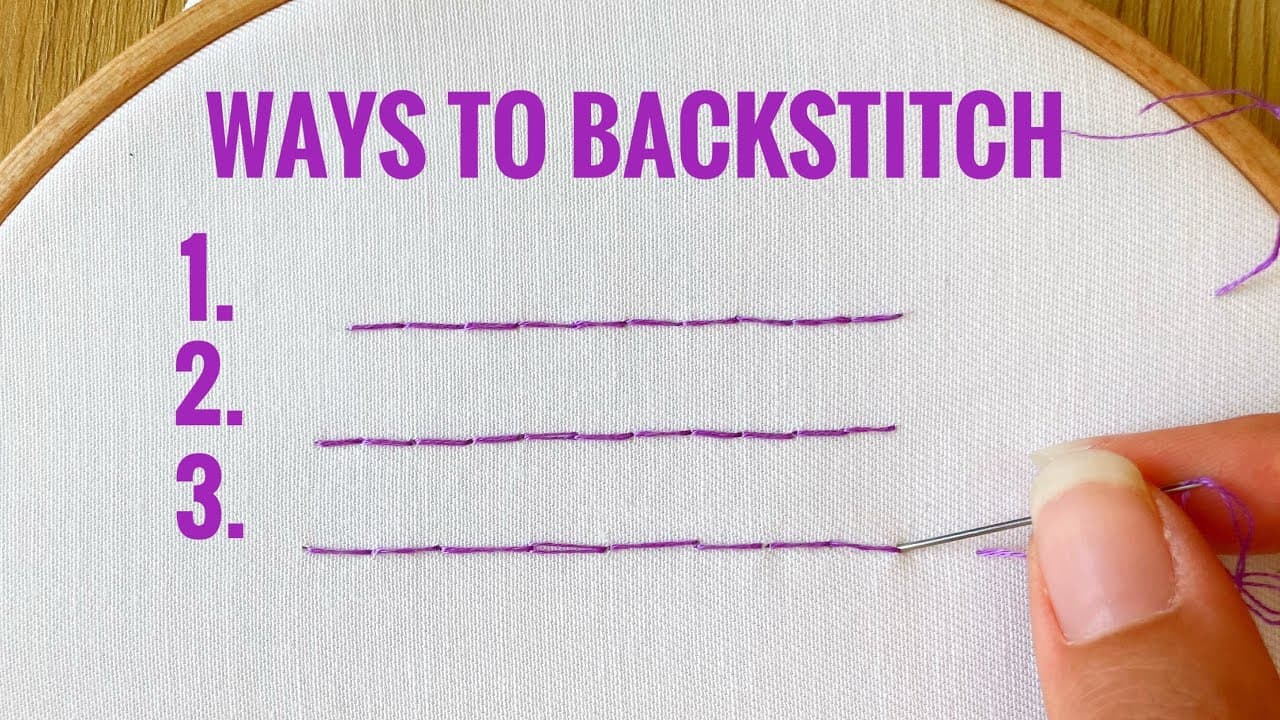
    Thread two strands of brown floss. Come up through the fabric and make a stitch about 1 cm long. Jump 1 cm ahead, come up, and go back down into the end of the last stitch. Repeat down the whole trunk. At the wide base, fill the shape with long satin stitches laid side by side. Tie a double knot on the back and trim the tail.

    Tip:

    Any brown or dark green works for the trunk. The video uses DMC 08.

    Back to all steps

  4. Step 4: Backstitch the Green Christmas Tree Branches

    Watch this step · 4:00

    Switch to green floss and use three strands so the branches look full. Work the same backstitch you used on the trunk, following each branch line on the pattern from the trunk outward. Keep your stitches short on the small side branches so the curves stay smooth. Fill every branch, top to bottom, before you move on to the lights.

    Tip:

    Shorter stitches follow a curve better than long ones.

    Back to all steps

  5. Step 5: Stitch Gold Light Strings Across the Christmas Tree

    Watch this step · 4:38

    Give the tree sparkle with DMC Light Effects metallic floss, two strands at a time. Backstitch swags of light string across the branches the same way you did the trunk. Metallic floss sits up off the fabric more than cotton and can be fussy to pull through. Go slowly and keep at it. The shine is worth the effort.

    Tip:

    Cut metallic floss shorter than usual, about 12 inches, to cut down on tangles.

    Back to all steps

  6. Step 6: Make French Knot Lights on the Christmas Tree

    Watch this step · 5:52

    Add the bulbs with French knots in bright colors. Come up through the fabric on a light string. Hold the floss taut with your other hand, wrap it twice around the needle and go back down in a hole right beside where you came up. Pull until the knot is snug but not tight. Pull too hard and the knot slips through to the back.

    Tip:

    Mix three or four colors and scatter them so no two of the same sit side by side.

    Back to all steps

  7. Step 7: Stitch the Gold Star on Top of the Christmas Tree

    Watch this step · 6:52

    Turn the hoop so you have room at the top. Using one strand of the gold metallic floss, stitch from point to point across the star in no set order until it looks full and bright. Then thread six strands of white and add small patches of snow along a few branches. Random spots look more like fresh snowfall than an even pattern.

    Tip:

    Stop adding snow while it still looks a little sparse.

    Back to all steps

  8. Step 8: Paint the Embroidery Hoop Walnut Brown

    Watch this step · 8:20

    Take the embroidery out of the hoop and paint the outer ring with brown acrylic paint for a walnut look. Wood stain works too if you have it, but paint is the cheaper choice. While the hoop dries, rinse the stabilizer out of the fabric in water; it dissolves away. Let the fabric dry flat, then put it back in the painted hoop and tighten it.

    Tip:

    Paint only the outside of the ring so it still grips the fabric.

    Back to all steps

  9. Step 9: Trim the Extra Fabric Around the Embroidery Hoop

    Watch this step · 8:34

    Once you are happy with how the tree sits in the hoop and the fabric is tight, turn it over. Cut away the extra fabric right down to the edge of the hoop with sharp scissors. Go slowly around the curve and keep the blades flat against the hoop so you do not snip into the embroidery or any knots on the back.

    Tip:

    Small curved scissors make this cut much easier.

    Back to all steps

  10. Step 10: Glue Felt to the Back of the Embroidery Hoop Ornament

    Watch this step · 8:50

    Trace the hoop on felt and cut out a circle the same size. Run hot glue around the edge of the felt and press it onto the back of the hoop. The felt hides the back of your stitches and gives the ornament a neat finish. Trim away any stray glue strings, thread a ribbon through the hoop screw and hang it on your tree.

    Tip:

    Write the year on the felt with a fabric pen for a keepsake.

    Back to all steps

How to Cross Stitch on Linen Over Two Threads

Keep going

How to Cross Stitch on Linen Over Two Threads

Keep going with embroidery

More on this topic, picked for this christmas tree.

You reached the last step

Save this project to come back to it

Your ticked steps, the free printable and your other saved makes, together in My Projects. Free, no password.

You tapped Save

Save this project for later

We'll email you a link, no password.

How to Embroider a Christmas Tree (Easy Hoop Ornament)

  • Your saved projects in one list
  • Your ticked steps on any device

Check your inbox for an email from us. Not there? Look in your spam folder.

Free printable

Printable sheet and shopping list for this project

The bonus is hidden until you sign up.

Free with a free account, no password. Every step above stays open to everyone.

Products Used

The Checklist

How to Embroider a Christmas Tree (Easy Hoop Ornament)

Tools
6
Materials
10
Steps
10
Video
9 min

Tools we recommend

As an Amazon Associate we earn from qualifying purchases. Links on this page may be affiliate links - clicking them and buying doesn't change your price, but helps support Crafting Step by Step.

Tags

The Crafter's Weekly

New embroidery tutorials, every Sunday

One short email with the week's best step-by-step guides. Free, no spam, unsubscribe anytime.

Did this work for you?

What's next

Related collections

Curated theme pages that include this tutorial.

Similar tutorials

Hand-picked next reads based on the one you just finished.

Liked this embroidery tutorial?

Pick the crafts you want to hear about. One email every Sunday with new step-by-step tutorials. No spam, easy to unsubscribe.

Get more like this in your inbox

Weekly digest. Pick the categories you want. Unsubscribe anytime.

Send me tutorials about

We only email about new tutorials. Easy unsubscribe anytime.