How to Do a Blanket Stitch (Decorative Edging by Hand)

The finished result: How to Do a Blanket Stitch (Decorative Edging by Hand)
  • Difficulty: Easy
  • About 25 minutes
  • 8 steps

You tapped Save

Save this project for later

We'll email you a link, no password.

How to Do a Blanket Stitch (Decorative Edging by Hand)

  • Your saved projects in one list
  • Your ticked steps on any device

Check your inbox for an email from us. Not there? Look in your spam folder.

Print

Steps written out by Crafting Step by Step from Sarah Homfray Embroidery's video (opens YouTube) (10:31). Published .

Blanket stitch is one of those hand embroidery stitches that pays you back the moment you learn it. It lays down a row of stitching with little arms standing up from a baseline, and that simple shape turns out to be useful everywhere: edging a blanket, binding a frayed edge, attaching an applique shape, or adding a decorative border. Sarah Homfray shows you how to work it from the very first stitch.

To be clear, this is the hand embroidery stitch, not a crocheted or knitted blanket. It gets its name from the edges of wool blankets, and it is the stitch people reach for in December to finish fleece throws, felt ornaments and Christmas stockings.

You will form the stitch in a hoop, learn the one move that makes it lock (coming up inside the loop every time), vary the arm lengths, then work it over a raw edge. If you are starting out, it pairs naturally with cross stitch as a foundation stitch.

Blanket stitch on an edge

Depth and spacing are the two numbers that matter. On felt or cotton, go in about 1/4 inch from the edge and space the arms 1/4 inch apart. On thick fleece, go 3/8 to 1/2 inch in so the stitch does not tear out.

Keep them even by marking dots along the edge with a water-soluble pen, or rest a ruler beside the work. After a dozen stitches your eye takes over.

Blanket stitch on felt and fleece

Felt does not fray, so blanket stitch is the classic way to join two felt shapes into an ornament. Stitch around the edge through both layers, and stop two inches short to push in a little stuffing before you close it.

For a fleece blanket, use yarn or six strands of floss and a large-eye needle. Punch the holes first with an awl if the fleece is dense. It is a slow but relaxing edge for a gift, and it looks handmade in a way a serger never does.

Turning a corner

At the corner, work three stitches into the same entry hole: one angled in, one on the diagonal, one angled out along the new side. The arms fan out like a quarter circle and the corner stays covered.

Starting and ending invisibly

On an edge, start with a small knot hidden between the layers, or bring the needle out from the inside of a fold. To end, take the thread to the back and weave it under the last few stitches. When you run out mid-row, finish at the bottom of an arm and bring the new thread up through that same last loop.

Blanket stitch vs buttonhole stitch

They are the same stitch. Leave gaps and it is blanket stitch; pack the arms tight and it becomes buttonhole stitch, a solid edge strong enough to bind a buttonhole or a cut applique shape. Learn the one and you get both.

Troubleshooting

  • Slanting stitches. Your needle is entering at an angle. Keep it square to the edge every time.
  • Loops flipping off the edge. You pulled too hard or skipped the loop. Tension gently and check the needle comes up inside the loop.
  • Uneven depth. Mark a guideline or use the fabric's weave as a ruler.

Once this is in your hands, try backstitch for outlines, chain stitch for curves and satin stitch for filling shapes.

Free printable

Print the steps and supply list for this project

One page you can take to the table. Free with a free account, no password.

Get the free printable

What you'll need

Free, for this project

Get this checklist by email

  • All 6 tools and materials, with tick boxes
  • A link to print all 8 steps on paper, to keep by you while you craft

No password. The whole tutorial stays free on this page.

Quick answer

Step-by-step blanket stitch tutorial for beginners. Form the looped edge, vary the arms, bind a raw edge, and turn it into buttonhole stitch by spacing. An easy project: about 25 minutes. You need 6 things, including embroidery floss, fabric or felt and embroidery hoop. The 8 steps start with start at the Bottom of the Stitch, form the Loop and Come Up Inside It, pull Down to Shape the Stitch and repeat to Build the Row.

Step-by-step guide

8 steps, about 11 minutes. Tap a picture to jump to that step. Your progress saves automatically.

Tick each step off as you go.

  1. Step 1: Start at the Bottom of the Stitch

    Watch this step · 0:47

    Blanket stitch builds along a baseline with little arms standing up from it, so you start at the bottom of where that row will sit. Bring your needle up at the baseline, then stab back down a short diagonal distance away, like reaching for the opposite corner of a small square.

    The trickiest part of this whole stitch is getting going. Once the first one is set, the rest follow the same rhythm. Keep your spacing relaxed for now and worry about evenness after a stitch or two.

    Tip:

    Watch this step Mark a faint guideline with a water-soluble pen if you want your baseline dead straight. It wipes away with a damp cloth when you are done.

    Back to all steps

  2. Step 2: Form the Loop and Come Up Inside It

    Watch this step · 1:04

    With the needle still down in the fabric, lay the working thread under the tip so it forms a little loop. Now bring the needle up immediately below where you went down and just to the right, catching the corner of that square, and make sure the point comes up inside the loop.

    That last part is the whole trick. If the needle does not pass through the loop, the stitch will not lock and you will just get a plain straight stitch instead.

    Tip:

    Watch this step If you lose track of the loop, hold it open with your thumb until the needle is through. A little patience here saves you from picking out stitches later.

    Back to all steps

  3. Step 3: Pull Down to Shape the Stitch

    Watch this step · 1:18

    Pull the thread slowly down toward you. As it tightens you will see it form a backward L: a vertical arm coming up from the baseline and a short horizontal bar running along it. That shape is the signature of blanket stitch.

    Put a finger on the bar as you tension so it does not creep or twist. Even, gentle tension is what keeps the row looking tidy. Yank it and the fabric puckers.

    Tip:

    Watch this step Aim for the same firmness on every pull. Consistent tension matters more than dead-even spacing for a row that reads as neat.

    Back to all steps

  4. Step 4: Repeat to Build the Row

    Watch this step · 1:45

    Work the next stitch exactly like the first. Go down into the fabric a short distance along the baseline, loop the thread, come up below inside the loop, and pull. A row starts to build, with the line of stitching running along the bottom and the little arms standing up.

    The arms sit outside the piece you are edging and the baseline sits on the fabric, which is why this stitch is so good for covering a raw edge neatly.

    Tip:

    Watch this step Keep your stitches evenly spaced by eyeballing the gap against the previous arm. After five or six they start to feel automatic.

    Back to all steps

  5. Step 5: Vary the Arm Length for a Decorative Edge

    Watch this step · 2:45

    You do not have to keep every arm the same height. Alternate a tall stitch with a short one, or work a repeating pattern, and the row turns into a decorative border. It is a simple way to add interest without learning a new stitch.

    Whatever rhythm you choose, keep checking that the needle has gone inside the loop before you tension. That is the one mistake that trips people up, and it is easy to fix by sliding the needle back under and re-looping.

    Tip:

    Watch this step This stitch is the cousin of cross stitch in the beginner toolkit. Learn both and you can edge, outline, and fill almost any small project.

    Back to all steps

  6. Step 6: Work the Stitch Over a Raw Edge

    Watch this step · 4:42

    Blanket stitch really shines as an edging. Hold the fabric in your hands or keep it in a hoop, then stab down a little way in from the raw edge and bring the needle through the loop right at the edge itself. The thread wraps over the side and anchors there.

    Repeat along the edge and you bind a frayed border into something clean and finished. Quilters love this for tidying edges; slow stitchers use it to frame a frayed edge on purpose.

    Tip:

    Watch this step Felt and tightly woven cotton both take this edge well. Looser weaves fray more, so keep your stitches a touch closer together on those.

    Back to all steps

  7. Step 7: Space It Out, or Pack It Tight for Buttonhole

    Watch this step · 5:20

    Spacing is what separates the two stitches in this family. Leave gaps between the arms and you have blanket stitch. Pack them right up against each other and you have buttonhole stitch, which lays down a solid, almost satin-like ridge of thread along the edge.

    Buttonhole takes more thread and more time, but it gives a really firm edge that holds up to handling and even stops cut fabric from fraying. When you reach the end, take the tail through to the back and weave it under the stitches so it does not show on the front.

    Tip:

    Watch this step Use blanket stitch for a light decorative edge and buttonhole when you need strength, like binding a buttonhole, a cut applique shape, or a wired three-dimensional piece.

    Back to all steps

  8. Step 8: See It on a Finished Piece

    Watch this step · 6:33

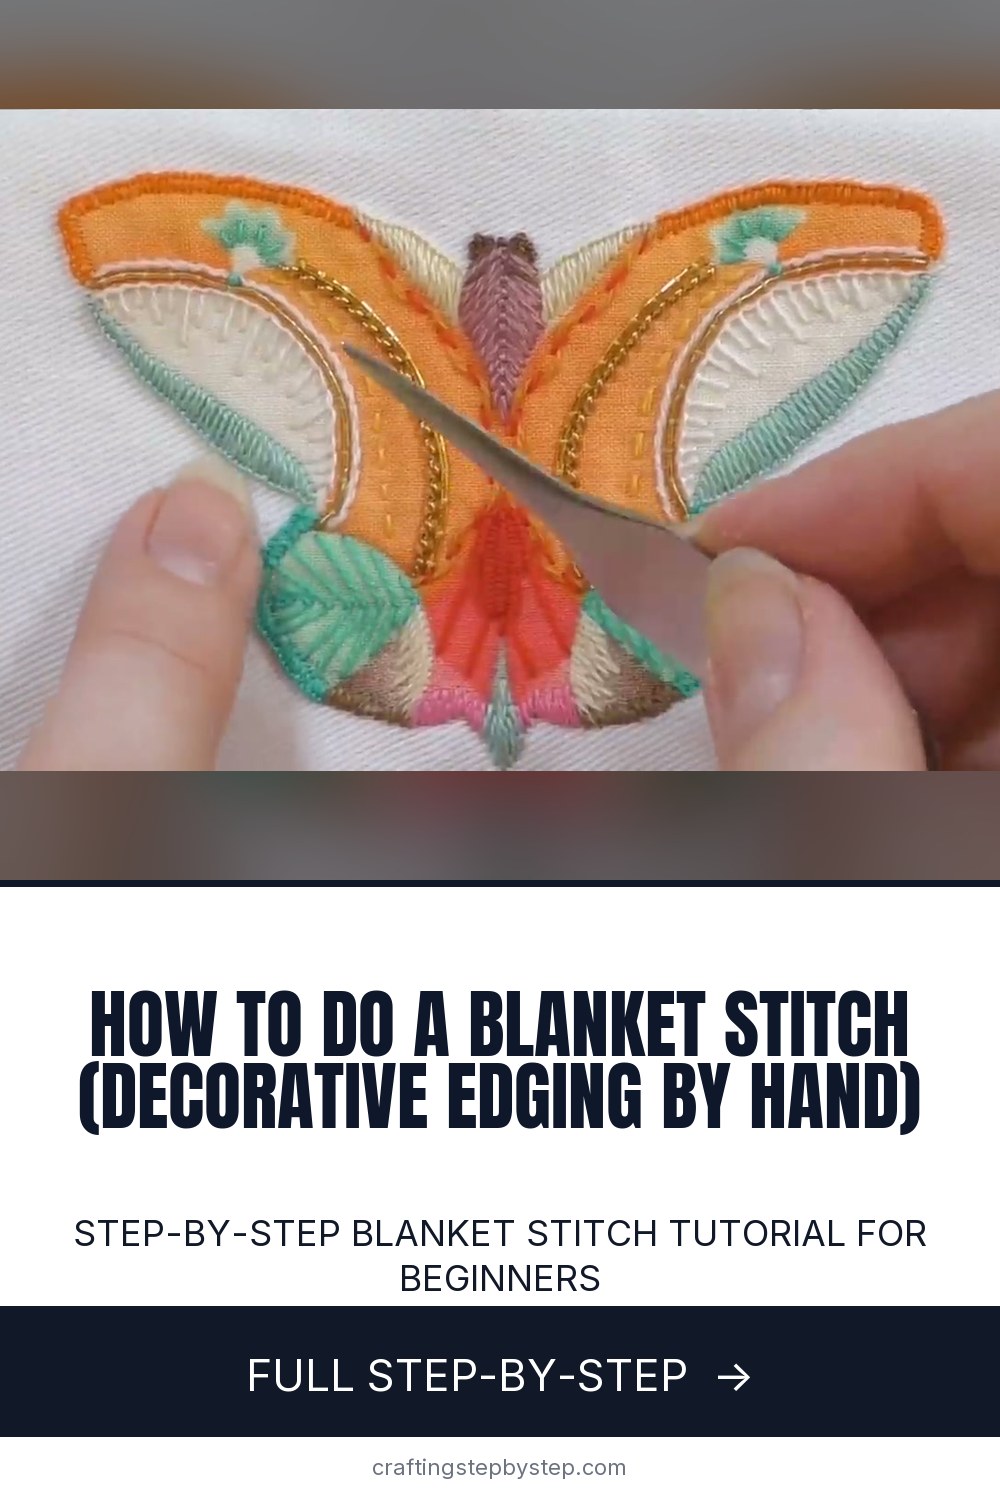
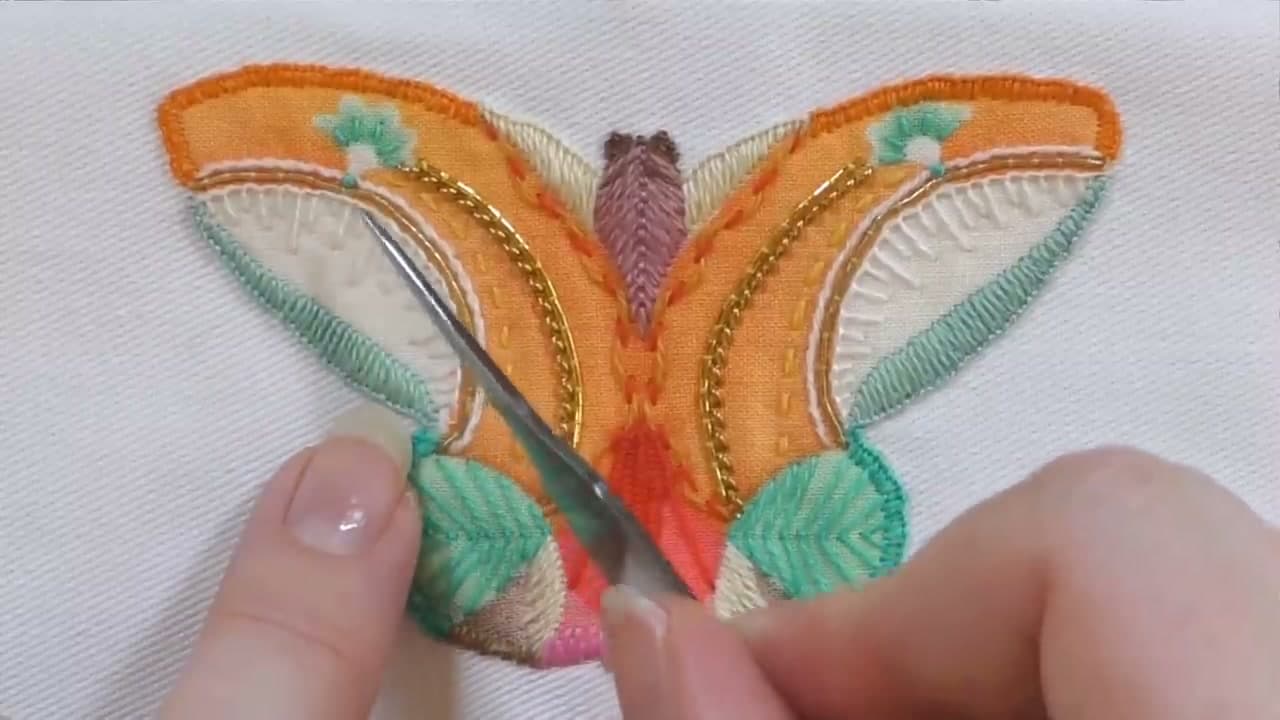
    Here is the stitch doing real work. Around this appliqued butterfly, blanket stitch follows every curve and corner cleanly, holding the cut fabric shapes down while adding a decorative outline at the same time. It does two jobs in one pass.

    That versatility is why it earns a permanent spot in your stitch bank. Use it to edge a blanket, attach a felt heart, join two layers of a pouch, or outline an applique. Once it is in your hands, you will reach for it constantly.

    Tip:

    Watch this step Try it next on a small felt shape attached to a backing fabric. It is a quick, satisfying first project that shows off the edge to full effect.

    Back to all steps

How to Do a Lazy Daisy Stitch

Keep going

How to Do a Lazy Daisy Stitch

7 steps · about 5 minutes

Keep going with embroidery

More on this topic, picked for this blanket stitch.

You reached the last step

Save this project to come back to it

Your ticked steps, the free printable and your other saved makes, together in My Projects. Free, no password.

You tapped Save

Save this project for later

We'll email you a link, no password.

How to Do a Blanket Stitch (Decorative Edging by Hand)

  • Your saved projects in one list
  • Your ticked steps on any device

Check your inbox for an email from us. Not there? Look in your spam folder.

Free printable

Printable sheet and shopping list for this project

The bonus is hidden until you sign up.

Free with a free account, no password. Every step above stays open to everyone.

Products Used

The Checklist

How to Do a Blanket Stitch (Decorative Edging by Hand)

Tools
4
Materials
2
Steps
8
Video
11 min

Tools we recommend

As an Amazon Associate we earn from qualifying purchases. Links on this page may be affiliate links - clicking them and buying doesn't change your price, but helps support Crafting Step by Step.

Tags

The Crafter's Weekly

New embroidery tutorials, every Sunday

One short email with the week's best step-by-step guides. Free, no spam, unsubscribe anytime.

Test your knowledge

Did the lesson stick? Start with this one.

5 questions covering what you just read. No signup, no score saved, and you can stop after this one.

Question 1 of 5

What's the one move that makes blanket stitch lock instead of falling flat?

Quick reference

Key takeaways from How to Do a Blanket Stitch (Decorative Edging by Hand)

5 questions, answers, and one-line explanations. Tap to expand.

  1. 1.What's the one move that makes blanket stitch lock instead of falling flat?

    Answer: The needle comes up inside the thread loop

    If the needle doesn't pass through the loop, you just get a plain straight stitch.

  2. 2.As you pull the stitch into shape, what does it form?

    Answer: A backward L with an arm and a bar

    The upright arm and the bar along the baseline are the stitch's signature shape.

  3. 3.Why is blanket stitch so good for finishing a raw fabric edge?

    Answer: The thread wraps over the edge and anchors it

    Worked over the edge, the looped thread binds a frayed border into a clean finish.

  4. 4.What turns blanket stitch into buttonhole stitch?

    Answer: Packing the stitches tight with no gaps

    Same stitch; spacing changes everything. Packed tight, it becomes buttonhole stitch.

  5. 5.For a row that reads as neat, what matters most?

    Answer: Consistent tension on every pull

    Even, gentle tension keeps the row tidy; yank it and the fabric puckers.

Did this work for you?

What's next

Related collections

Curated theme pages that include this tutorial.

Similar tutorials

Hand-picked next reads based on the one you just finished.

Liked this embroidery tutorial?

Pick the crafts you want to hear about. One email every Sunday with new step-by-step tutorials. No spam, easy to unsubscribe.

Get more like this in your inbox

Weekly digest. Pick the categories you want. Unsubscribe anytime.

Send me tutorials about

We only email about new tutorials. Easy unsubscribe anytime.