How to Draw a Butterfly (Easy Monarch Butterfly Drawing)

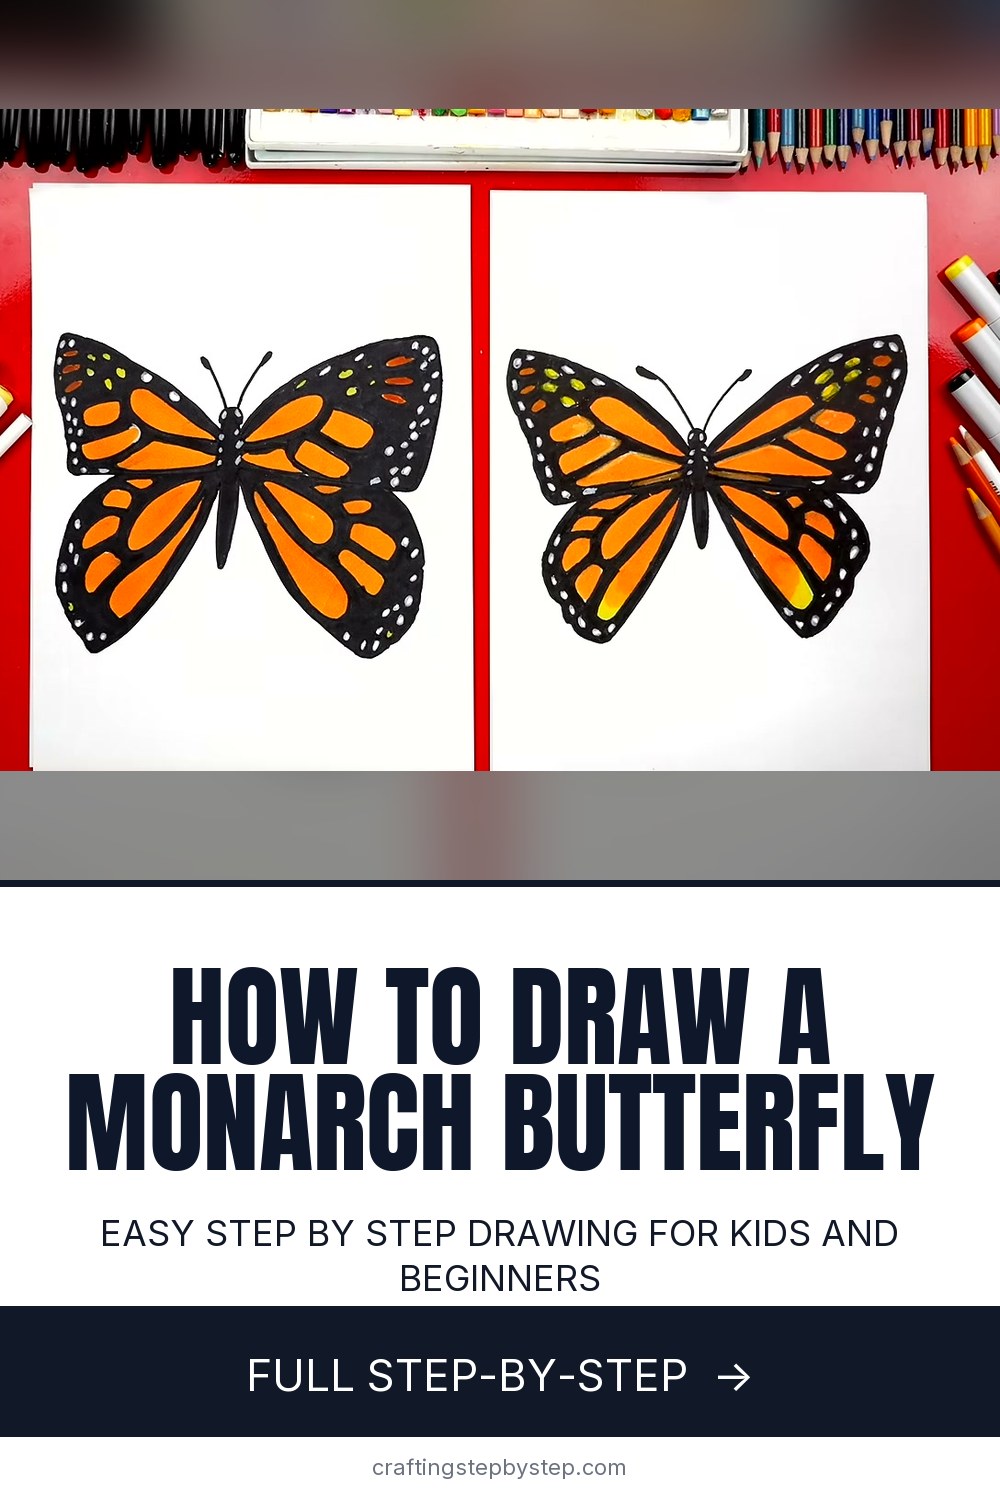
The finished result: How to Draw a Butterfly (Easy Monarch Butterfly Drawing)
  • Difficulty: Easy
  • About 30 minutes
  • 10 steps

You tapped Save

Save this project for later

We'll email you a link, no password.

How to Draw a Butterfly (Easy Monarch Butterfly Drawing)

  • Your saved projects in one list
  • Your ticked steps on any device

Check your inbox for an email from us. Not there? Look in your spam folder.

Print

Steps written out by Crafting Step by Step from Art for Kids Hub's video (opens YouTube) (9:02). Published .

A monarch butterfly looks complicated, with all those veins and spots. Broken into small shapes, it is one of the easiest insects to draw. Rob from Art for Kids Hub draws this monarch side by side with his son Jack, using a black marker and a few colors. You build the body, frame the wings, then fill them with the cell shapes and white dots that make a monarch look like a monarch.

How to draw a butterfly: the short version

  • Draw the body in three parts: thorax, head and abdomen.
  • Frame the forewings and hind wings, the same on both sides.
  • Add antennae with a small club at each tip.
  • Draw the orange cell shapes and the ovals at the wing tips.
  • Line the wing edges with tiny white spots.
  • Color the veins and borders black and the cells orange.

What you need

A black marker, smooth paper and something orange to color with. Markers give the bold look in the video, but crayons and colored pencils work too. If you are nervous about the marker, sketch lightly in pencil first and trace over it once you like the shapes.

Getting the wings to match

A butterfly is symmetrical, which means both sides are the same. Rob's trick is to draw one piece on the left and then repeat it right away on the right, rather than finishing one whole wing first. Your two sides will still be a little different. That is fine. Real monarchs are not perfect either, and nobody will hold a ruler to your drawing.

Monarch facts to share while you draw

The top wings are called forewings and the bottom ones are hind wings. The middle body part is the thorax, and the long end is the abdomen. Monarch antennae end in little clubs, which is one way to tell a butterfly from a moth. The legs are tucked underneath, so they do not show from this top view. Kids like learning the words while they draw.

Drawing it with kids

Sit side by side and draw at the same time, the way Rob and Jack do. Younger children can skip the tip ovals and edge spots and go straight to coloring. Older kids can add more spots and blend two oranges. Hang both drawings together when you are done.

Make it your own

  • Swap orange for blue and draw a blue morpho.
  • Add a flower or a milkweed leaf for the monarch to land on.
  • Cut the finished butterfly out and glue it to a card or a window.
  • Color the orange darker near the body and lighter at the edges for a glow.

Common problems

  • Wings too small. Let the top curves reach close to the edge of the paper. Big wings leave room for the spots.
  • Spots run together. Leave a thin gap of black between every shape.
  • Marker bleeds through. Put a scrap sheet underneath.

Keep drawing

Draw a garden around your monarch with flowers, or try a bird next. Learn to shade with colored pencils. For butterflies off the page, make paper butterflies or embroider a butterfly.

Free printable

Print the steps and supply list for this project

One page you can take to the table. Free with a free account, no password.

Get the free printable

What you'll need

Free, for this project

Get this checklist by email

  • All 4 tools and materials, with tick boxes
  • A link to print all 10 steps on paper, to keep by you while you craft

No password. The whole tutorial stays free on this page.

Quick answer

Draw a monarch butterfly step by step: body, wings, antennae, spots and color. An easy project: about 30 minutes. You need 4 things, including drawing or marker paper, black permanent marker and pencil and eraser. The 10 steps start with draw the Butterfly's Body: Thorax, Head and Abdomen, draw the Top Curves of the Butterfly's Forewings, close the Butterfly's Forewings With a Bumpy Edge, draw the Butterfly's Hind Wings and add the Butterfly's Antennae With Club Tips.

Step-by-step guide

10 steps, about 9 minutes. Tap a picture to jump to that step. Your progress saves automatically.

Tick each step off as you go.

  1. Step 1: Draw the Butterfly's Body: Thorax, Head and Abdomen

    Watch this step · 0:38

    Start in the middle of your paper with a small oval. This is the thorax, the middle part of the body where the wings attach. On top of it, draw an upside down U for the head. Below the thorax, draw a longer U shape for the abdomen. Keep the whole body small and centered, because the wings will spread out a long way on both sides.

    Tip:

    Lightly sketch in pencil first if you want to erase and adjust.

    Back to all steps

  2. Step 2: Draw the Top Curves of the Butterfly's Forewings

    Watch this step · 1:30

    From the top of the thorax, draw a big curve that sweeps up and out on the left, reaching close to the edge of the paper. Repeat it on the right so the two curves match. Then draw a straight line out sideways from the body on each side. Below that, draw a long diagonal line reaching down on both sides. These lines are the frame for all four wings.

    Tip:

    Draw one side, then the other right away. It is easier to match them.

    Back to all steps

  3. Step 3: Close the Butterfly's Forewings With a Bumpy Edge

    Watch this step · 2:08

    The top wings are the forewings. Start at the tip of the top curve and draw the outer edge down and around, adding a few small bumps as you go. Curve it back in to meet the straight side line. Repeat it on the other side. The bumps make the wing edge look natural instead of smooth like a balloon.

    Tip:

    Two or three gentle bumps are plenty. Too many look like a cloud.

    Back to all steps

  4. Step 4: Draw the Butterfly's Hind Wings

    Watch this step · 2:27

    The lower wings are the hind wings. Start on the side line, a little closer to the body, and draw a big curve that swings out and down. Add a few bumps along the bottom edge, then curve back in to meet the diagonal line near the abdomen. Do the same on the other side. Now you have the full outline of a butterfly.

    Tip:

    Keep the hind wings a bit smaller and rounder than the forewings.

    Back to all steps

  5. Step 5: Add the Butterfly's Antennae With Club Tips

    Watch this step · 2:45

    From the top of the head, draw a thin curved line out to one side for an antenna. At the very end, make a small thick dot. Butterfly antennae end in little clubs like this. Repeat it on the other side and thicken both tips. Skip the legs. They are tucked underneath, and you are looking down on the top of the butterfly.

    Tip:

    Press harder at the tip of the marker to make the club tips bold.

    Back to all steps

  6. Step 6: Draw the Long Cell Shapes in the Monarch's Forewings

    Watch this step · 4:00

    Monarchs have orange shapes between their black veins. In the forewing, start near the body and draw a long rounded shape that curves back to where it started. Add a small oval beside it, then a longer shape that reaches further out. Follow the edges of the shapes you already drew so a thin black gap stays between each one. Repeat everything on the other forewing.

    Tip:

    Your shapes do not need to match the video exactly. Fill the space evenly.

    Back to all steps

  7. Step 7: Add Ovals to the Tips of the Monarch's Forewings

    Watch this step · 5:18

    Near the top corner of each forewing, draw two medium ovals, leave a small space, then add two smaller ones. Right at the tip, draw three long thin ovals side by side. These tip spots are what make it read as a monarch at a glance. Do the left wing first, then copy the same pattern on the right.

    Tip:

    Keep the tip ovals small. They should sit inside the wing, not touch the edge.

    Back to all steps

  8. Step 8: Draw the Raindrop and Cell Shapes in the Hind Wings

    Watch this step · 5:50

    Move down to the hind wings. In the middle of each one, draw a big raindrop shape. Below it, draw a long shape that follows the raindrop, swings out to the wing edge and follows the bottom curve back in. Then fit three or four short ovals in a row beside them, filling the space up to the forewing. Repeat on the other hind wing.

    Tip:

    If a shape comes out wonky, it still works. The black fill hides small wobbles.

    Back to all steps

  9. Step 9: Add the Monarch Butterfly's White Edge Spots

    Watch this step · 7:50

    Around the outer edge of every wing, draw lots of tiny ovals and circles. These stay white when you color, so they pop against the black border. You do not have to match any exact number. Use your own pattern, bigger near the wing tips and smaller along the hind wings, and add them to both sides.

    Tip:

    Pause the video whenever you need extra time on a step.

    Back to all steps

  10. Step 10: Color the Monarch Butterfly Black and Orange

    Watch this step · 8:41

    Fill everything outside your shapes with black: the body, the veins between the cells and the wide border around the wings. Leave the tiny edge spots white. Then color the cell shapes orange. For extra depth, add a little yellow at the tips or a darker orange near the body. Step back and you have a bright monarch butterfly.

    Tip:

    Color the black first so the orange does not smear under the marker.

    Back to all steps

How to Draw a Sea Turtle (Realistic, Step by Step)

Keep going

How to Draw a Sea Turtle (Realistic, Step by Step)

Keep going with drawing

More on this topic, picked for this butterfly.

You reached the last step

Save this project to come back to it

Your ticked steps, the free printable and your other saved makes, together in My Projects. Free, no password.

You tapped Save

Save this project for later

We'll email you a link, no password.

How to Draw a Butterfly (Easy Monarch Butterfly Drawing)

  • Your saved projects in one list
  • Your ticked steps on any device

Check your inbox for an email from us. Not there? Look in your spam folder.

Free printable

Printable sheet and shopping list for this project

The bonus is hidden until you sign up.

Free with a free account, no password. Every step above stays open to everyone.

Products Used

The Checklist

How to Draw a Butterfly (Easy Monarch Butterfly Drawing)

Tools
2
Materials
2
Steps
10
Video
9 min

Tools we recommend

As an Amazon Associate we earn from qualifying purchases. Links on this page may be affiliate links - clicking them and buying doesn't change your price, but helps support Crafting Step by Step.

Tags

The Crafter's Weekly

New drawing tutorials, every Sunday

One short email with the week's best step-by-step guides. Free, no spam, unsubscribe anytime.

Did this work for you?

What's next

Related collections

Curated theme pages that include this tutorial.

Similar tutorials

Hand-picked next reads based on the one you just finished.

Liked this drawing tutorial?

Pick the crafts you want to hear about. One email every Sunday with new step-by-step tutorials. No spam, easy to unsubscribe.

Get more like this in your inbox

Weekly digest. Pick the categories you want. Unsubscribe anytime.

Send me tutorials about

We only email about new tutorials. Easy unsubscribe anytime.