How to Draw a Raccoon

Save it for later. We'll email you a link, no password.

Find it again on your phone or computer, with your finished steps ticked.

You tapped Save

Save this project for later

We'll email you a link, no password.

How to Draw a Raccoon

  • Your saved projects in one list
  • Your ticked steps on any device

Check your inbox for an email from us. Not there? Look in your spam folder.

  • 10 steps
  • 9:06 video
  • Difficulty: Easy
  • About 30 minutes
  • Drawing

Based on a video by Art for Kids Hub

Opens their YouTube channel

Steps written out by Crafting Step by Step · Published · Updated

The finished result: How to Draw a Raccoon

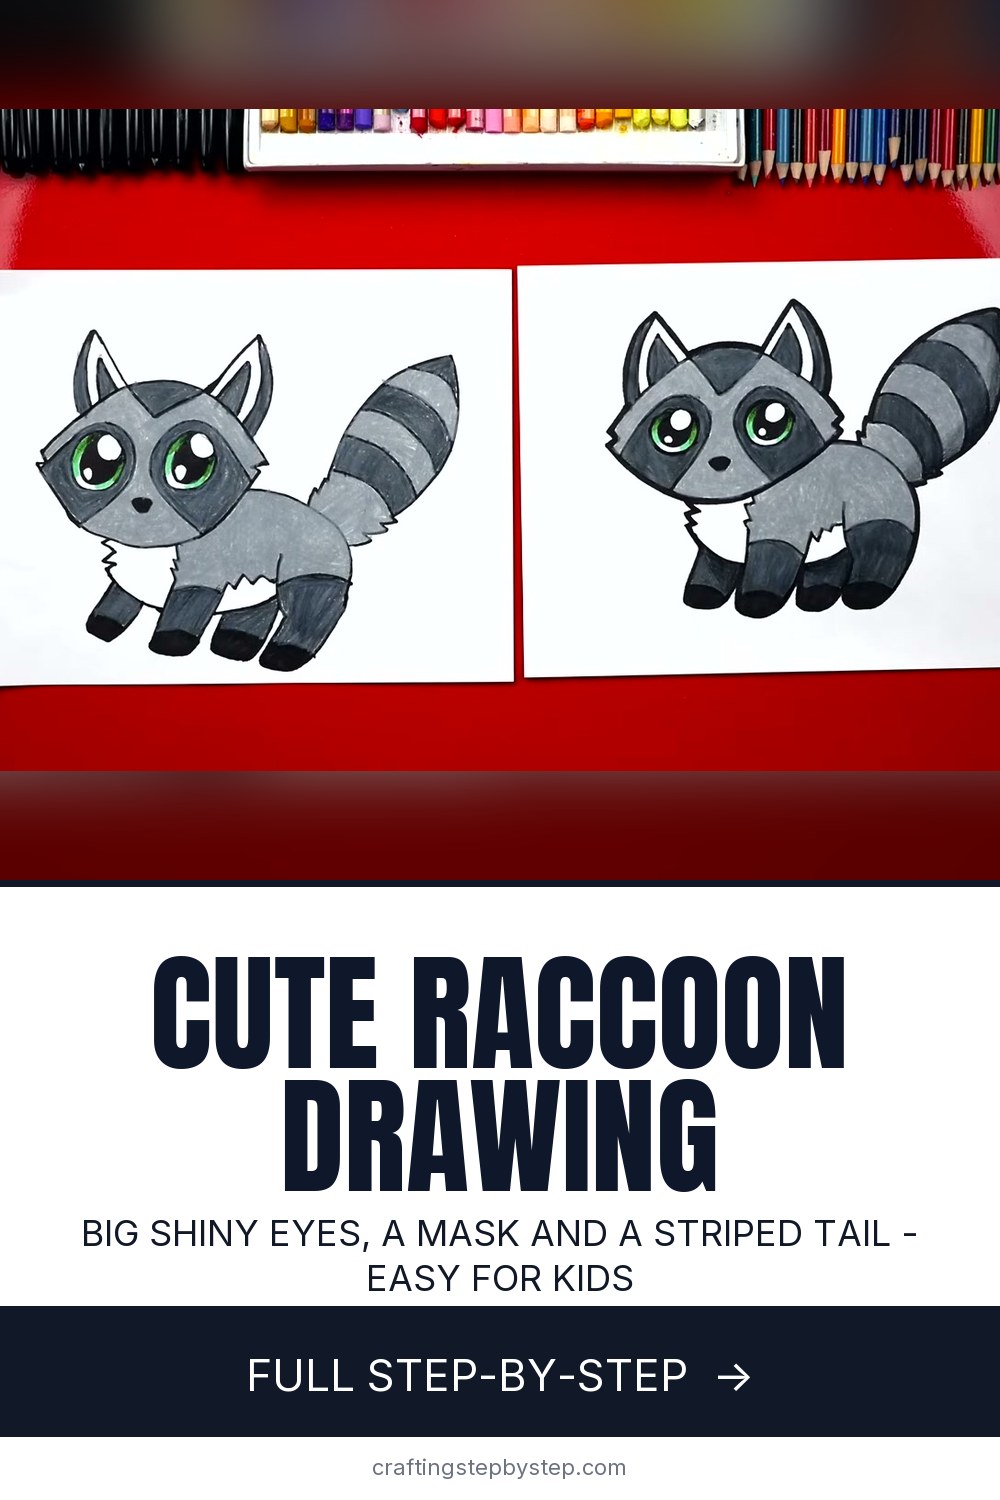
This cute raccoon drawing comes from Art for Kids Hub, where a dad and his son draw side by side at a red table. You start with two huge shiny eyes and build the whole cartoon raccoon around them: a little nose, fluffy cheeks, pointed ears, the famous mask, short legs and a big striped tail. Then you color it grey and give it green eyes.

You need a black marker, a sheet of paper and colored pencils. It takes about nine minutes.

What makes a raccoon drawing look like a raccoon

Three things. The mask, the ringed tail and the dark paws. Without them, this same body reads as a fox, a cat or a husky pup. Draw the mask as a curved band that wraps around each eye and meets at a V on the forehead. Then give the tail five or six curved stripes. Curved, not straight. Curves make the tail look round.

The big eyes are what make it cute. Leave a gap between them for the nose, and keep the highlight circles in the same spot in both eyes.

Supplies for a cartoon raccoon

A fine point permanent marker gives the bold outline in the video. Plain printer paper is fine for practice. A heavier drawing pad keeps the ink from bleeding and takes colored pencil layers better. Nervous about mistakes? Sketch in pencil and trace it after.

For color, the video uses colored pencils: light grey for the body, dark grey for the mask and stripes, black for the paws, and two greens for the eyes. Markers work too, but go light on the grey so the black lines still show.

Shading the grey fur

Grey is the hard color here. Press lightly for the body and go over it twice instead of pressing hard once. Then switch to a darker grey for the mask, the ear edges and every other tail stripe. Leave the stripes in between light. That light, dark, light pattern is what makes the tail read as ringed from across the room. The paws get the darkest color of all, so the raccoon looks like it wears little black gloves. Leave the chest and the inside of the ears white.

Make it bigger, make it yours

Draw the eyes big. The dad says it himself at the end: his son's bigger eyes looked better. Big eyes leave room for the mask and fill the page, and they are easier for small hands to color.

Once it is done, give your raccoon a scene. A trash can lid is the classic joke. A pile of fall leaves works for an October classroom wall.

Raccoon drawing ideas to try next

  • A raccoon peeking over a log, drawn from the eyes up.
  • A baby raccoon with an even bigger head and shorter legs.
  • A woodland set: add a fox and a wolf with the same big eyes.
  • Swap the mask for stripes and spots and you are close to a cat drawing.

Common raccoon drawing problems

  • It looks like a fox. Darken the mask and the tail stripes. Those two carry the whole look.
  • The tail looks flat. Curve every stripe the same way, like rings around a tube.
  • The legs look too long. Stop them short. Cartoon animals look cuter with stubby legs.
  • Coloring covers the eyes. Color around the highlight circles and leave them white.

New to drawing? Start with how to draw for the basics.

Free printable

Print the steps and supply list for this project

One page you can take to the table. Free with a free account, no password.

Get the free printable

What you'll need

Free, for this project

Get this checklist by email

  • All 4 tools and materials, with tick boxes
  • A link to print all 10 steps on paper, to keep by you while you craft

No password. The whole tutorial stays free on this page.

Quick answer

Draw a cute cartoon raccoon in 10 easy steps: big eyes, the black mask, pointed ears and a striped bushy tail, then color it grey. An easy project: about 30 minutes. You need 4 things, including colored pencils, black fine point permanent marker and pencil and eraser. The 10 steps start with draw the Raccoon's Big Round Eyes With Highlights, draw the Raccoon's Little V Nose, draw the Raccoon Head With Fluffy Cheeks and draw the Raccoon's Pointed Ears.

Step-by-step guide

10 steps, about 9 minutes. Tap a picture to jump to that step. Your progress saves automatically.

Tick each step off as you go.

  1. Step 1: Draw the Raccoon's Big Round Eyes With Highlights

    Watch this step · 1:20

    Start with two big circles near the middle of your page. Leave a gap between them. That space is for the nose and the mask later. Inside the top right of each eye, draw a smaller circle for the light. Draw a C shape around it for the pupil, then a tiny circle at the bottom left. Color the pupils black and leave the little circles white.

    Tip:

    Go big with the eyes. Bigger eyes make a cuter raccoon and give you more room for the mask.

    Back to all steps

  2. Step 2: Draw the Raccoon's Little V Nose

    Watch this step · 1:32

    Right below the eyes and between them, draw a small V. Connect the top of the V with a short line so it becomes a triangle. Then color it in black. Keep it small. A tiny nose leaves the eyes as the main feature of the face, and that is where the cuteness comes from. Check that it sits in the middle of the gap.

    Tip:

    Look at both eyes before you place the nose. Center it between them, a little lower than the bottom of the eyes.

    Back to all steps

  3. Step 3: Draw the Raccoon Head With Fluffy Cheeks

    Watch this step · 1:56

    Start out to the left of one eye. Draw a wide, spread out U that dips under the nose and comes back up on the other side. Now add a little V notch coming in on each side of the U. Those notches make the bushy cheeks. Then draw the top of the head going up over the eyes and back down to meet the cheeks.

    Tip:

    Keep the U wide. A narrow U squeezes the eyes and leaves no room for the cheeks.

    Back to all steps

  4. Step 4: Draw the Raccoon's Pointed Ears

    Watch this step · 2:26

    On top of the head, draw a line straight up, then curve it back down to the head. The outside of the ear is curved and the inside is straight. Repeat on the other side. Try to bring both ears up to the same height. It already starts to look like a raccoon at this point, even without the mask.

    Tip:

    Draw the second ear while looking at the first one. Matching is easier that way.

    Back to all steps

  5. Step 5: Draw the Raccoon Mask and the Inside of the Ears

    Watch this step · 3:38

    Here is the raccoon part. Draw an upside down U that goes up and around one eye and back down to the cheek. Do the same around the other eye. On the forehead, draw a V that lines up with the ears. Then add a thicker curve along the outer edge of each ear, and a small straight-then-curved shape inside each one.

    Tip:

    Let the mask lines hug the eyes loosely. A tight mask makes the eyes look small.

    Back to all steps

  6. Step 6: Draw the Raccoon's Zigzag Chest and Front Legs

    Watch this step · 4:28

    From under one cheek, draw a short zigzag line coming down for the fur on the chest, then curve it at the bottom. Next to it, draw another zigzag and a line coming down for the front leg. Keep it short. Curve it at the bottom and back up for the back of the leg. Add the second front leg right beside it.

    Tip:

    Short legs look cartoon cute. Stop the line sooner than you think.

    Back to all steps

  7. Step 7: Draw the Raccoon's Belly and Back Legs

    Watch this step · 5:00

    Picture the body going behind the front leg. Draw a line for the belly that comes out the back and curves up. Now the back leg. Draw a curve that connects to the belly, then a line forward that matches the front leg. Add one more curve for the back of the leg, and a curve from the cheek around to the back.

    Tip:

    Make the back legs the same length as the front legs so your raccoon stands level.

    Back to all steps

  8. Step 8: Draw the Raccoon's Big Bushy Tail

    Watch this step · 5:48

    Your raccoon is missing a big, huge tail. Draw a small zigzag where the tail meets the body for fur. Then draw a big curve going up and out. Come back down with another big curve. Stop before you connect, and draw a second zigzag to match the first one. That closes the tail with a fluffy edge.

    Tip:

    Make the tail almost as tall as the body. A big tail is what sells a raccoon.

    Back to all steps

  9. Step 9: Add Stripes to the Raccoon Tail and Draw the Paws

    Watch this step · 7:00

    Draw curved lines across the tail for stripes. Curved, not straight, so the tail looks round. Space them evenly and add two at a time. Then add a curve near the top of each leg and another near the bottom for the dark paws. Oops, only three legs? Add a fourth leg behind the others with its own paw curve.

    Tip:

    Curve every stripe the same direction. That keeps the tail looking 3D.

    Back to all steps

  10. Step 10: Color the Raccoon Grey With Green Eyes

    Watch this step · 7:50

    Now color. The video uses colored pencils. Light grey for the body, dark grey for the mask, ears and tail stripes, black for the paws. Leave the chest white. For the eyes, color the outside light green and leave a white space at the bottom. Add dark green at the top, then a little black at the very top so the eyes look shiny.

    Tip:

    Color in small circles instead of long strokes. The grey goes on smoother and looks like fur.

    Back to all steps

How to Draw an Owl

Keep going

How to Draw an Owl

You reached the last step

Save this project to come back to it

Your ticked steps, the free printable and your other saved makes, together in My Projects. Free, no password.

You tapped Save

Save this project for later

We'll email you a link, no password.

How to Draw a Raccoon

  • Your saved projects in one list
  • Your ticked steps on any device

Check your inbox for an email from us. Not there? Look in your spam folder.

Free printable

Printable sheet for this project

The bonus is hidden until you sign up.

Free with a free account, no password. Every step above stays open to everyone.

Products Used

The Checklist

How to Draw a Raccoon

Tools
2
Materials
2
Steps
10
Video
9 min

Tools we recommend

As an Amazon Associate we earn from qualifying purchases. Links on this page may be affiliate links - clicking them and buying doesn't change your price, but helps support Crafting Step by Step.

Tags

The Crafter's Weekly

New drawing tutorials, every Sunday

One short email with the week's best step-by-step guides. Free, no spam, unsubscribe anytime.

Test your knowledge

Did the lesson stick? Start with this one.

5 questions covering what you just read. No signup, no score saved, and you can stop after this one.

Question 1 of 5

What do you draw first for this raccoon?

Quick reference

Key takeaways from How to Draw a Raccoon

5 questions, answers, and one-line explanations. Tap to expand.

  1. 1.What do you draw first for this raccoon?

    Answer: Two big round eyes

    The whole raccoon is built around two big shiny eyes.

  2. 2.Why leave a gap between the two eyes?

    Answer: Room for the nose and mask

    The space between the eyes holds the nose and the mask later.

  3. 3.Without which three details would this body read as a fox or cat?

    Answer: Mask, ringed tail and dark paws

    The mask, ringed tail and dark paws are the raccoon giveaways.

  4. 4.Why draw the tail stripes curved instead of straight?

    Answer: Curves make the tail look round

    Curved stripes wrap around the tail and give it volume.

  5. 5.How do you get even grey fur with colored pencil?

    Answer: Press lightly and go over it twice

    Two light layers give smoother grey than one heavy pass.

Did this work for you?

What's next

Related collections

Curated theme pages that include this tutorial.

Similar tutorials

Hand-picked next reads based on the one you just finished.

Liked this drawing tutorial?

Pick the crafts you want to hear about. One email every Sunday with new step-by-step tutorials. No spam, easy to unsubscribe.

Get more like this in your inbox

Weekly digest. Pick the categories you want. Unsubscribe anytime.

Send me tutorials about

We only email about new tutorials. Easy unsubscribe anytime.