How to Draw a Gingerbread Man

Save it for later. We'll email you a link, no password.

Find it again on your phone or computer, with your finished steps ticked.

You tapped Save

Save this project for later

We'll email you a link, no password.

How to Draw a Gingerbread Man

  • Your saved projects in one list
  • Your ticked steps on any device

Check your inbox for an email from us. Not there? Look in your spam folder.

  • 10 steps
  • 8:18 video
  • Difficulty: Easy
  • About 30 minutes
  • Drawing

Based on a video by Art for Kids Hub

Opens their YouTube channel

Steps written out by Crafting Step by Step · Published · Updated

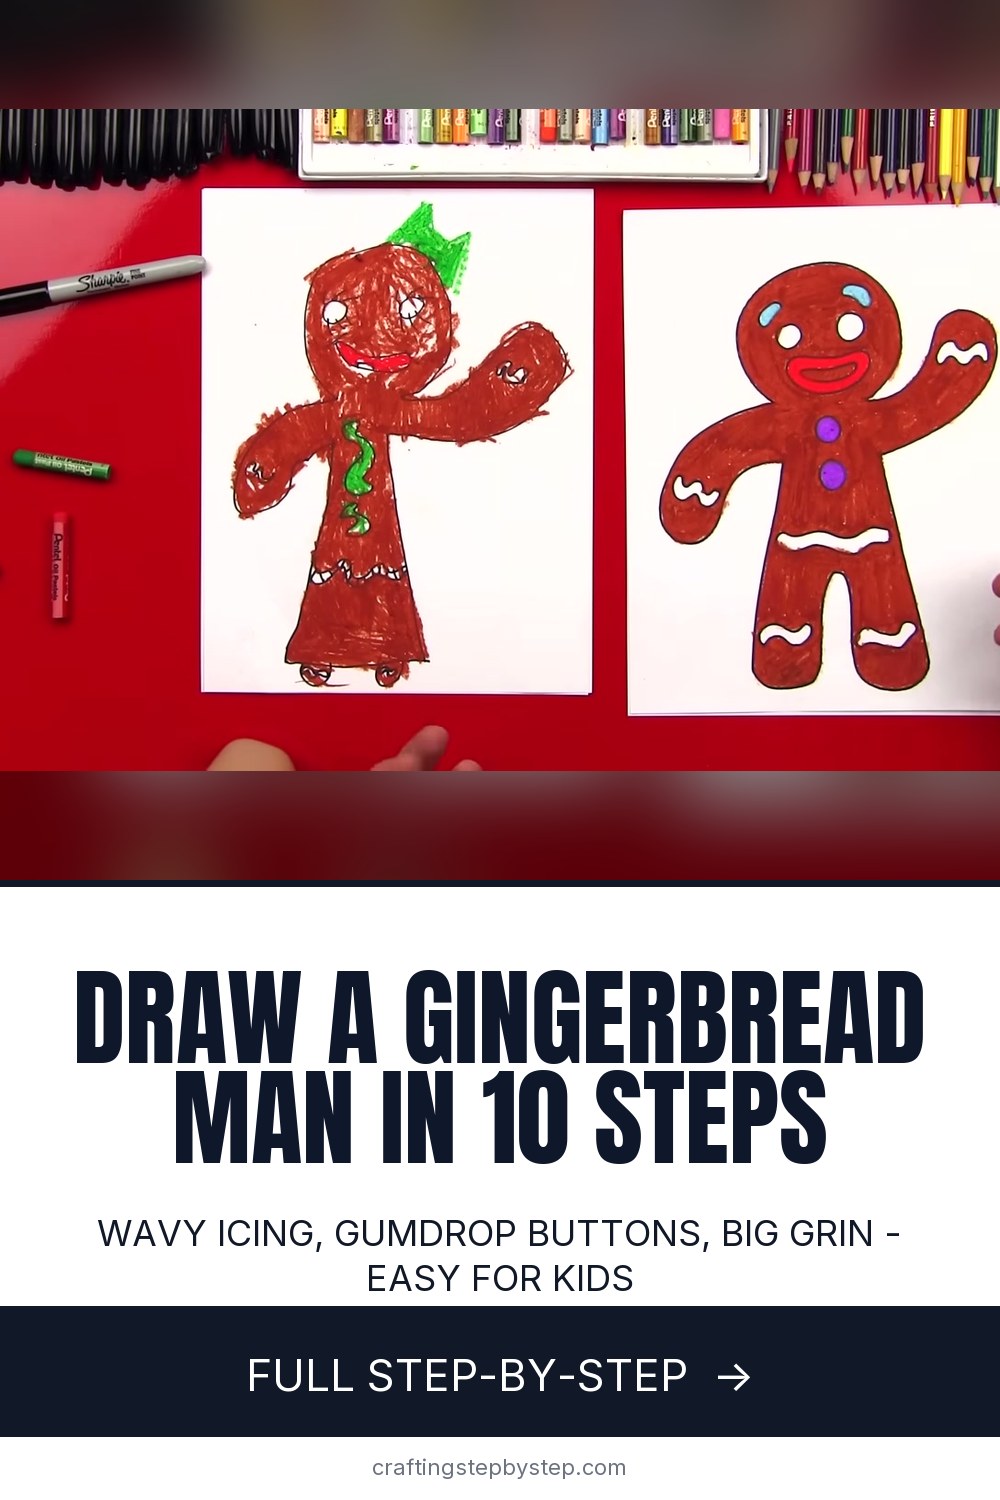
The finished result: How to Draw a Gingerbread Man

A gingerbread man is one of the friendliest things a kid can draw. He is round, a little lopsided, and nobody minds if one arm comes out bigger than the other. This lesson comes from Rob at Art for Kids Hub, who draws it next to his daughter Hadley. She turns hers into a gingerbread girl with a dress, so you get two versions in one video.

The outline goes down in one black marker. Then comes the fun part: eyes, a goofy grin, gumdrop buttons and wavy lines of icing. You finish by coloring him cookie brown and leaving the icing white. Plan on about fifteen minutes.

What you need

A black marker, a sheet of paper and something brown. Rob uses oil pastels, which go on thick and make the drawing look like a baked cookie. Crayons give a similar waxy look. Markers are faster but can streak on large areas, so color in small circles. Turn the paper vertical before you start. The gingerbread man stands up tall and needs the height.

Why the head starts as an open circle

The head is drawn with a gap at the bottom, marked by two small dots. Those dots are where the neck goes, and the arms grow straight out of them. Because the head never closes, there is no line to erase where it meets the body. The whole outline reads as one smooth cookie shape, the way a real cutter would make it.

Gingerbread man or gingerbread girl

Stop at the body lines and you have a choice. Connect them at the bottom with a flat line and add two little feet, and you have a dress. Draw a leg on each side with a rounded notch between them, and you have a classic gingerbread man. Kids love making a whole family this way: a tall one, a small one, one with a bow. Add a bow on the head or a scarf at the neck to tell them apart.

Decorating ideas

The face and icing are where every drawing gets its own personality. Rob draws a wide mouth like the cookie in Shrek. Hadley adds eyelashes and a single tooth. Try candy buttons in three colors, a zigzag of icing down the middle, or rosy cheeks. Leave the icing lines uncolored so they stay bright white against the brown. If you want the same look on real cookies, a bag of white royal icing and the same wavy lines will do it.

Holiday uses

A small gingerbread man fits on the front of a folded Christmas card. Draw a few on cardstock, cut them out and punch a hole for a tree hanger, or tie one to a present as a tag. Our Christmas gift tags and Christmas ornaments guides show both ideas. Teachers can line a classroom window with a row of them next to a paper Christmas tree.

Common gingerbread man drawing problems

  • The arm runs into the body. Put a dot below the neck dot before you draw the second arm. Start and stop the arm on those dots.
  • He looks too skinny. Draw the arms and legs fat, like hot dogs. A thin gingerbread man looks like a stick figure.
  • The icing disappears. Outline the icing in marker before you color, then color around it.

Want more faces to practice? Try how to draw a face, or start with how to draw for the basics.

Free printable

Print the steps and supply list for this project

One page you can take to the table. Free with a free account, no password.

Get the free printable

What you'll need

Free, for this project

Get this checklist by email

  • All 5 tools and materials, with tick boxes
  • A link to print all 10 steps on paper, to keep by you while you craft

No password. The whole tutorial stays free on this page.

Quick answer

Draw a cute gingerbread man in 10 easy steps: round head, waving arm, big smile, gumdrop buttons and wavy icing. An easy project: about 30 minutes. You need 5 things, including drawing paper or sketch pad, brown oil pastels or crayons and black fine point permanent marker. The 10 steps start with draw the Gingerbread Man's Round Head With a Gap for the Neck, draw the Gingerbread Man's Waving Arm and add the Second Arm and the Gingerbread Man's Body Lines.

Step-by-step guide

10 steps, about 8 minutes. Tap a picture to jump to that step. Your progress saves automatically.

Tick each step off as you go.

  1. Step 1: Draw the Gingerbread Man's Round Head With a Gap for the Neck

    Watch this step · 1:24

    Turn your paper so it is tall, not wide. Near the top, put two small dots side by side. That gap is the neck. Start your marker on the left dot and draw a big round head up and over to the right dot. Do not close the circle. The open bottom is where the arms and body will connect later.

    Tip:

    Move the dots a little farther apart if the head looks pinched. A wide neck makes a sturdier cookie.

    Back to all steps

  2. Step 2: Draw the Gingerbread Man's Waving Arm

    Watch this step · 1:43

    From the right neck dot, draw a line curving up and out. Round off the end like a hot dog, then bring a second line back down and in toward where the body will be. The arm points up, so your gingerbread man looks like he is waving hello. Keep it thick. Gingerbread arms are short and chubby, not long and thin.

    Tip:

    Stop the bottom line well away from the head. You need room there for the body line.

    Back to all steps

  3. Step 3: Add the Second Arm and the Gingerbread Man's Body Lines

    Watch this step · 2:38

    Put a new dot on the left, a little below the neck dot. Draw the second arm from the neck dot out and down, round off the end, and bring it back up to the new dot. This arm hangs down so he is not waving with both hands. From the bottom of each arm, draw a long line straight down the page. Those two lines are the sides of the gingerbread man's body.

    Tip:

    Let the body lines spread out a little as they go down. It gives him a solid, cookie-cutter shape.

    Back to all steps

  4. Step 4: Draw the Gingerbread Man's Legs and Rounded Feet

    Watch this step · 3:12

    At the bottom of each body line, curve out and round off a foot. Bring the line back up the inside of the leg, make a rounded notch between the legs, and come back down for the other foot. Now the outline is finished. Want a gingerbread girl instead? Connect the two body lines with a flat line for a dress and add two small feet under it.

    Tip:

    Make both feet the same size. Lopsided feet make the gingerbread man look like he is tipping over.

    Back to all steps

  5. Step 5: Draw Two Round Gingerbread Man Eyes

    Watch this step · 3:38

    Draw two circles side by side in the upper half of the head. Make them big. Large eyes are what make a gingerbread man look happy instead of spooky. Leave them white for now. If you like, add a few short lines on the outside of each eye for eyelashes, the way Hadley does on her gingerbread girl.

    Tip:

    Space the eyes about one eye-width apart. Too close together and he looks worried.

    Back to all steps

  6. Step 6: Draw a Big Smiling Gingerbread Man Mouth

    Watch this step · 4:08

    Under the eyes, draw a wide curved line for the top of the mouth. Bring a deeper curve around underneath to close it, so the mouth looks like a hot dog bent into a smile. Rob makes his big and goofy, like the gingerbread man in Shrek. Draw a second curve inside the mouth to show the opening. Any mouth works here, so have fun with it.

    Tip:

    Give the mouth a tooth or a tongue. Small details like that are what make kids laugh when they see it.

    Back to all steps

  7. Step 7: Add Jelly Bean Eyebrows and Gumdrop Buttons to the Gingerbread Man

    Watch this step · 4:48

    Above each eye, draw a small jelly bean shape for an eyebrow. Tilt them a little for a surprised or cheeky look. Skip them if you prefer a plain face. Go down to the chest and draw two circles, one above the other, in the middle of the body. These are the gumdrop buttons. You will color them later, so draw them a good size.

    Tip:

    Add a third button lower down if your gingerbread man is tall. Odd numbers look best.

    Back to all steps

  8. Step 8: Draw Wavy Icing Trim on the Gingerbread Man's Hands

    Watch this step · 5:45

    Near the end of each arm, draw a wavy line that goes up and down like a small W. Then draw a second wavy line a tiny bit below it and connect the two at both ends. That closed squiggle looks like a piped line of icing. Do one on the waving hand and one on the lower hand. You will leave these white when you color.

    Tip:

    Keep the wave small and tight. A big loose wave reads as a worm, not icing.

    Back to all steps

  9. Step 9: Add an Icing Belt and Leg Trim to the Gingerbread Man

    Watch this step · 6:32

    Draw a longer wavy icing line across the waist, from one side of the body to the other, and close it into a band. That is his belt. Now add a short band of icing near the bottom of each leg, the same way you did the hands. On a gingerbread girl, put the wavy line along the hem of the dress or across the neck instead.

    Tip:

    Match the size of every icing band. When they line up, the drawing looks decorated with one piping bag.

    Back to all steps

  10. Step 10: Color the Gingerbread Man Brown and Leave the Icing White

    Watch this step · 7:14

    Pick a warm brown oil pastel or crayon and color the whole body, head, arms and legs. Work around the eyes, the inside of the mouth and every icing band so they stay white. Color the mouth red, the buttons purple or any candy color you like, and the eyebrows blue. Go over the brown twice for a rich, baked cookie look.

    Tip:

    Color the edges first, then fill the middle. It keeps the brown from slipping over the icing.

    Back to all steps

How to Draw a Raven (Realistic Pencil Sketch)

Keep going

How to Draw a Raven (Realistic Pencil Sketch)

You reached the last step

Save this project to come back to it

Your ticked steps, the free printable and your other saved makes, together in My Projects. Free, no password.

You tapped Save

Save this project for later

We'll email you a link, no password.

How to Draw a Gingerbread Man

  • Your saved projects in one list
  • Your ticked steps on any device

Check your inbox for an email from us. Not there? Look in your spam folder.

Free printable

Printable sheet for this project

The bonus is hidden until you sign up.

Free with a free account, no password. Every step above stays open to everyone.

Products Used

The Checklist

How to Draw a Gingerbread Man

Tools
2
Materials
3
Steps
10
Video
8 min

Tools we recommend

As an Amazon Associate we earn from qualifying purchases. Links on this page may be affiliate links - clicking them and buying doesn't change your price, but helps support Crafting Step by Step.

Tags

The Crafter's Weekly

New drawing tutorials, every Sunday

One short email with the week's best step-by-step guides. Free, no spam, unsubscribe anytime.

Test your knowledge

Did the lesson stick? Start with this one.

5 questions covering what you just read. No signup, no score saved, and you can stop after this one.

Question 1 of 5

Why is the head drawn as an open circle with two dots?

Quick reference

Key takeaways from How to Draw a Gingerbread Man

5 questions, answers, and one-line explanations. Tap to expand.

  1. 1.Why is the head drawn as an open circle with two dots?

    Answer: The arms grow straight out of the neck gap

    With no line to close, the outline flows into one smooth cookie shape.

  2. 2.Why point one arm up and let the other hang down?

    Answer: It makes him look like he is waving

    One raised arm adds movement and personality.

  3. 3.What makes the gingerbread man look happy instead of spooky?

    Answer: Big round eyes and a wide smile

    Large eyes and a goofy grin read as friendly.

  4. 4.How do you draw a piped line of icing?

    Answer: Two wavy lines joined at both ends

    A closed wavy band looks like icing squeezed from a bag.

  5. 5.When coloring the cookie brown, what should stay white?

    Answer: The icing bands, eyes and inside of the mouth

    Working around the icing is what makes it look like real frosting.

Did this work for you?

What's next

Related collections

Curated theme pages that include this tutorial.

Similar tutorials

Hand-picked next reads based on the one you just finished.

Liked this drawing tutorial?

Pick the crafts you want to hear about. One email every Sunday with new step-by-step tutorials. No spam, easy to unsubscribe.

Get more like this in your inbox

Weekly digest. Pick the categories you want. Unsubscribe anytime.

Send me tutorials about

We only email about new tutorials. Easy unsubscribe anytime.