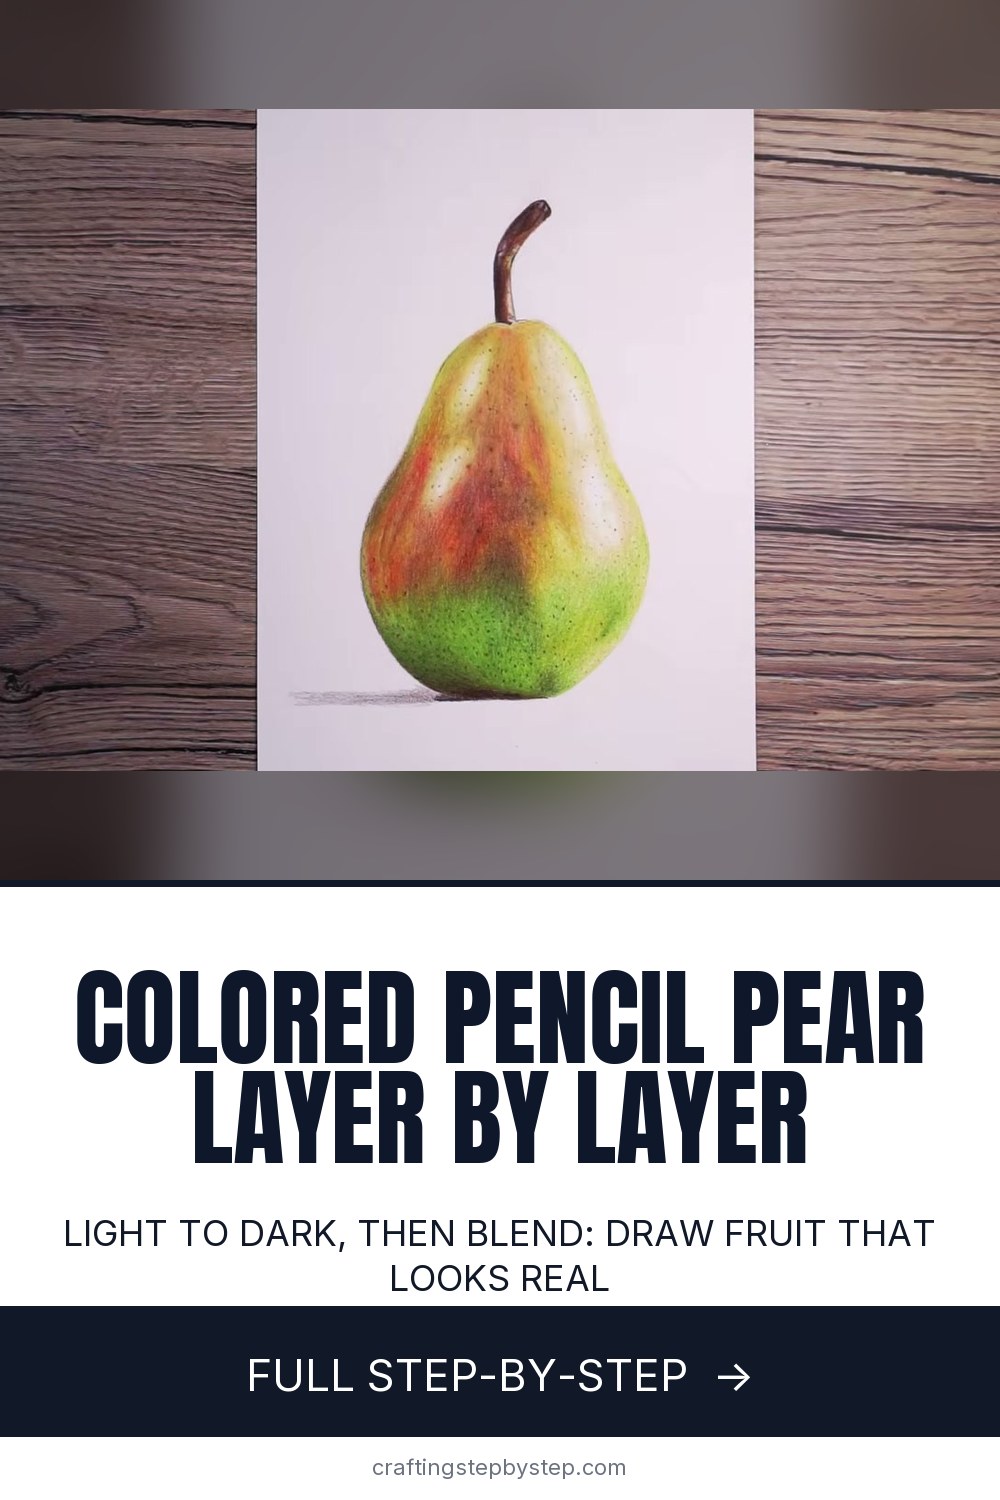
Colored pencils look easy until you try to make something look real. The trick is layering: many light coats of color, built up slowly, instead of one heavy pass. Gemma Chambers of Gemma Chambers Art shows the whole method on a ripe pear, from the first pale wash of cream to the speckled skin and curved stem. The same process works on fruit, flowers, pets or faces.
How to draw with colored pencils: the short version
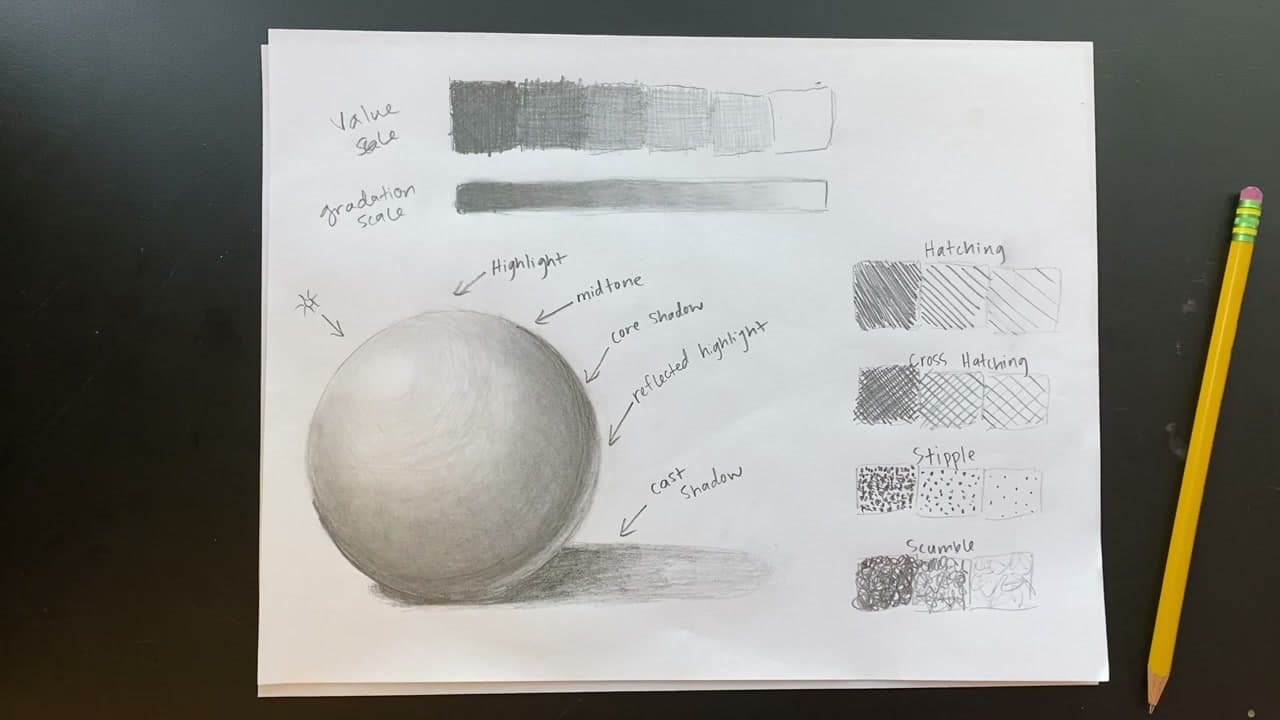
- Press lightly and use small circles for smooth, even color.
- Start with the lightest color and work toward the darkest.
- Then go back up from dark to light, pressing harder each time.
- Add texture and small details last.
Why light pressure matters
Colored pencil is wax or oil pigment. Every heavy stroke flattens the tooth of the paper, and once the tooth is full, nothing more will stick. Light layers leave room for the next color and the next. That is how you get deep, rich color and smooth blends. Gemma warns that a layered drawing tends to look washed out until the last stretch. That is normal. Keep going.
Choosing pencils and paper
Soft core pencils like Prismacolor Premier lay down creamy color and blend well. Harder pencils work too but need more layers. You do not need 150 colors. A set of 24 to 48 covers most subjects once you learn to mix by layering. For paper, smooth Bristol board takes many layers and gives fine detail. Drawing paper with a little tooth is fine for practice. Thin printer paper pills and tears after a few coats.
Picking colors from a reference photo
Work from a photo or a real object, not from memory. Squint at it to see the big color areas. Look for the lightest color in each area first, then the next darkest. The top of Gemma's pear runs cream to brown to red, and the bottom runs pale green to deep green. Leave the bright highlight spots as bare paper from the start. Pure white is hard to add back later.
Layering vs blending
People ask about the difference all the time. They are close to the same thing. Blending is the result you get from layering: two colors laid over each other read as one new color. Some artists use a colorless blender pencil or a solvent to melt the layers together, but firm pressure with your lightest pencil does a similar job, as you will see in step 8.
Common problems
- Waxy shine and colors will not stick. You pressed too hard too soon. Spray fixative lightly between layers, or plan for fewer heavy passes next time.
- Grainy, speckled look. Paper is showing through. Add another light layer, or burnish with your lightest color.
- Muddy colors. Too many dark layers over each other. Mix with neighbors on the color wheel instead of black.
Practice ideas
Simple round fruit makes a great first subject: a pear, an apple, a lemon or a peach. Then try a flower or a pet portrait. Frame the finished piece, or turn a small one into a greeting card.
New to drawing? Start with how to draw and how to shade, then try drawing an apple. For a softer, painterly look, try watercolor pencils.