How to Draw Flowers

Save it for later. We'll email you a link, no password.

Find it again on your phone or computer, with your finished steps ticked.

You tapped Save

Save this project for later

We'll email you a link, no password.

How to Draw Flowers

  • Your saved projects in one list
  • Your ticked steps on any device

Check your inbox for an email from us. Not there? Look in your spam folder.

  • 7 steps
  • 12:57 video
  • Difficulty: Easy
  • About 45 minutes
  • Materials about $6 to $12
  • Drawing

Based on a video by Jennifer M. Beaupre

Opens their YouTube channel

Steps written out by Crafting Step by Step · Published · Updated

The finished result: How to Draw Flowers
Also in:Painting

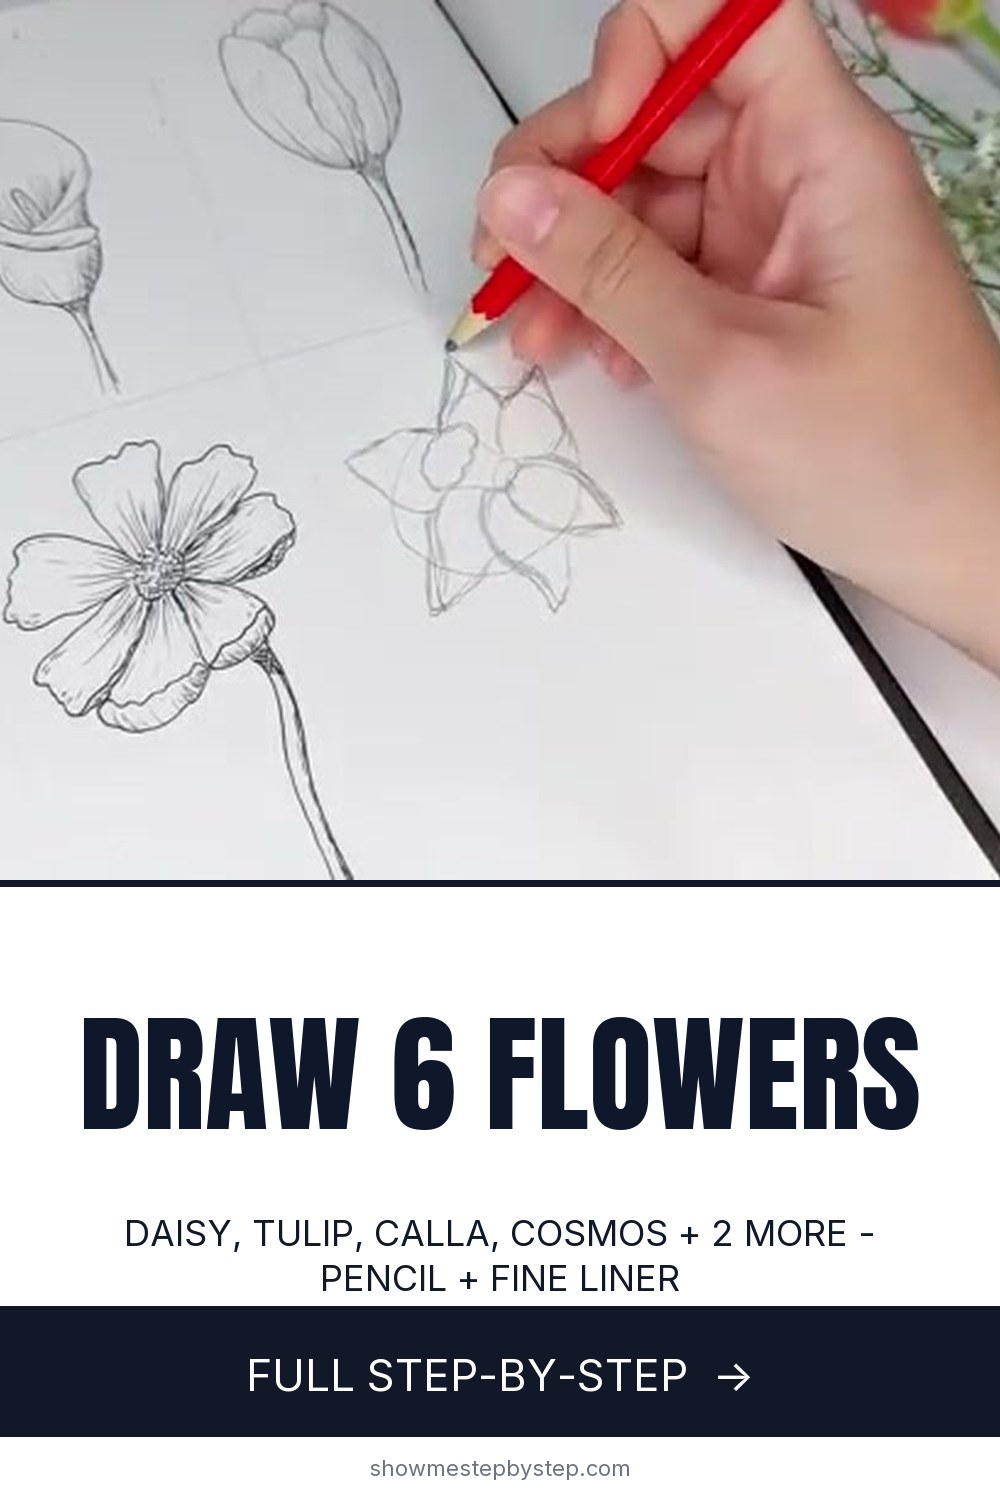
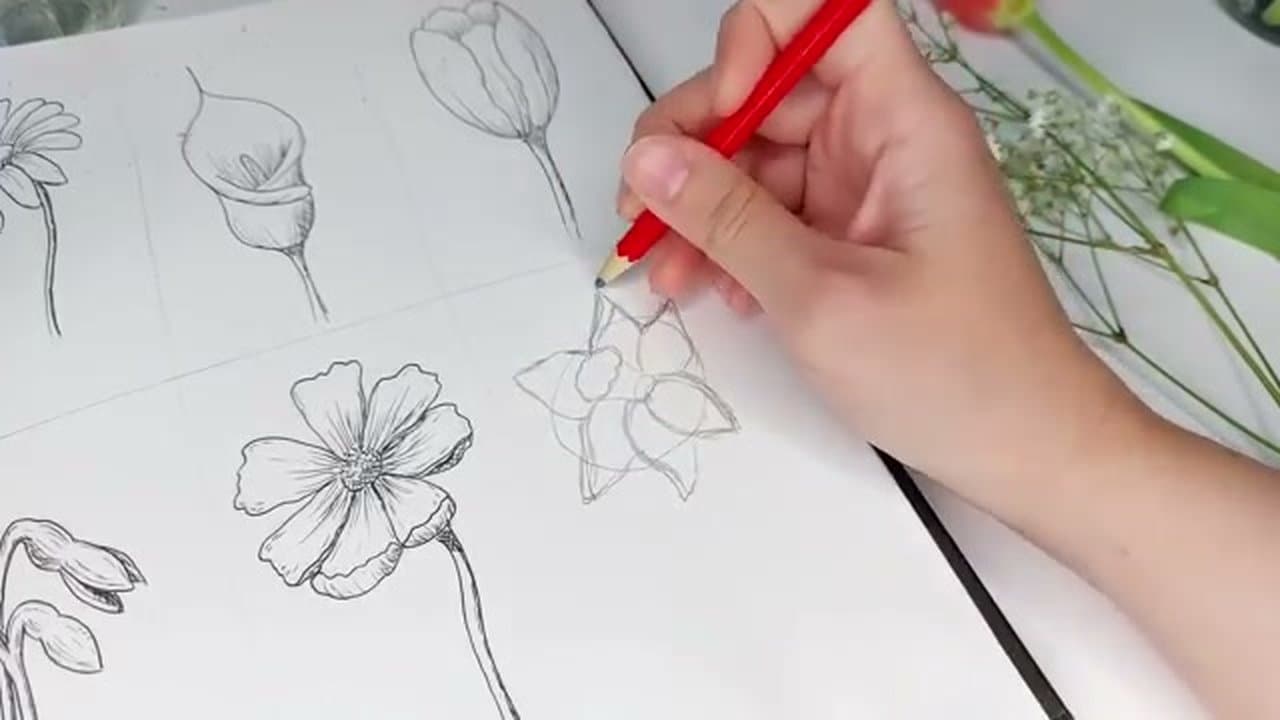
Drawing realistic flowers feels like an advanced skill, but every flower is a few simple shapes layered up with the right shadows. Jennifer Beaupre walks through six different flowers in this tutorial, each one teaching a slightly different shape language - circles for the daisy and cosmos, soft curves for the calla lily, fluttery edges for the tulip and daffodil, and bulby teardrops for the snowdrop.

The technique is the same for all six. Sketch loosely in pencil, outline with a 03 fine liner, erase the pencil, then go back in with a 01 for contour lines, shadow strokes and cross-hatching. The hatching is what turns a flat sketch into something that could sit in a botanical book.

Plan on about an hour for all six, 6-10 minutes each. Skip to whichever flower you want most, or repeat one across the page.

The center-and-petals formula

Nearly every flower starts the same way: place the center, draw a guide shape for the outer edge, then hang petals between the two. The center tells you where the flower faces. A round center means it looks straight at you. Squash that circle into an oval and the whole flower tilts, so the petals on the near side get shorter and the far ones hide behind the center.

Count and petal shape do the rest. Get those two right and the flower reads as itself even in a rough sketch.

What makes each of the six read as that flower

  • Daisy - lots of narrow petals around a big textured center. The count can be loose.
  • Calla lily - one wrapped, cone-like petal with a single spike up the middle. No separate petals at all.
  • Tulip - a closed cup taller than it is wide, with wavy edges.
  • Snowdrop - three drooping teardrop petals hanging from a bent stem.
  • Cosmos - exactly seven tapered petals with wiggly edges, a few flipped up at the tips.
  • Daffodil - six flat petals in a star behind a ruffled trumpet.

For more petals and harder folds, try the rose or the sunflower next.

Stems, leaves and drawing a bouquet

A stem is two lines that stay the same distance apart, and it should enter the flower at the center, not at the edge. Tuck it behind the head so it looks attached. Leaves come off the stem at an angle and point upward. Daffodils and tulips get long, strappy leaves; daisies get small jagged ones. The leaf tutorial covers veins and folded edges.

For a bouquet, draw the biggest flower first near the middle, then tuck smaller ones around and behind it. Overlap is the secret. Let one flower cover part of another and vary which way each head faces. Gather every stem to one point low in the bunch.

Adding color

Fine liner ink is waterproof once dry, so you can color right over it. Colored pencils work well: lay a light base, then darken the same spots you hatched. Watercolor is faster - a pale wash over the ink lets the line work do the shading for you. The flower painting tutorial goes further with brushes. Leave the paper white at the petal tips where the light hits.

Common mistakes

  • Every petal the same. Real petals vary. Change the length and angle a little each time.
  • Stem glued to the side of the head. Line it up with the center.
  • Erasing too soon. Wait until the ink is fully dry, or the eraser drags it into gray streaks.
  • Too much hatching. Shadows belong at the petal base and where petals overlap. Stop before the flower goes gray.

If the sketching and shading here feel like guesswork, the fundamentals - pencil grades, the light-pass method and picking a light source - are at how to draw.

Free printable

Print the steps and supply list for this project

One page you can take to the table. Free with a free account, no password.

Get the free printable

What you'll need

Free, for this project

Get this checklist by email

  • All 5 tools and materials, with tick boxes
  • A link to print all 7 steps on paper, to keep by you while you craft

No password. The whole tutorial stays free on this page.

Quick answer

Beginner flower drawing tutorial. Daisy, calla lily, tulip, snowdrop, cosmos, daffodil with pencil and fine liner. Step-by-step photos for each. An easy project: about 45 minutes. Materials cost about $6 to $12. You need 5 things, including Sketchbook or drawing paper, Pencil and Eraser. The 7 steps: set up your page, draw a daisy, draw a calla lily, draw a tulip, draw snowdrops, draw a cosmos and draw a daffodil.

Step-by-step guide

7 steps, about 13 minutes. Tap a picture to jump to that step. Your progress saves automatically.

Tick each step off as you go.

  1. Step 1: Set up your page

    Watch this step · 0:22

    Section your sketchbook page into six equal boxes with light pencil lines - two columns and three rows works well. This keeps each flower confined to its own space so the page looks tidy at the end.

    Have a pencil, eraser, and at least two fine liner pens ready. A 03 fine liner is for outlining, and a 01 is for the smaller shadow strokes that come later.

    Tip:

    If you only own one fine liner, use it - the size difference matters less than the artist makes it sound. Just press lighter for the shadow lines and harder for the outlines.

    Back to all steps

  2. Step 2: Draw a daisy

    Watch this step · 1:05

    Start with one big circle for the outer flower and a smaller circle in the middle for the florets. Add petals around the outer circle - the daisy is forgiving, so anywhere from 10 to 20 petals will look right. Don't worry about exact symmetry.

    Outline with the 03 fine liner, then erase the pencil. Use the 01 to add a contour line down the middle of each petal and cross-hatching in the floret center. Those small lines are what make the flower feel real instead of cartoonish.

    Back to all steps

  3. Step 3: Draw a calla lily

    Watch this step · 2:10

    Make the calla lily shape soft and loose - two long curving arms that wrap around each other above a curved bell shape. Add a thin pistol straight up the center.

    Outline with the fine liner, then add contour lines around the bottom of the flower for the bell shape. The right side of the flower gets shadow lines and a touch of cross-hatching to suggest it curves away from the light. Add darkness behind the pistol too - it deepens the throat of the flower.

    Back to all steps

  4. Step 4: Draw a tulip

    Watch this step · 4:00

    Start with a rough rectangle outline. Place two main petals on the outside, then build inner and back petals between them. Round out the corners and keep the petal edges fluttery and slightly wiggly - hard curved lines look stiff and unnatural.

    Outline with the fine liner, then add a single line down the center of each petal. Add small shadow strokes near the base of each petal and a few cross-hatch marks underneath the flower for ground shadow.

    Tip:

    If your tulip looks too symmetrical, that's a sign you outlined too carefully. Real tulips lean and tip - a slight asymmetry makes the drawing more believable.

    Back to all steps

  5. Step 5: Draw snowdrops

    Watch this step · 6:40

    Start with bulby circles, then elongate each into three teardrop petals - only three are visible per flower. Draw two snowdrops if you want, one fully open and one barely open. Add a quick angled stem and a single grass blade poking out near it.

    Snowdrops are very curved and bulbous. Contour around the petal edges to emphasize the volume, and use light cross-hatching underneath to suggest weight without overworking the drawing. Less is more here - the flower looks delicate when you stop early.

    Back to all steps

  6. Step 6: Draw a cosmos

    Watch this step · 8:00

    Make a big outer circle and a smaller inner one for the pistol. Add exactly seven tapered petals - cosmos look wrong with a different count. Keep the petal edges wiggly and let a few petals flip upward for a more realistic curl.

    Outline everything except the top of the pistol - leave that part open. Add darkness in the middle with cross-hatching, then shadow lines near each petal base and along the inner edges. The open top of the pistol is what makes the cosmos look three-dimensional rather than flat.

    Back to all steps

  7. Step 7: Draw a daffodil

    Watch this step · 10:40

    Start with three circles - a large outer one for the petal spread, a middle fluttery one for the trumpet rim, and a small one for the trumpet base. Connect the two smaller circles into a trumpet shape, then add six petals around the outer circle in a star pattern.

    Outline with the fine liner using a wiggly line on the trumpet rim - that ruffled edge is signature daffodil. Add depth with shadow lines inside the trumpet and at the base of each petal. Lines clustered at the petal base make the flower look like it has weight and dimension.

    Back to all steps

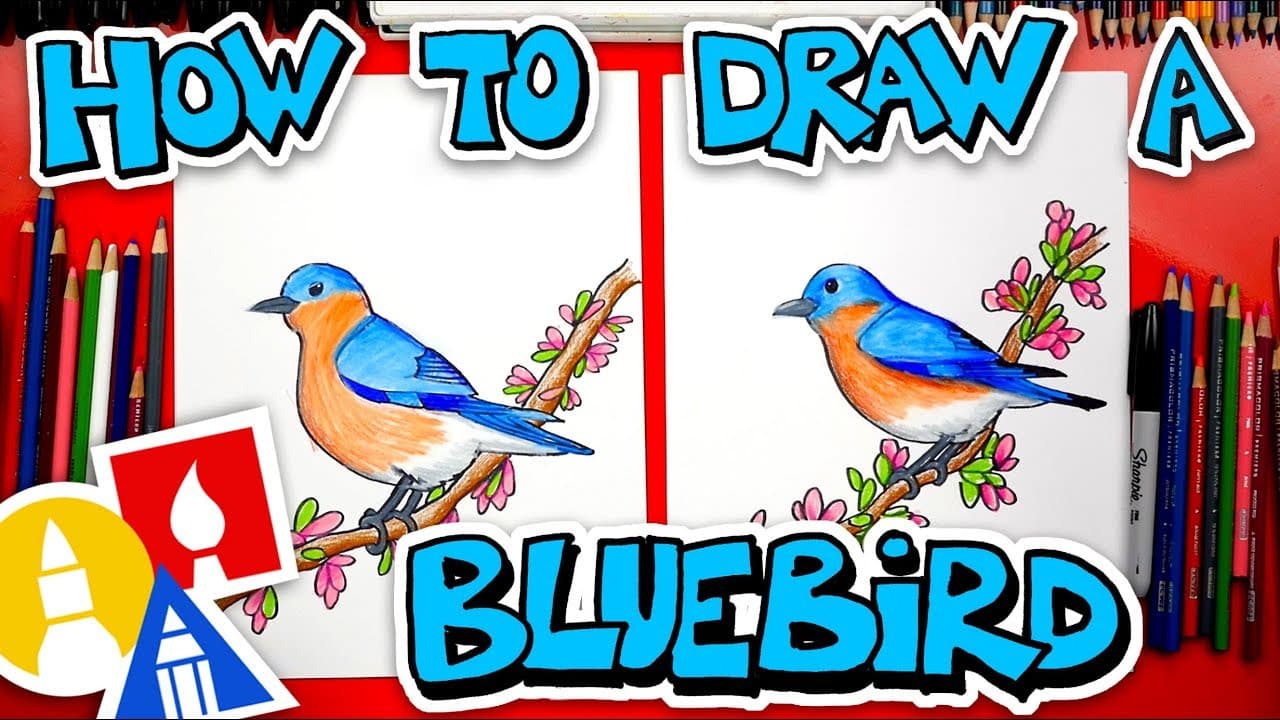
How to Draw a Bird: Step-by-Step Bluebird Drawing for Beginners

Keep going

How to Draw a Bird: Step-by-Step Bluebird Drawing for Beginners

9 steps · about 8 minutes

You reached the last step

Save this project to come back to it

Your ticked steps, the free printable and your other saved makes, together in My Projects. Free, no password.

You tapped Save

Save this project for later

We'll email you a link, no password.

How to Draw Flowers

  • Your saved projects in one list
  • Your ticked steps on any device

Check your inbox for an email from us. Not there? Look in your spam folder.

Free printable

Printable sheet for this project

The bonus is hidden until you sign up.

Free with a free account, no password. Every step above stays open to everyone.

Products Used

The Checklist

How to Draw Flowers

Tools
4
Materials
1
Steps
7
Video
13 min

Tools we recommend

As an Amazon Associate we earn from qualifying purchases. Links on this page may be affiliate links - clicking them and buying doesn't change your price, but helps support Crafting Step by Step.

Tags

The Crafter's Weekly

New drawing tutorials, every Sunday

One short email with the week's best step-by-step guides. Free, no spam, unsubscribe anytime.

Test your knowledge

Did the lesson stick? Start with this one.

5 questions covering what you just read. No signup, no score saved, and you can stop after this one.

Question 1 of 5

What pen size is used to outline each flower?

Quick reference

Key takeaways from How to Draw Flowers

5 questions, answers, and one-line explanations. Tap to expand.

  1. 1.What pen size is used to outline each flower?

    Answer: 03 fine liner

    The 03 fine liner does the main outline. The 01 comes back later for smaller contour and shadow strokes that add depth.

  2. 2.How many petals should a cosmos always have?

    Answer: Seven petals

    Exactly 7 tapered petals. Cosmos look wrong with a different count. The flower's identity is in that specific petal number.

  3. 3.Technique that makes flowers feel three-dimensional?

    Answer: Cross-hatching shadows

    Cross-hatching is what separates a flat sketch from a botanical-looking flower. Concentrate it in shadow areas and petal bases.

  4. 4.How many flowers does the tutorial cover?

    Answer: Six flowers

    Daisy, calla lily, tulip, snowdrop, cosmos, and daffodil. Section your page into 6 boxes so each one has its own space.

  5. 5.Why keep tulip petal edges wiggly?

    Answer: Avoids stiff look

    Hard curved lines look stiff and unnatural. Real tulips lean and tip slightly - a wiggly edge and mild asymmetry feels believable.

Did this work for you?

What's next

Related collections

Curated theme pages that include this tutorial.

Similar tutorials

Hand-picked next reads based on the one you just finished.

Liked this drawing tutorial?

Pick the crafts you want to hear about. One email every Sunday with new step-by-step tutorials. No spam, easy to unsubscribe.

Get more like this in your inbox

Weekly digest. Pick the categories you want. Unsubscribe anytime.

Send me tutorials about

We only email about new tutorials. Easy unsubscribe anytime.