How to Crochet a Blanket

The finished result: How to Crochet a Blanket
  • Difficulty: Easy
  • About 20 hours
  • 7 steps

You tapped Save

Save this project for later

We'll email you a link, no password.

How to Crochet a Blanket

  • Your saved projects in one list
  • Your ticked steps on any device

Check your inbox for an email from us. Not there? Look in your spam folder.

Print

Steps written out by Crafting Step by Step from Bella Coco's video (opens YouTube) (17:29). Published .

Also in:Crafts

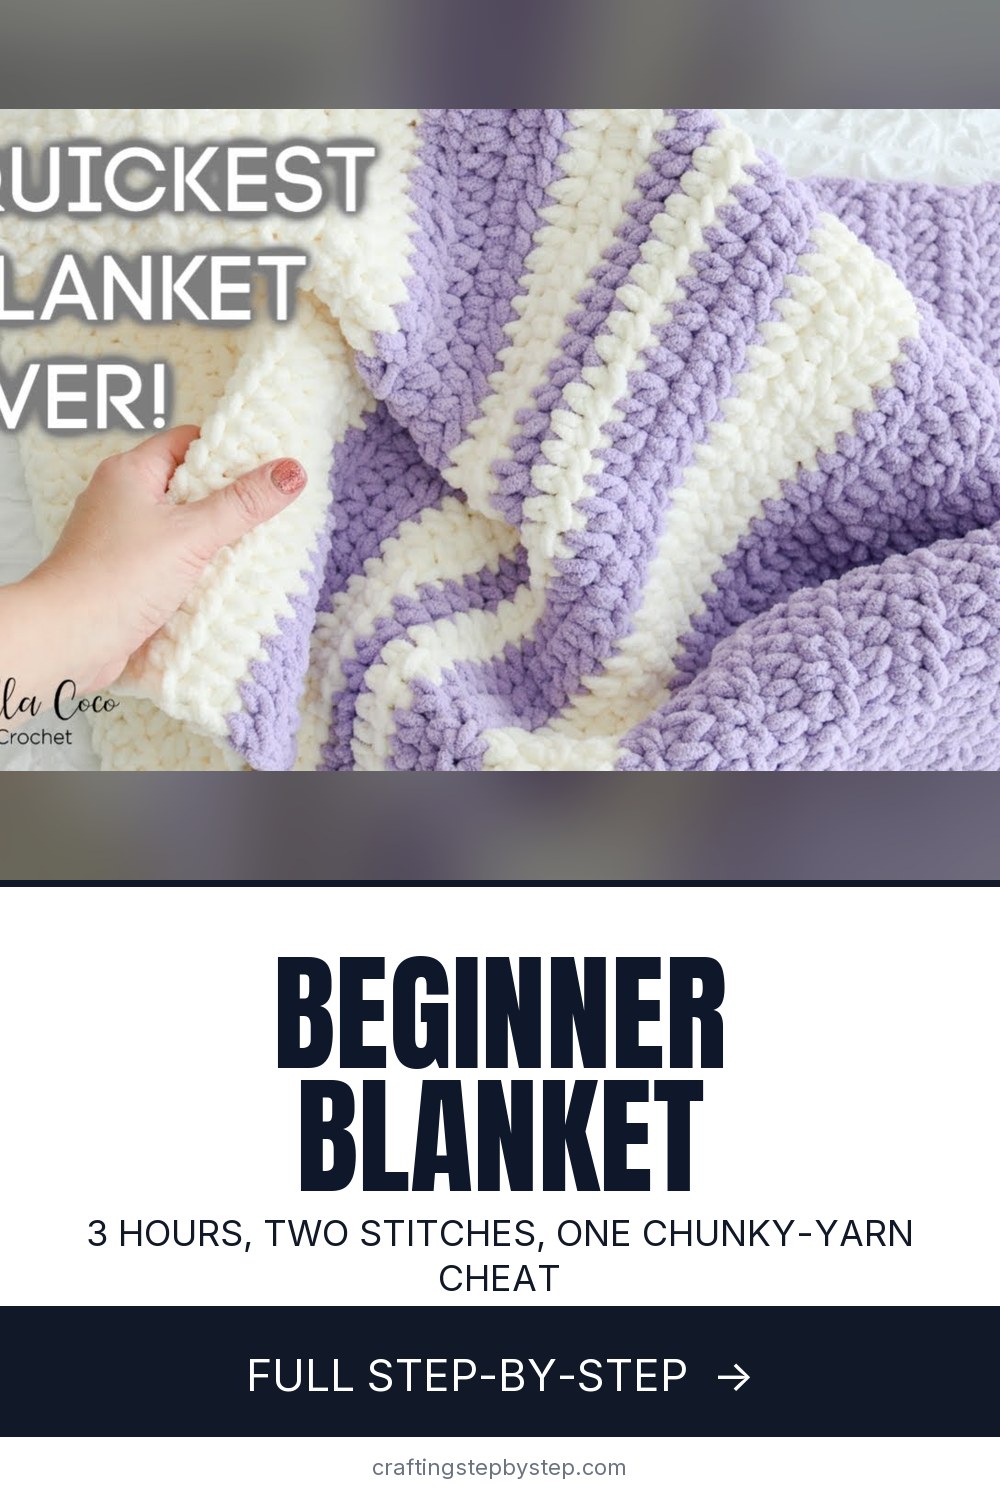
Most beginner blanket patterns hide a lie - they look easy but take forever. This one from Sarah-Jayne Fragola at Bella Coco does build up in about three hours, because the chunky yarn and big hook do the heavy lifting for you.

You only need two things: a slip knot and the half double crochet (half treble in UK terms - same stitch, different name). The whole pattern is rows of half doubles, and color stripes give it a finished look without any fancy technique. It makes a stroller or lap blanket that works as a baby shower gift or a quick housewarming present.

What you need

  • About 200g each of two colors of Bernat Baby Blanket (super bulky, weight 6)
  • An 8mm crochet hook
  • Scissors and a yarn needle

Blanket sizes

Width comes from your foundation chain, length from how many rows you stop at. These are common finished sizes and rough yardage in super bulky yarn:

BlanketSize (inches)Super bulky yarn
Baby / stroller30 x 36300-500 yd
Lap36 x 48600-800 yd
Throw50 x 601,000-1,300 yd
Twin66 x 901,800-2,400 yd

Work a few rows, measure, and adjust the chain before you commit. Half double crochet has no stitch multiple, so add or remove chains in any number and keep the extra 2 for turning. Worsted yarn takes roughly twice the yardage and twice the hours.

Choosing yarn

Acrylic and chenille wash well and forgive uneven tension, which is why most first blankets use them. Cotton is heavier and cooler, good for summer throws, but it shows every wobble. Bulky yarn is the speed trick. Chenille sheds a little and its stitches are hard to see, so count by feel and go slow when ripping back. Buy every skein at once and check the dye lot number on the label.

Keeping the edges straight

Count your stitches at the end of every row. The usual culprit is the turning chain: miss the stitch into its top and the blanket narrows, work into its base as well and it widens. A stitch marker in the first and last stitch of each row makes them easy to find.

Adding a border

One round of single crochet all the way around hides the bumpy row ends. Work three stitches into each corner so it lies flat. For more, see how to add edging to crochet.

Troubleshooting

  • Getting wider or narrower: recount and rip back to the last good row.
  • Wavy sides: tension changed between rows, or the turning chain is too tight.
  • Ran out mid-stripe: finish the stripe in a new dye lot and repeat that shade elsewhere so it looks planned.

Where to go next

For cleaner stripes see changing colors in crochet. Want more texture? Try the granny stripe blanket or a shell stitch. Prefer needles? Here is how to knit a blanket.

Free printable

Print the steps and supply list for this project

One page you can take to the table. Free with a free account, no password.

Get the free printable

Quick answer

Crochet a chunky beginner blanket in three hours. An easy project: about 20 hours. Materials cost about $25 to $50. The 7 steps: gather your materials, make a slip knot, chain 55 to start the foundation, work the first row of half double crochet, turn and work row two, build rows and change colors and tie off and weave in the ends.

Step-by-step guide

7 steps, about 17 minutes. Tap a picture to jump to that step. Your progress saves automatically.

Tick each step off as you go.

  1. Step 1: Gather your materials

    Watch this step · 0:35

    Pull out two 300g balls of Bernat Baby Blanket yarn in two contrasting colors and an 8mm crochet hook. The big hook plus the chunky yarn is what makes this blanket fast - thinner yarn doubles or triples the time.

    Roughly 200g of each color is enough for a baby blanket. If you want a bigger lap blanket or throw, double up to 400g per color. You'll also want a pair of scissors and a yarn needle to weave in the ends at the finish.

    Tip:

    If your local shop is out of Bernat Baby Blanket, look for any super bulky (size 6) chenille yarn. The texture is what hides any tension wobbles in your stitches - perfect for a first project.

    Back to all steps

  2. Step 2: Make a slip knot

    Watch this step · 2:12

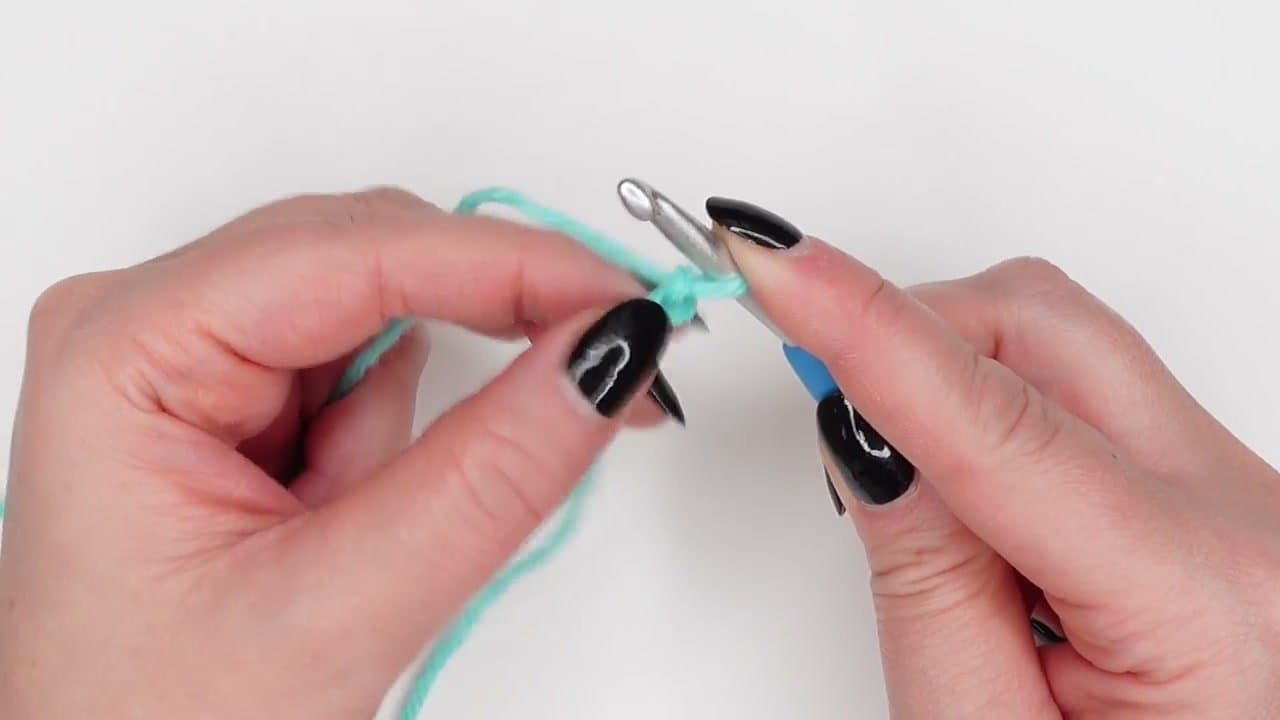
    Pull about six inches of yarn off the ball as your tail. Wrap the yarn around two fingers to form a small cross, then bring the working yarn (the part still attached to the ball) over the front of the cross.

    Slide the back loop forward through the front loop. Pull the working yarn to tighten the knot. Slip the loop onto your crochet hook and pull snug - tight enough to stay on the hook, loose enough to slide along it.

    Back to all steps

  3. Step 3: Chain 55 to start the foundation

    Watch this step · 3:20

    Yarn over the hook (wrap the working yarn around the shaft from back to front) and pull through the loop already on the hook. That's your first chain. Repeat 54 more times for a total of 55 chains.

    The first 53 chains define how wide your blanket will be. The extra 2 at the end act as turning chains so the first stitch sits at the right height. Keep your tension loose - tight foundation chains make the first row a fight to work into.

    Tip:

    Don't count the loop on the hook itself - it's not a chain. Count the V-shapes that lay flat below the hook.

    Back to all steps

  4. Step 4: Work the first row of half double crochet

    Watch this step · 5:20

    Skip the first two chains from the hook. Insert the hook into the third chain. Yarn over and pull a loop through that chain - you should now have three loops on the hook. Yarn over again and pull through all three loops at once. That's one half double crochet.

    Repeat into every chain along the row. By the end you'll have 53 stitches sitting on top of your foundation chain.

    Tip:

    If your stitches look uneven, you're probably yarning over inconsistently. Keep the yarn flowing from the same finger every time and the tension evens out.

    Back to all steps

  5. Step 5: Turn and work row two

    Watch this step · 7:20

    Chain 2 to lift up to the next row's height, then flip the work over so the back of row one faces you. From here on, that chain-2 counts as the first stitch of the new row.

    Half double crochet into the top of the next stitch and work all the way across. When you reach the end, work one final half double into the very top of the previous row's turning chain - that last stitch is what keeps the edges from leaning inward.

    Back to all steps

  6. Step 6: Build rows and change colors

    Watch this step · 11:40

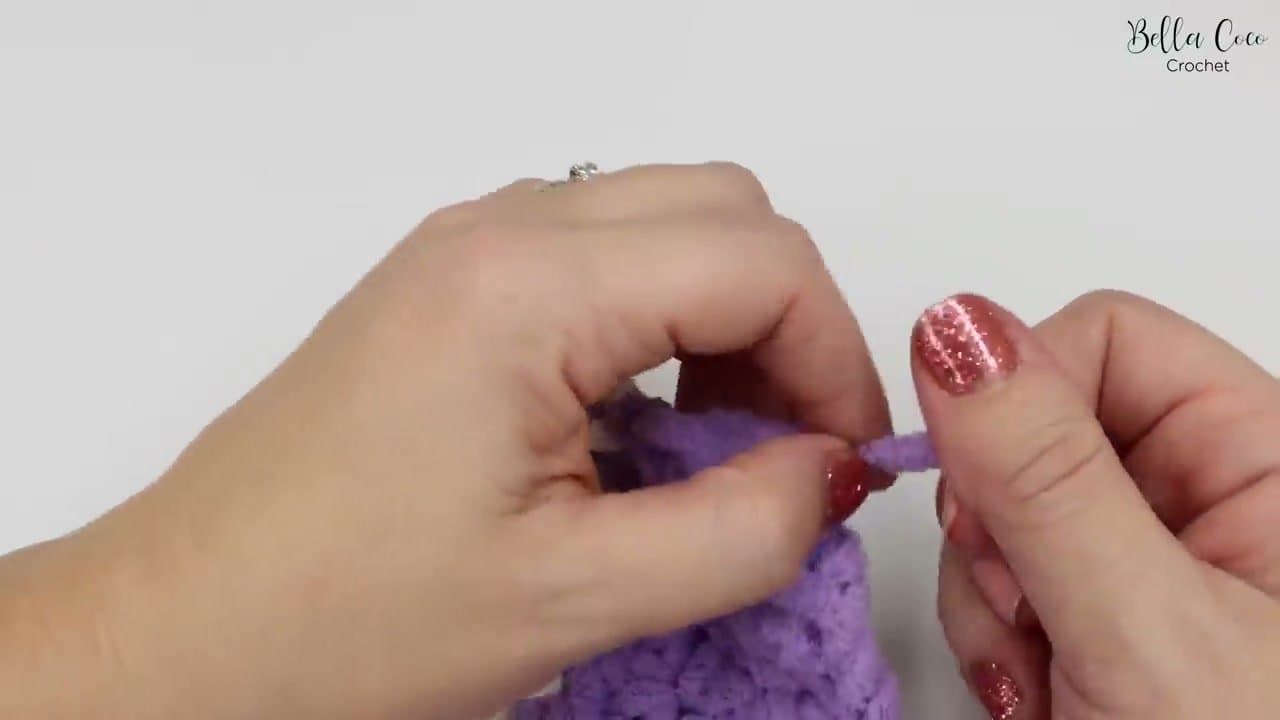
    Repeat the row pattern - chain 2, turn, half double across - for 12 rows in your first color. To switch colors, work the last stitch of row 12 right up to the final yarn-over. Drop the old color, pick up the new color, and pull it through the loops on the hook to complete the stitch.

    Snip the old yarn leaving a 6-inch tail (you'll weave it in later). Continue with the new color. Repeat the color stripes however many times your blanket calls for - Bella Coco's full pattern with row counts is in her blog post.

    Tip:

    Count your stitches at the end of every row. Accidentally adding or skipping one stitch makes the blanket get wider or narrower, and the edges start to slope.

    Back to all steps

  7. Step 7: Tie off and weave in the ends

    Watch this step · 16:50

    After the last stitch of your final row, cut the working yarn six inches from the hook. Yarn over and pull the cut tail all the way through the loop on the hook to lock the stitch.

    Thread each loose tail (including the color-change tails) onto a yarn needle. Weave the tail back and forth through three or four stitches on the back side of the blanket so it hides between the rows. Trim flush so nothing pokes through to the front.

    Tip:

    Weaving in ends is the most-skipped step and the reason cheap-looking blankets unravel after a few washes. Don't shortcut it.

    Back to all steps

How to Crochet a Star (No Magic Circle Method for Beginners)

Keep going

How to Crochet a Star (No Magic Circle Method for Beginners)

Keep going with crochet

More on this topic, picked for this blanket.

You reached the last step

Save this project to come back to it

Your ticked steps, the free printable and your other saved makes, together in My Projects. Free, no password.

You tapped Save

Save this project for later

We'll email you a link, no password.

How to Crochet a Blanket

  • Your saved projects in one list
  • Your ticked steps on any device

Check your inbox for an email from us. Not there? Look in your spam folder.

Free printable

Printable sheet for this project

The bonus is hidden until you sign up.

Free with a free account, no password. Every step above stays open to everyone.

Products Used

Tools we recommend

As an Amazon Associate we earn from qualifying purchases. Links on this page may be affiliate links - clicking them and buying doesn't change your price, but helps support Crafting Step by Step.

Tags

The Crafter's Weekly

New crochet tutorials, every Sunday

One short email with the week's best step-by-step guides. Free, no spam, unsubscribe anytime.

Test your knowledge

Did the lesson stick? Start with this one.

5 questions covering what you just read. No signup, no score saved, and you can stop after this one.

Question 1 of 5

What makes this blanket so fast to crochet?

Quick reference

Key takeaways from How to Crochet a Blanket

5 questions, answers, and one-line explanations. Tap to expand.

  1. 1.What makes this blanket so fast to crochet?

    Answer: A big hook paired with chunky yarn

    Thick yarn on an 8mm hook covers ground quickly; thin yarn takes far longer.

  2. 2.How many chains does the blanket start with?

    Answer: 55

    You chain 55 to set the foundation width before the first row.

  3. 3.What do you chain at the start of each new row?

    Answer: Chain 2 to reach the row's height

    The chain-2 turning chain lifts the yarn to the height of the next row.

  4. 4.When is the right moment to switch colors?

    Answer: On the final yarn-over of the last stitch

    Pulling the new color through that last yarn-over makes the change seamless.

  5. 5.In half double crochet, how many loops sit on the hook before the final pull?

    Answer: Three

    You yarn over and draw through all three loops at once to finish the stitch.

Did this work for you?

What's next

Related collections

Curated theme pages that include this tutorial.

Similar tutorials

Hand-picked next reads based on the one you just finished.

Liked this crochet tutorial?

Pick the crafts you want to hear about. One email every Sunday with new step-by-step tutorials. No spam, easy to unsubscribe.

Get more like this in your inbox

Weekly digest. Pick the categories you want. Unsubscribe anytime.

Send me tutorials about

We only email about new tutorials. Easy unsubscribe anytime.