How to Add Edging to Crochet

CrochetEasy9:067 stepsBrowse more →
Also in:Fiber Arts

By CraftingStepByStepPublished

Based on a video by Bella Coco.

Your blanket is done, the squares are joined, and the edges look... unfinished. That last round of edging is what takes a homemade blanket from "it's nice" to "can I have one for the baby shower?" This walkthrough teaches the two-part edging recipe most crocheters reach for: a tidy single crochet foundation round, then a classic shell or scalloped border on top.

The technique below comes from Bella Coco's tried-and-tested shell edging, the one she uses on her own granny square blankets. The shell pattern is a five-treble fan anchored with a slip stitch, repeated all the way around. It is the workhorse decorative edge for baby blankets, throws, and afghans.

If you want a cleaner more modern look, stop after the single crochet round. That alone is a finished, professional edge. The shell round is what you add when you want a little prettiness. Both methods start the same way, so you can decide as you go.

For more crochet foundations, see our guides on how to crochet a magic ring, how to double crochet, and how to single crochet. When the blanket is fully finished, give it a wet block with our how to block crochet guide so the shells lie flat.

Step-by-Step Guide

1

Step 1: Check Your Blanket Edge

0:40
Step 1: Step 1: Check Your Blanket Edge

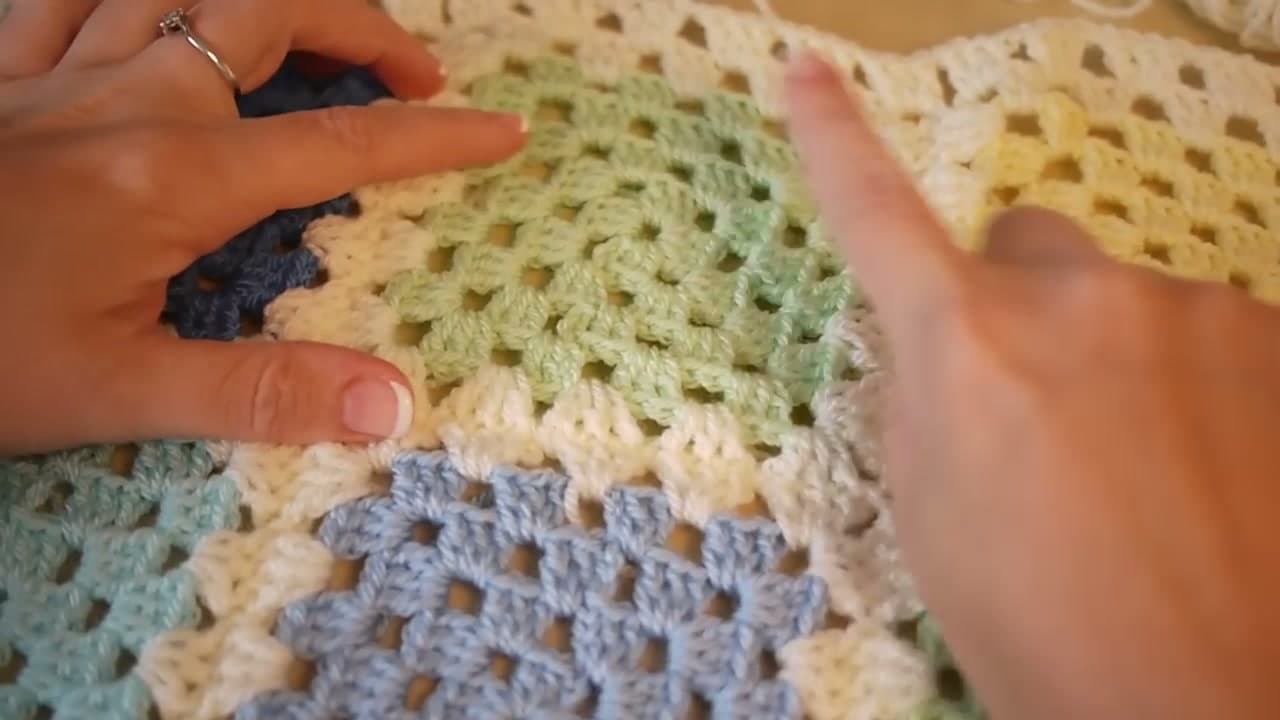
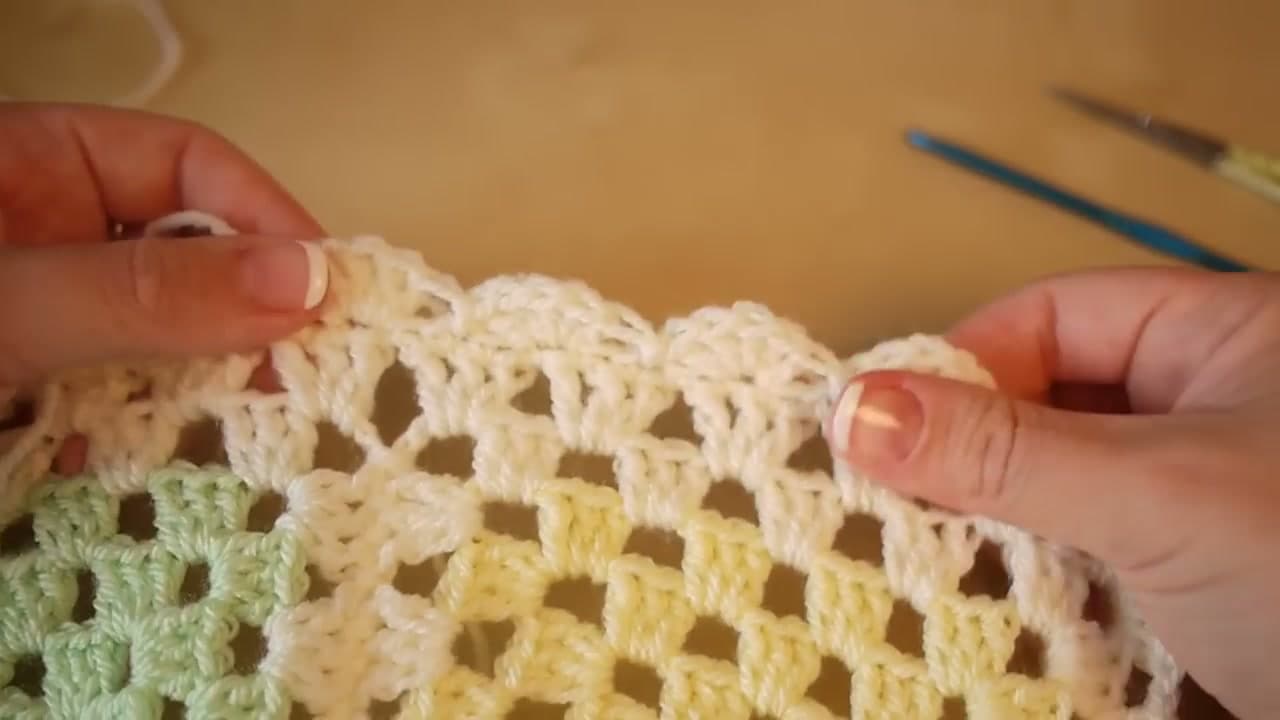
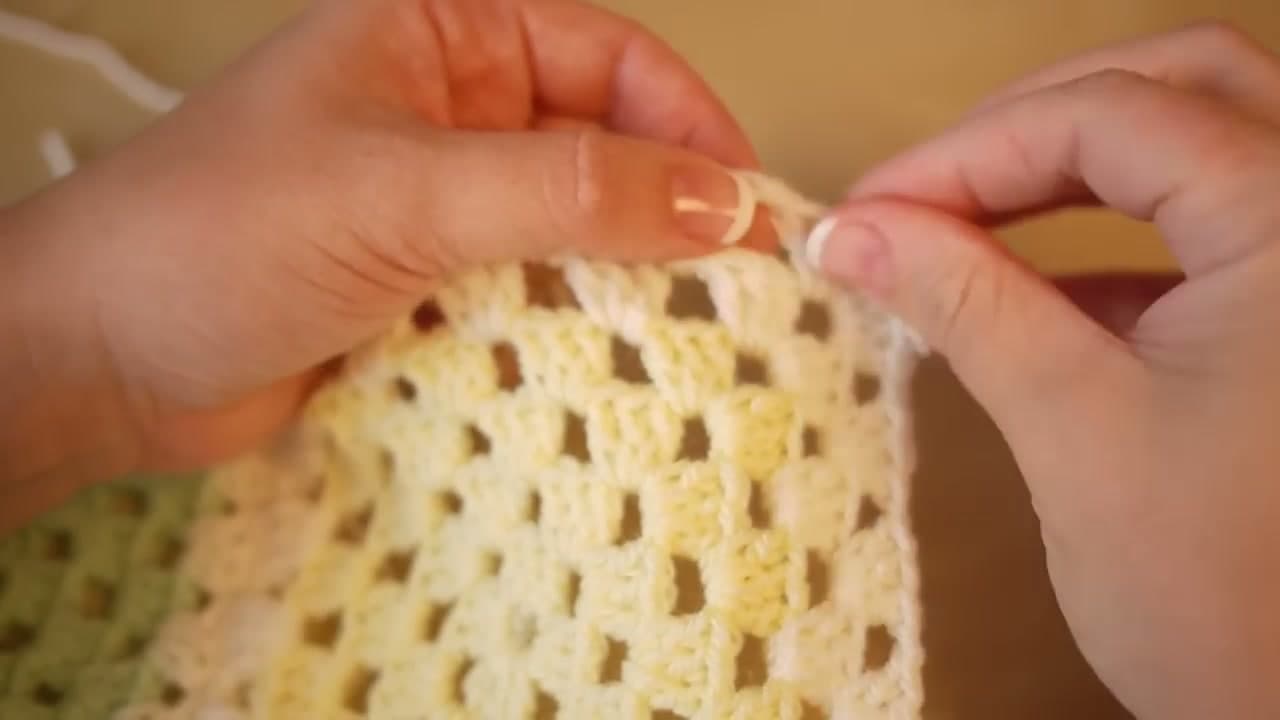
Lay your blanket flat and take a good look at the edge. If you joined granny squares, you should see colour blocks meeting with little chain spaces between rows. If you finished with a treble crochet round on the outside, even better - you already have a clean rail to build on.

Decide whether you want a simple clean edge or a decorative one. Either way, the next step is the same foundation round that evens everything out.

Tip

If your blanket curls a bit at the corners, do not worry. The foundation round will pull it straight.
2

Step 2: Attach Yarn and Start the Foundation Round

1:35
Step 2: Step 2: Attach Yarn and Start the Foundation Round

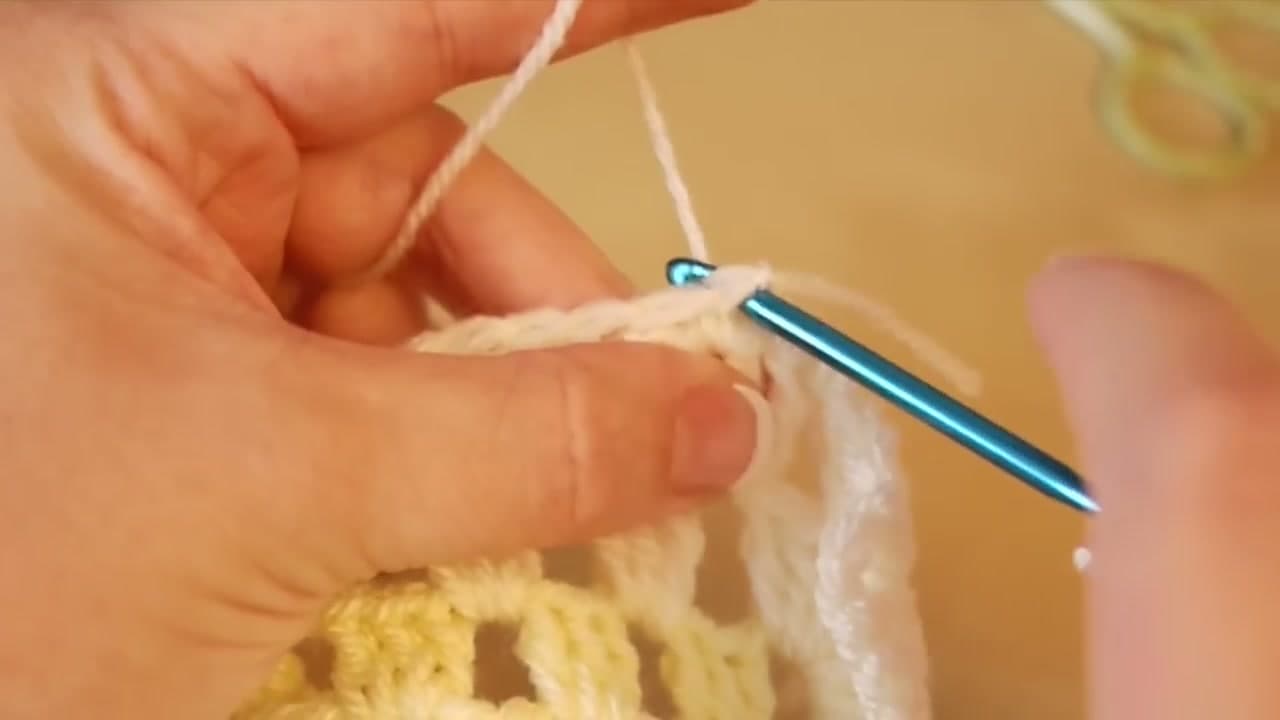
Attach your yarn to any chain space along the edge with a slip stitch. Bella Coco uses a white that matches the joining colour, but any colour from the blanket works.

Insert your hook into the next chain space, yarn over, pull through, yarn over, pull through both loops. That is a single crochet, US terms (double crochet in UK terms). This single round goes around the entire blanket, working one stitch into each chain space.

Tip

Work two single crochet stitches into each corner chain space. That extra stitch keeps the corner from puckering.

3

Step 3: Work the Foundation Round All the Way Around

2:20
Step 3: Step 3: Work the Foundation Round All the Way Around

Keep going around the whole blanket. One single crochet into each chain space, two into the corners. Move slowly and check that your tension stays even - too tight and the edge will cup, too loose and it will ripple.

When you reach the start, slip stitch into the first single crochet to close the round. Many crocheters stop right here. A single crochet round is a finished, professional edge on its own.

Tip

If you want a slightly bolder edge, add a second round of single crochet before the shell stitch.

4

Step 4: Attach Fresh Yarn for the Shell Border

4:00
Step 4: Step 4: Attach Fresh Yarn for the Shell Border

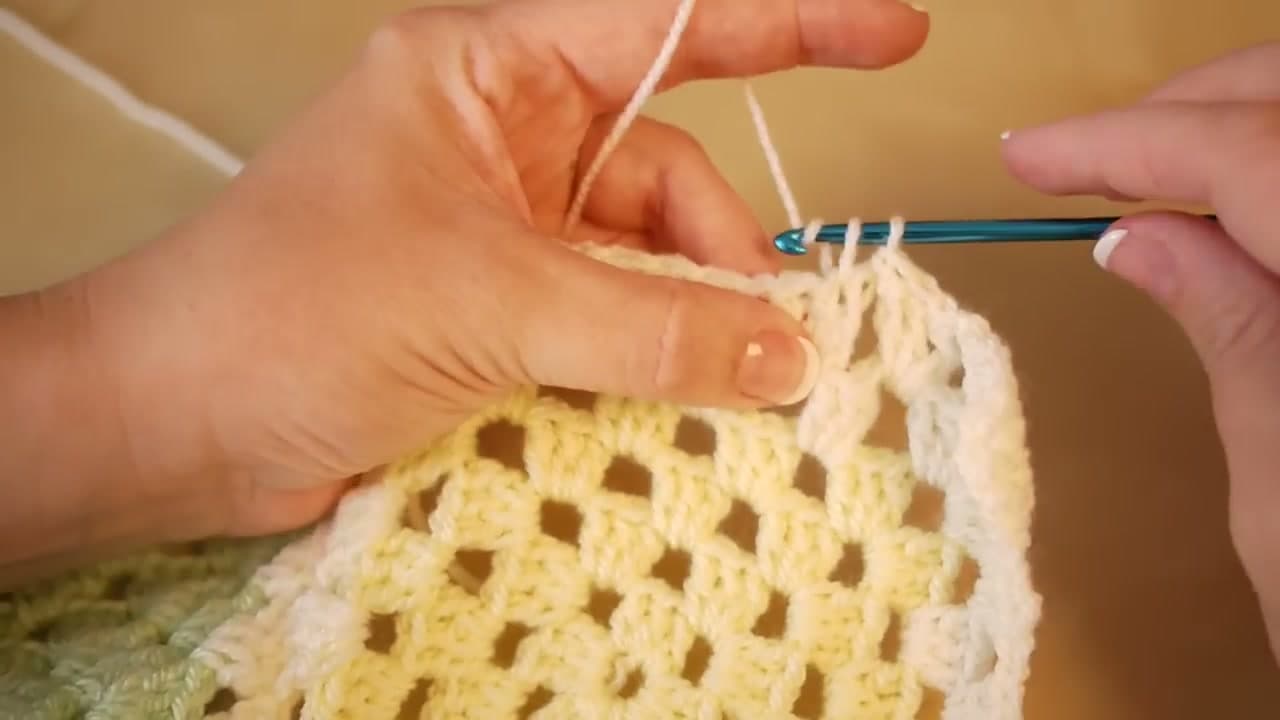
For the decorative round you can keep going with the same yarn or switch to a contrast colour for a real "wow" effect. Bella Coco shows the technique on a small swatch using fresh white yarn.

Insert your hook into one of the chain spaces from the round you just finished. Pull a loop of new yarn through and tie a small knot at the back to anchor it. You are ready to build the first shell.

Tip

White is the safest contrast colour for any blanket. It frames the colours like a picture frame.

5

Step 5: Build the Shell - Five Treble Crochet

4:50
Step 5: Step 5: Build the Shell - Five Treble Crochet

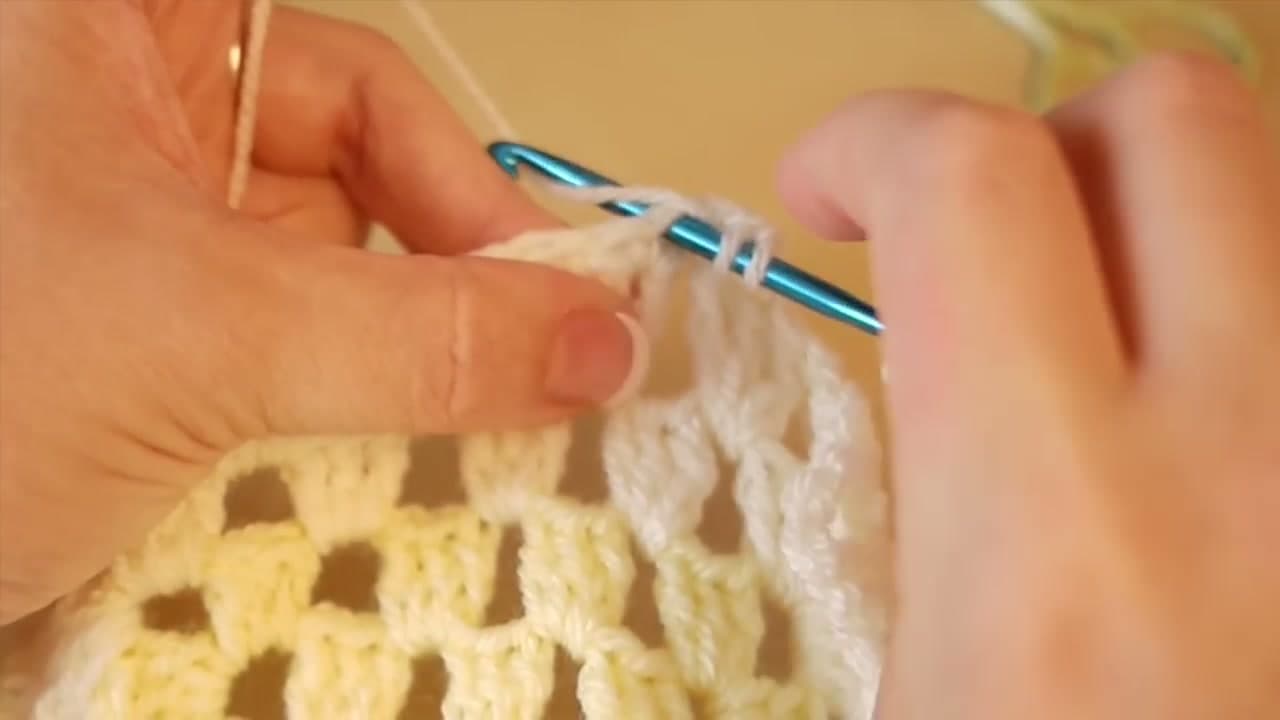
Skip one chain space. Into the next chain space, work five treble crochet stitches (US treble = UK double treble): yarn over, insert hook, yarn over, pull through, yarn over, pull through two, yarn over, pull through two. That is one treble. Repeat four more times into the same chain space.

All five trebles share one chain space and fan outward. That fan is the shell. It sits up off the edge with a beautiful arc.

Tip

If "treble crochet" feels intimidating, this is the same stitch known as "double crochet" in UK patterns. Five tall stitches into one hole.

6

Step 6: Skip, Slip Stitch, Repeat

6:30
Step 6: Step 6: Skip, Slip Stitch, Repeat

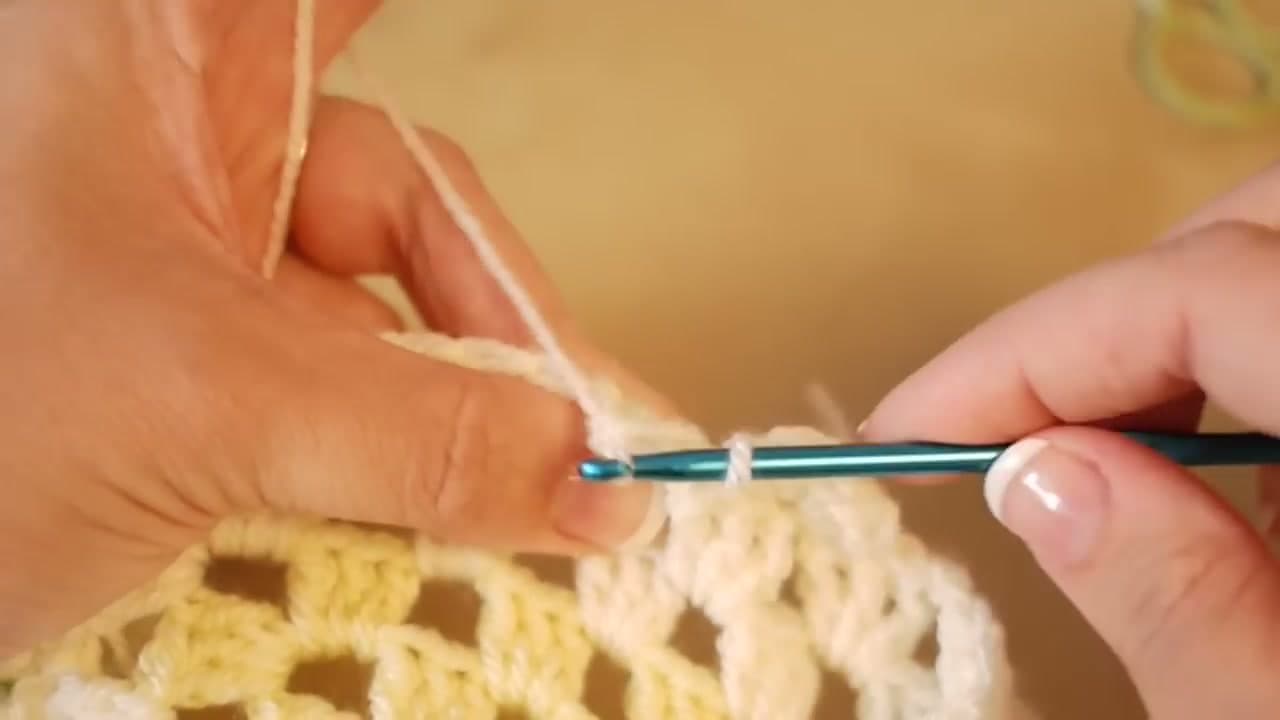
After the five trebles fan out, skip the next chain space. Slip stitch into the chain space after that. The slip stitch anchors the shell down and starts the next one.

Now repeat: skip one, five trebles into the next chain space, skip one, slip stitch. Every shell uses one chain space, the slip stitch uses one chain space, and you skip one in between. That rhythm continues all the way around the blanket.

Tip

Whisper the count to yourself: "skip, five, skip, slip." Falling into the rhythm is what makes the shells look identical.

7

Step 7: Close the Round and Weave In the Tail

8:00
Step 7: Step 7: Close the Round and Weave In the Tail

When you reach your starting shell, slip stitch into the first chain space you began with. That closes the round cleanly.

Cut the yarn leaving about a six inch tail. Pull it through to fasten off. Thread the tail onto your tapestry needle and weave it back through three or four shells on the wrong side, then snip the end. Your blanket is finished.

Tip

Give the finished blanket a gentle wet block. The shells will open up and lie flat, and the whole piece will look like it came from a shop.

Products Used

☐ The Checklist

How to Add Edging to Crochet

Tools
4
Materials
1
Steps
7
Video
9 min

Your Guide

Bella Coco

As an Amazon Associate we earn from qualifying purchases. Links on this page may be affiliate links - clicking them and buying doesn't change your price, but helps support ShowMeStepByStep.

Tags

Test your knowledge

Did the lesson stick? Find out in 2 minutes.

5 quick questions covering what you just read. No signup, no score saved — just a gut check.

Quick reference

Key takeaways from How to Add Edging to Crochet

5 questions, answers, and one-line explanations. Tap to expand.

  1. 1.First round of the edging recipe?

    Answer: Single crochet foundation

    Tidy SC foundation round evens everything out, then shell/scallop border on top. Single crochet alone is a finished edge.

  2. 2.Stitches per chain space on the foundation?

    Answer: Just one SC

    One single crochet into each chain space - except corners get TWO. That extra stitch handles the turn.

  3. 3.What is a 'shell' in this border?

    Answer: Five trebles, one space

    Five treble crochet stitches sharing one chain space - all fan outward into an arc. The signature shell shape.

  4. 4.Rhythm after each shell?

    Answer: Skip one, slip stitch

    Skip one chain space, slip stitch into the next. Slip stitch anchors the shell and starts the next one.

  5. 5.How to close the round cleanly?

    Answer: Slip stitch to start

    Slip stitch into the first chain space you began with. Then cut yarn, weave the tail through 3-4 shells on the wrong side.

What's next

Weekly Digest

Liked this crochet tutorial?

Pick the categories you want to hear about. Weekly digest of new step-by-step tutorials. No spam, easy unsubscribe.

Send me tutorials about

We only email about new tutorials. Easy unsubscribe anytime.