How to Make Shrinky Dinks

CraftsEasy8:588 stepsPart of DIY Crafts for BeginnersBrowse more →
The finished result: How to Make Shrinky Dinks

By CraftingStepByStepPublished

Based on a video by Jessie Katz Greenberg.

Shrink plastic is cheap, the oven does the hard part, and a sheet costs less than a coffee. What trips people up is that everything changes size in there. A drawing that looks right at full size comes out with lines three times heavier, and a hole you forgot to punch can never be added. So the smartest first project is not a charm. It is a test card.

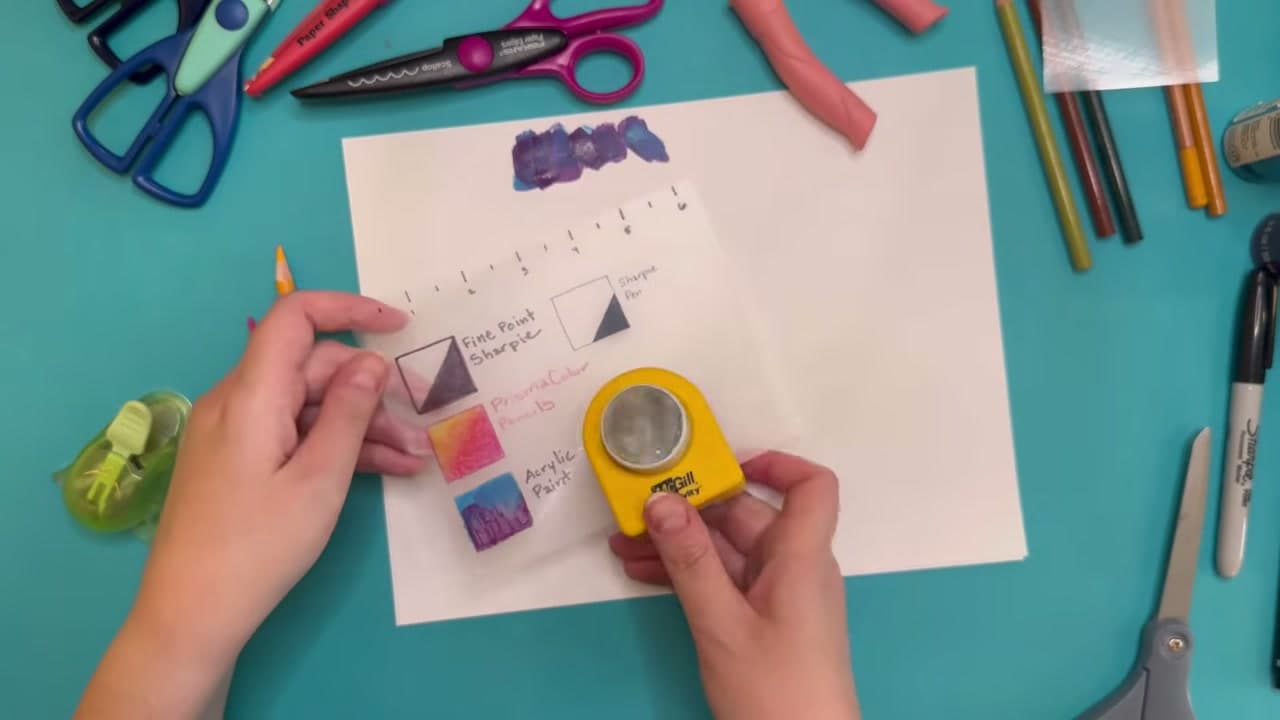
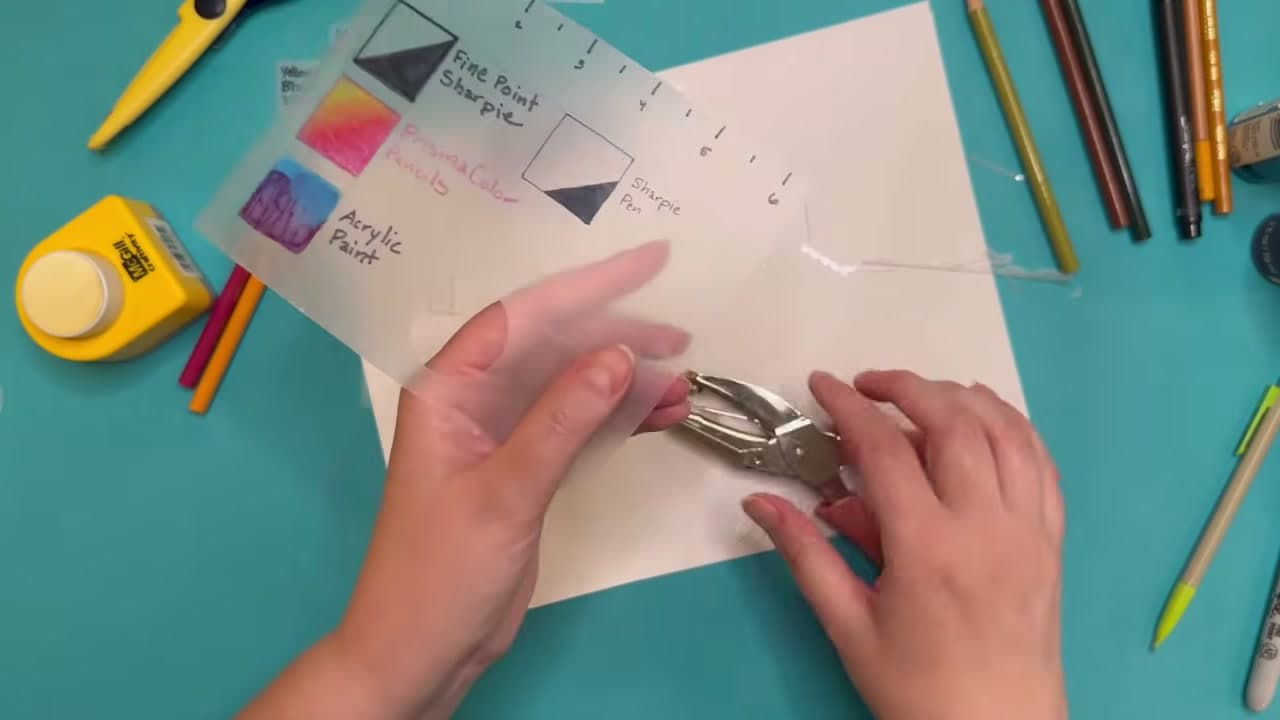
This walkthrough follows Jessie Katz Greenberg, who makes exactly that. One sheet carries a hand-drawn ruler along the top, four labeled swatches of Sharpie, Sharpie pen, colored pencil and acrylic paint, a punched circle, a rounded corner and two sizes of hole. She bakes it at 325F for 1 to 3 minutes, and the 6 inch card comes back at about 2.5 inches. Keep that card on your desk and every project after it stops being guesswork.

Take one thing from this page and make it this: punch your hanging hole before the plastic goes in the oven. Shrunk pieces are too thick and too hard for a punch to bite, and she says so on camera while punching hers. When your piece is ready to hang, opening a jump ring the right way is the other half of that job.

Crafting with a kid on a rainy afternoon? This sits well next to making your own stickers and pressing flowers, and once you have punched a few shrunk circles they string up fine on a beaded bracelet.

What you'll need

Step-by-Step Guide

8 steps · about 9 minutes.Check off each step as you go and your progress saves automatically.

1

Find the Matte Side of the Shrink Plastic Sheet

0:20
Step 1: Find the Matte Side of the Shrink Plastic Sheet - How to Make Shrinky Dinks

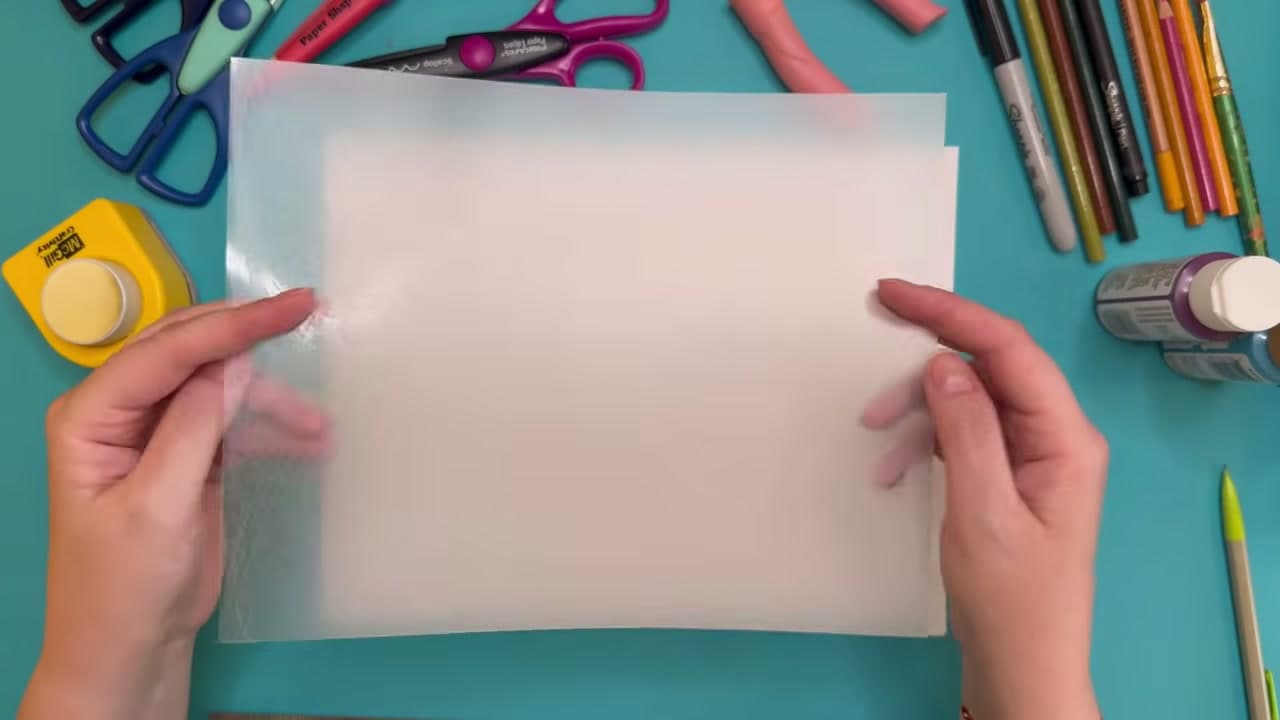
Take one sheet out of the pack and run a thumb over both faces. Ruff n Ready sheets come pre-frosted, so one side is rough and the other is slick. The rough side is the one you draw on. Pigment grabs that texture and stays put, where ink on the glossy face beads up and wipes off on your hand.

Plain clear shrink plastic exists too, and it needs a pass with fine sandpaper before it will take pencil or paint. Buying the frosted kind skips that job.

Tip

If you lose track of which face is which, hold the sheet at an angle to a lamp. The glossy side throws a reflection and the matte side does not.

2

Draw an Inch Ruler Along the Top Edge

0:58
Step 2: Draw an Inch Ruler Along the Top Edge - How to Make Shrinky Dinks

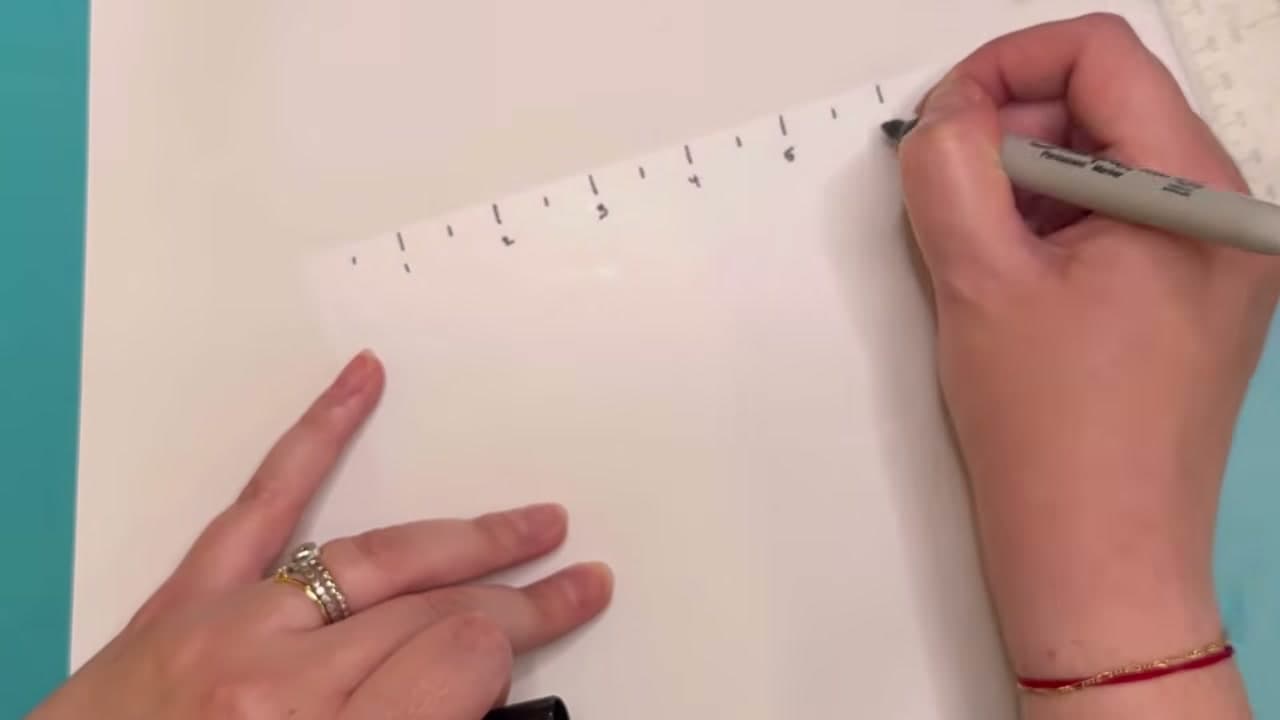
Lay a ruler across the top of the sheet and put a pencil notch every half inch. Go back over the notches with a fine point Sharpie and write a number at each full inch, out to six. It takes two minutes and it is the most useful thing on the finished card.

Once this bakes, you can hold it against any drawing and read the real shrink off it. The rule of thumb is about a third of the original size, which is hard to picture until you own a ruler that has been through the oven.

Tip

Pencil first, marker second. A faint pencil guideline almost disappears after shrinking, and marker is permanent from the moment it touches the sheet.

Used in this stepmetal ruler 12 inch
3

Fill and Label a Test Square for Each Pen and Pencil

2:06
Step 3: Fill and Label a Test Square for Each Pen and Pencil - How to Make Shrinky Dinks

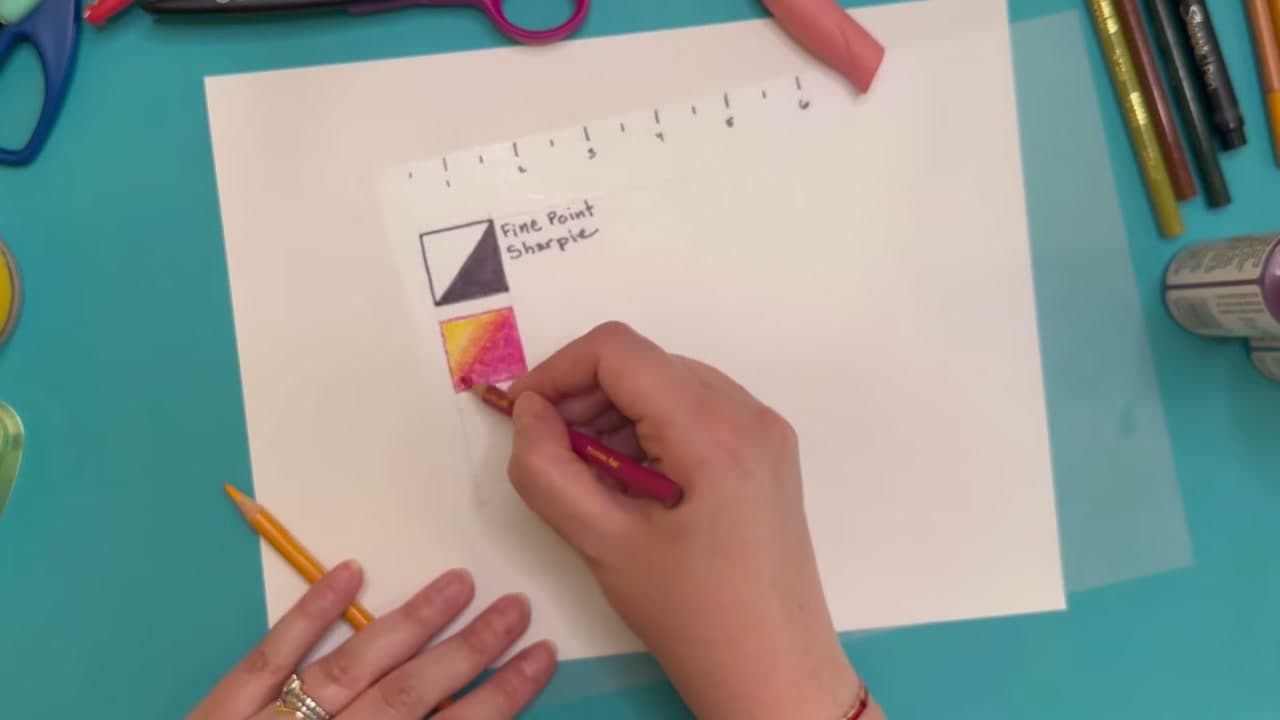
Rule a column of one inch squares down the sheet in pencil. Outline the first in fine point Sharpie, fill half of it in solid, and write the material name beside it. Leaving the other half empty lets you judge line weight and solid coverage on the same square.

Do the same for a Sharpie pen, which lays a thinner line, and for two colored pencils blended into each other. Prismacolor blends well on paper and takes more work on plastic, which is worth knowing before you commit to a real piece.

Tip

Label every square as you draw it, not at the end. Four shrunk swatches an inch tall look a lot alike, and an unlabeled card tells you nothing on the day you need it.

4

Brush Acrylic Paint Into the Last Square

2:46
Step 4: Brush Acrylic Paint Into the Last Square - How to Make Shrinky Dinks

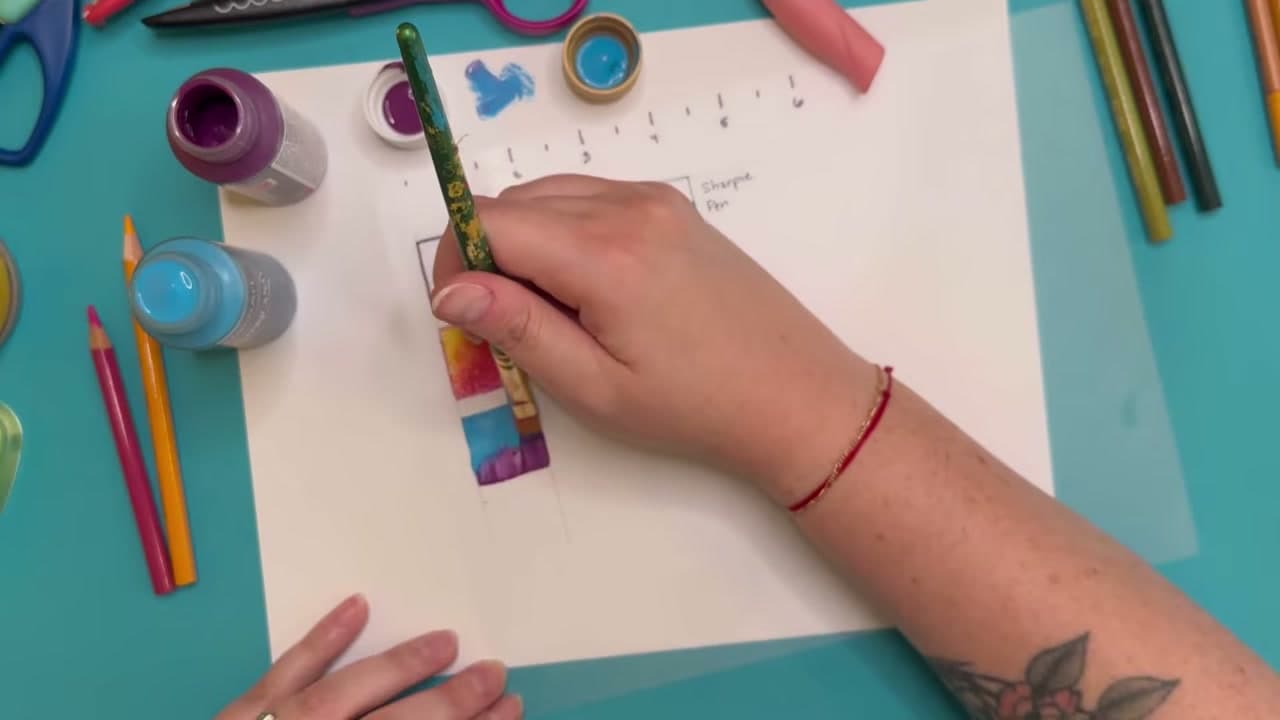
Load a brush with two acrylic colors and work them together inside the last square, then label it. Paint sits on top of shrink plastic instead of soaking in, so blending is stubborn and the coat stays slightly raised.

This square earns its place after baking. Run a fingernail across it and the paint scratches, and so does the colored pencil. The Sharpie does not. That is your answer on whether a finished piece needs a coat of varnish, resin or clear nail polish before anyone wears it.

Tip

Thin coats shrink better than thick ones. A heavy blob of acrylic can crack or lift at the edges as the plastic pulls in underneath it.

5

Punch a Circle and Round a Corner to Test Your Shapes

3:10
Step 5: Punch a Circle and Round a Corner to Test Your Shapes - How to Make Shrinky Dinks

Use a one inch circle punch on the spare part of the sheet and keep the circle, because it bakes down into a neat disc. Take one corner off the card with a corner rounder so you can see how a curve holds its shape.

Cut a few loose squares too and trim two sides of each with decorative scissors, one pattern per square, labeled. Scallops and zigzags come out of the oven sharper and smaller than you expect, and a wide pattern needs a longer strip before it reads at all.

Tip

The punch has to cut cleanly. A ragged edge or a half-punched corner gets more obvious after shrinking, not less, because every flaw lands in a smaller space.

6

Punch the Hanging Hole Before It Goes in the Oven

4:30
Step 6: Punch the Hanging Hole Before It Goes in the Oven - How to Make Shrinky Dinks

Punch any hole you are going to need while the plastic is still thin. Shrinking makes it far thicker and much harder, and a hole punch will not bite through a finished piece. There is no fixing this afterwards short of a drill.

Put a mini punch and a standard punch on the same test piece. Both holes close up as the sheet shrinks, and seeing the two finished sizes side by side tells you which one leaves room for a jump ring or a length of wire.

Tip

Keep the hole a little way in from the edge. A hole punched right at the rim can tear out as the plastic pulls in around it.

7

Lay the Pieces Color Side Up and Bake at 325F for 1 to 3 Minutes

5:20
Step 7: Lay the Pieces Color Side Up and Bake at 325F for 1 to 3 Minutes - How to Make Shrinky Dinks

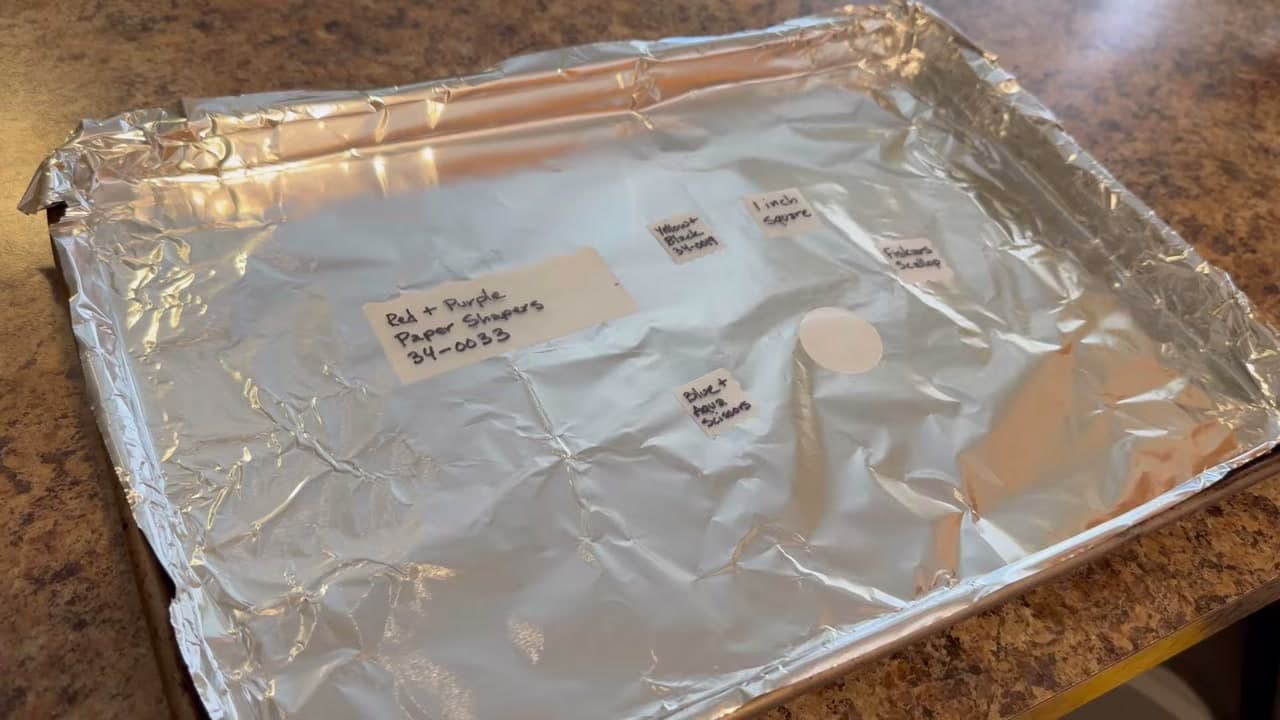
Line a baking sheet with foil and set the pieces on it color side up, with space between them. Group similar sizes on the same tray. Small pieces finish in about a minute and a large card can take the full three, so a mixed tray means pulling something too early.

Bake at 325F with the oven door shut. The pieces curl up hard, sometimes folding right over on themselves, then relax and flatten back out. Give them another 30 seconds after they flatten, then take the tray out.

Tip

Check your packaging before you preheat. 325F for 1 to 3 minutes is what Ruff n Ready calls for, and other brands run anywhere from 300F to 350F.

8

Press Flat With the Bottom of a Bowl, Then Cool on the Pan

6:38
Step 8: Press Flat With the Bottom of a Bowl, Then Cool on the Pan - How to Make Shrinky Dinks

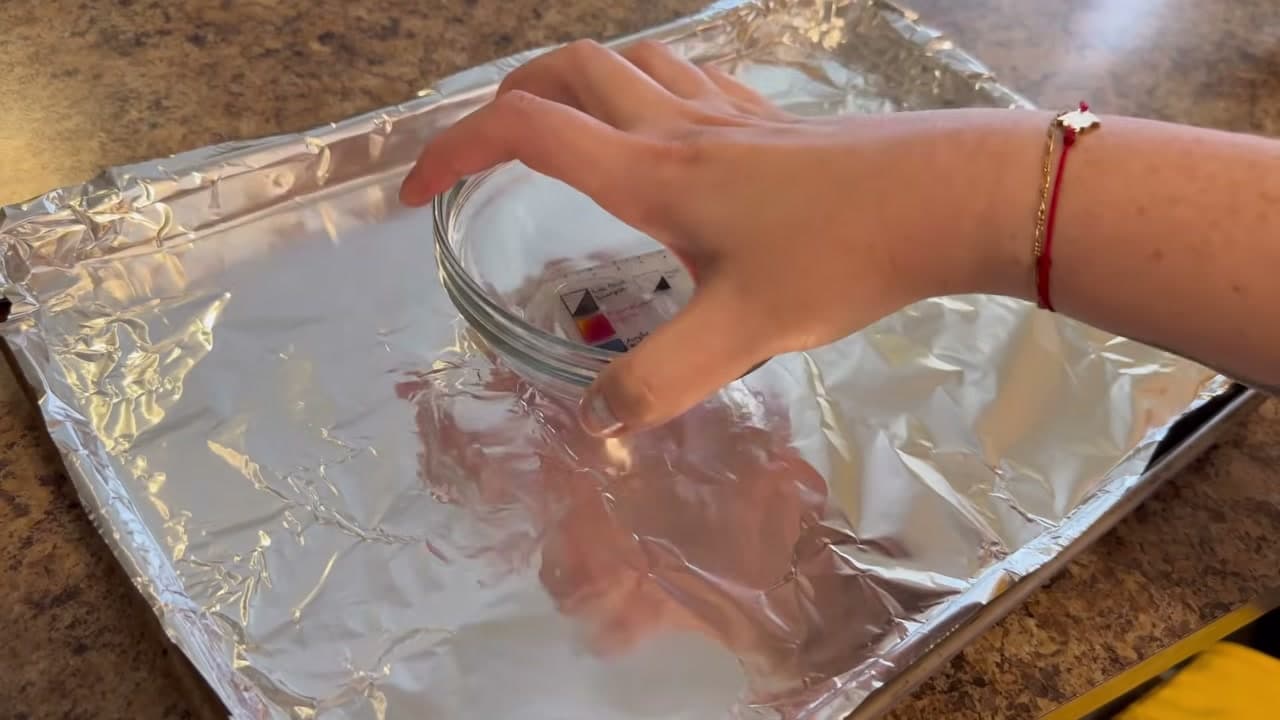
Straight out of the oven, press any piece that came out wavy under the flat bottom of a glass or a bowl. One second of pressure while the plastic is hot is enough. Large pieces curl at the corners more than small ones, so the cheat sheet itself usually wants this.

Then leave everything alone until the pan is cold. Warm shrink plastic still bends, and picking a piece up too soon puts a kink in it that will not come out. Big pieces hold heat longer than they look like they should.

Tip

Use a glass or a ceramic bowl, not your hand. The pieces come out hot enough to burn you, and finger pressure leaves the surface uneven anyway.

Keep going

How to Make Kinetic Sand

Products Used

The Checklist

How to Make Shrinky Dinks

Tools
14
Materials
3
Steps
8
Video
9 min

Tools we recommend

Your Guide

Jessie Katz Greenberg

As an Amazon Associate we earn from qualifying purchases. Links on this page may be affiliate links - clicking them and buying doesn't change your price, but helps support CraftingStepByStep.

Tags

Sunday How-To

New crafts tutorials, every Sunday

One short email with the week's best step-by-step guides. Free, no spam, unsubscribe anytime.

Did this work for you?

What's next

Related collections

Curated theme pages that include this tutorial.

Weekly Digest

Liked this crafts tutorial?

Pick the categories you want to hear about. Weekly digest of new step-by-step tutorials. No spam, easy unsubscribe.

Send me tutorials about

We only email about new tutorials. Easy unsubscribe anytime.