How to Make a Snow Globe

CraftsEasy6:4310 stepsBrowse more →
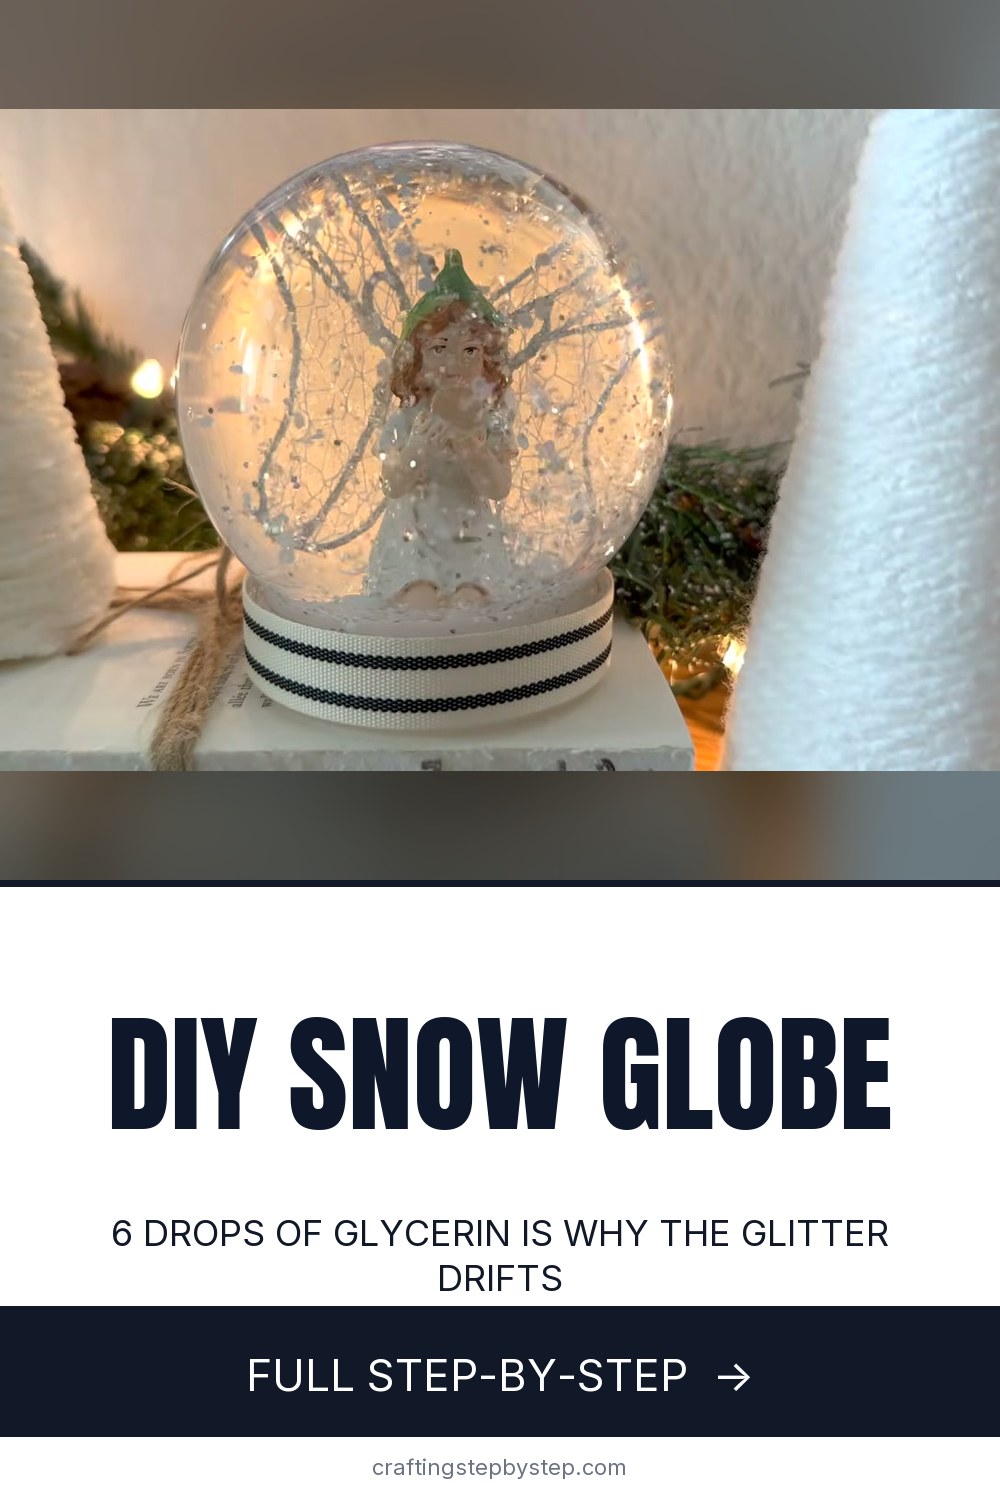
The finished result: How to Make a Snow Globe

By CraftingStepByStepPublished

Based on a video by She's Crafty and She Knows It.

A snow globe is a sealed jar of water with something pretty inside. What separates one that looks magical from one that looks like a jar of cloudy water is two decisions: what you glue inside it, and whether you add glycerin.

Sarah from She's Crafty and She Knows It builds two here. The first one failed, and she leaves that in the video, which is more useful than a tutorial where everything works.

Glycerin is the whole trick

Plain water lets glitter drop straight to the bottom in about two seconds. Vegetable glycerin thickens the water just enough that the glitter drifts and swirls the way snow does. Six drops is the number for a globe this size.

Do not substitute. Baby oil, mineral oil and dish soap all get suggested online and none of them behave the same way. Glycerin is cheap, it is sold in the baking aisle or online, and one bottle will outlast every globe you ever make.

What went wrong the first time

The first globe used Model Magic to build a little snowy mound for two small owl figurines to sit on. It looked perfect on day one. By day three the water had gone slightly cloudy, and by day five it was murky enough that you could barely see the owls.

Air-dry clay breaks down in water. Sealing it with spray polyurethane did not save it, and may have made it worse by putting more into the water. So: nothing porous goes inside a snow globe. No air-dry clay, no polymer clay you have not tested, no paper, no wood, no fabric.

Pick a bigger figurine instead

The fix is not a better sealant, it is a taller figurine. Choose one that fills the globe on its own and you do not need a mound underneath it at all. The second globe used a single resin fairy, and weeks later the water was still perfectly clear.

Resin and solid plastic figurines are the safe picks. Cake toppers, small toys and railway-model scenery all work.

Give the glue a full day

Super glue on plastic is slow. It bonds skin instantly and then takes its time on the two surfaces you actually care about. Glue the figurine down, run a second bead around where it meets the base, and leave it 24 hours before it goes anywhere near water. A figurine that comes loose inside a sealed globe cannot be fixed.

Step-by-Step Guide

10 steps · about 7 minutes.Check off each step as you go and your progress saves automatically.

1

Lay Out Your Supplies

0:13
Step 1: Lay Out Your Supplies - How to Make a Snow Globe

You need a plastic snow globe blank, a figurine, glitter, vegetable glycerin, super glue and a scrap of ribbon. The blank unscrews at the bottom and the cap doubles as the base the figurine stands on. Kits are sold specifically for this and are far easier than trying to seal a mason jar yourself.

Tip

Plastic over glass if children will handle it. A glass globe full of water is heavier than it looks.

2

Pick a Figurine Tall Enough to Fill the Globe

5:11
Step 2: Pick a Figurine Tall Enough to Fill the Globe - How to Make a Snow Globe

Hold your figurine against the empty globe before you glue anything. You want one that nearly fills the space on its own. A short figurine tempts you into building a mound underneath it, and mounds are what ruin snow globes. Resin and solid plastic are the safe materials.

Tip

Cake toppers and model railway figures are cheap, solid and come in the right scale.

3

Glue the Figurine to the Base

5:24
Step 3: Glue the Figurine to the Base - How to Make a Snow Globe

The cap that screws into the bottom of the globe is your base. Put a good blob of super glue on it and press the figurine down squarely in the middle. Check it sits straight from the side before the glue grabs, because a figurine glued on a lean stays leaning forever.

Tip

Dry-fit first. Screw the base into the globe with the figurine held in place to check it clears the sides.

Used in this stepsuper glue for plastic
4

Reinforce the Joint and Wait a Full Day

6:00
Step 4: Reinforce the Joint and Wait a Full Day - How to Make a Snow Globe

Run a second bead of glue right around where the figurine meets the base, catching the feet or whatever touches down. Then leave it alone for 24 hours. Super glue sets fast on skin and slowly on plastic, and this is the one joint in the build you cannot reach again once the globe is sealed.

Tip

Tug the figurine gently before you fill anything. Better it comes off now than tomorrow, inside the water.

Used in this stepsuper glue for plastic
5

Stand the Globe in a Measuring Cup

2:22
Step 5: Stand the Globe in a Measuring Cup - How to Make a Snow Globe

The globe is round and will roll off the table the moment you let go of it. Sit it open-side-up in a glass measuring cup or a small bowl so it stays put and both your hands stay free for the filling.

Tip

Do this over a tray. Loose glitter travels, and you will be finding it for weeks otherwise.

Used in this stepglass measuring cup
6

Add as Much Glitter as You Want

2:40
Step 6: Add as Much Glitter as You Want - How to Make a Snow Globe

Tip in fine glitter, mixing whites and silvers for something that reads as snow. There is no wrong amount here, though a generous pour looks better in the swirl than a sparse one. Fine glitter floats and drifts; chunky craft glitter sinks fast and looks like debris.

Tip

Mix two or three sizes of white and iridescent glitter. A single grade looks flat once it is moving.

7

Fill With Water, Leaving Room for the Figurine

2:58
Step 7: Fill With Water, Leaving Room for the Figurine - How to Make a Snow Globe

Pour water in, stopping short of the rim. The figurine and the cap both displace water, so a globe filled to the brim will overflow when you screw the base in. Lower the figurine in briefly to test the level, then top up or tip out until it sits right.

Tip

Distilled water stays clearer for longer than tap water, which can leave a faint film over time.

Used in this stepdistilled water
8

Add Six Drops of Glycerin

3:16
Step 8: Add Six Drops of Glycerin - How to Make a Snow Globe

Six drops of vegetable glycerin into a globe this size. It thickens the water just enough that the glitter tumbles slowly and swirls instead of dropping like sand. Screw the base in, turn the globe over and watch it fall. Too fast means another drop or two.

Tip

Go one drop at a time past six. Too much glycerin and the glitter hangs there instead of settling at all.

Used in this stepvegetable glycerin
9

Trim the Base With Ribbon

3:52
Step 9: Trim the Base With Ribbon - How to Make a Snow Globe

The seam where the cap meets the globe is the one unlovely part of a kit build. A narrow ribbon hot-glued around it hides the joint and finishes the piece. Entirely optional, and it takes about a minute.

If your globe seeps at all, run a bead of glue around the cap before the ribbon goes on.

Tip

Glue the base shut permanently if small children will be shaking it. Otherwise leave it so you can top the water up later.

10

Stand It Where the Light Catches It

4:06
Step 10: Stand It Where the Light Catches It - How to Make a Snow Globe

Put the finished globe somewhere with light behind or beside it. Glitter needs light to do anything, and a globe on a dark shelf just looks like a jar. A stack of books, a mantel or a windowsill next to a string of fairy lights all work.

Tip

Keep it out of direct sun. Sunlight through a water-filled globe fades whatever is inside it.

Used in this stepbattery fairy lights

Keep going

How to Preserve Fall Leaves

8 steps · about 8 minutes

Products Used

The Checklist

How to Make a Snow Globe

Tools
3
Materials
6
Steps
10
Video
7 min

Tools we recommend

Your Guide

She's Crafty and She Knows It

As an Amazon Associate we earn from qualifying purchases. Links on this page may be affiliate links - clicking them and buying doesn't change your price, but helps support CraftingStepByStep.

Tags

Sunday How-To

New crafts tutorials, every Sunday

One short email with the week's best step-by-step guides. Free, no spam, unsubscribe anytime.

Did this work for you?

What's next

Related collections

Curated theme pages that include this tutorial.

Weekly Digest

Liked this crafts tutorial?

Pick the categories you want to hear about. Weekly digest of new step-by-step tutorials. No spam, easy unsubscribe.

Send me tutorials about

We only email about new tutorials. Easy unsubscribe anytime.