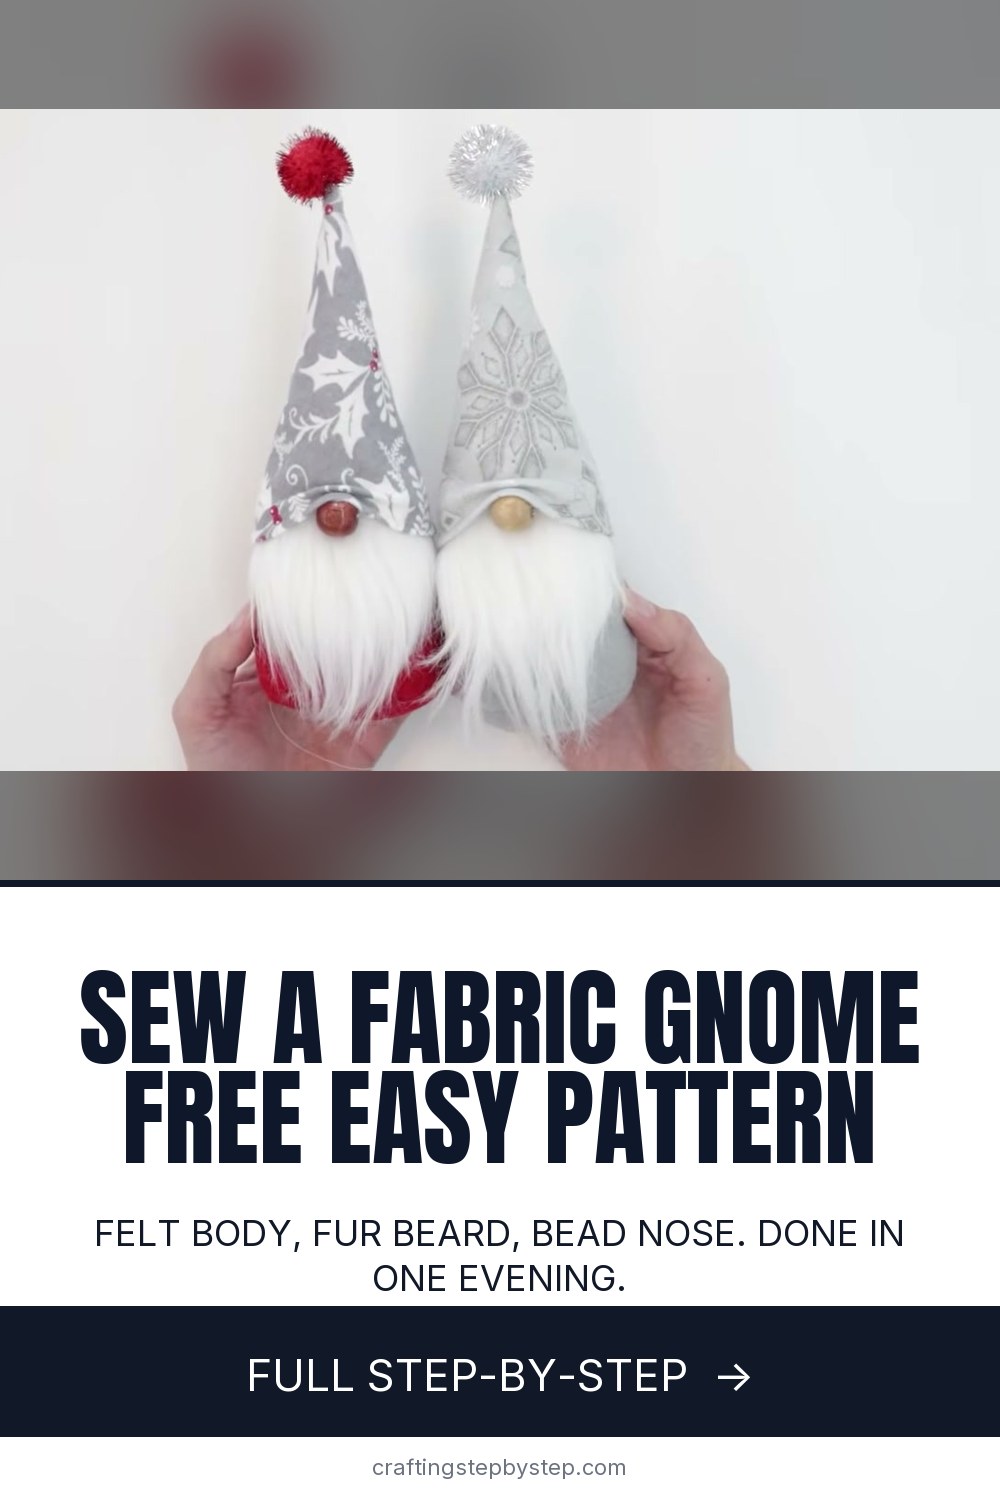
How to Make a Fabric Gnome (Free Sewing Pattern)

The finished result: How to Make a Fabric Gnome (Free Sewing Pattern)
  • Difficulty: Easy
  • About 1 hour 30 minutes
  • 10 steps

You tapped Save

Save this project for later

We'll email you a link, no password.

How to Make a Fabric Gnome (Free Sewing Pattern)

  • Your saved projects in one list
  • Your ticked steps on any device

Check your inbox for an email from us. Not there? Look in your spam folder.

Print

Steps written out by Crafting Step by Step from LearnCreateSew (LearnCreateSew)'s video (opens YouTube) (19:54). Published .

Also in:Sewing

Fabric gnomes are the little round-bellied Scandinavian figures you see on mantels every December, with a long beard, a slouchy hat and a nose peeking out underneath. This one comes from LearnCreateSew, whose free pattern comes in two sizes on the LearnCreateSew site. It is a quick sew: a felt cone for the body, a fur beard, a flannel hat and a wooden bead for the nose. Most people finish one in an evening.

How to make a fabric gnome: the short version

  • Cut a felt body, a felt base, a flannel hat and a fur beard from the pattern.
  • Sew the beard to the body, then sew the body into a cone with the base on the bottom.
  • Weight the bottom with poly pellets, stuff with polyfil and slip stitch it shut.
  • Hem and sew the hat, add a bead nose and a pom pom, and slouch the hat down.

Choosing the fur for the beard

The beard makes or breaks a gnome. Look for faux fur with a long pile, meaning the hairs hang well past the edge of the backing fabric. Short pile fur looks like a mustache, not a beard. Check the direction of the hairs too: they should brush downward, the same way as the arrow on the beard pattern piece. Cut from the back in tiny snips so you only cut the backing, never the hair.

Fabric choices

Felt is the easiest body fabric because it does not fray and needs no hem. Flannel or quilting cotton works well for the hat, and a fat quarter is plenty. Fussy cut the hat if your print has a direction. For an all-year gnome, try denim, plaid or burlap in place of Christmas prints.

Keeping your gnome from tipping

A stuffed cone wobbles. A few spoonfuls of poly pellets in the bottom keeps it standing. The video uses about 8 tablespoons for the medium size and sews them into a small fabric pouch so they stay flat on the base. Rice or crushed walnut shells work too, though plastic pellets last longest and do not attract pests. If small children or pets will be near the gnome, the pouch is worth the extra five minutes.

No sewing machine?

You can sew the whole gnome by hand with a backstitch. It takes longer, but felt is easy to hand sew. Close the stuffing gap with a ladder stitch, which is the same idea as the slip stitch in the video. New to machines? Start with how to use a sewing machine.

Ideas for gifts and decor

  • Make a family of three in small, medium and large.
  • Swap the red for pink and white for a Valentine's gnome.
  • Tuck a sprig of greenery or a tiny bell into the hat band.
  • Add a hanging loop to a small one for a tree ornament.

Common problems

  • Gnome falls over. Add more pellets and flatten the pouch on the base.
  • Lumpy body. Tear polyfil into small fluffy pieces before stuffing.
  • Bald patches in the beard. You cut through the hair. Snip only the backing.

Want more gnomes and winter friends? Try a sock snowman, carve a wooden gnome or draw a gnome.

Free printable

Print the steps and supply list for this project

One page you can take to the table. Free with a free account, no password.

Get the free printable

What you'll need

Free, for this project

Get this checklist by email

  • All 17 tools and materials, with tick boxes
  • A link to print all 10 steps on paper, to keep by you while you craft

No password. The whole tutorial stays free on this page.

Quick answer

Sew a fabric gnome with a felt body, fur beard, flannel hat and bead nose. An easy project: about 1 hour 30 minutes. Materials cost about $6 to $12. You need 17 things, including long pile faux fur, poly pellets and polyfil stuffing. The 10 steps start with trace the Gnome Hat Pattern Onto the Fabric, snip the Faux Fur Beard Backing With Small Scissors and pin the Fur Beard to the Red Felt Gnome Body.

Step-by-step guide

10 steps, about 20 minutes. Tap a picture to jump to that step. Your progress saves automatically.

Tick each step off as you go.

  1. Step 1: Trace the Gnome Hat Pattern Onto the Fabric

    Watch this step · 2:46

    Print the free LearnCreateSew pattern and tape the pieces together. The video makes the medium size here. Fold your hat fabric so you are working with one layer, lay the hat pattern on the wrong side and trace around it with a marking pen. You only need one hat piece. Cut it out, then trace and cut the body and the round base from felt the same way.

    Tip:

    Move the pattern around on a printed fabric before you trace so you like where the motifs land.

    Back to all steps

  2. Step 2: Snip the Faux Fur Beard Backing With Small Scissors

    Watch this step · 5:14

    Check which way the fur brushes down and match it to the arrow on the beard pattern. Flip the fur over, trace the beard on the back and cut it out slowly. Use small scissors and do not open them all the way. Take tiny snips through the backing only. Big cuts slice off the long hairs and give your gnome an unfortunate haircut.

    Tip:

    Cut outdoors or over a bin. Fur sheds loose fibers everywhere.

    Back to all steps

  3. Step 3: Pin the Fur Beard to the Red Felt Gnome Body

    Watch this step · 7:16

    Trim the body pattern along the dotted beard placement line. Lay that top piece on the felt body to show where the beard goes. Line the top edge of the beard up with the pattern edge and center it. Pin it in place, then sew along the top edge of the beard with an eighth inch seam. Brush the fur away from the needle as you go.

    Tip:

    Mark the center line on the beard and body if you do not trust your eye.

    Back to all steps

  4. Step 4: Sew the Side Seam of the Gnome Body

    Watch this step · 8:14

    Fold the body in half with right sides together so the beard is hidden inside. Pin the long side. Sew from the tip down to the corner with a quarter inch seam, but leave a gap of about two and a half to three inches above the beard line for turning. Do not leave the gap at the very tip. A pointed tip is hard to slip stitch shut.

    Tip:

    Backstitch on both sides of the gap so it does not pull open while stuffing.

    Back to all steps

  5. Step 5: Sew In the Gnome Base and Clip the Curves

    Watch this step · 9:30

    Tuck the beard down inside, out of the way. Pin the felt circle to the bottom edge, right sides together, and sew around it with a quarter inch seam. Keep the circle flat on the machine so you can move the body fabric aside. Clip around the base with pinking shears so it lies flat, staying clear of the stitches. Trim the tip, then turn the gnome right side out.

    Tip:

    No pinking shears? Cut small triangles into the seam allowance with regular scissors.

    Back to all steps

  6. Step 6: Weight the Gnome Body With Poly Pellets

    Watch this step · 11:30

    Pour poly pellets into the bottom so your gnome stands without wobbling. A large funnel helps; small ones jam. The video goes one step further and sews two scrap fabric circles a little bigger than the base into a pouch, fills it with about 8 tablespoons of pellets, sews it shut and slides the pouch into the gnome. Flatten it on the bottom so the gnome sits level.

    Tip:

    Pin half an inch from your stitch line so pellets stay away from the needle.

    Back to all steps

  7. Step 7: Stuff the Gnome and Slip Stitch the Opening Closed

    Watch this step · 13:44

    Tear polyfil into small, fluffy pieces so the body does not turn lumpy. Pack it in around the pellet pouch and shape the gnome as you go. Once the base is full, start slip stitching the opening a quarter inch from the edge. Stop halfway, add more stuffing to firm up the top, then finish the seam and knot it off.

    Tip:

    A chopstick pushes stuffing into the tip of the cone.

    Back to all steps

  8. Step 8: Hem the Gnome Hat and Fold It Into a Cone

    Watch this step · 15:26

    Lay the hat right side down. Fold the curved edge up a quarter inch and stitch it down to hem it, all the way around. Press it if you like. Fold the hat in half with right sides together, sew the long side with a quarter inch seam and turn it right side out. Slip it on the gnome to check the fit. A little loose gives you slouchy folds.

    Tip:

    Hat too baggy? Sew the side again with a wider seam.

    Back to all steps

  9. Step 9: Sew the Wooden Bead Nose on the Gnome

    Watch this step · 17:34

    Take the hat off. Find the back seam and go straight across to the front; that is the center of the beard. The video sets the top of the nose about a quarter inch below the top of the beard, so the hat can slouch over it. Start the needle where the knot will hide under the hat and stitch through the wooden bead several times. Wood beads can be rough inside, so pull gently.

    Tip:

    Making a batch? Sew the nose on right after the beard while the body is still flat.

    Back to all steps

  10. Step 10: Slouch the Hat Over the Gnome's Nose

    Watch this step · 18:32

    Sew a pom pom to the tip of the hat, stitching through the pom pom itself and not only its fluff, or hot glue it. Put the hat on with the seam at the back. Pull it down past the nose, then scrunch it up and over so it rests on the bead. Play with the folds until you like the look. A few hand stitches or dots of glue hold it in place.

    Tip:

    Pinch the hat tip into a bend for a more playful gnome.

    Back to all steps

How to Make a Popsicle Stick Sled Ornament

Keep going

How to Make a Popsicle Stick Sled Ornament

Keep going with crafts

More on this topic, picked for this fabric gnome.

You reached the last step

Save this project to come back to it

Your ticked steps, the free printable and your other saved makes, together in My Projects. Free, no password.

You tapped Save

Save this project for later

We'll email you a link, no password.

How to Make a Fabric Gnome (Free Sewing Pattern)

  • Your saved projects in one list
  • Your ticked steps on any device

Check your inbox for an email from us. Not there? Look in your spam folder.

Free printable

Printable sheet and shopping list for this project

The bonus is hidden until you sign up.

Free with a free account, no password. Every step above stays open to everyone.

Products Used

The Checklist

How to Make a Fabric Gnome (Free Sewing Pattern)

Tools
8
Materials
9
Steps
10
Video
20 min

Tools we recommend

As an Amazon Associate we earn from qualifying purchases. Links on this page may be affiliate links - clicking them and buying doesn't change your price, but helps support Crafting Step by Step.

Tags

The Crafter's Weekly

New crafts tutorials, every Sunday

One short email with the week's best step-by-step guides. Free, no spam, unsubscribe anytime.

Did this work for you?

What's next

Related collections

Curated theme pages that include this tutorial.

Similar tutorials

Hand-picked next reads based on the one you just finished.

Liked this crafts tutorial?

Pick the crafts you want to hear about. One email every Sunday with new step-by-step tutorials. No spam, easy to unsubscribe.

Get more like this in your inbox

Weekly digest. Pick the categories you want. Unsubscribe anytime.

Send me tutorials about

We only email about new tutorials. Easy unsubscribe anytime.