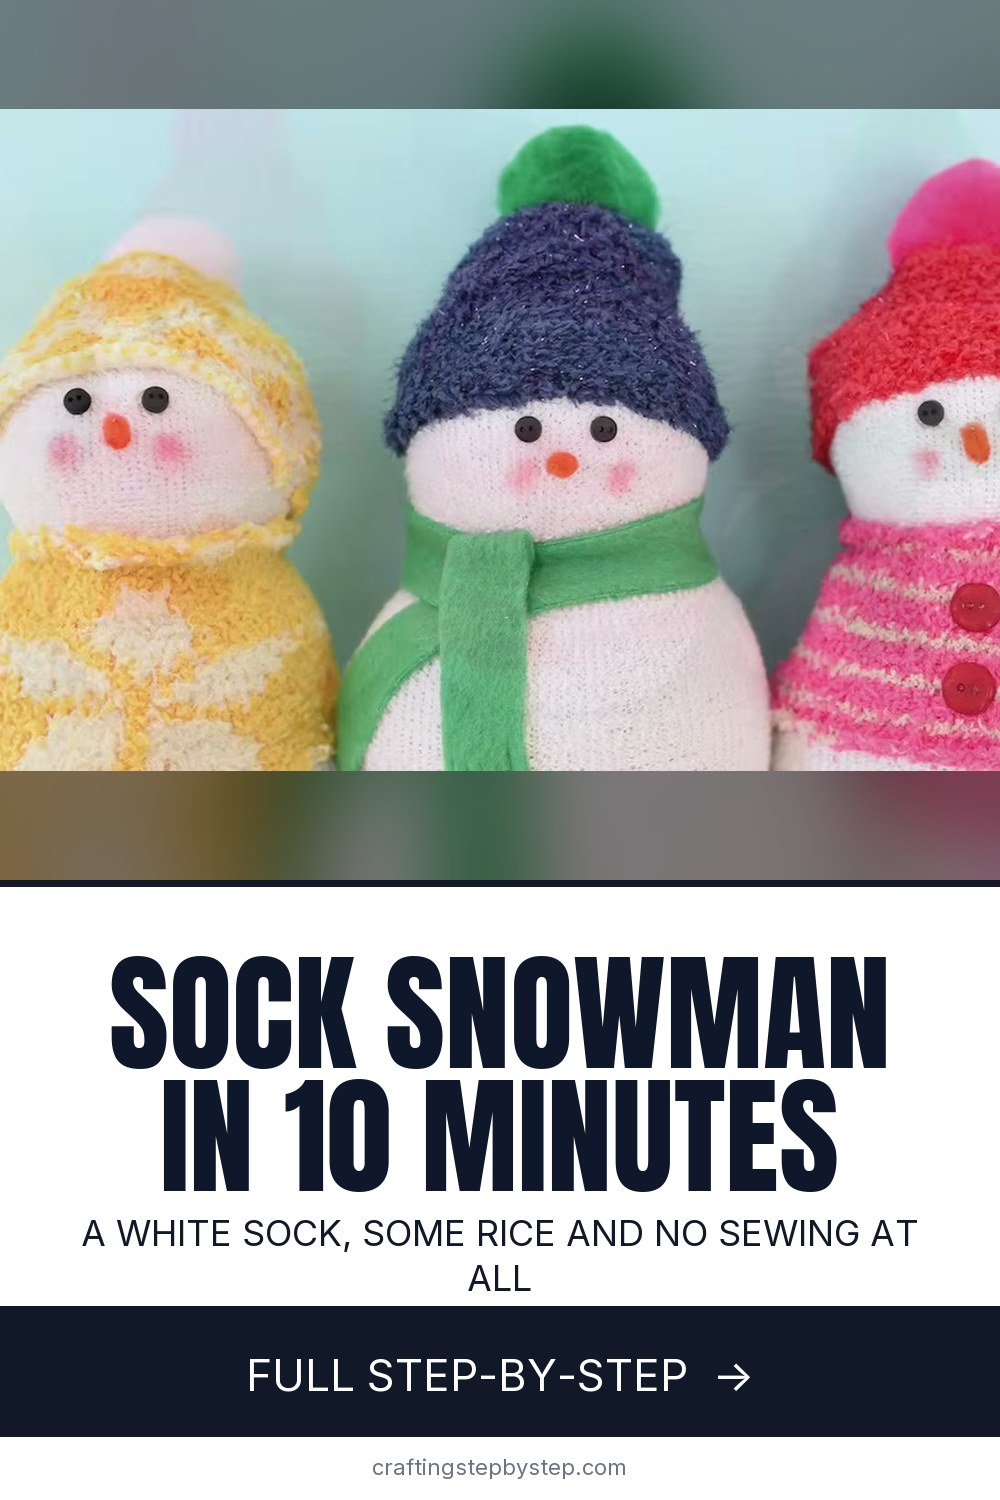
How to Make a Sock Snowman (10 Minute No-Sew Christmas Craft)

The finished result: How to Make a Sock Snowman (10 Minute No-Sew Christmas Craft)
  • Difficulty: Easy
  • About 15 minutes
  • 10 steps

You tapped Save

Save this project for later

We'll email you a link, no password.

How to Make a Sock Snowman (10 Minute No-Sew Christmas Craft)

  • Your saved projects in one list
  • Your ticked steps on any device

Check your inbox for an email from us. Not there? Look in your spam folder.

Print

Steps written out by Crafting Step by Step from Make Life Lovely's video (opens YouTube) (7:18). Published .

A sock snowman is a plump little snowman made from a plain white sock filled with rice, dressed in a fuzzy sock hat and sweater. This version comes from Make Life Lovely, and it takes about 10 minutes from start to finish. There is no sewing at all. Rubber bands shape the body and a glue gun holds the face and buttons. They cost very little, so you can make a whole row of them for teachers, neighbors and grandkids.

How to make a sock snowman: the short version

  • Cut a white sock under the heel and turn it inside out.
  • Fill it with about 3 cups of rice and tie the top with a rubber band.
  • Add a second rubber band to make the head.
  • Cut a fuzzy sock into a hat and a sweater and slide them on.
  • Glue on button eyes, a pipe cleaner nose, a pom pom and sweater buttons.

Choosing the socks

For the body, use a new white men's crew sock with no colored heel or toe. A gray heel shows through and looks like a smudge. Turning the sock inside out gives a softer, fluffier snowman and hides the ribbing. For the hat and sweater, fuzzy women's socks work best. The stripes and snowflake patterns sold every December make each snowman look different. One fuzzy sock dresses one snowman.

Rice or something else?

Rice gives the snowman weight, so it sits up on a shelf and does not tip over. Plain long grain rice is cheapest. Plastic poly pellets are a good swap if the snowman might end up near a damp window or a curious dog, since rice can attract pests over time. Polyester stuffing makes a lighter snowman, but it will not stand on its own unless you add a handful of rice at the bottom.

Bounce the sock on the table as you fill it. The rice settles and you can fit more in, which keeps the snowman round and firm.

Hot glue safety

The eyes and nose are tiny, so your fingers get close to the glue. Use a low temperature glue gun if you have one, and press the pieces on with the tip of a toothpick or the end of a pencil. Children can do the filling, shaping and dressing, and a grown-up can handle the glue.

Ways to change it up

  • Scarf. Cut a strip from fleece or the leftover sock and tie it around the neck.
  • Size. A baby sock makes an ornament size snowman. A knee sock makes a tall one.
  • Family set. Make one per grandchild in their favorite color.
  • Cheeks. No blush? A pink colored pencil rubbed on lightly works too.

Common problems

  • The snowman slumps. It needs more rice. Open the top band and add a half cup.
  • The head is lopsided. Roll the middle rubber band up or down until the head looks round.
  • The sweater slides. Put a dot of hot glue under the back edge.

More snowman crafts

Fold a row of paper snowmen with the kids, or try a crochet snowman ornament for the tree. For a quieter afternoon, paint a snowman or draw one.

Free printable

Print the steps and supply list for this project

One page you can take to the table. Free with a free account, no password.

Get the free printable

What you'll need

Free, for this project

Get this checklist by email

  • All 12 tools and materials, with tick boxes
  • A link to print all 10 steps on paper, to keep by you while you craft

No password. The whole tutorial stays free on this page.

Quick answer

Make a sock snowman from a white sock and rice in 10 minutes. An easy project: about 15 minutes. Materials cost about $3 to $8. You need 12 things, including white men's crew sock, fuzzy patterned sock and about 3 cups of rice. The 10 steps start with cut the White Sock Under the Heel for the Sock Snowman, funnel Rice Into the Sock Snowman Body and tie the Top of the Rice-Filled Sock With a Rubber Band.

Step-by-step guide

10 steps, about 7 minutes. Tap a picture to jump to that step. Your progress saves automatically.

Tick each step off as you go.

  1. Step 1: Cut the White Sock Under the Heel for the Sock Snowman

    Watch this step · 0:33

    Start with a new, clean white men's sock that has no colored heel or toe. Lay it flat and cut straight across right under the heel. You will use the long tube part with the toe still closed. Now turn the sock inside out. The inside is softer and fluffier, and the knit lines do not show as much on the finished snowman.

    Tip:

    Crew socks give a good size. Ankle socks are too short.

    Back to all steps

  2. Step 2: Funnel Rice Into the Sock Snowman Body

    Watch this step · 1:28

    Plan on about three cups of rice for each snowman. Open the sock and set a wide funnel inside so the rice goes in without spilling everywhere. Pour in a cup at a time. Every so often, bounce the sock on the table and pull it up to stretch it. The rice settles and makes room for more, so the snowman stays plump and stands up well.

    Tip:

    No funnel? Roll a sheet of paper into a cone.

    Back to all steps

  3. Step 3: Tie the Top of the Rice-Filled Sock With a Rubber Band

    Watch this step · 1:52

    When the sock is nice and full, gather the open top together. Wrap a rubber band around it several times so it holds tight. A second rubber band is good insurance. You can also use string or a ponytail holder. Leave the little tuft of sock sticking up for now. It gets trimmed and hidden under the hat later.

    Tip:

    Squeeze out extra air before you tie it so the body is firm.

    Back to all steps

  4. Step 4: Pinch the Sock Snowman Head With a Second Rubber Band

    Watch this step · 2:12

    Decide where the head should go. About one third of the way down from the top looks right. Slide another rubber band over the top and down to that spot, wrapping it a couple of times to cinch in a neck. Press and shape the two sections with your hands until both look round. Make Life Lovely uses two bands here to be safe.

    Tip:

    Roll the band up or down to make the head bigger or smaller.

    Back to all steps

  5. Step 5: Cut the Striped Sock for the Snowman Hat and Sweater

    Watch this step · 2:38

    Grab a colored or patterned sock for the clothes. Lay it flat and cut across a few inches above the toe. That toe piece becomes the hat. Then cut again right under the heel. The tube between your two cuts becomes the sweater. Trim the extra tuft off the top of the snowman so the hat sits flat.

    Tip:

    Fuzzy socks with stripes or snowflakes look the cutest.

    Back to all steps

  6. Step 6: Pull the Striped Sweater Onto the Sock Snowman

    Watch this step · 3:10

    Pull the toe piece over the top of the head like a knit cap and fold up the edge for a brim. Then slide the sock tube down over the body as a sweater. Fold the top of it over to look like a collar. Tug it around until it is on straight and even, with the same amount of white showing at the bottom on every side.

    Tip:

    If the sweater is long, fold the bottom edge under.

    Back to all steps

  7. Step 7: Hot Glue the Button Eyes and Pipe Cleaner Nose on the Sock Snowman

    Watch this step · 4:04

    Cut a short piece of orange pipe cleaner for a carrot nose. Set it in the middle of the face. Place two tiny black buttons above it for eyes. Move them around until the face looks right to you, then glue each one down with a hot glue gun. Be careful here. The pieces are small and your fingers are close to the hot glue.

    Tip:

    Press small pieces on with a toothpick to keep your fingers clear.

    Back to all steps

  8. Step 8: Dab Pink Blush Cheeks on the Sock Snowman

    Watch this step · 4:26

    For rosy cheeks, use a bit of pink powder blush. Take a tiny pom pom, dip it in the blush, and press it gently on each side of the face. Start light. You can always add more. A cotton swab or a small makeup brush works the same way. The cheeks give the snowman a sweet, chilly look.

    Tip:

    Tap off extra blush first so you do not get a dark spot.

    Back to all steps

  9. Step 9: Glue a Pom Pom on the Sock Snowman Hat

    Watch this step · 4:56

    Pick a pom pom in a size you like for the top of the hat. White looks like a classic winter cap, but a color that matches the sweater is fun too. Add a dab of hot glue and press it onto the tip of the hat. Then lift the edges of the hat and sweater and glue them in place so nothing slides.

    Tip:

    A larger pom pom hides a lumpy hat top.

    Back to all steps

  10. Step 10: Glue Red Buttons Down the Sock Snowman Sweater

    Watch this step · 6:38

    Finish with a few buttons down the front of the sweater. Make Life Lovely uses three small red ones, with a heart shaped button at the top. Space them evenly and glue each one with a small dot of hot glue. Set your snowman on a shelf, a mantel or a windowsill, or wrap it up as a gift.

    Tip:

    Match the button color to the hat for a pulled-together look.

    Back to all steps

How to Dye Easter Eggs Naturally

Keep going

How to Dye Easter Eggs Naturally

Keep going with crafts

More on this topic, picked for this sock snowman.

You reached the last step

Save this project to come back to it

Your ticked steps, the free printable and your other saved makes, together in My Projects. Free, no password.

You tapped Save

Save this project for later

We'll email you a link, no password.

How to Make a Sock Snowman (10 Minute No-Sew Christmas Craft)

  • Your saved projects in one list
  • Your ticked steps on any device

Check your inbox for an email from us. Not there? Look in your spam folder.

Free printable

Printable sheet and shopping list for this project

The bonus is hidden until you sign up.

Free with a free account, no password. Every step above stays open to everyone.

Products Used

The Checklist

How to Make a Sock Snowman (10 Minute No-Sew Christmas Craft)

Tools
3
Materials
9
Steps
10
Video
7 min

Tools we recommend

As an Amazon Associate we earn from qualifying purchases. Links on this page may be affiliate links - clicking them and buying doesn't change your price, but helps support Crafting Step by Step.

Tags

The Crafter's Weekly

New crafts tutorials, every Sunday

One short email with the week's best step-by-step guides. Free, no spam, unsubscribe anytime.

Did this work for you?

What's next

Related collections

Curated theme pages that include this tutorial.

Similar tutorials

Hand-picked next reads based on the one you just finished.

Liked this crafts tutorial?

Pick the crafts you want to hear about. One email every Sunday with new step-by-step tutorials. No spam, easy to unsubscribe.

Get more like this in your inbox

Weekly digest. Pick the categories you want. Unsubscribe anytime.

Send me tutorials about

We only email about new tutorials. Easy unsubscribe anytime.