How to Draw a Gnome

Save it for later. We'll email you a link, no password.

Find it again on your phone or computer, with your finished steps ticked.

You tapped Save

Save this project for later

We'll email you a link, no password.

How to Draw a Gnome

  • Your saved projects in one list
  • Your ticked steps on any device

Check your inbox for an email from us. Not there? Look in your spam folder.

  • 9 steps
  • 6:39 video
  • Difficulty: Easy
  • About 30 minutes
  • Drawing

Based on a video by Cartooning Club Junior

Opens their YouTube channel

Steps written out by Crafting Step by Step · Published · Updated

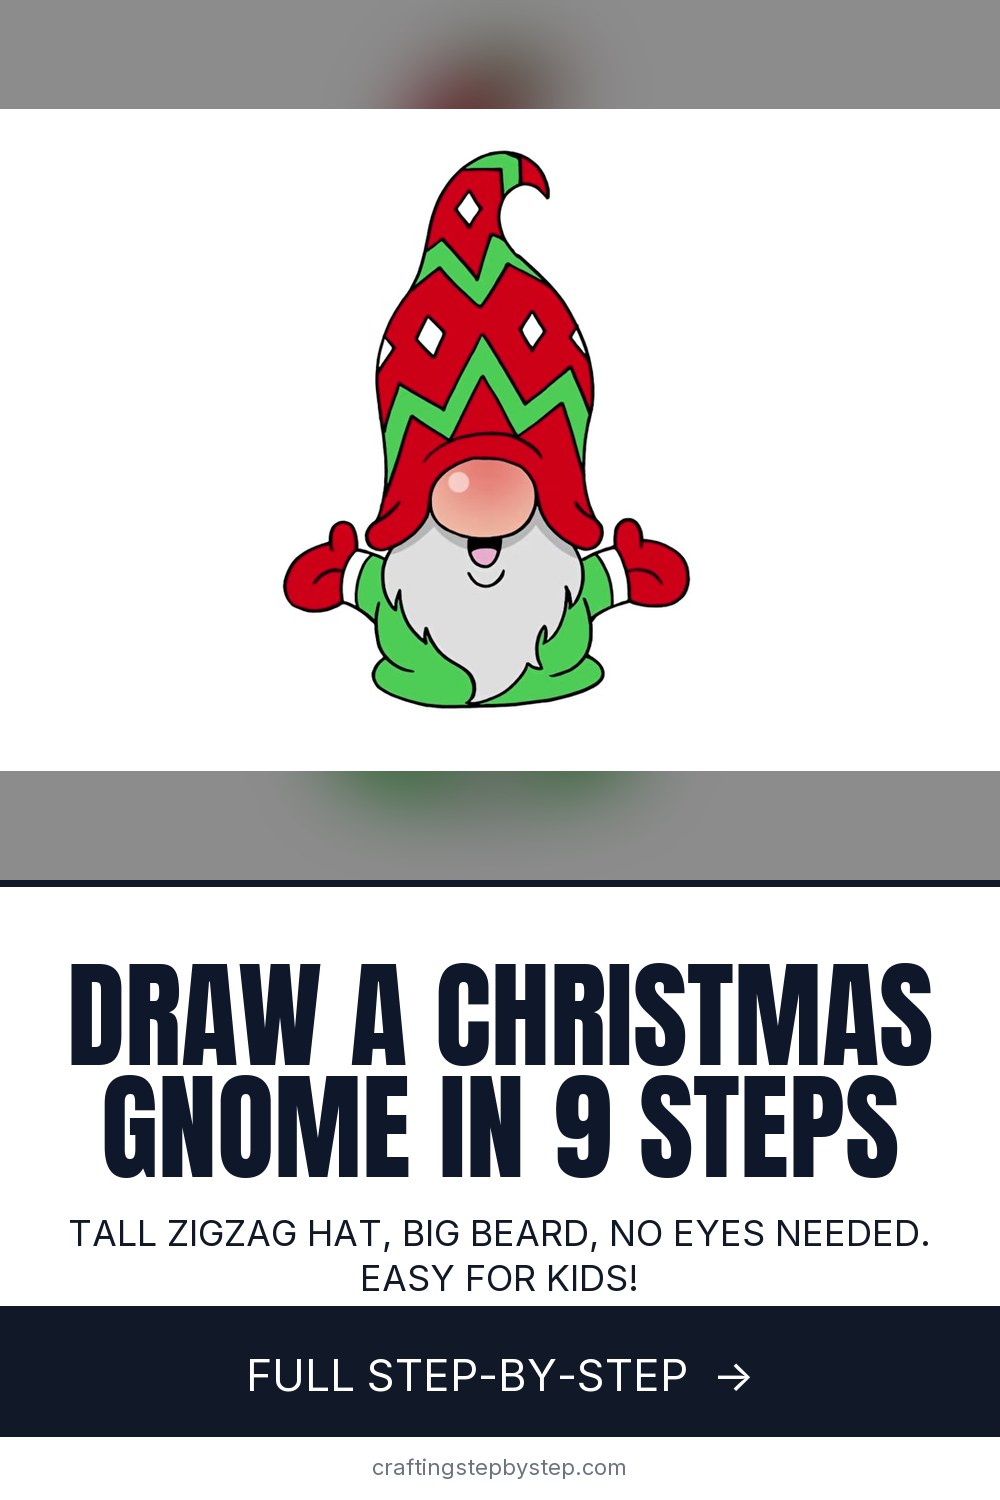
The finished result: How to Draw a Gnome

This Christmas gnome comes from Cartooning Club Junior, a channel built for younger and beginner artists. You start with a round nose in the middle of the page and build everything around it: a tall floppy hat, a zigzag and diamond pattern, a big wavy beard and two little arms with mittens. There are no eyes to draw. The hat covers them, and that is what makes it look like a gnome.

The lesson runs under seven minutes. You need a black marker and a sheet of paper, plus markers or colored pencils if you want to add color at the end.

Why the nose comes first in a gnome drawing

Most drawings start with the head. A gnome has no visible head, so the nose does the job. Once the oval sits in the center, the hat brim drapes over it, the beard hangs under it and the body tucks behind the beard. Every shape touches the nose, so nothing drifts out of place. Draw the nose too high and the hat runs off the top of the page. Aim for a little below the middle.

The hat is about half of the whole gnome. That tall cone is the joke, so do not be shy with it.

Markers, paper and color

A fine point black permanent marker gives the bold outline you see in the video. Heavier drawing paper keeps ink from bleeding through, which matters once you color. Nervous about mistakes? Sketch lightly in pencil, trace in marker, then erase.

The creator adds color digitally at the end: red hat with green zigzags and white diamonds, a pink nose, a light grey beard, a green body and red mittens. You can match that with washable markers or colored pencils. Leave the diamonds white so the pattern pops.

The Scandinavian Christmas gnome

Holiday gnomes come from Scandinavia, where the tomte (Sweden) or nisse (Norway and Denmark) is a small bearded farm guardian. Families leave him a bowl of rice porridge on Christmas Eve. That is why the hat is long, the beard is huge and the face hides. Draw him on folded cardstock for a Christmas card, cut him out for gift tags, or tape a row of gnomes in a classroom window. He sits well beside an elf drawing or a Santa drawing.

Gnome drawing ideas to try next

  • Swap the zigzags for stripes, stars or snowflakes on the hat.
  • Give him a candy cane or a little present to hold in one mitten.
  • Draw a girl gnome with two braids poking out under the hat.
  • Line up three gnomes of different heights with different hat colors.
  • Put him next to a Christmas tree or a gingerbread man for a holiday scene.

Common gnome drawing problems

  • The hat looks like a traffic cone. Bend the tip over to one side and let the sides curve a little.
  • The pattern gets messy. Draw the bottom zigzag first, then copy the same shape higher up.
  • The beard looks stiff. Make each wave a curve that ends in a point, and change the sizes.
  • The arms look stuck on. Start them at the edge of the beard, not the body.

New to drawing? How to draw covers the basics.

Free printable

Print the steps and supply list for this project

One page you can take to the table. Free with a free account, no password.

Get the free printable

What you'll need

Free, for this project

Get this checklist by email

  • All 4 tools and materials, with tick boxes
  • A link to print all 9 steps on paper, to keep by you while you craft

No password. The whole tutorial stays free on this page.

Quick answer

Draw a cute Christmas gnome in 9 easy steps: tall zigzag hat, round nose, wavy beard and mittens. An easy project: about 30 minutes. You need 4 things, including drawing paper, washable markers or colored pencils and black fine point permanent marker. The 9 steps start with draw an Oval Nose in the Middle of the Gnome Drawing, drape the Gnome's Hat Brim Over the Nose and draw the Tall Gnome Hat Up to a Bent Tip.

Step-by-step guide

9 steps, about 7 minutes. Tap a picture to jump to that step. Your progress saves automatically.

Tick each step off as you go.

  1. Step 1: Draw an Oval Nose in the Middle of the Gnome Drawing

    Watch this step · 0:21

    Start a little below the center of your page. Begin at the top of the nose and curve out to the left, down and back toward the middle. Do the same on the right side and close the shape. You want a wide oval, a bit flat on the bottom. This nose is the anchor for the whole gnome, so give it a good size. Everything else gets built around it.

    Tip:

    Leave plenty of room above the nose. The hat is tall.

    Back to all steps

  2. Step 2: Drape the Gnome's Hat Brim Over the Nose

    Watch this step · 0:46

    The hat sits right on top of the nose. On the left side, draw a line that bends down past the nose and curls out to the side. Round off the end like a floppy flap. Repeat on the right. Then add a fold line across the top of the nose, going up, across and back down. That curve makes the brim look thick and soft.

    Tip:

    Keep both curled ends at about the same height so the hat looks even.

    Back to all steps

  3. Step 3: Draw the Tall Gnome Hat Up to a Bent Tip

    Watch this step · 1:28

    From each end of the brim, draw the side of the hat going up. Let the lines bend in a little, then rise. They lean toward each other as they climb. At the top, curve the hat over to the right and finish with a hooked tip. The hat narrows as it goes up. Make it at least twice as tall as the nose and brim together.

    Tip:

    A bent tip looks floppy and fun. A straight point looks like a cone.

    Back to all steps

  4. Step 4: Add a Zigzag Pattern Across the Gnome Hat

    Watch this step · 2:08

    Time for the hat pattern. In the center, above the brim, draw a point. Bring lines down and out toward the left and right sides of the hat, like a wide letter M. Then trace the same zigzag a little higher up so you get a band. Your lines should touch the edges of the hat on both sides. It looks like a knitted sweater pattern.

    Tip:

    Count your points. Matching the number of points in each row keeps it tidy.

    Back to all steps

  5. Step 5: Draw Diamond Shapes and More Zigzags on the Gnome Hat

    Watch this step · 3:15

    Above the first band, draw two small diamonds side by side. Add a half diamond at each edge where the hat cuts it off. Then draw a second zigzag band higher up, the same way as the first. Finish with one diamond near the tip. The pattern repeats: zigzag, diamonds, zigzag, diamond. Take your time here. This is the slowest part.

    Tip:

    Pause the video after each row. Small diamonds are easier to keep even.

    Back to all steps

  6. Step 6: Draw the Gnome's Open Mouth Under the Nose

    Watch this step · 4:10

    Move down under the nose. Draw a small half oval for the open mouth, like a smile. Under it, add a short curve for the lower lip. Inside the mouth, draw a curve for the tongue and fill in the top part black. That little open mouth gives your gnome a cheerful face, even without eyes.

    Tip:

    Keep the mouth small. The beard grows all around it.

    Back to all steps

  7. Step 7: Draw the Gnome's Big Wavy Beard

    Watch this step · 4:40

    Tuck the beard under the hat. On the left, start at the brim and draw a curve that swoops down and in, then flicks back up into a point. Repeat it again lower. On the right, curl out and back in the same way. Bring both sides down to meet in a pointy tip below the mouth. Wavy, pointed edges make it look like real hair.

    Tip:

    Make the waves different sizes. A perfect pattern looks stiff.

    Back to all steps

  8. Step 8: Draw the Gnome's Round Body Behind the Beard

    Watch this step · 5:18

    The body hides behind the beard. On each side, step out from the beard and curl a line around and down. Bend it back in at the bottom. Then add a curved fold along the bottom edge that crosses under the beard tip. Erase or skip any line that would go through the beard. The beard stays in front.

    Tip:

    Keep the body short and wide. A long body makes him look like a wizard.

    Back to all steps

  9. Step 9: Add Arms and Mittens to Finish the Gnome Drawing

    Watch this step · 6:02

    Start at the side of the beard and draw the arm going up and out to the wrist. Bend it back in to the body. Add a cuff line at the wrist. For the mitten, point a thumb up, then round out the hand and pull it back to the wrist. Repeat on the other side. Sign your art, then color it: red hat, green body, red mittens.

    Tip:

    Raise both mittens up. It looks like he is cheering.

    Back to all steps

How to Draw a Sleigh

Keep going

How to Draw a Sleigh

You reached the last step

Save this project to come back to it

Your ticked steps, the free printable and your other saved makes, together in My Projects. Free, no password.

You tapped Save

Save this project for later

We'll email you a link, no password.

How to Draw a Gnome

  • Your saved projects in one list
  • Your ticked steps on any device

Check your inbox for an email from us. Not there? Look in your spam folder.

Free printable

Printable sheet for this project

The bonus is hidden until you sign up.

Free with a free account, no password. Every step above stays open to everyone.

Products Used

The Checklist

How to Draw a Gnome

Tools
2
Materials
2
Steps
9
Video
7 min

Tools we recommend

As an Amazon Associate we earn from qualifying purchases. Links on this page may be affiliate links - clicking them and buying doesn't change your price, but helps support Crafting Step by Step.

Tags

The Crafter's Weekly

New drawing tutorials, every Sunday

One short email with the week's best step-by-step guides. Free, no spam, unsubscribe anytime.

Test your knowledge

Did the lesson stick? Start with this one.

5 questions covering what you just read. No signup, no score saved, and you can stop after this one.

Question 1 of 5

What do you draw first on this Christmas gnome?

Quick reference

Key takeaways from How to Draw a Gnome

5 questions, answers, and one-line explanations. Tap to expand.

  1. 1.What do you draw first on this Christmas gnome?

    Answer: The nose

    The nose comes first because the hat and beard both hang off it.

  2. 2.Why does a gnome drawing usually hide the eyes?

    Answer: The hat brim covers them

    The hat sits right on the nose, which is the classic Scandinavian gnome look.

  3. 3.Which country's Christmas tradition is the gnome, or tomte, from?

    Answer: Scandinavia

    The tomte or nisse is a Scandinavian Christmas figure.

  4. 4.How do you draw the beard so it looks wavy?

    Answer: Swoops that flick to points

    Curves that swoop down and flick back into points read as wavy hair.

  5. 5.Why do the zigzag bands on the hat lean with its sides?

    Answer: To follow the hat's shape

    A pattern that bends with the hat makes it look like it wraps around a cone.

Did this work for you?

What's next

Related collections

Curated theme pages that include this tutorial.

Similar tutorials

Hand-picked next reads based on the one you just finished.

Liked this drawing tutorial?

Pick the crafts you want to hear about. One email every Sunday with new step-by-step tutorials. No spam, easy to unsubscribe.

Get more like this in your inbox

Weekly digest. Pick the categories you want. Unsubscribe anytime.

Send me tutorials about

We only email about new tutorials. Easy unsubscribe anytime.