How to Do Bubble Letters

CalligraphyEasy15:298 stepsPart of DIY Crafts for BeginnersBrowse more →
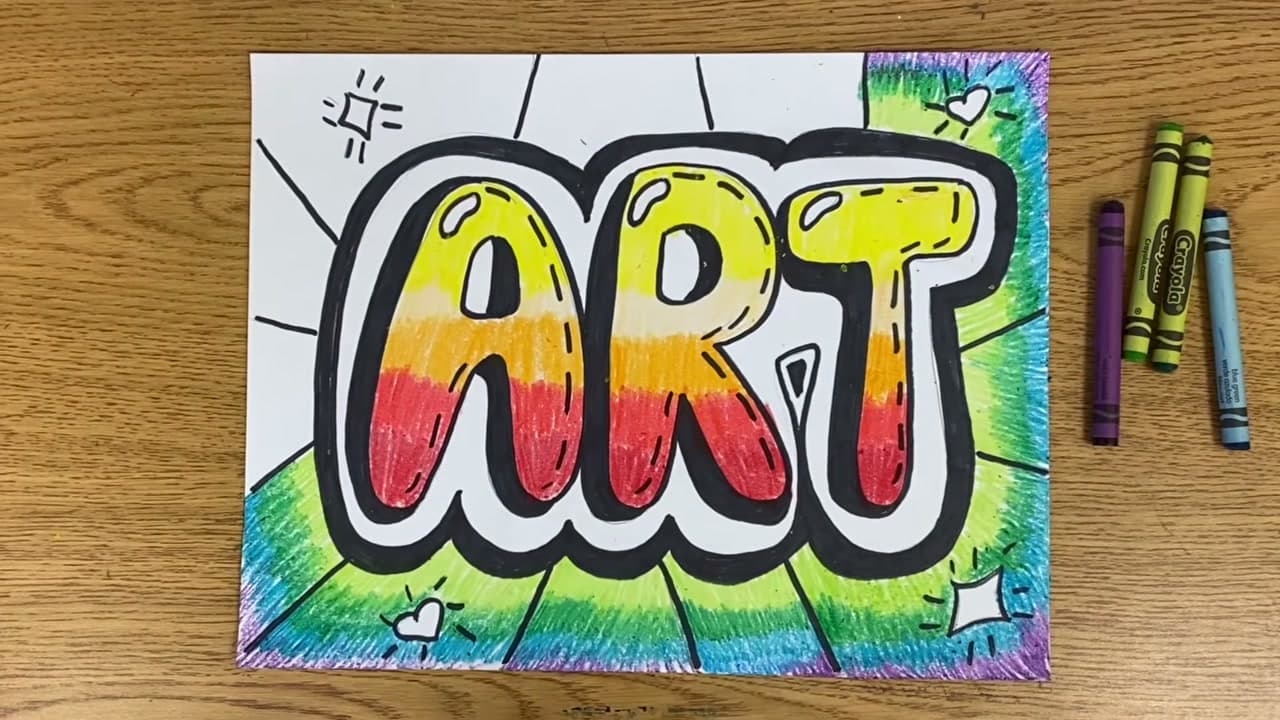
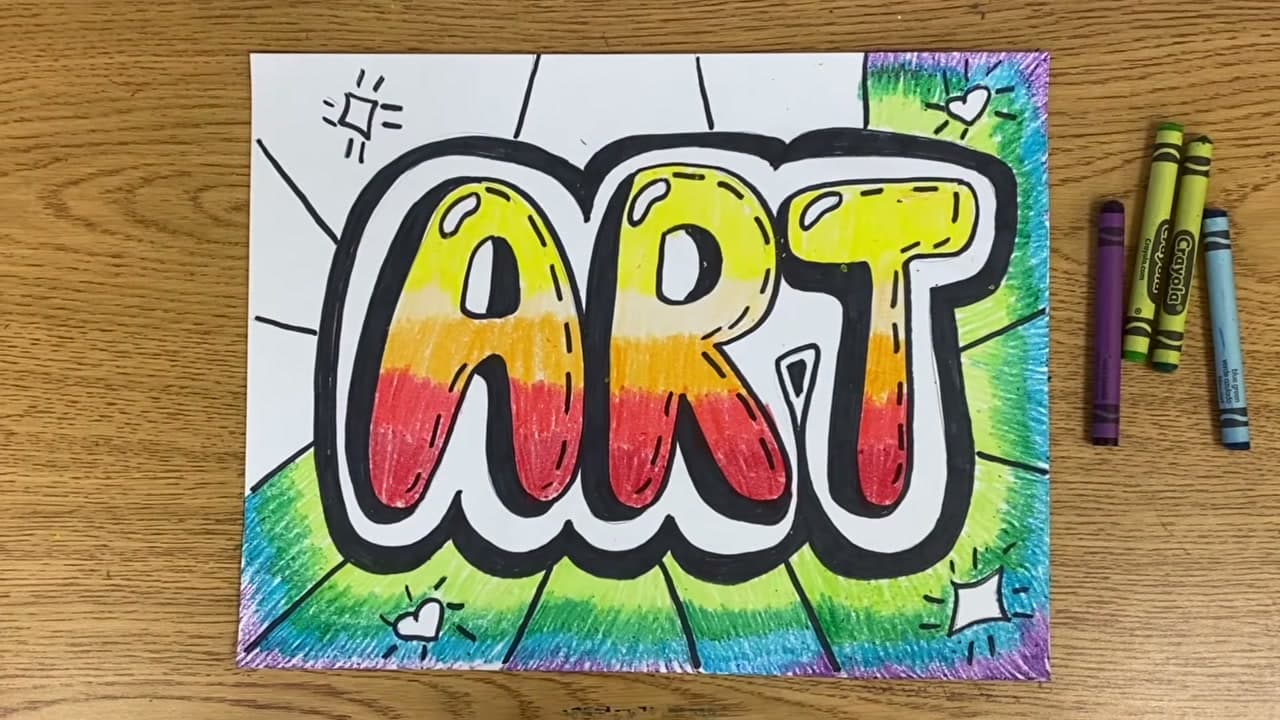
The finished result: How to Do Bubble Letters
Also in:Crafts

By CraftingStepByStepPublished

Based on a video by Kenwood K-8 Center Art Class.

Bubble letters look like a knack you either have or you do not. They are a method. Write your word out in plain print capitals, wrap each letter in one long curvy line, then erase what is underneath. Everything after that is decoration.

This walkthrough follows the art teacher behind Kenwood K-8 Center Art Class, who builds the word ART on a dry erase board first and then redraws the same design on paper with a Sharpie and a box of crayons. The board half is deliberate practice, not a different project. Run through it once on a whiteboard or scrap paper and the paper version comes out clean. She also makes the point that the trick is not limited to capitals. The same curvy line works on lowercase and on cursive, so the method carries to any word you want.

Nine of the eleven minutes of real work happen with a pencil and an eraser, which means you can practice this on the back of an envelope. The crayons only show up at the end.

More lettering on the site: faux calligraphy runs on the same outline-and-thicken idea with an ordinary pen, italic covers pen angle and letter slant, and learning calligraphy is where to start if you want the full alphabet. For general pencil work, see how to draw.

What you'll need

Step-by-Step Guide

8 steps · about 15 minutes.Check off each step as you go and your progress saves automatically.

1

Write Your Word in Print Capitals with Space Between the Letters

1:00
Step 1: Write Your Word in Print Capitals with Space Between the Letters - How to Do Bubble Letters

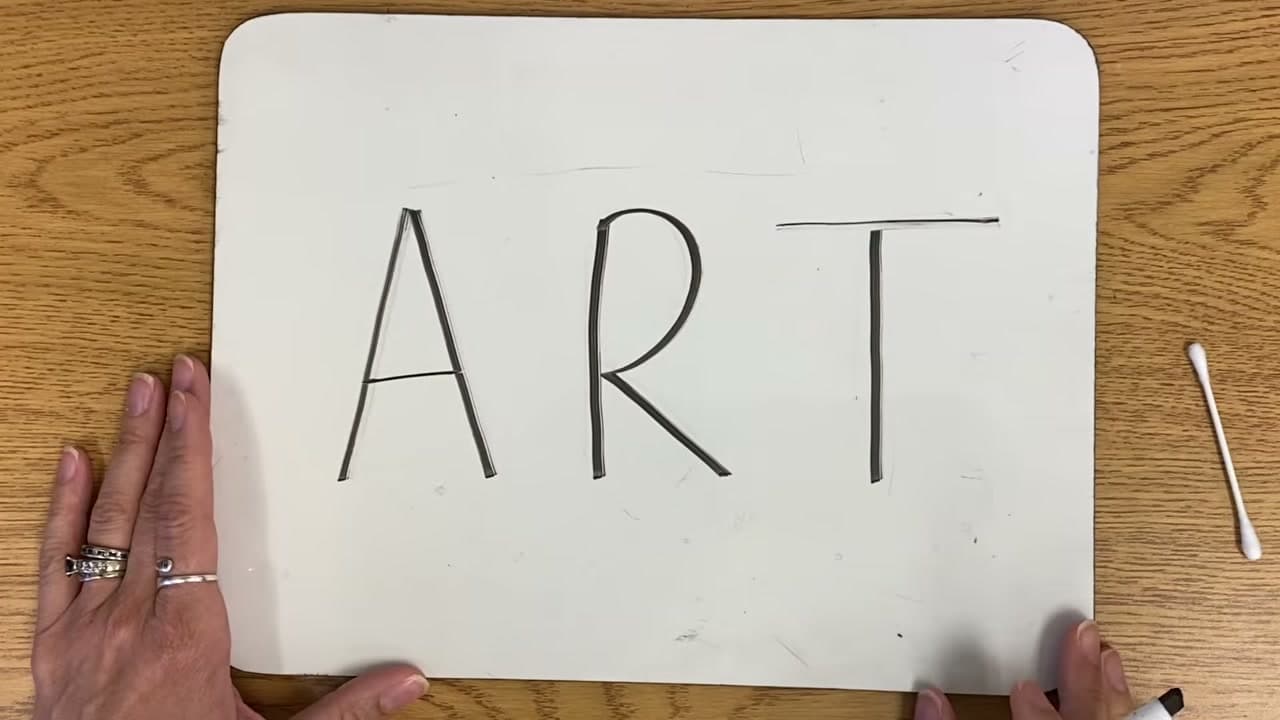
Write your word across the page in plain block capitals, the way you would print a label. Keep the strokes thin and the pressure light. Leave a wide gap between the letters, wider than feels right, because every one of them is about to gain a fat rounded outline that eats into the space on both sides.

ART is a good first word. Three letters, three different shapes to practice on, and short enough that you can start over without much loss. Anything under five letters works.

Tip

Letters printed close together leave the bubbles nowhere to go and the shapes merge into a blob. If you are unsure, add another finger width between them.
Used in this steppencildry erase board
2

Draw One Long Curvy Line Around Each Printed Letter

1:43
Step 2: Draw One Long Curvy Line Around Each Printed Letter - How to Do Bubble Letters

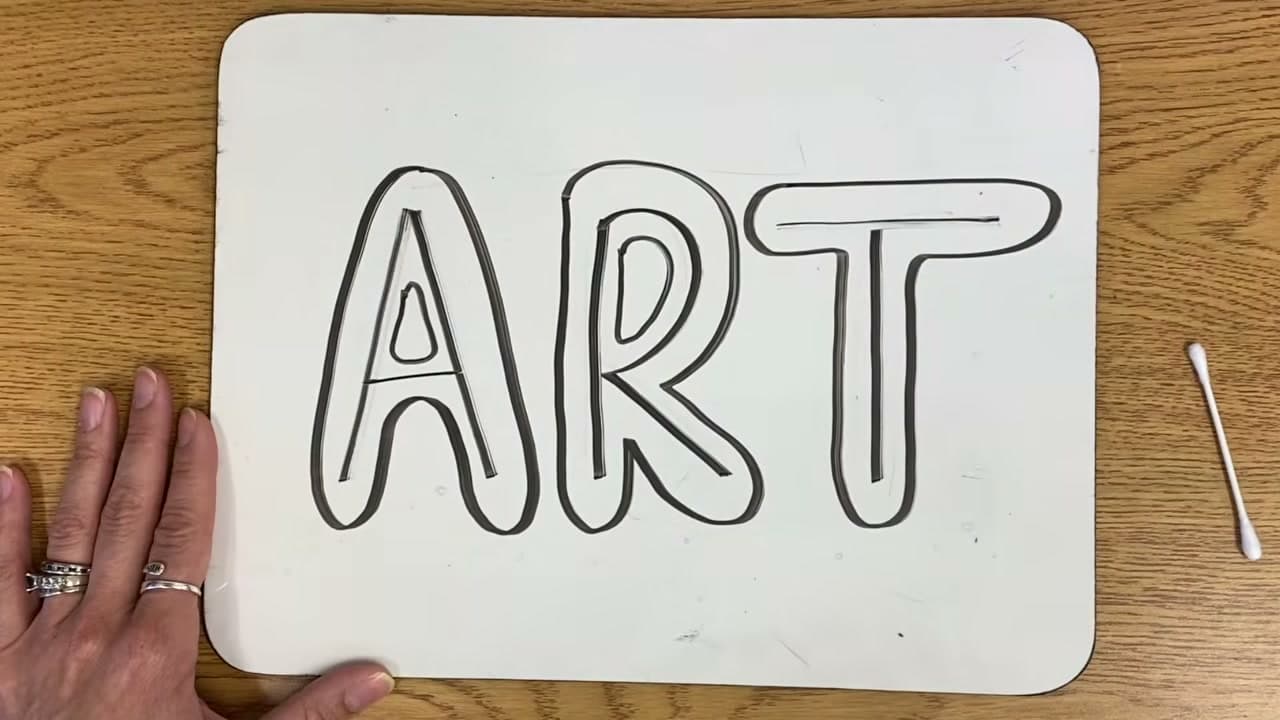
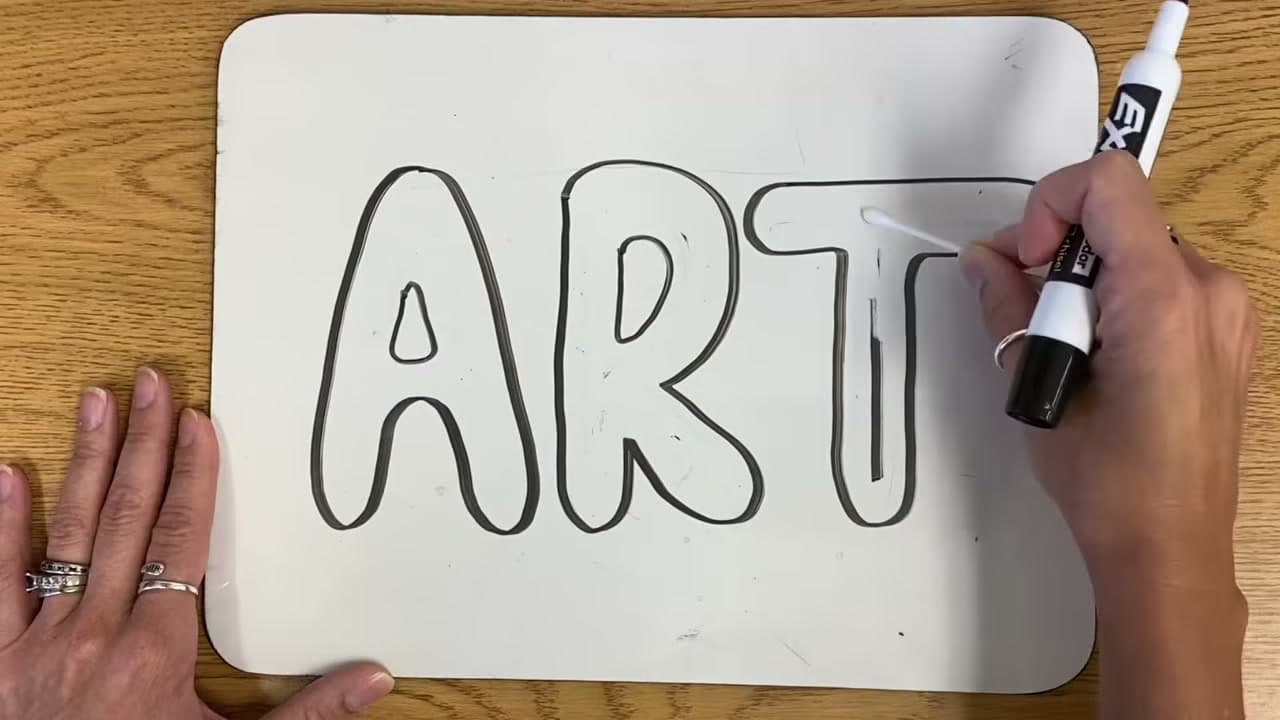
Start at the bottom of the first letter and draw one continuous curvy line all the way around the outside of it, the way you would draw a cloud. Follow the shape of the letter but round off every corner and let the line bulge a little between the corners. Bring it back to where you started and close it up.

Any letter with a hole in it needs a second small curvy shape inside. The A has a triangle, the R has a loop. Draw those the same way, rounded and slightly swollen, then move on to the next letter.

Tip

Hold the line about a pencil width off the printed letter the whole way around. An even gap is what makes the finished shapes look inflated rather than lumpy.

3

Erase the Printed Letters So the Bubble Letters Appear

2:08
Step 3: Erase the Printed Letters So the Bubble Letters Appear - How to Do Bubble Letters

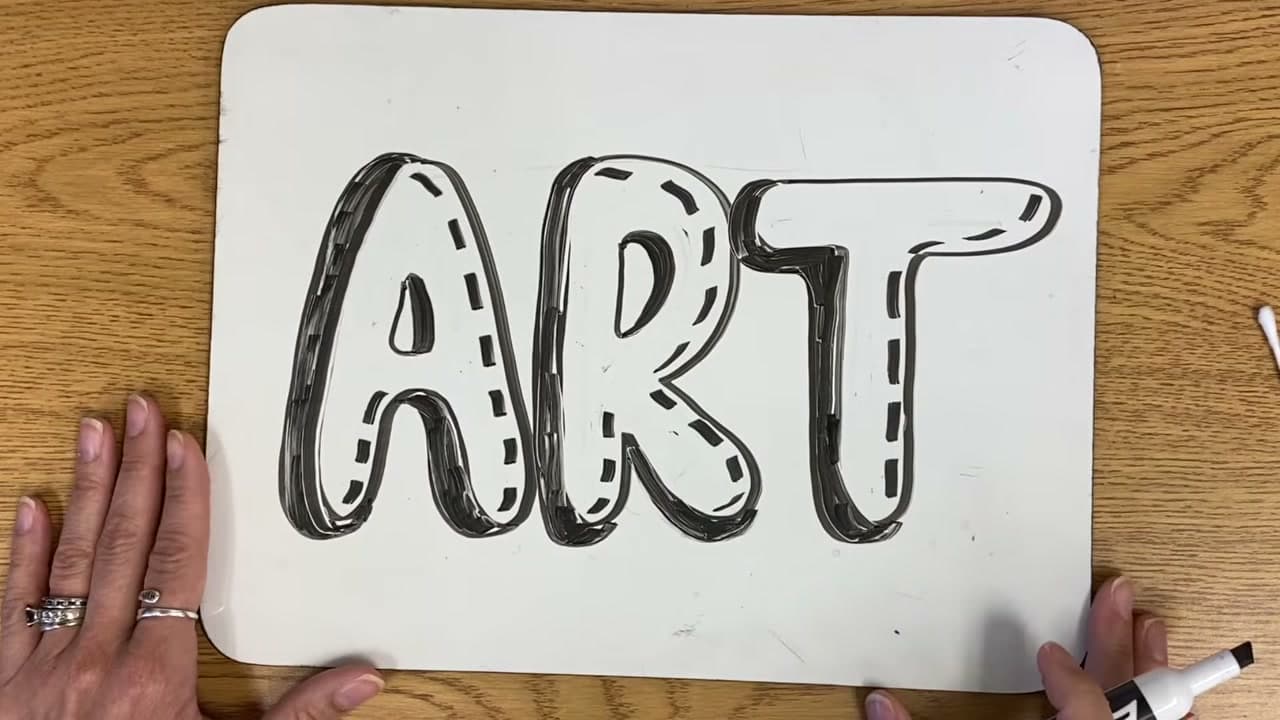
Rub out every printed line trapped inside the curvy outlines and leave the outlines alone. The thin skeleton disappears and what is left is a row of fat rounded bubble letters spelling the same word.

This is the payoff, and it is the reason the printing had to stay light. Press hard at step one and you are left with a grey ghost inside each bubble that no amount of erasing will lift, and it shows through the color later.

Tip

A white polymer eraser lifts graphite without smudging it sideways. Work in short strokes and blow the crumbs clear instead of sweeping them across the page.

4

Add Dashed Highlights and a Solid Shadow to Each Bubble Letter

4:34
Step 4: Add Dashed Highlights and a Solid Shadow to Each Bubble Letter - How to Do Bubble Letters

Pick one side of every letter, the right for example, and run a broken line of short dashes just inside the outline. Use the same side on all the letters so the light reads as coming from one place.

Now go to the opposite side. Draw a second line a short way in from the edge, then fill the narrow channel between that line and the outline in solid black. The dashes read as a highlight, the filled band reads as a cast shadow, and between them the letter lifts off the page.

Tip

On paper you can shade the shadow band with the side of a pencil instead of filling it solid black. A soft grade blends smoother than a hard one.

5

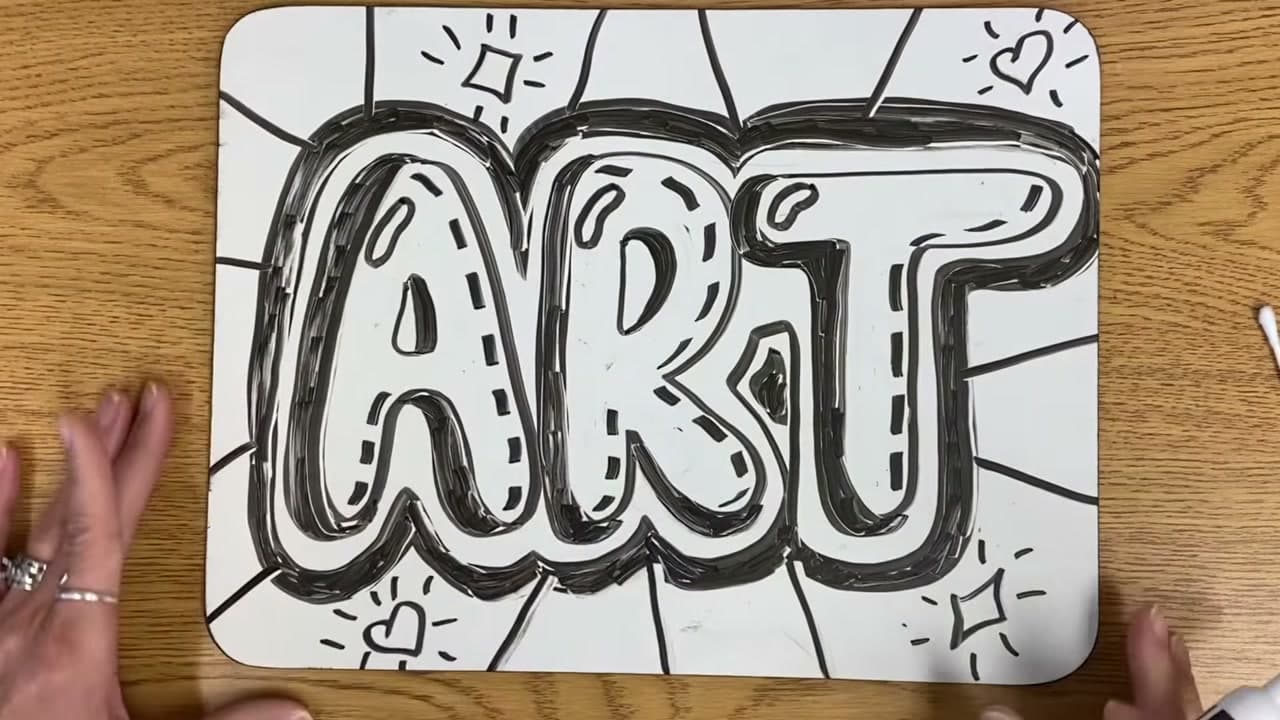
Draw a Thick Black Border Around the Word and Add Sparkles

7:41
Step 5: Draw a Thick Black Border Around the Word and Add Sparkles - How to Do Bubble Letters

Treat the whole word as one shape and trace a curvy line right around the outside of it, dipping into the gaps between letters wherever there is room. Go around a second time a little wider, then fill the band between the two lines in solid black. That heavy border is what makes the word read from across a room.

Fill the empty corners with four point sparkles and small hearts. Then draw a small cloud shape near the top of each letter and leave it white, so the bubbles look shiny the way a balloon does.

Tip

Draw the shine shape before you color anything. Coloring around a shape you can see is far easier than trying to leave a white gap by eye.

Used in this stepexpo dry erase markers
6

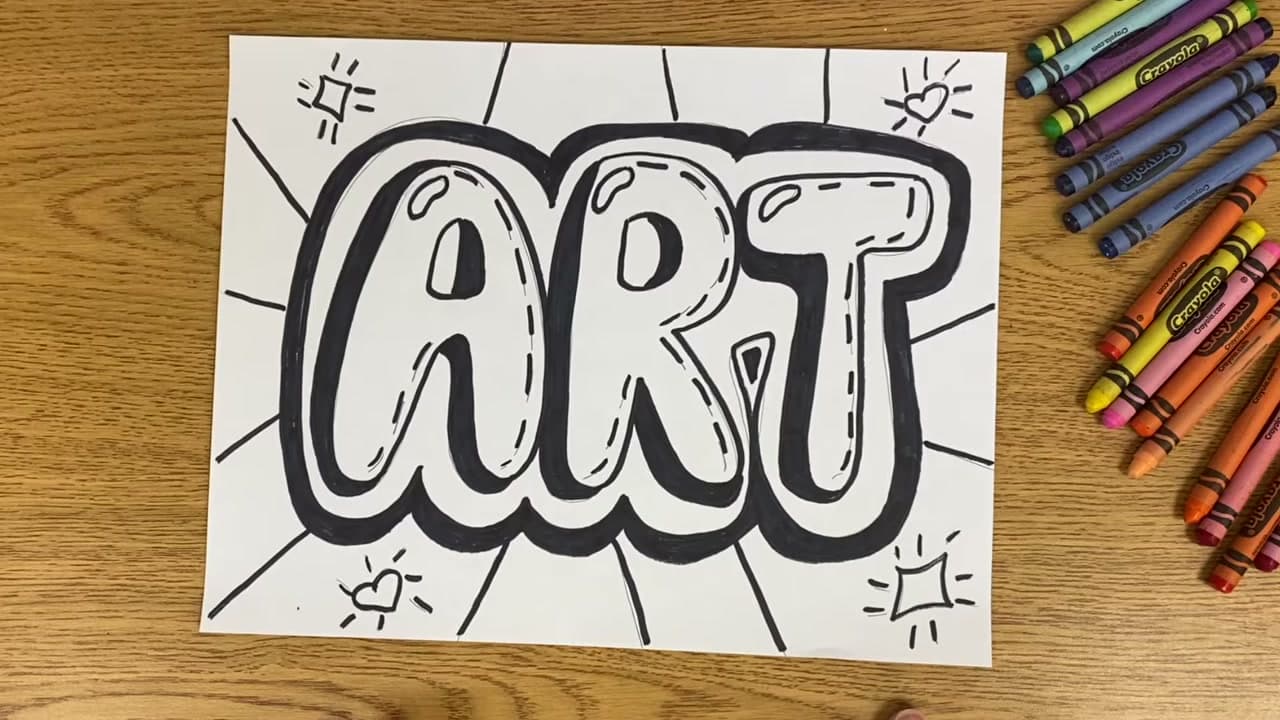
Redraw the Bubble Letters on Paper with a Black Sharpie

9:20
Step 6: Redraw the Bubble Letters on Paper with a Black Sharpie - How to Do Bubble Letters

The board version was the rehearsal. Redraw the same design on white paper in light pencil, then trace every line with a black Sharpie. Give the ink a minute to dry and erase any pencil still showing through the outlines.

Ink goes on before color, not after. Sharpie will not smear once it is dry, so a crayon can run right over the outlines without dragging black across the paper.

Tip

A black crayon works if you have no permanent marker, but save it for last. Crayon over crayon lifts the wax underneath and muddies both colors.

7

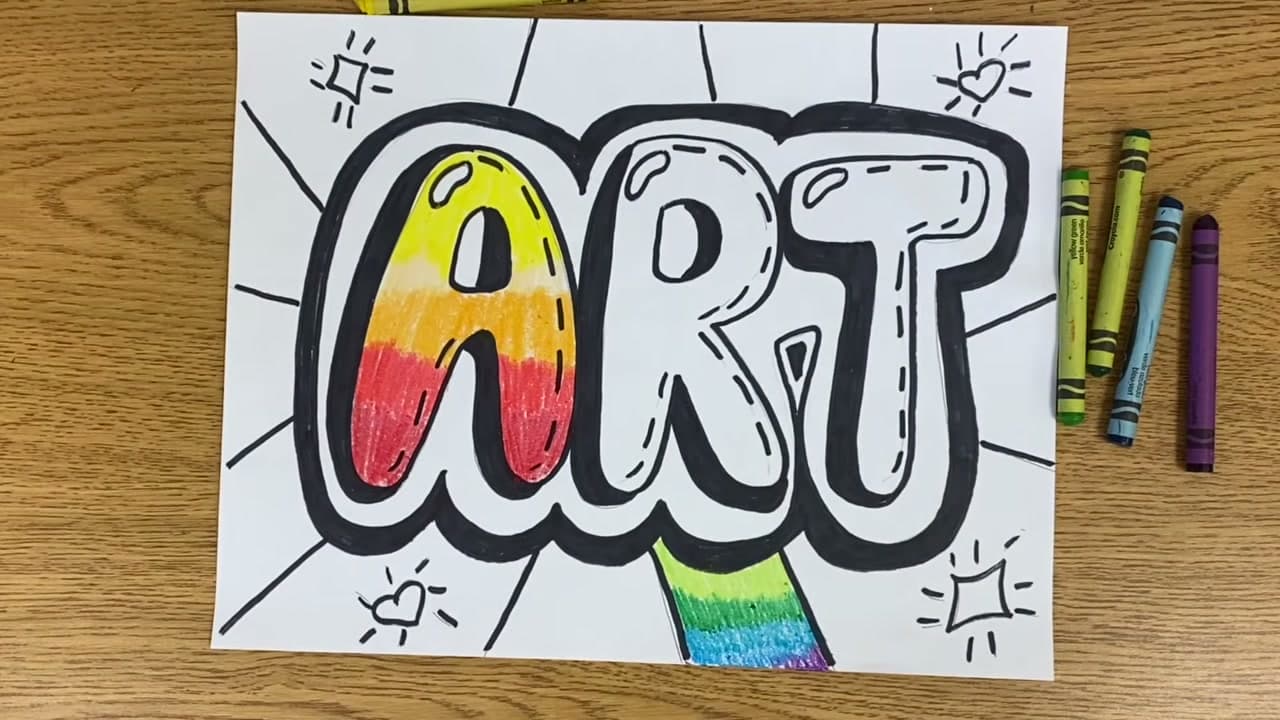
Color the Bubble Letters Light to Dark in Warm Colors

12:46
Step 7: Color the Bubble Letters Light to Dark in Warm Colors - How to Do Bubble Letters

Split the crayons into warm colors and cool colors and give the letters one family, the background the other. The video runs yellow across the top of each letter, into orange through the middle, and red at the bottom, so the value gets darker as it drops.

Press hard enough that the wax sits solid with no paper showing through. Color around the little cloud shape and leave it white, or the shine disappears under the first layer.

Tip

Overlap each color a short way into the one above it before you move on. That narrow blend is what turns three flat bands into a gradient.

Used in this stepcrayola crayons 24 count
8

Color the Background Radiating Out From the Bubble Letters

13:17
Step 8: Color the Background Radiating Out From the Bubble Letters - How to Do Bubble Letters

Fill the background with the cool family, working outward from the word. Light green sits closest to the letters, then blue, then purple at the edges. The radiating guide lines split the background into wedges, which makes it easy to see where each color should land.

Turn the paper as you go so every crayon stroke points away from the word. Strokes running outward make the color look like it is exploding off the letters. Strokes running up and down flatten the whole thing out.

Tip

Inside the word, keep the strokes going one direction only. Changing direction halfway through a letter shows up as a visible seam once the wax is down.

Keep going

How to Write in Calligraphy - 7 Step Beginner Tutorial

7 steps · about 10 minutes

Products Used

The Checklist

How to Do Bubble Letters

Tools
5
Materials
3
Steps
8
Video
15 min

Tools we recommend

Your Guide

Kenwood K-8 Center Art Class

As an Amazon Associate we earn from qualifying purchases. Links on this page may be affiliate links - clicking them and buying doesn't change your price, but helps support CraftingStepByStep.

Tags

Sunday How-To

New calligraphy tutorials, every Sunday

One short email with the week's best step-by-step guides. Free, no spam, unsubscribe anytime.

Did this work for you?

What's next

Related collections

Curated theme pages that include this tutorial.

Weekly Digest

Liked this calligraphy tutorial?

Pick the categories you want to hear about. Weekly digest of new step-by-step tutorials. No spam, easy unsubscribe.

Send me tutorials about

We only email about new tutorials. Easy unsubscribe anytime.