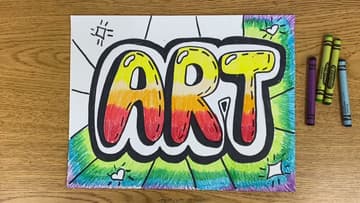
How to Do Bubble Letters
Source: Kenwood K-8 Center Art Class • Full tutorial: www.craftingstepbystep.com/calligraphy/how-to-do-bubble-letters
- Difficulty
- Easy
- Hands-on time
- About 45 minutes
- Cost
- About $5 to $10
- Makes
- 1 bubble letter word or sign

Tools
- Pencil
- Eraser
- Black Sharpie or permanent marker
- Dry erase board (optional, for practice)
- Black dry erase marker (optional)
Materials
- White drawing paper or cardstock
- Box of crayons
- Colored pencils (alternative to crayons)
Steps
1. Write Your Word in Print Capitals with Space Between the Letters
Write your word across the page in plain block capitals, the way you would print a label. Keep the strokes thin and the pressure light.
Tip: Letters printed close together leave the bubbles nowhere to go and the shapes merge into a blob. If you are unsure, add another finger width between them.
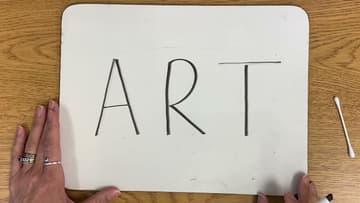
2. Draw One Long Curvy Line Around Each Printed Letter
Start at the bottom of the first letter and draw one continuous curvy line all the way around the outside of it, the way you would draw a cloud. Follow the shape of the letter but round off every corner and let the line bulge a little between the corners.
Tip: Hold the line about a pencil width off the printed letter the whole way around. An even gap is what makes the finished shapes look inflated rather than lumpy.
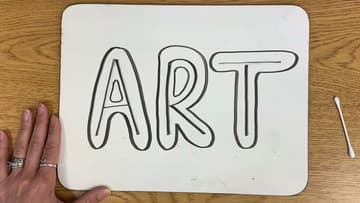
3. Erase the Printed Letters So the Bubble Letters Appear
Rub out every printed line trapped inside the curvy outlines and leave the outlines alone. The thin skeleton disappears and what is left is a row of fat rounded bubble letters spelling the same word.
Tip: A white polymer eraser lifts graphite without smudging it sideways. Work in short strokes and blow the crumbs clear instead of sweeping them across the page.
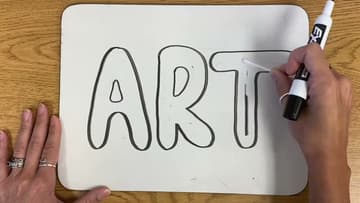
4. Add Dashed Highlights and a Solid Shadow to Each Bubble Letter
Pick one side of every letter, the right for example, and run a broken line of short dashes just inside the outline. Use the same side on all the letters so the light reads as coming from one place.
Tip: On paper you can shade the shadow band with the side of a pencil instead of filling it solid black. A soft grade blends smoother than a hard one.
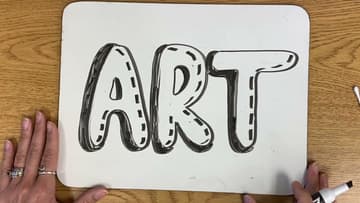
5. Draw a Thick Black Border Around the Word and Add Sparkles
Treat the whole word as one shape and trace a curvy line right around the outside of it, dipping into the gaps between letters wherever there is room. Go around a second time a little wider, then fill the band between the two lines in solid black.
Tip: Draw the shine shape before you color anything. Coloring around a shape you can see is far easier than trying to leave a white gap by eye.
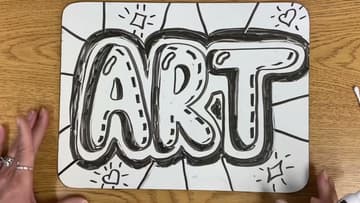
6. Redraw the Bubble Letters on Paper with a Black Sharpie
The board version was the rehearsal. Redraw the same design on white paper in light pencil, then trace every line with a black Sharpie.
Tip: A black crayon works if you have no permanent marker, but save it for last. Crayon over crayon lifts the wax underneath and muddies both colors.
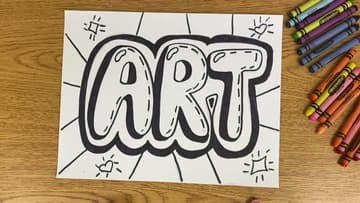
7. Color the Bubble Letters Light to Dark in Warm Colors
Split the crayons into warm colors and cool colors and give the letters one family, the background the other. The video runs yellow across the top of each letter, into orange through the middle, and red at the bottom, so the value gets darker as it drops.
Tip: Overlap each color a short way into the one above it before you move on. That narrow blend is what turns three flat bands into a gradient.
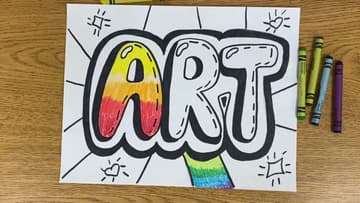
8. Color the Background Radiating Out From the Bubble Letters
Fill the background with the cool family, working outward from the word. Light green sits closest to the letters, then blue, then purple at the edges.
Tip: Inside the word, keep the strokes going one direction only. Changing direction halfway through a letter shows up as a visible seam once the wax is down.