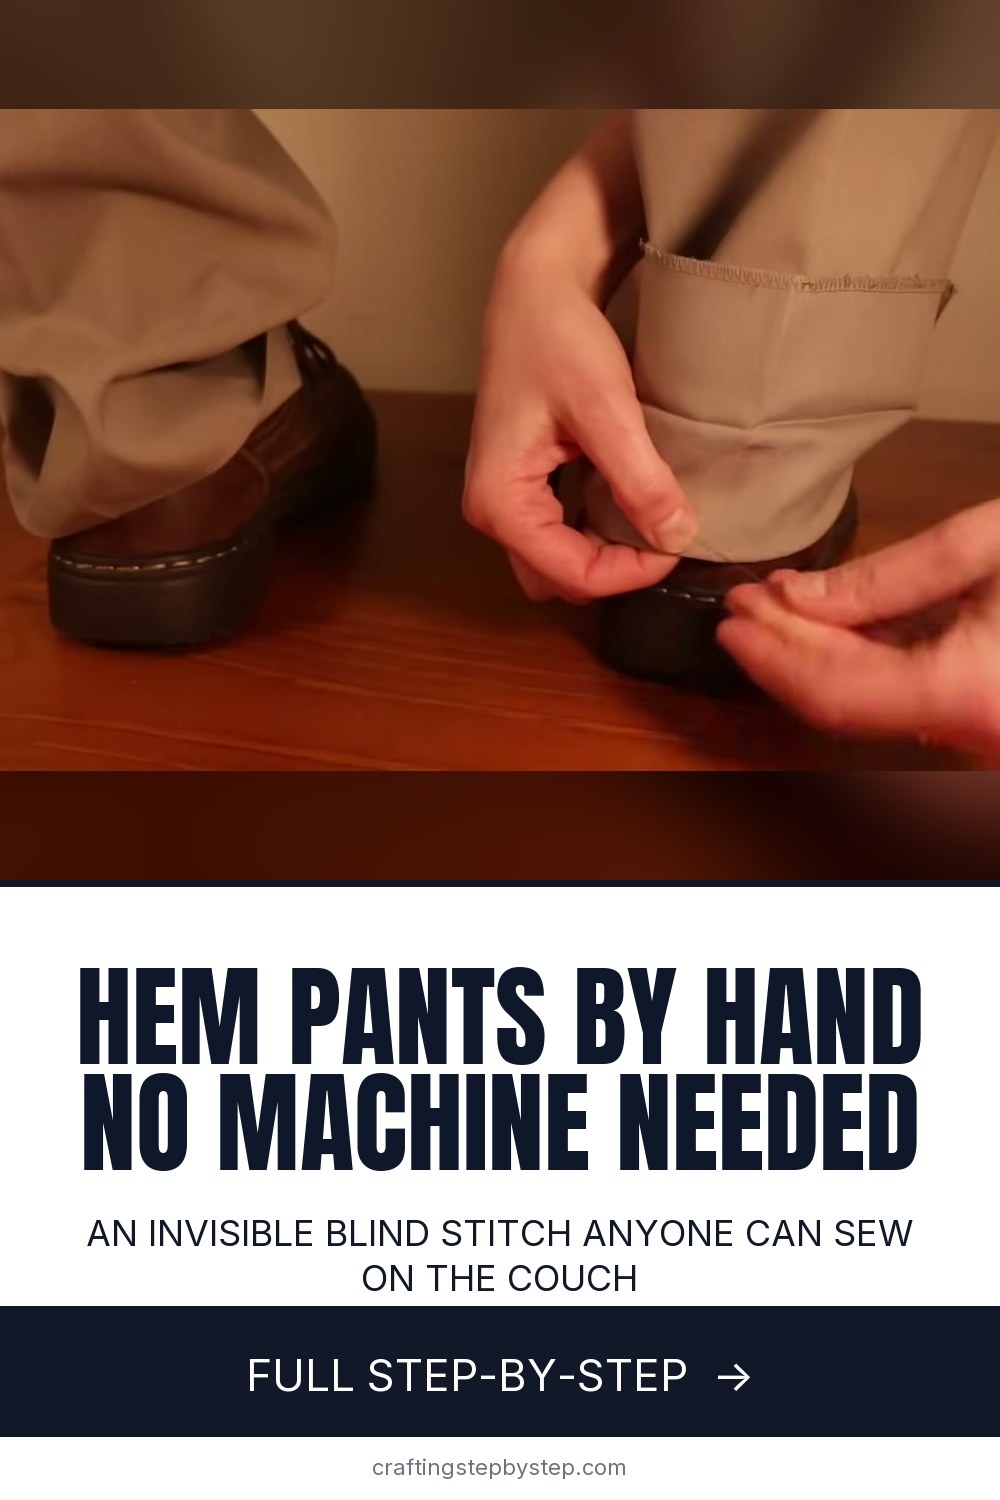
How to Hem Pants by Hand With an Invisible Blind Stitch

The finished result: How to Hem Pants by Hand With an Invisible Blind Stitch
  • Difficulty: Easy
  • About 1 hour
  • 10 steps

You tapped Save

Save this project for later

We'll email you a link, no password.

How to Hem Pants by Hand With an Invisible Blind Stitch

  • Your saved projects in one list
  • Your ticked steps on any device

Check your inbox for an email from us. Not there? Look in your spam folder.

Print

Steps written out by Crafting Step by Step from Easy Sewing for Beginners' video (opens YouTube) (13:21). Published .

You do not need a sewing machine to shorten a pair of pants. Domenica from Easy Sewing for Beginners hems a pair of khaki dress pants entirely by hand, and the finished hem is close to invisible from the outside. The trick is a blind stitch that grabs only one or two threads of the pant leg on each pass. It takes longer than a machine, but it is quiet, portable and gives the cleanest finish on dress pants.

How to hem pants by hand: the short version

  • Unpick the old hem with a seam ripper.
  • Fold the leg up to the new length while the wearer has shoes on, and pin.
  • Mark a 2 inch hem allowance below the fold and cut off the rest.
  • Turn the pants inside out, fold up 2 inches and press.
  • Tuck the raw edge under, pin, and blind stitch all the way around.

Getting the length right

Always measure with the shoes the pants will be worn with. Dress shoes and sneakers can change the right length by half an inch or more. For a classic look on dress pants, the front should touch the top of the shoe with a slight break. You only need to pin one leg. Measure how far it is turned up and copy that number to the other leg on the table.

Thread and needle

Match the thread to the pants as closely as you can. Domenica used red thread so it would show on camera, and a few red flecks peek through on the outside. A matching color hides them completely. Use a single strand, not doubled, so less thread shows through. A fine, sharp hand sewing needle slips into the fabric without leaving holes.

The blind stitch in plain words

Work with the pants inside out. Angle the needle and pass it through the folded hem edge. Then, right next to where it came out, pick up one or two threads of the single layer of the pant leg, about 1/8 inch above the fold. Move along about 1/4 inch and repeat. Left-handed sewers work left to right, right-handed sewers right to left. Keep the thread relaxed. Pulling tight makes small dimples on the outside.

How long it takes

Plan on about an hour for the first pair: 20 minutes to measure, mark, cut and press, and 15 to 20 minutes of stitching per leg. It goes faster once the blind stitch feels natural. It is good work for the couch, since you need only a needle, thread and pins once the hem is pressed.

Which pants this works for

  • Best: dress pants, chinos, wool trousers and skirts.
  • Works: lightweight cotton and linen.
  • Skip: heavy denim. Jeans hems are too thick for a neat hand blind stitch, so use a machine or keep the original hem.

Common problems

  • Stitches show on the outside. You caught too many threads. Take only one or two.
  • The hem puckers. The thread is too tight. Ease each stitch.
  • One leg ends up longer. Measure the turn-up on both legs before you cut.

More mending and sewing

Have a machine? See how to hem pants at home for the machine and no-sew methods. Keep building hand skills with sewing a button by hand, the ladder stitch and darning a sock.

Free printable

Print the steps and supply list for this project

One page you can take to the table. Free with a free account, no password.

Get the free printable

What you'll need

Free, for this project

Get this checklist by email

  • All 8 tools and materials, with tick boxes
  • A link to print all 10 steps on paper, to keep by you while you craft

No password. The whole tutorial stays free on this page.

Quick answer

Hem pants by hand with a blind stitch that barely shows. An easy project: about 1 hour. You need 8 things, including thread to match the pants, seam ripper and sewing gauge. The 10 steps start with unpick the Old Pant Hem With a Seam Ripper, fold the Pant Leg Up to the New Length Over a Shoe, measure the Turned-Up Pant Cuff So It Is Even and mark the 2 Inch Hem Allowance on the Pant Leg.

Step-by-step guide

10 steps, about 13 minutes. Tap a picture to jump to that step. Your progress saves automatically.

Tick each step off as you go.

  1. Step 1: Unpick the Old Pant Hem With a Seam Ripper

    Watch this step · 0:34

    Turn the cuff so you can see the stitching on the inside of the leg. Slide the point of a seam ripper under a stitch and push it forward to cut the thread. Work your way all the way around the hem, then pull out the loose threads. Do the same on the other leg. Go slowly so you never cut the pant fabric itself.

    Tip:

    Cut every third or fourth stitch, then pull the thread. It comes out faster.

    Back to all steps

  2. Step 2: Fold the Pant Leg Up to the New Length Over a Shoe

    Watch this step · 1:04

    Have the wearer put the pants on with the shoes they will wear with them. Fold the leg up on the outside until it hits the length you want. Pop a pin in to hold it. You only need to do this on one leg. The measurement transfers to the other leg later, on the table, so nobody has to stand still for long.

    Tip:

    Check from the front and the back. The back can sit a little longer.

    Back to all steps

  3. Step 3: Measure the Turned-Up Pant Cuff So It Is Even

    Watch this step · 2:10

    Lay the pants flat on a table. Measure how deep the cuff is turned up at the pin. Domenica's is a little over 4 inches. Go around the leg with a sewing gauge and set the cuff to that same depth everywhere, adding a few pins as you go. Then fold the other leg up by the same amount so both match.

    Tip:

    A sewing gauge with a sliding marker saves you reading the ruler each time.

    Back to all steps

  4. Step 4: Mark the 2 Inch Hem Allowance on the Pant Leg

    Watch this step · 3:30

    You need about 2 inches of fabric below the fold for the new hem. That leaves enough to fold over twice and hide the raw edge. Measure 2 inches down from the fold and mark it with a pen. Make several marks around the leg, then join them into a line. Repeat on the second leg.

    Tip:

    Use a fabric pen or chalk that wipes off, in case a mark shows later.

    Back to all steps

  5. Step 5: Cut Off the Extra Pant Leg Fabric

    Watch this step · 4:10

    Cut along the marked line with sharp fabric scissors, going through both layers of the folded cuff. The fabric below the line is the extra length you no longer need. Repeat on the second leg. Then take the pins out, unfold the cuffs and turn the pants inside out for pressing.

    Tip:

    Keep fabric scissors for fabric only. Paper dulls them fast.

    Back to all steps

  6. Step 6: Fold Up and Press the 2 Inch Pant Hem

    Watch this step · 5:00

    With the pants inside out, fold the bottom of each leg up by 2 inches. Check the depth with your gauge as you go around. Press the fold flat with a hot iron. A sharp crease here makes the stitching much easier and keeps the hem straight. Do the full circle of each leg before you move on.

    Tip:

    Use a pressing cloth on dark fabric so the iron does not leave a shine.

    Back to all steps

  7. Step 7: Tuck the Raw Edge Under and Pin the Pant Hem

    Watch this step · 6:02

    The cut edge will start to fray fast. Roll it under so the raw edge is hidden inside the fold, leaving a finished hem about 1 1/4 inches deep. Press as you go around the leg. Then add a few pins so the hem stays folded while you stitch. A wrist pin cushion keeps the pins right at hand.

    Tip:

    Pin parallel to the hem edge so the pins do not snag your thread.

    Back to all steps

  8. Step 8: Blind Stitch the Pant Hem by Hand

    Watch this step · 9:05

    Thread a needle with a single strand and knot the end. Anchor it with two small stitches in the side seam. Angle the needle through the folded hem, then pick up only one or two threads of the pant leg right above the fold. Pull through gently. Move along about 1/4 inch and repeat all the way around.

    Tip:

    Fewer threads caught means less shows on the outside.

    Back to all steps

  9. Step 9: Check the Row of Blind Stitches on the Pant Hem

    Watch this step · 10:40

    After a few inches, stop and look. On the inside you see a neat row of small stitches along the top of the hem. Flip the leg to the outside and check that almost nothing shows. If you spot tiny dots of thread, you took too many threads on those stitches. Take fewer on the next ones and keep going.

    Tip:

    Stitch in good light. It is much easier to pick up one thread.

    Back to all steps

  10. Step 10: Secure the Thread at the End of the Pant Hem

    Watch this step · 11:43

    When you get back to the side seam, take the needle through the two layers of the hem. As the thread forms a loop, pass the needle through the loop and pull it tight. Do it once more. To hide the tail, slide the needle between the layers, bring it out a little way off and snip the thread close.

    Tip:

    Press the finished hem once more from the inside for a crisp edge.

    Back to all steps

How to Sew a Ladder Stitch (Invisible Hand Stitch)

Keep going

How to Sew a Ladder Stitch (Invisible Hand Stitch)

10 steps · about 7 minutes

Keep going with sewing

More on this topic, picked for this project.

You reached the last step

Save this project to come back to it

Your ticked steps, the free printable and your other saved makes, together in My Projects. Free, no password.

You tapped Save

Save this project for later

We'll email you a link, no password.

How to Hem Pants by Hand With an Invisible Blind Stitch

  • Your saved projects in one list
  • Your ticked steps on any device

Check your inbox for an email from us. Not there? Look in your spam folder.

Free printable

Printable sheet and shopping list for this project

The bonus is hidden until you sign up.

Free with a free account, no password. Every step above stays open to everyone.

Products Used

The Checklist

How to Hem Pants by Hand With an Invisible Blind Stitch

Tools
7
Materials
1
Steps
10
Video
13 min

Tools we recommend

As an Amazon Associate we earn from qualifying purchases. Links on this page may be affiliate links - clicking them and buying doesn't change your price, but helps support Crafting Step by Step.

Tags

The Crafter's Weekly

New sewing tutorials, every Sunday

One short email with the week's best step-by-step guides. Free, no spam, unsubscribe anytime.

Did this work for you?

What's next

Related collections

Curated theme pages that include this tutorial.

Similar tutorials

Hand-picked next reads based on the one you just finished.

Liked this sewing tutorial?

Pick the crafts you want to hear about. One email every Sunday with new step-by-step tutorials. No spam, easy to unsubscribe.

Get more like this in your inbox

Weekly digest. Pick the categories you want. Unsubscribe anytime.

Send me tutorials about

We only email about new tutorials. Easy unsubscribe anytime.