How to Make a Paper Sunflower (Easy Craft Tutorial)

Based on a video by FUNCRAFT

Opens their YouTube channel

Steps written out by CraftingStepByStep · Published · Updated

Watch the original video (opens YouTube)
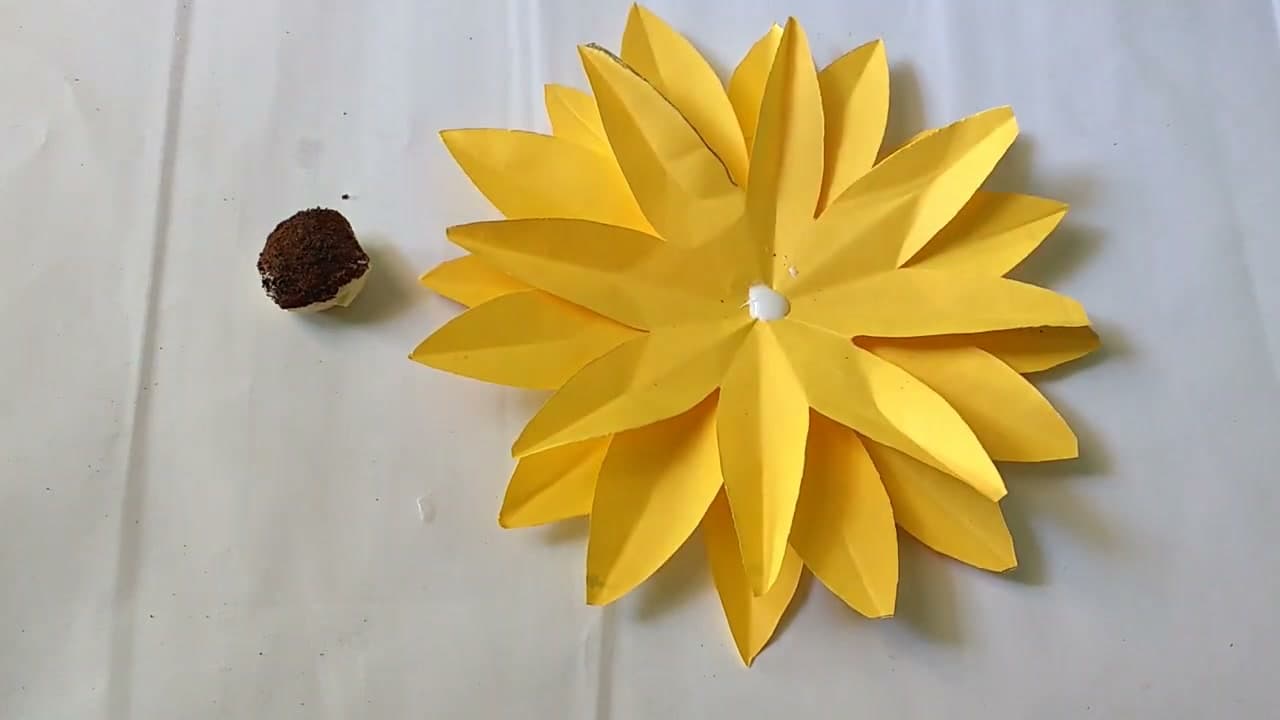
The finished result: How to Make a Paper Sunflower (Easy Craft Tutorial)
Also in:Other Crafts

A paper sunflower is one of those crafts that looks impressive but takes almost nothing to make. Three squares of yellow paper, a pair of scissors, and a dab of glue get you the petals. A spoonful of coffee grounds rolled onto a glue-coated paper ball gives you the dark textured center that makes the flower actually look like a sunflower instead of a generic yellow daisy.

FUNCRAFT walks through the snowflake-style fold method that turns one square into an eight-petal layer with a single cut. Stack three of those layers, offset them so the petals fill the gaps, and the result is a dense 16-to-24 petal sunflower big enough to display in a vase or glue onto a greeting card. It's a great summer craft for kids - the folding and cutting are safe with kid scissors, and the coffee-grounds center is the kind of detail that gets a 'whoa, how did you do that' reaction.

For more paper-flower projects, see our guides on making paper roses, folding an origami heart, folding an origami crane, and paper quilling for beginners.

What you'll need

Step-by-step guide

8 steps, about 6 minutes. Tap a picture to jump to that step. Your progress saves automatically.

Tick each step off as you go.

  1. Step 1: Cut Three 18cm Yellow Squares

    Watch this step · 0:28
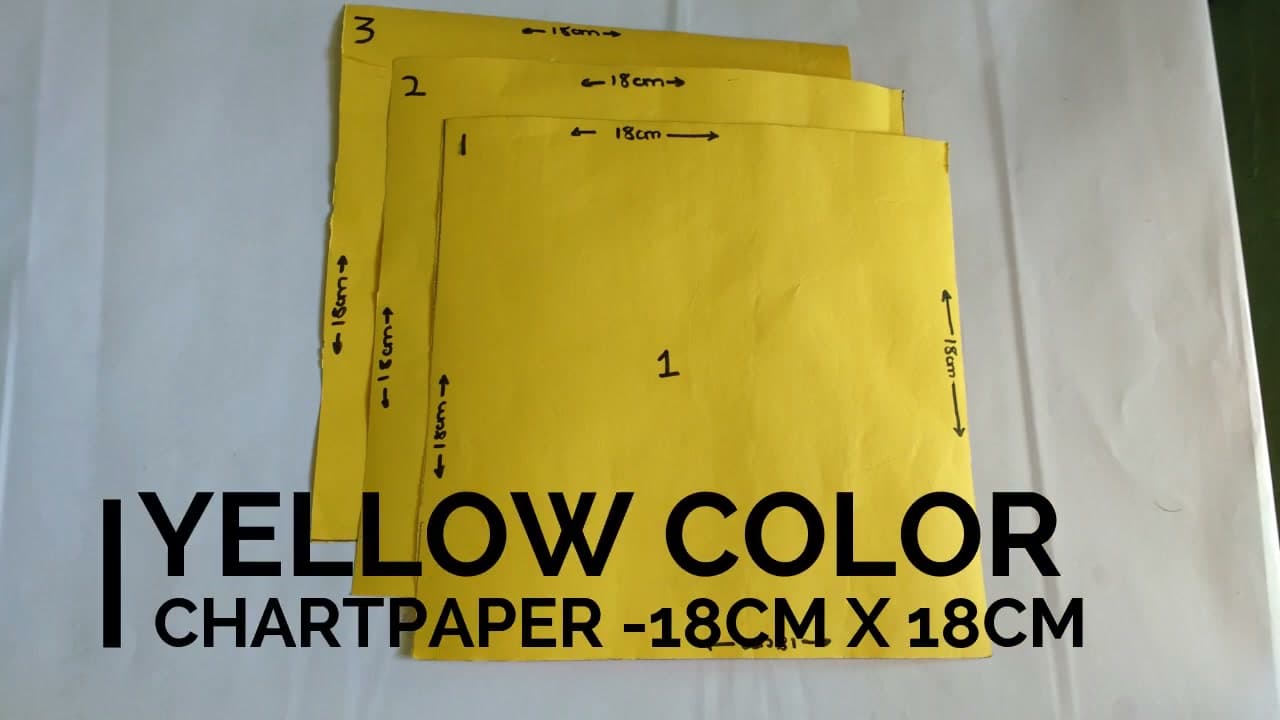
    Start with a sheet of yellow chart paper or any sturdy yellow craft paper. Construction paper works, cardstock works, even a yellow file folder works. Mark out three 18cm by 18cm squares with a pencil and ruler.

    The exact size is less important than the consistency - all three squares need to match, because they become the three stacked petal layers. If you cut one square smaller than the other two, that layer won't sit right in the stack. Measure twice, then cut all three at once if you can.

    Tip:

    Eyeballing the squares is tempting but the petals end up uneven. Spend the extra minute with the ruler. A small mismatch in the squares becomes a bigger mismatch in the final flower.
    Back to all steps

  2. Step 2: Fold the Square Into a Narrow Triangle

    Watch this step · 0:45

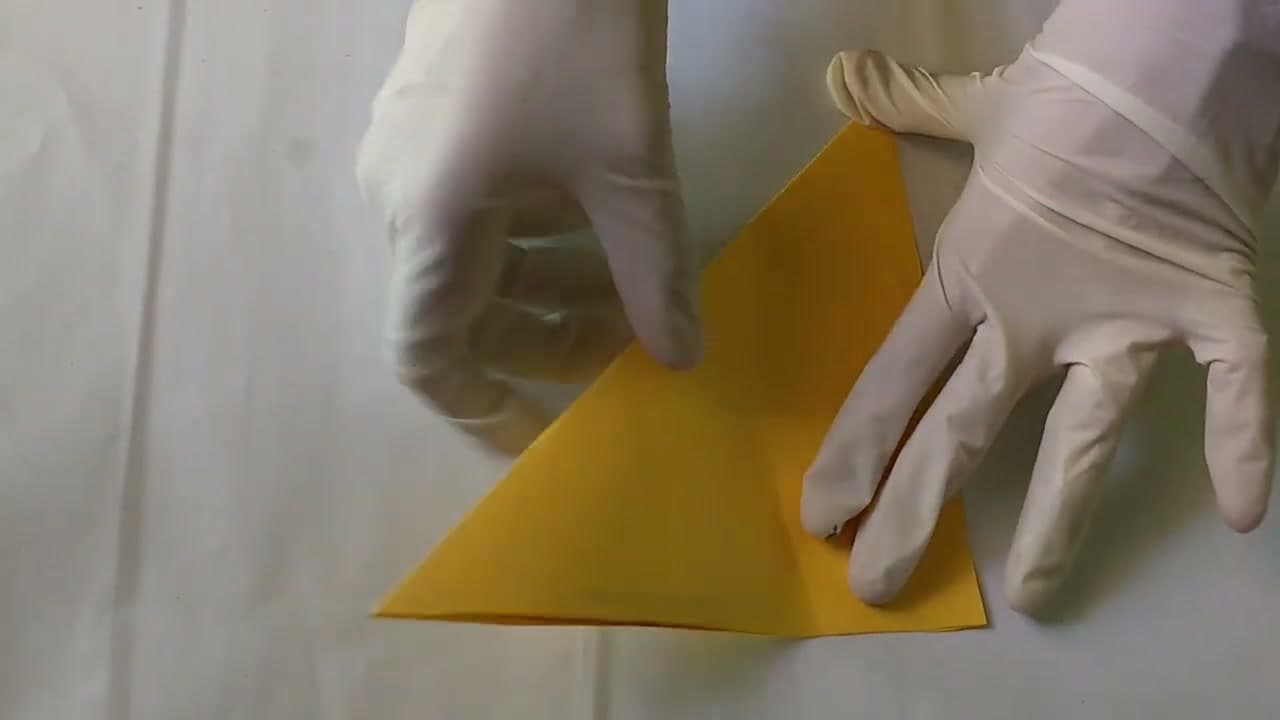
    Take one of your yellow squares and fold it in half diagonally - corner to corner - so you have a right triangle. Run your fingernail along the fold to crease it sharply.

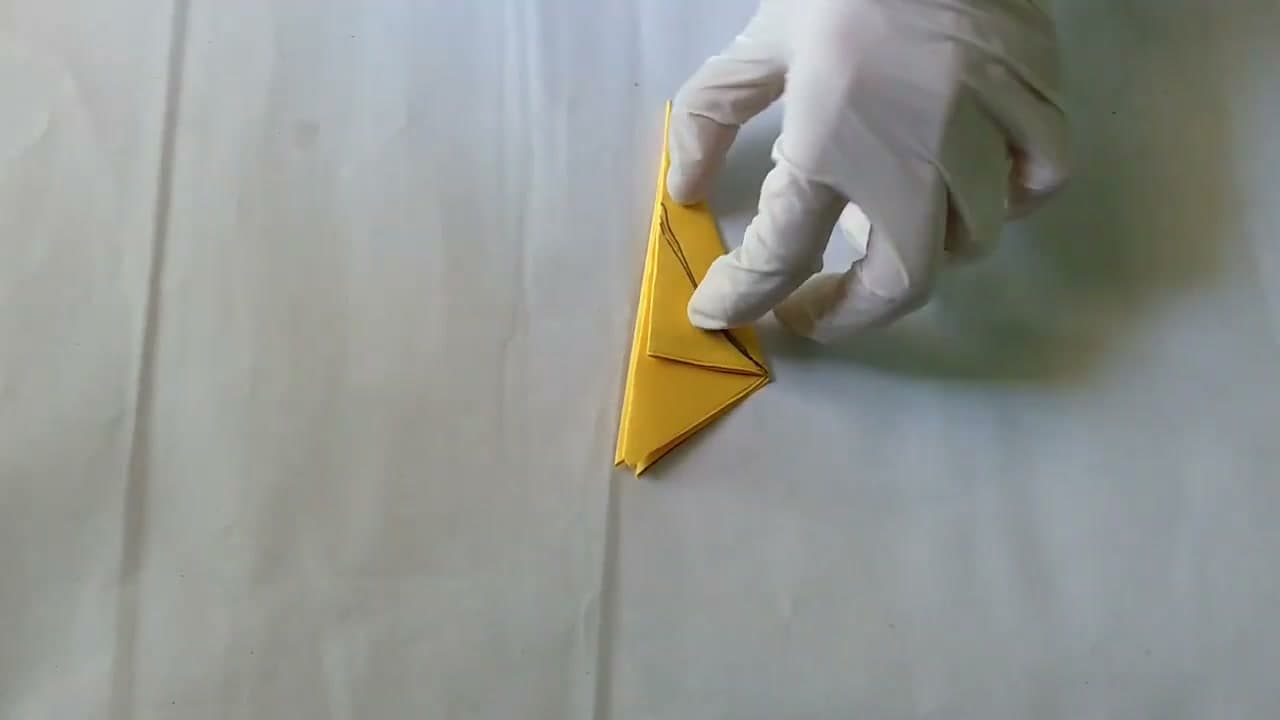
    Now fold that triangle in half again, point to point, to make a smaller triangle. Crease it. Then fold one more time the same way. You end up with a narrow folded triangle eight layers thick at the open edge. This is the same fold you'd use to make a paper snowflake. The eight layers are what give you the eight petals when you unfold later.

    Tip:

    Crease each fold hard. Soft creases let the paper spring back open and the next fold won't line up. A bone folder helps if you have one, but a fingernail or the back of a spoon works fine.

    Back to all steps

  3. Step 3: Draw the Petal Shape

    Watch this step · 1:35

    Lay the folded triangle on your work surface with the closed point at the top and the open edge at the bottom. With a pencil, draw a long curved petal shape from the top point down to the open edge. The shape should taper to a sharp point at the top and widen toward the bottom - imagine drawing one half of a long leaf.

    The line you draw is the cut line. Everything outside the line gets cut away. The wider you make the petal, the wider the petals on your finished flower. A narrow petal gives a delicate look; a wider petal gives a more solid sunflower silhouette.

    Tip:

    Draw lightly. If the line goes through to the back of the folded stack, the pencil mark can show on the finished petals. A 2H or HB pencil with a light touch is better than a soft 2B that smears.

    Back to all steps

  4. Step 4: Cut Along the Pencil Line

    Watch this step · 1:50

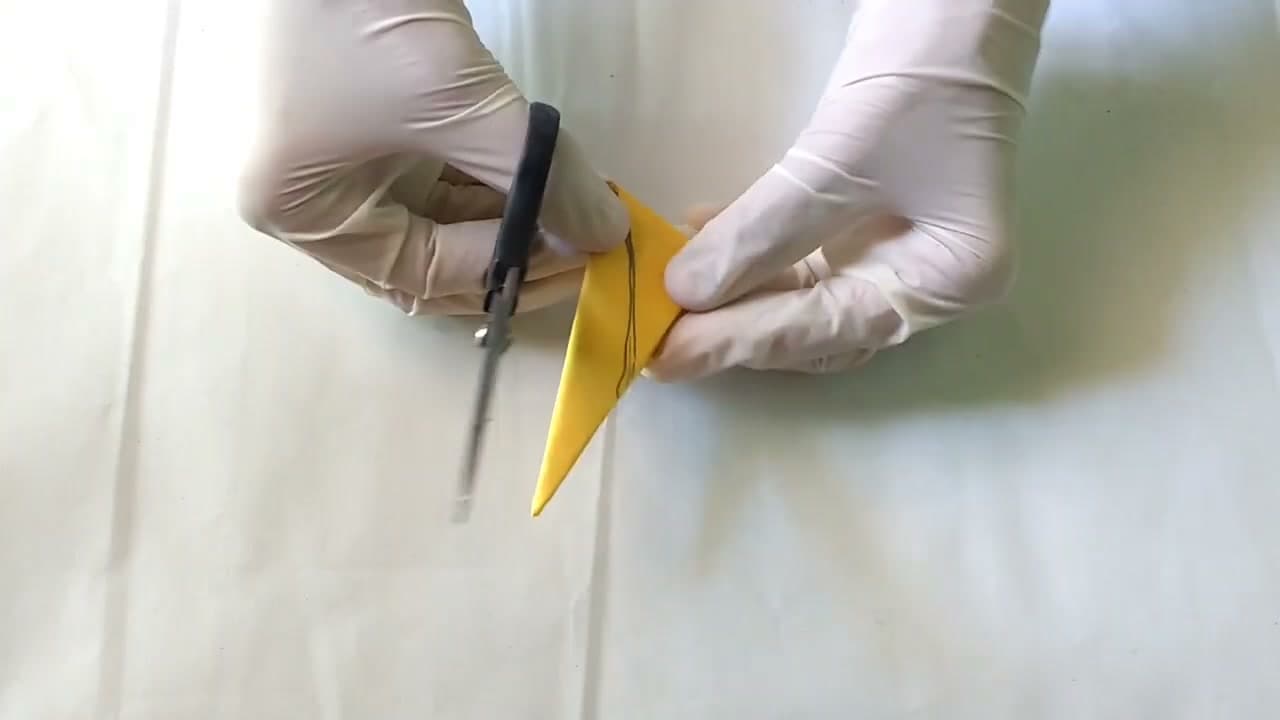
    Holding the folded triangle firmly so the layers don't shift, cut along the pencil line with scissors. You're cutting through all eight layers at once, so use sharp scissors - dull craft scissors will chew the edges and leave the petals ragged.

    Take the curve slowly. The smoother the cut, the cleaner the petal edges look when you unfold. Discard the trimmed waste paper - what's left in your hand is the petal layer.

    Tip:

    If your scissors struggle through eight layers, fold one fewer time so you cut through four layers and a four-petal layer. Stack two of those to get eight petals. The flower comes out the same; you just trade one cut for two.

    Back to all steps

  5. Step 5: Unfold the Eight-Petal Layer

    Watch this step · 2:30

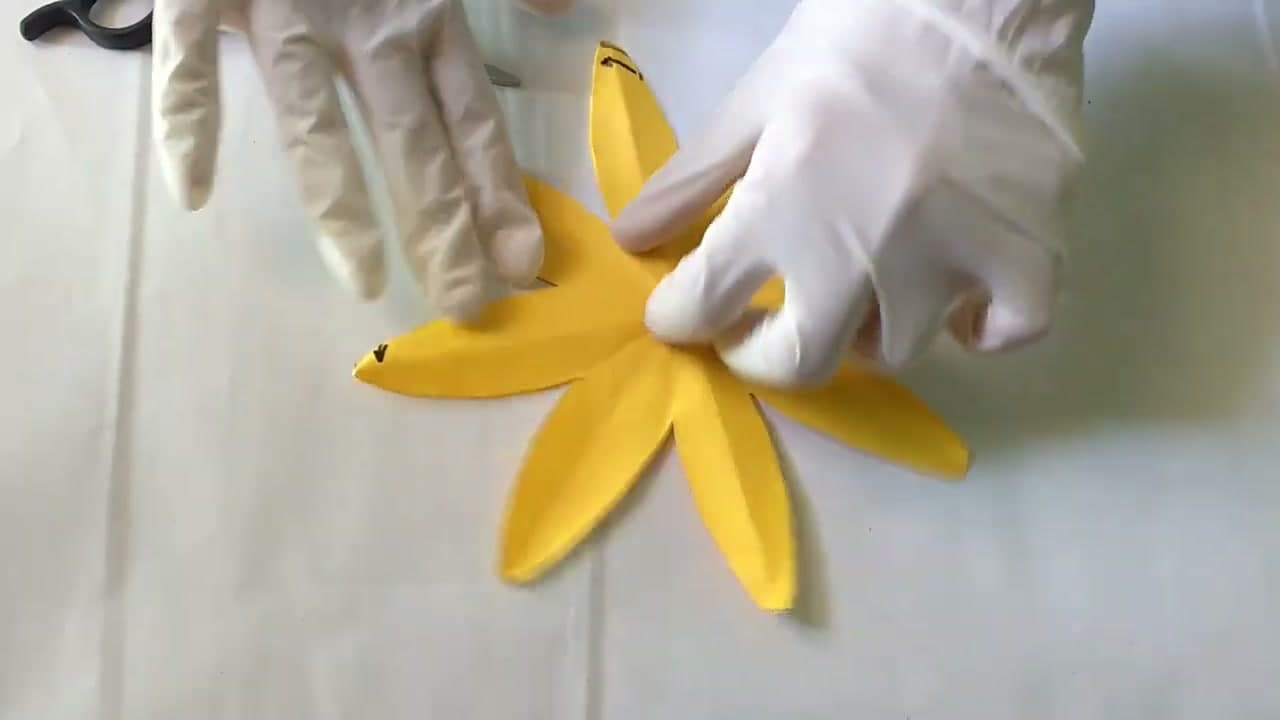
    Carefully open the folded paper. As you unfold each layer, smooth it flat with your hand so the petals lie evenly. When you reach the last fold the paper opens into a flat eight-petal flower shape.

    The fold creases stay visible as ridges running down the middle of each petal, which is exactly what you want - those creases give each petal a natural three-dimensional curve so the layer isn't completely flat. Set this petal layer aside and repeat steps 2 through 5 with the other two yellow squares so you end up with three identical layers.

    Tip:

    If the petals look pinched at the center where the folds meet, gently flex each petal back along its crease. The center should sit flat without bunching, otherwise the stacked layers won't lie clean on top of each other.

    Back to all steps

  6. Step 6: Make the Coffee-Ground Sunflower Center

    Watch this step · 4:15

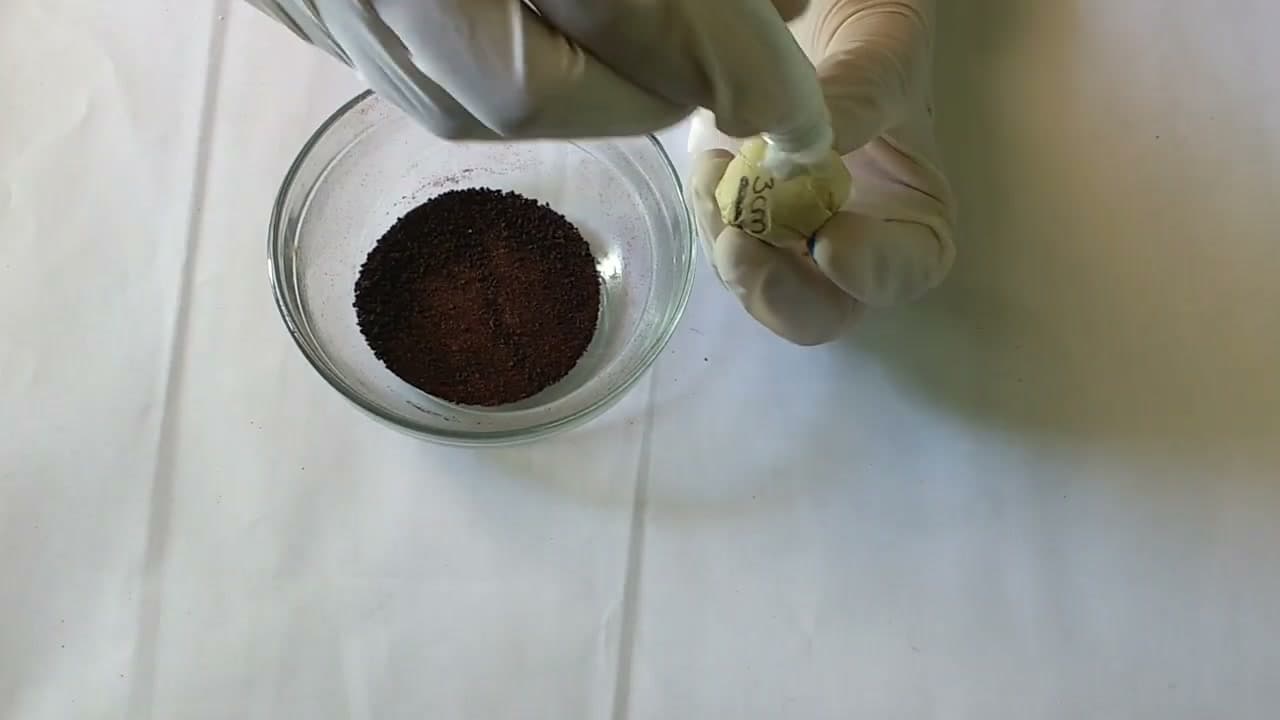
    This is the step that turns a yellow paper flower into a sunflower. Take a scrap of paper and crumple it tightly into a small ball about 2cm across. Coat the outside of the ball with white glue - really coat it, every surface needs glue on it.

    Tip some ground coffee or used coffee grounds into a small bowl. Roll the glue-coated paper ball through the coffee so the grounds stick all over it. Press gently so the grounds bond into the glue. You end up with a dark brown textured ball that looks remarkably like the dried seed disc of a real sunflower. Set it on a piece of waxed paper to dry for a few minutes.

    Tip:

    Used coffee grounds from your morning pot work better than fresh - they're already wet so they stick easier and the color is a deeper brown. If you don't drink coffee, instant coffee crystals or even cocoa powder give a similar effect.

    Back to all steps

  7. Step 7: Stack and Glue the Three Layers

    Watch this step · 5:15

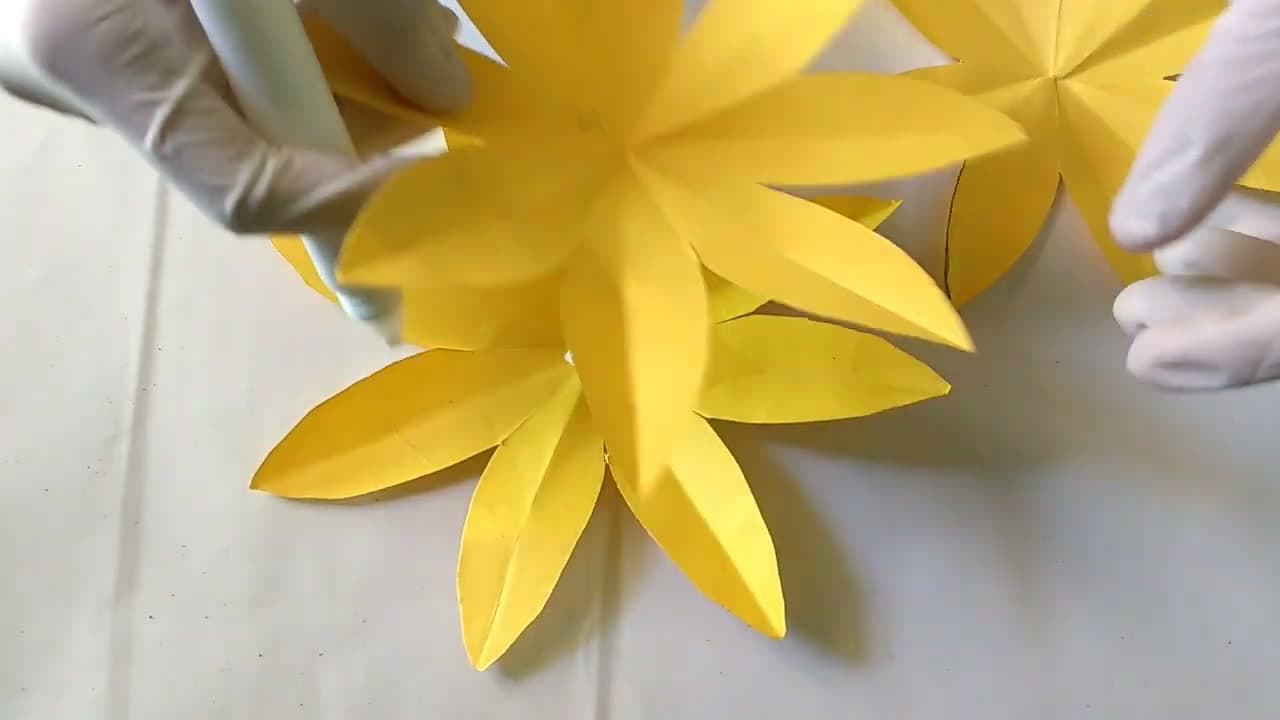
    Lay one petal layer flat. Put a dot of glue in the center, then place the second layer on top, rotating it so its petals fall in the gaps between the first layer's petals. Press the centers together until the glue grabs.

    Repeat with the third layer. Rotate it again so its petals fall in the gaps left by the first two layers. The offset stacking is what makes the finished flower look full and three-dimensional instead of like a flat 8-petal cutout. You end up with what looks like 16 to 24 petals radiating from the center.

    Tip:

    If the petals droop after stacking, lift each petal back into a slight cup shape with your fingers. The fold creases want to sit that way - help them. The flower looks alive when the petals have a curve to them.

    Back to all steps

  8. Step 8: Attach the Center and Finish

    Watch this step · 5:58

    Put a generous dot of glue in the very center of the stacked petal layers - right where all three centers meet. Press the coffee-ground textured ball firmly onto the glue and hold it for ten or fifteen seconds so it bonds.

    Let the whole flower dry for an hour. Once everything sets, you have a finished paper sunflower ready to display. Glue it to a wooden dowel or pipe cleaner for a stem and stand it in a vase. Tape it to a greeting card for a birthday. Or string a few together as a garland for a summer party.

    Tip:

    For a stem, hot glue a green pipe cleaner or a thin wood dowel painted green to the back of the flower. Add two paper leaves cut from green cardstock and you have a complete sunflower stem long enough for a tall vase.

    Back to all steps

Keep going

How to Draw Water in Pen and Ink (8-Step Seascape Tutorial)

Products Used

The Checklist

How to Make a Paper Sunflower (Easy Craft Tutorial)

Tools
4
Materials
4
Steps
8
Video
6 min

Tools we recommend

As an Amazon Associate we earn from qualifying purchases. Links on this page may be affiliate links - clicking them and buying doesn't change your price, but helps support CraftingStepByStep.

Tags

The Crafter's Weekly

New paper crafts tutorials, every Sunday

One short email with the week's best step-by-step guides. Free, no spam, unsubscribe anytime.

Test your knowledge

Did the lesson stick? Start with this one.

5 questions covering what you just read. No signup, no score saved, and you can stop after this one.

Question 1 of 5

How many petal layers does the finished sunflower have?

Quick reference

Key takeaways from How to Make a Paper Sunflower (Easy Craft Tutorial)

5 questions, answers, and one-line explanations. Tap to expand.

  1. 1.How many petal layers does the finished sunflower have?

    Answer: Three identical layers, stacked and rotated so petals offset

    Three layers stacked with rotated petals reads as 16-24 petals from above.

  2. 2.How many times do you fold the triangle before cutting the petal shape?

    Answer: Three times (resulting in an eight-layer narrow triangle, like a paper snowflake)

    Same fold as a snowflake; eight layers give you eight petals when unfolded.

  3. 3.What gives the sunflower its dark textured center?

    Answer: A crumpled paper ball coated in glue and rolled in coffee grounds

    Coffee-coated paper ball looks remarkably like the dried seed disc of a real sunflower.

  4. 4.When stacking the three petal layers, what do you do?

    Answer: Rotate each layer so its petals fall in the GAPS between the previous layer's petals

    Offset stacking creates the full multi-petal sunflower look.

  5. 5.Why do the fold creases that remain in each layer matter?

    Answer: They give each petal a natural three-dimensional curve so the layer isn't completely flat

    Crease ridges create dimensional curve in the petals.

Did this work for you?

What's next

Similar tutorials

Hand-picked next reads based on the one you just finished.

Liked this paper crafts tutorial?

Pick the crafts you want to hear about. One email every Sunday with new step-by-step tutorials. No spam, easy to unsubscribe.

Get more like this in your inbox

Weekly digest. Pick the categories you want. Unsubscribe anytime.

Send me tutorials about

We only email about new tutorials. Easy unsubscribe anytime.