How to Fold an Origami Crane: 8 Step Beginner Tutorial

Paper CraftsMedium8:068 steps
Also in:Crafts

Based on a video by Origami Tsunami.

The paper crane is the gateway to origami. It uses a handful of foundational folds that show up in dozens of other models, so once you can make a crane, the rest of origami opens up.

This walkthrough breaks down the standard crane into eight clear folds. Use a square of origami paper if you have it, or cut a square from regular printer paper. The whole thing takes about ten minutes the first time and three minutes once you have the muscle memory.

Step-by-Step Guide

1

Step 1: Make a Square

0:42
Step 1: Step 1: Make a Square

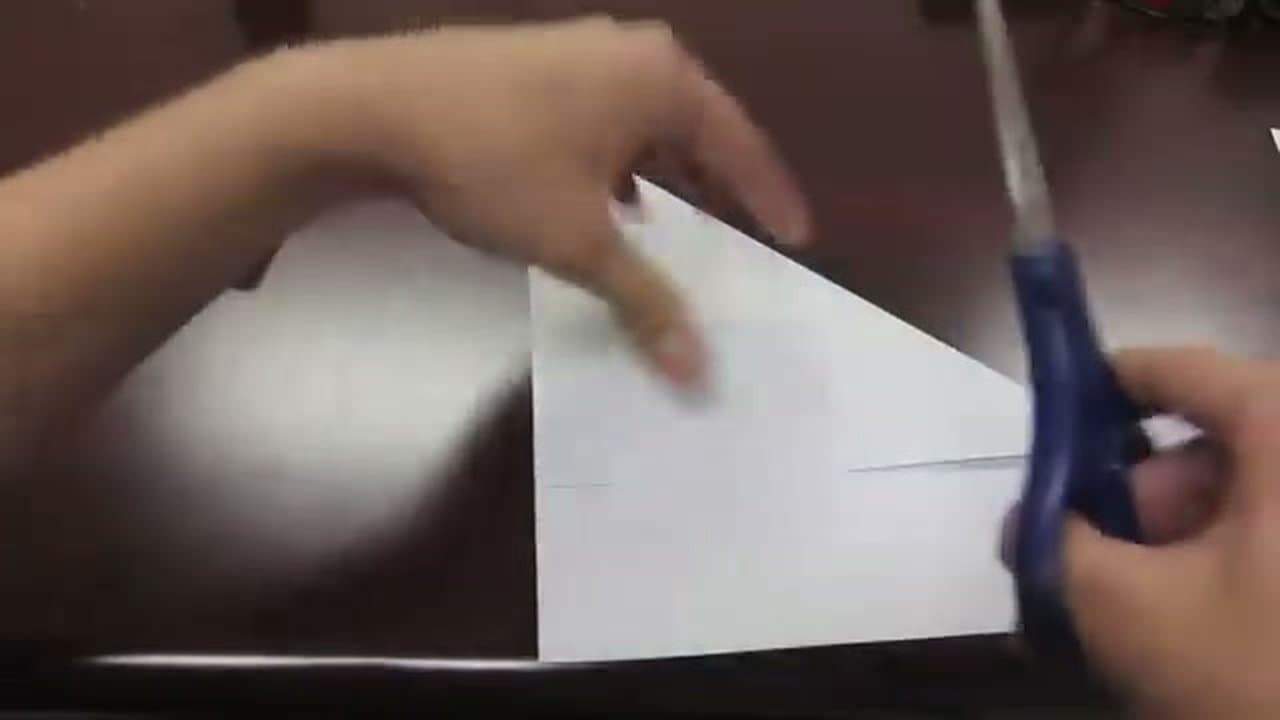
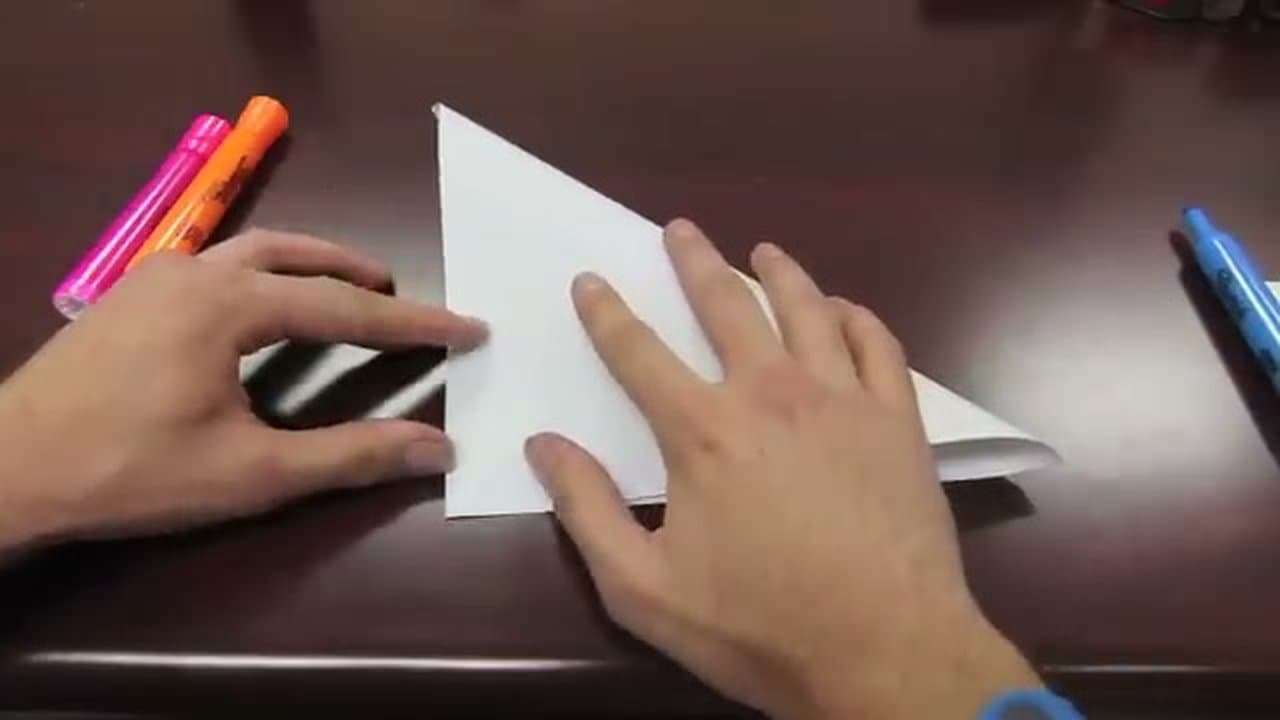
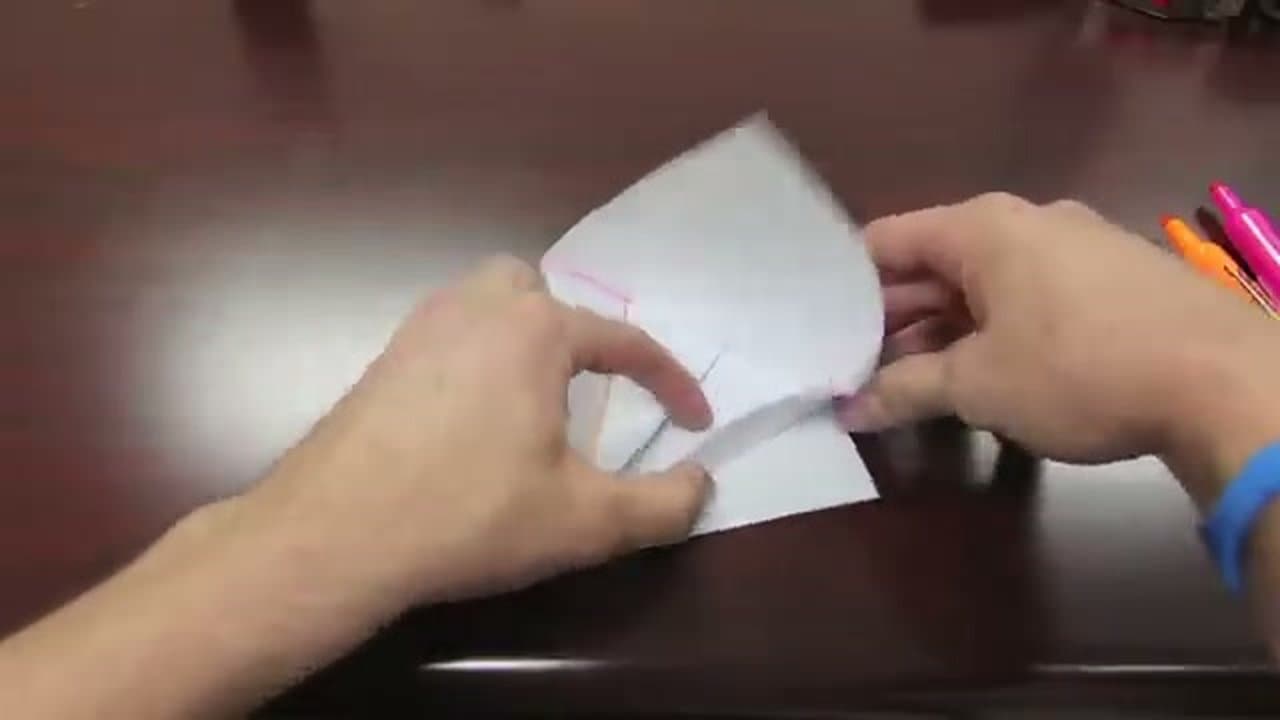
If your paper isn't already square, here's how to make one. Take a rectangular sheet, fold one corner diagonally over so the short edge lines up with the long edge. You'll have a triangle with a strip of extra paper sticking out the bottom.

Cut that strip off with scissors, then unfold. You now have a perfect square with one diagonal crease already done for you, which is a head start on the next step.

Tip

Origami paper is usually 6 inches square and colored on one side. If you're using printer paper, the white-on-white look is fine for practice but a colored side reads better in photos.

2

Step 2: Crease the Diagonals

1:25
Step 2: Step 2: Crease the Diagonals

Fold the square in half diagonally, corner to corner, and crease firmly. Unfold. Now fold the other diagonal so it crosses the first crease, then unfold again.

Your square should now have two intersecting diagonal creases forming an X. These four crease lines set up the structural folds for the rest of the bird, so make sure they go all the way to the corners.

3

Step 3: Crease the Horizontal and Vertical

2:00
Step 3: Step 3: Crease the Horizontal and Vertical

Flip the paper over so the X creases stick up like mountain peaks rather than valleys. Fold the square in half horizontally to crease the middle, then unfold. Fold it in half vertically and unfold again.

You should now have a star pattern: two diagonals running corner to corner, plus two perpendicular lines through the middle. The mix of mountain and valley creases is what lets the next step collapse cleanly.

4

Step 4: Collapse Into the Square Base

2:40
Step 4: Step 4: Collapse Into the Square Base

Lift the paper by the centers of two opposite edges and bring those points together. The diagonal creases will naturally pull the other two corners inward as you press it down.

Press the whole thing flat into a small square with open flaps on one side and a closed point on the other. This shape, four triangle flaps stacked on top of one closed square, is called the square base. Most traditional origami starts here.

Tip

If the paper resists the collapse, your creases probably aren't sharp enough. Refold each one over the edge of a table to make them crisper, then try again.

5

Step 5: Fold the Kite on Both Sides

3:30
Step 5: Step 5: Fold the Kite on Both Sides

Place the square base with the open flaps pointing toward you. Take the bottom-right edge of the top layer and fold it inward to meet the vertical center crease. Do the same with the bottom-left edge.

The top of the figure becomes a narrow point that looks like a kite. Flip the whole stack over and repeat the same two folds on the back. Press all four folds firmly so they hold.

6

Step 6: Open Up Into the Bird Base

4:55
Step 6: Step 6: Open Up Into the Bird Base

This is the move that surprises beginners. Lift the bottom point of the top layer straight up, opening the kite flaps so the side edges fold inward along their existing creases.

The paper rises up and then collapses flat into a longer, narrower diamond. Flip the whole thing over and repeat on the back. You now have the bird base, which is also the foundation for frogs, lilies, and several other classic models.

7

Step 7: Reverse-Fold the Neck and Tail

6:40
Step 7: Step 7: Reverse-Fold the Neck and Tail

Pick one of the long bottom flaps - this will become the neck. Open it slightly and tuck it up between the layers so it points whichever way you want the head to face. This is called an inside reverse fold.

The other long flap becomes the tail. You can leave it pointing the original direction or reverse-fold it the same way to make the bird symmetric. Either looks good.

8

Step 8: Form the Head and Open the Wings

7:47
Step 8: Step 8: Form the Head and Open the Wings

On the neck flap, pinch a small section near the tip and reverse-fold it forward. That bend becomes the crane's head and beak. A shorter bend gives a stubby head, a longer one looks more graceful, so adjust until you like it.

Gently pull the two wings outward to open up the body. Your origami crane is finished. Make a thousand of them and tradition says you get a wish.

Products Used

☐ The Checklist

How to Fold an Origami Crane: 8 Step Beginner Tutorial

Tools
1
Materials
2
Steps
8
Video
8 min

Your Guide

Origami Tsunami

As an Amazon Associate we earn from qualifying purchases. Links on this page may be affiliate links - clicking them and buying doesn't change your price, but helps support ShowMeStepByStep.

Related Tutorials