How to Paint a Tree: 5 Acrylic Tree Techniques

Also in:Crafts

By CraftingStepByStepPublished Updated

Based on a video by Wild Creates.

Trees are one of the first things beginner painters try and one of the first things they get frustrated with. The trick is using the right brush. The fan brush is built specifically for this kind of texture - the splayed bristles create natural leaf and needle patterns that would take ages to paint stroke-by-stroke.

This walkthrough from Wild Creates and his friend Tally covers four different tree types using the same fan brush: a pine tree, a tree with lots of leaves, a slim canopy tree, and a tree leaning off the side of the canvas. Master these four and you can drop a tree into almost any landscape. To put a whole grove of them together, try the forest pathway painting next.

Step-by-Step Guide

1

Step 1: Set Up Your Palette and Brushes

0:30
Step 1: Step 1: Set Up Your Palette and Brushes

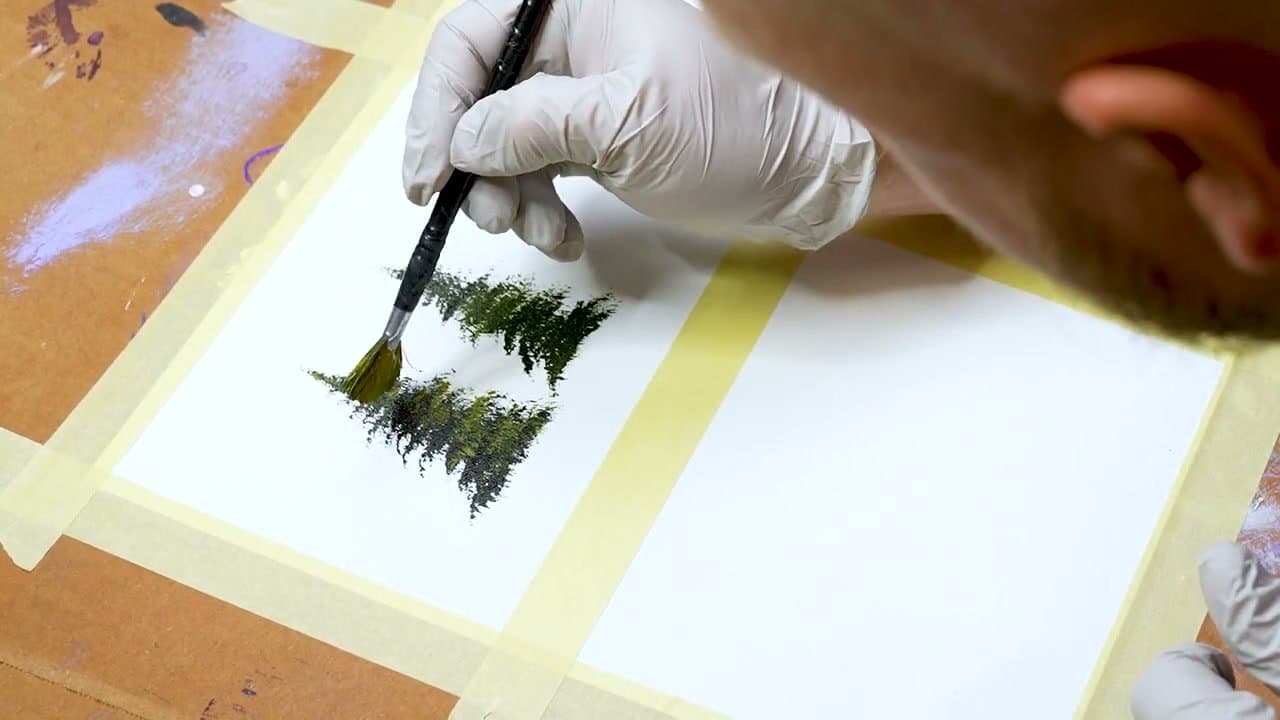
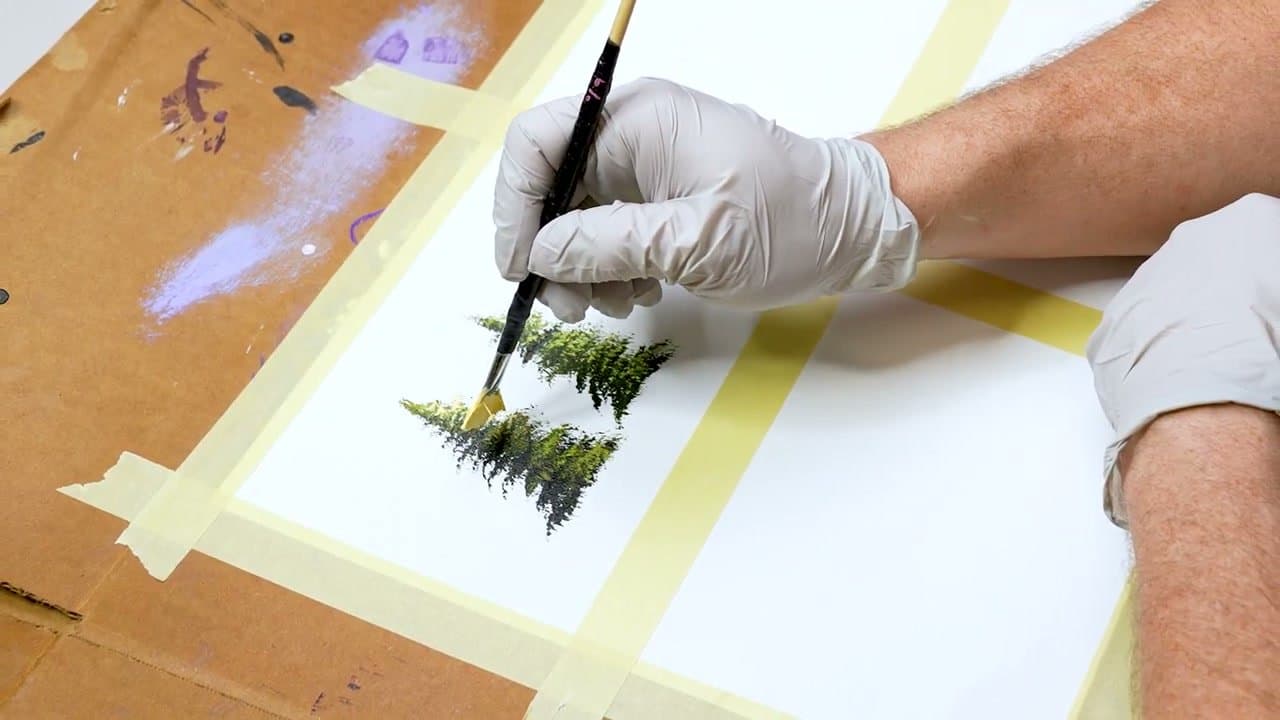
The fan brush is the workhorse for all four trees. Get one in size 4 or 6. You'll also need a small round brush for trunk details. Put dark sap green, a mid-tone green, yellow, burnt umber (for trunks), and white on your palette.

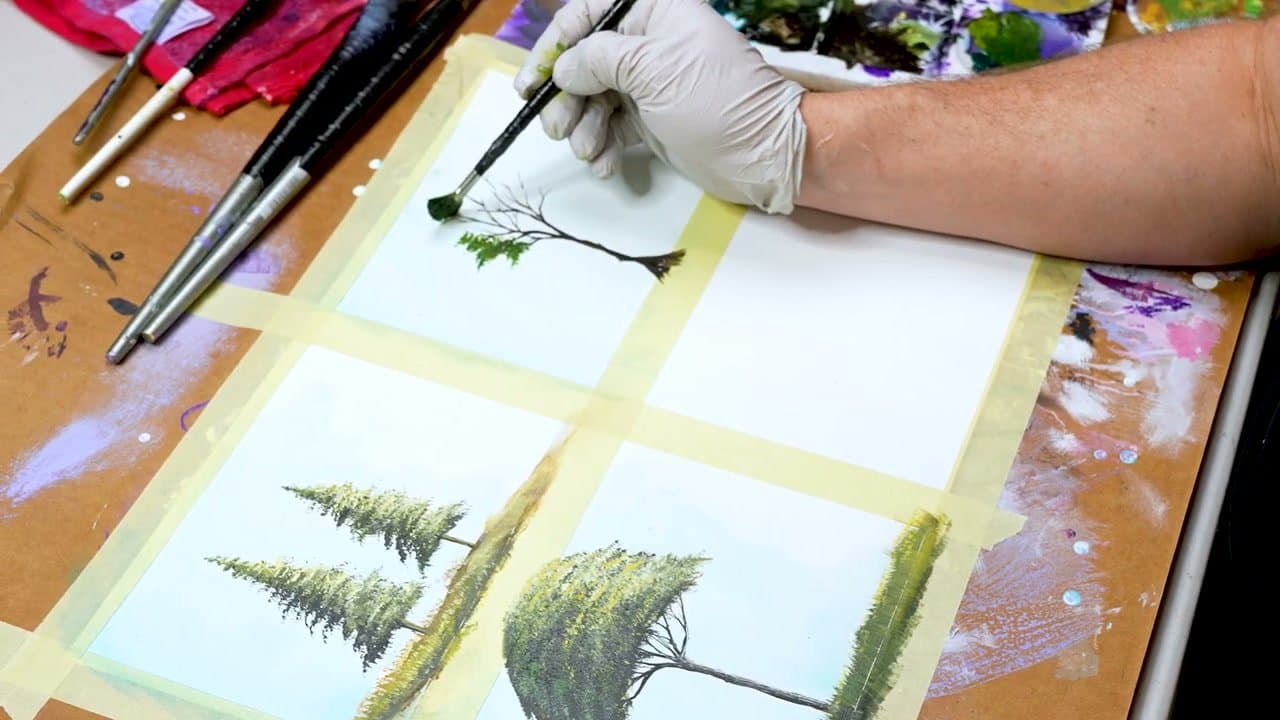
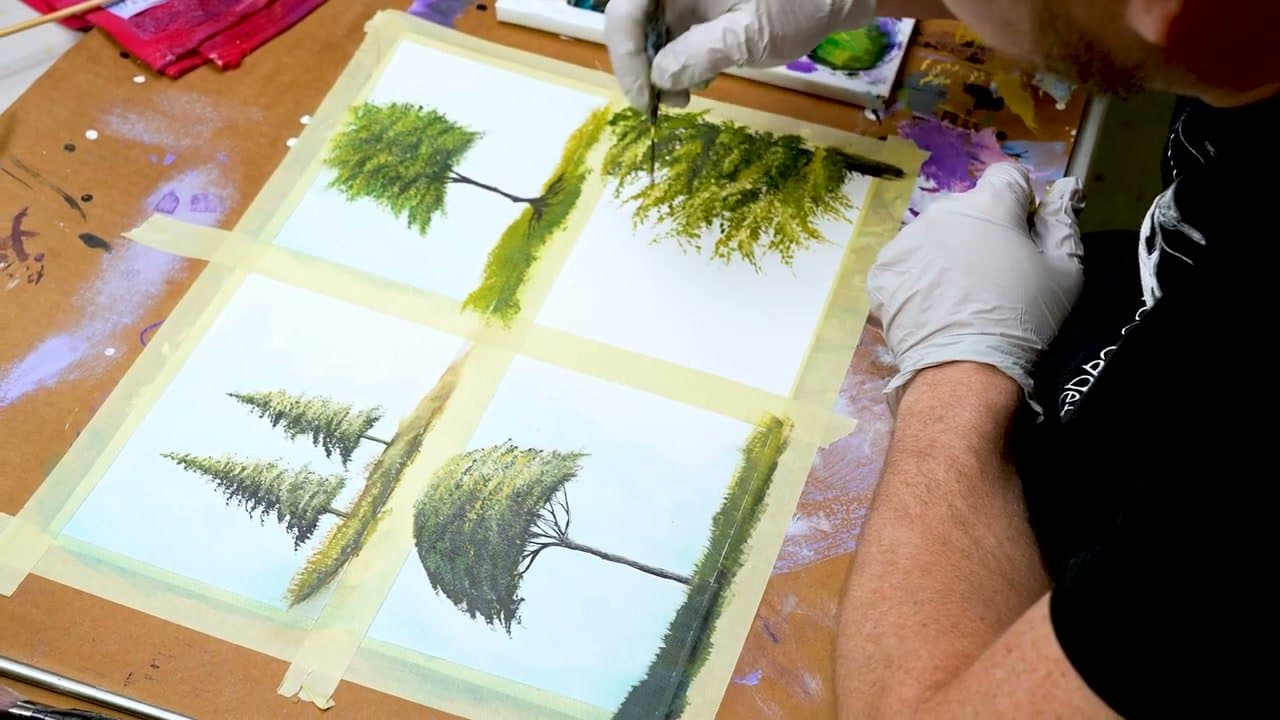
Tape off four squares on your canvas so you can practice all four tree styles on one panel. The painter's tape gives you clean white borders between trees so you can compare techniques side by side.

Tip

Don't dilute your acrylic too much for trees. The thick paint loaded onto the fan brush is what creates the natural texture - watery paint just smears.

2

Step 2: Paint a Pine Tree (Zigzag Method)

2:10
Step 2: Step 2: Paint a Pine Tree (Zigzag Method)

Load the fan brush with dark sap green. Working from the SIDE of the brush (not flat-on), dab in a downward triangle zigzag motion - widest at the bottom, narrowing to a point at the top.

Open the bristles slightly as you go to expose more of the brush - that's what creates the pine-needle texture on the outside edges. Reload the brush often. One brushload won't fill a whole tree, and trying to make it stretch makes the tree look thin.

Tip

Don't be afraid to make the tree patchy. Real pines have gaps where light shows through - a perfectly filled triangle reads as fake.

Products used in this step

3

Step 3: Add Mid-Tones and Highlights

3:35
Step 3: Step 3: Add Mid-Tones and Highlights

With a clean fan brush, mix a mid-tone color - green plus a touch of yellow gives you a marbled lighter green. Use the same zigzag motion over the dark base, focusing on the side of the tree facing your light source.

Add small dabs of pure yellow on top for highlights. Don't blend them in - the unblended bits read as light catching individual needles. Keep the highlights only on the lit side; the shaded side stays dark.

Tip

Leave the mid-tone color marbled on your palette. Don't fully mix the green and yellow - the variation in color shows seasonal change in the tree.

4

Step 4: Paint a Leafy or Slim Canopy Tree

7:20
Step 4: Step 4: Paint a Leafy or Slim Canopy Tree

For a deciduous tree, use the corner of the fan brush to dab clusters of leaves in a rough oval shape. Build with darks first, then mid-tones, then highlights on the light-facing side.

For a slim canopy tree (like an African acacia), paint a thin trunk first with a small round brush in burnt umber. Then build a wide flat canopy at the top using horizontal sweeping strokes - the bristles fan outward to create the foliage texture.

5

Step 5: Paint a Side-Leaning Tree (Off-Center)

9:50
Step 5: Step 5: Paint a Side-Leaning Tree (Off-Center)

The last tree leans in from the side of the canvas. Start the trunk near the edge, curving back toward the painting. Build the canopy on top using whatever method fits the tree type (pine zigzag or leafy dab).

Side trees feel natural when they lean TOWARD your light source - it suggests the tree is growing toward the sun. Painted asymmetry that looks intentional is the hardest part of this whole tutorial.

Tip

Once you've painted all four, leave them taped overnight. Pull the painter's tape carefully when dry - the clean white borders make each tree look like a tiny finished study.

Products Used

☐ The Checklist

How to Paint a Tree: 5 Acrylic Tree Techniques

Tools
7
Materials
6
Steps
5
Video
10 min

Your Guide

Wild Creates

As an Amazon Associate we earn from qualifying purchases. Links on this page may be affiliate links - clicking them and buying doesn't change your price, but helps support ShowMeStepByStep.

Tags

Test your knowledge

Did the lesson stick? Find out in 2 minutes.

5 quick questions covering what you just read. No signup, no score saved — just a gut check.

Quick reference

Key takeaways from How to Paint a Tree: 5 Acrylic Tree Techniques

5 questions, answers, and one-line explanations. Tap to expand.

  1. 1.Which brush is the workhorse for painting these four acrylic trees?

    Answer: A fan brush in size 4 or 6

    The fan brush handles all four trees. Its splayed bristles create natural foliage texture you can't easily fake with other shapes.

  2. 2.Why does the tutorial say not to dilute the acrylic too much when painting trees?

    Answer: Thick paint on a loaded fan brush is what makes natural texture

    The fan brush needs body in the paint to leave the textured marks that read as needles and leaves. Watery paint just smears.

  3. 3.What motion makes a believable pine tree shape with a fan brush?

    Answer: Side-of-the-brush dabs in a downward triangle zigzag

    Working from the side of the brush in a downward zigzag triangle gives you the wide base, pointed top, and natural needle texture.

  4. 4.Why keep the yellow highlights on the lit side of the tree only?

    Answer: It suggests light catching needles on one side and leaves the rest dark

    Highlights only on the lit side imply a light source, giving the tree real dimension. Highlights everywhere flatten it back out.

  5. 5.A side-leaning tree feels natural when it leans which direction?

    Answer: Toward your light source

    Trees grow toward the sun. Leaning the trunk toward your painted light source makes the asymmetry read as intentional, not crooked.

What's next

Related collections

Curated theme pages that include this tutorial.

Weekly Digest

Liked this painting tutorial?

Pick the categories you want to hear about. Weekly digest of new step-by-step tutorials. No spam, easy unsubscribe.

Send me tutorials about

We only email about new tutorials. Easy unsubscribe anytime.