How to Paint a Waterfall with Acrylics (Step by Step)

PaintingEasy10:017 stepsBrowse more →

By CraftingStepByStepPublished

Based on a video by Joony art.

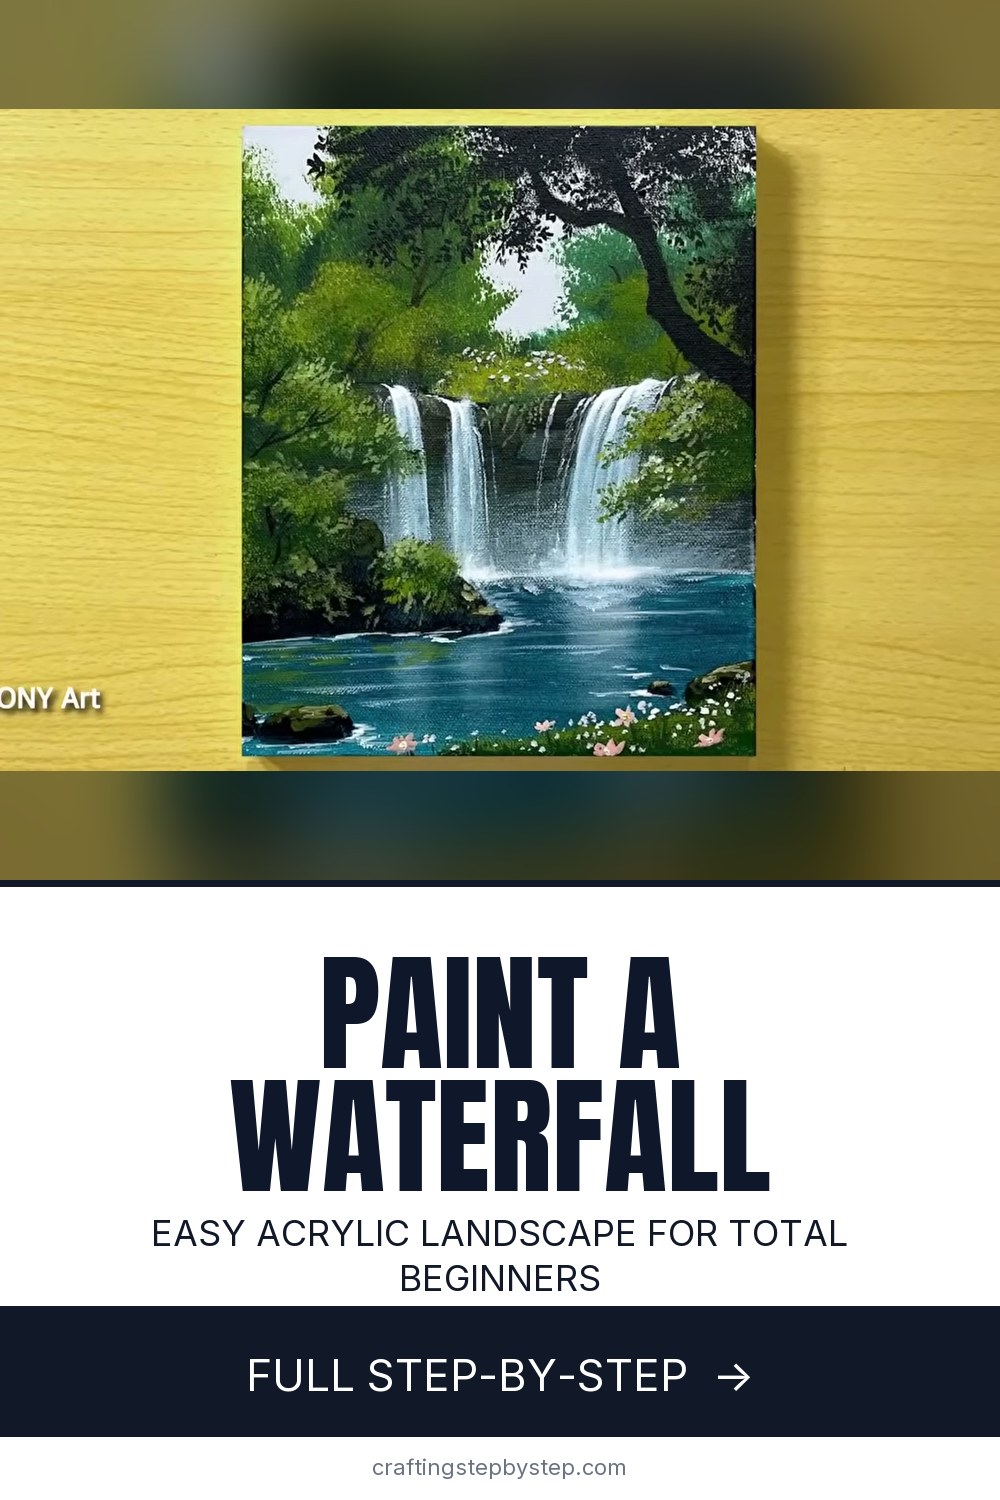
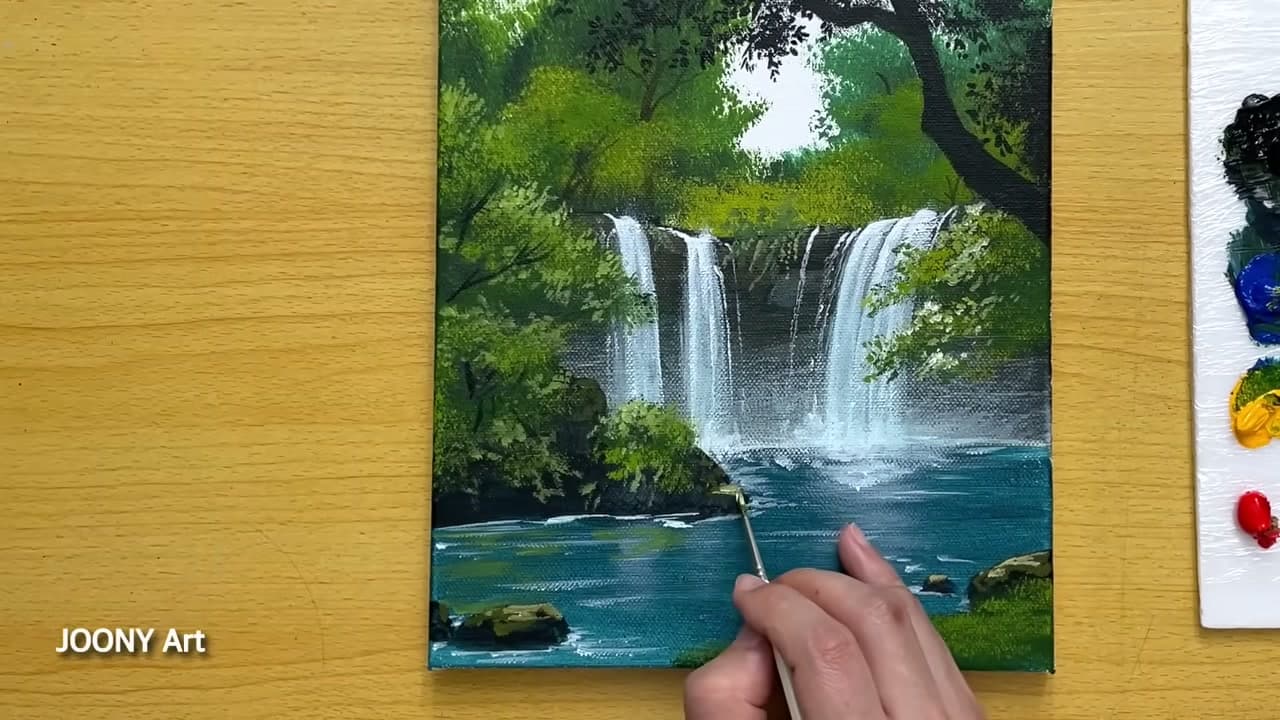
A waterfall looks like a hard thing to paint until you see it built in layers. Joony art breaks this peaceful forest scene into a handful of steps you can follow with a few brushes and five tube colors. You start soft and green at the top, drop in a dark rock cliff, then pull the white water straight down over it. The creator says right up front that beginners can paint along, and the finished canvas backs that up - it reads as a real place, not a first try.

The order matters here. Dark before light is the whole trick with acrylics. You lay the charcoal rock band first so the white water has something to fall against, and you save the brightest highlights and the little wildflowers for the very end. Work back to front and top to bottom and the scene almost assembles itself. If you have not mixed acrylics before, run through acrylic painting for beginners first so the paint consistency feels familiar.

Once you have this waterfall down, the same layered approach carries straight into other landscapes. The treeline technique is the same one used in how to paint a forest, the water sits on the same rules as how to paint ocean waves, and if you want a bigger backdrop behind your falls, try how to paint mountains with acrylics. Grab a canvas and let's get the greens down.

Step-by-Step Guide

7 steps · about 10 minutes.Check off each step as you go and your progress saves automatically.

1

Step 1: Dab In the Green Treeline

1:18
Step 1: Step 1: Dab In the Green Treeline

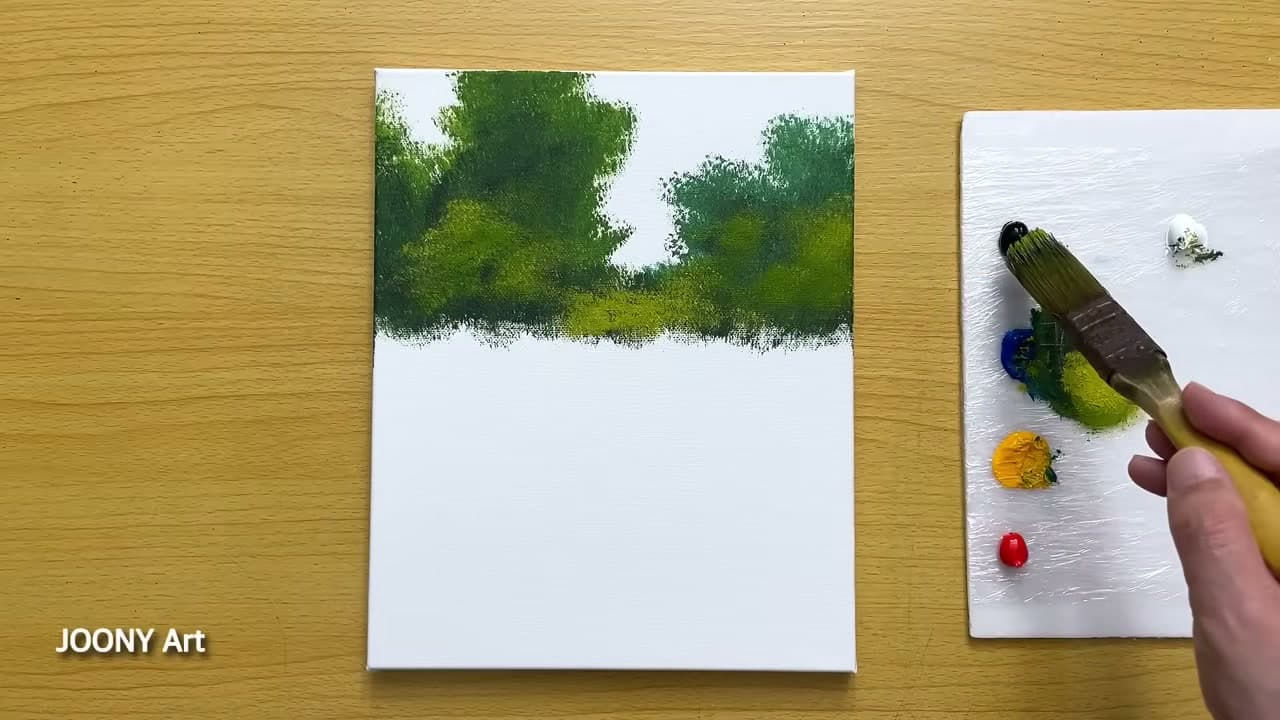
Load a flat brush with a dark and a mid green and tap a soft band of trees across the top third of the canvas. Bounce the bristles straight at the surface instead of stroking sideways. That broken, dabbed edge is what makes the foliage read as leaves rather than a flat green wall.

Leave the middle of the treeline a little lower and lighter. That dip is where the sky peeks through and where the falls will sit later, so you want some breathing room there.

Tip

Watch this step Use two greens, not one. A darker green in the shadows and a lighter yellow-green on top gives the trees instant depth before you add a single detail.
2

Step 2: Block In the Dark Rock Cliff

2:30
Step 2: Step 2: Block In the Dark Rock Cliff

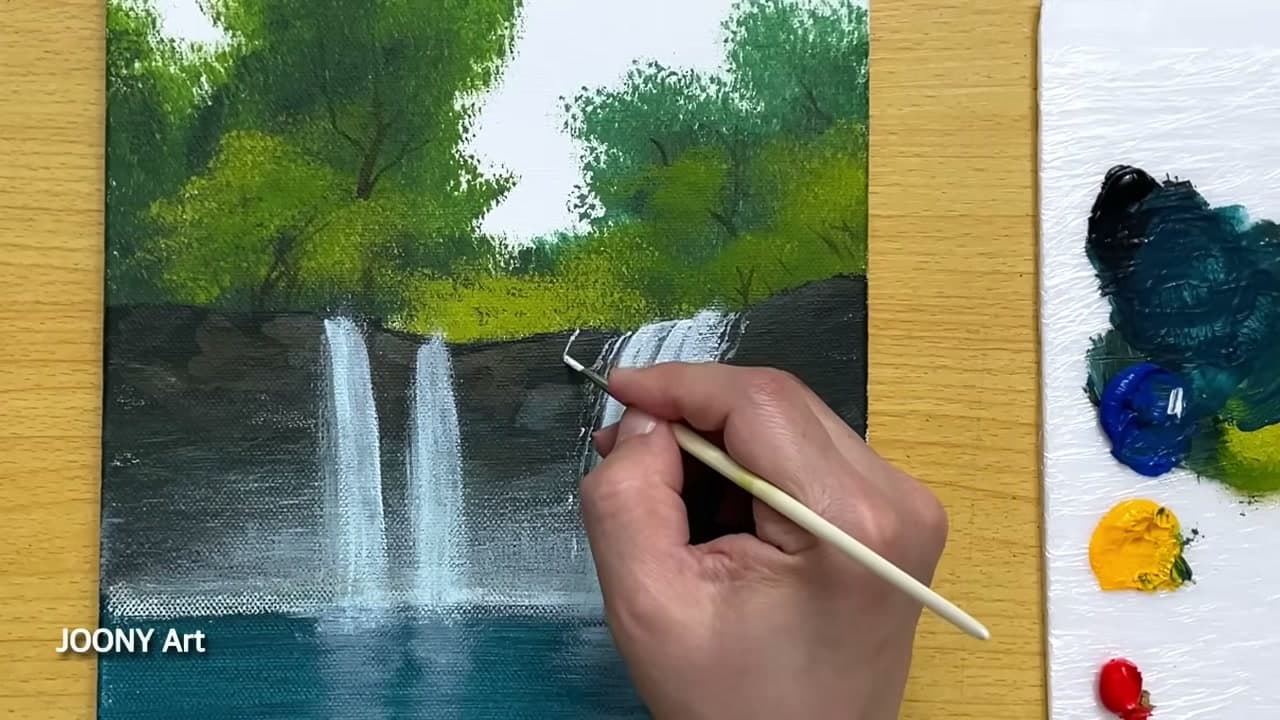
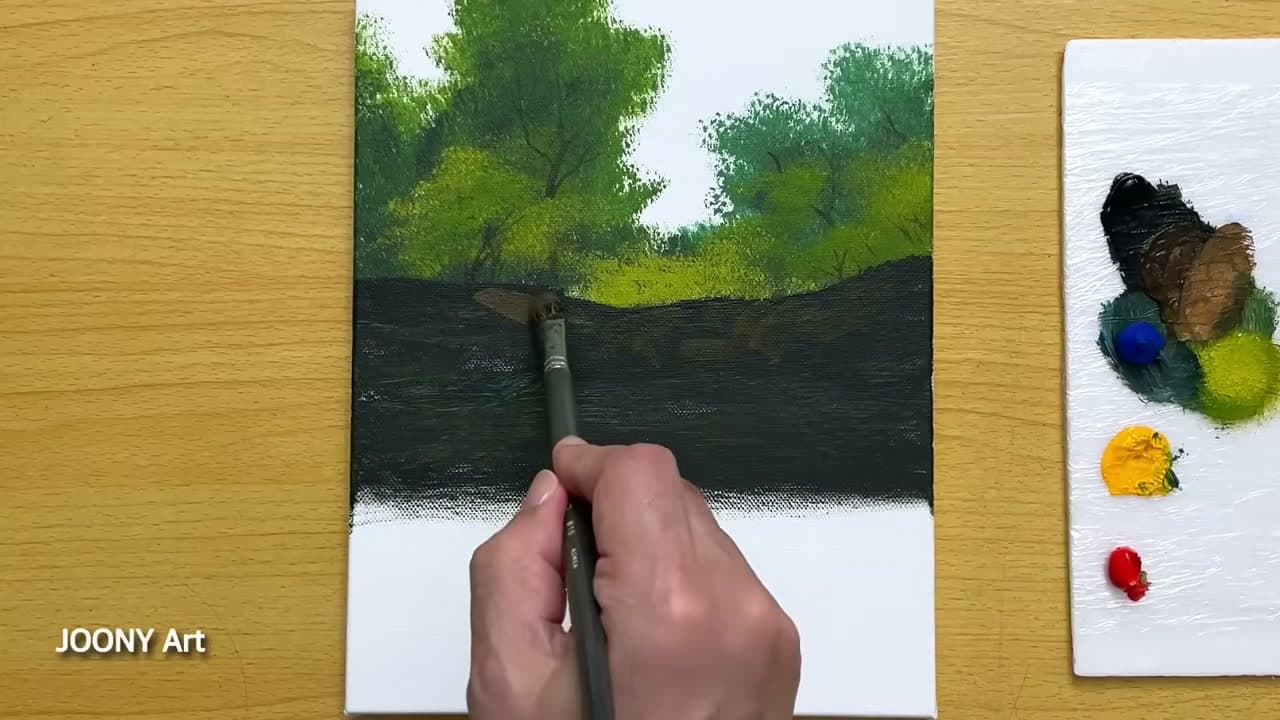
Mix black with a touch of blue to get a cool charcoal, then block in a solid band of rock right below the treeline. Drag the flat brush sideways so the band stays flat and dark. This is the cliff the water pours over, so it needs to be the darkest thing on the canvas.

Keep the top edge of the rock uneven and a little ragged. Real stone is never a straight line, and a broken edge lets the green trees settle down into the rock instead of floating above it.

Tip

Watch this step Paint this band good and dark now. If it dries too light, the white water later will barely show up against it and the falls lose their punch.

3

Step 3: Pull Down the Falling Water

4:00
Step 3: Step 3: Pull Down the Falling Water

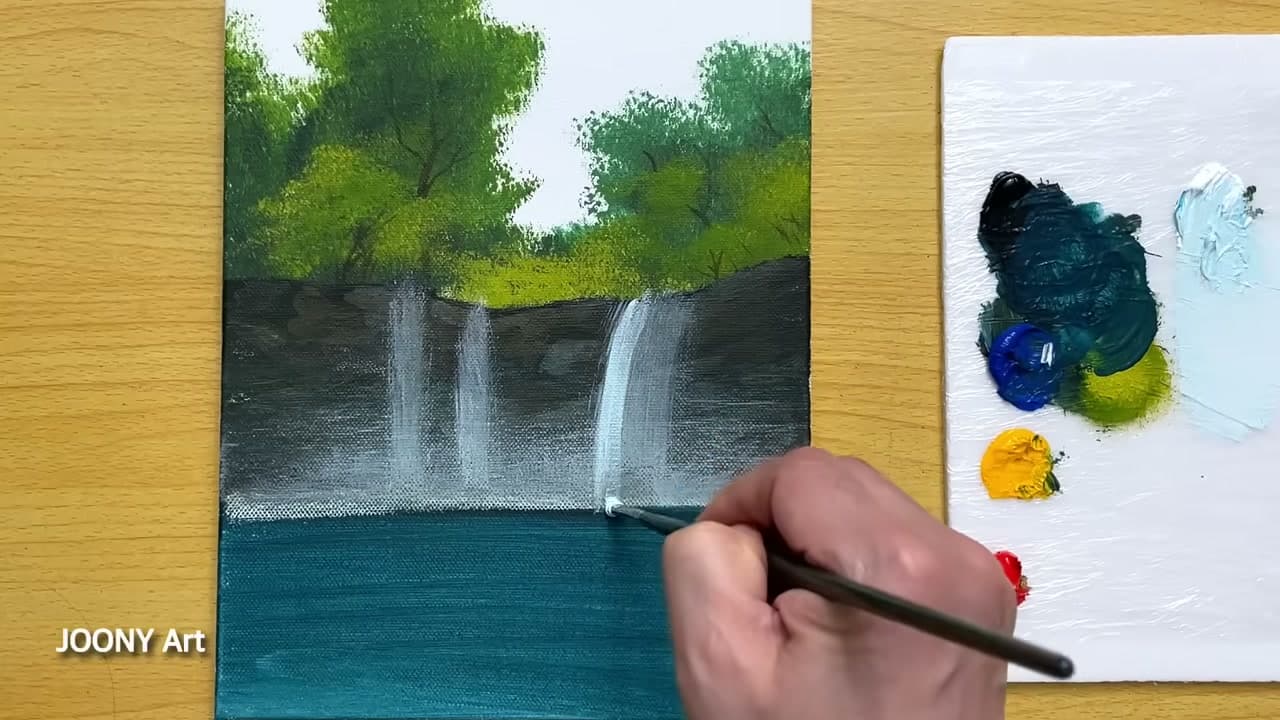
Switch to white on a thin round brush and pull straight vertical strokes down the dark cliff. Start each stream narrow at the top and let the strokes widen and soften as they drop. Two or three separate falls look more natural than one solid sheet of white.

Keep your pressure light. You want the dark rock to still show through the water in places, because water is see-through and that broken white is what makes it look wet instead of painted on.

Tip

Watch this step Flick the brush off the canvas at the bottom of each stroke. That little lift feathers the water so it fades into mist instead of stopping in a hard line.

4

Step 4: Fill the Teal Pool

5:50
Step 4: Step 4: Fill the Teal Pool

Mix cerulean blue with a little black for a deep teal and fill the pool along the bottom of the canvas. Lay it in with flat horizontal strokes so the surface reads as still water lying flat, not a wall standing up.

Where the falls meet the pool, drag a few lighter streaks straight down into the teal. That is the churn and the reflection of the white water, and it ties the falls to the pool so they feel connected.

Tip

Watch this step Keep your horizontal strokes level and parallel. Water reflects the world flat, so any diagonal stroke here reads as a tilted pond and breaks the illusion.

5

Step 5: Brighten the Water and Add Spray

7:30
Step 5: Step 5: Brighten the Water and Add Spray

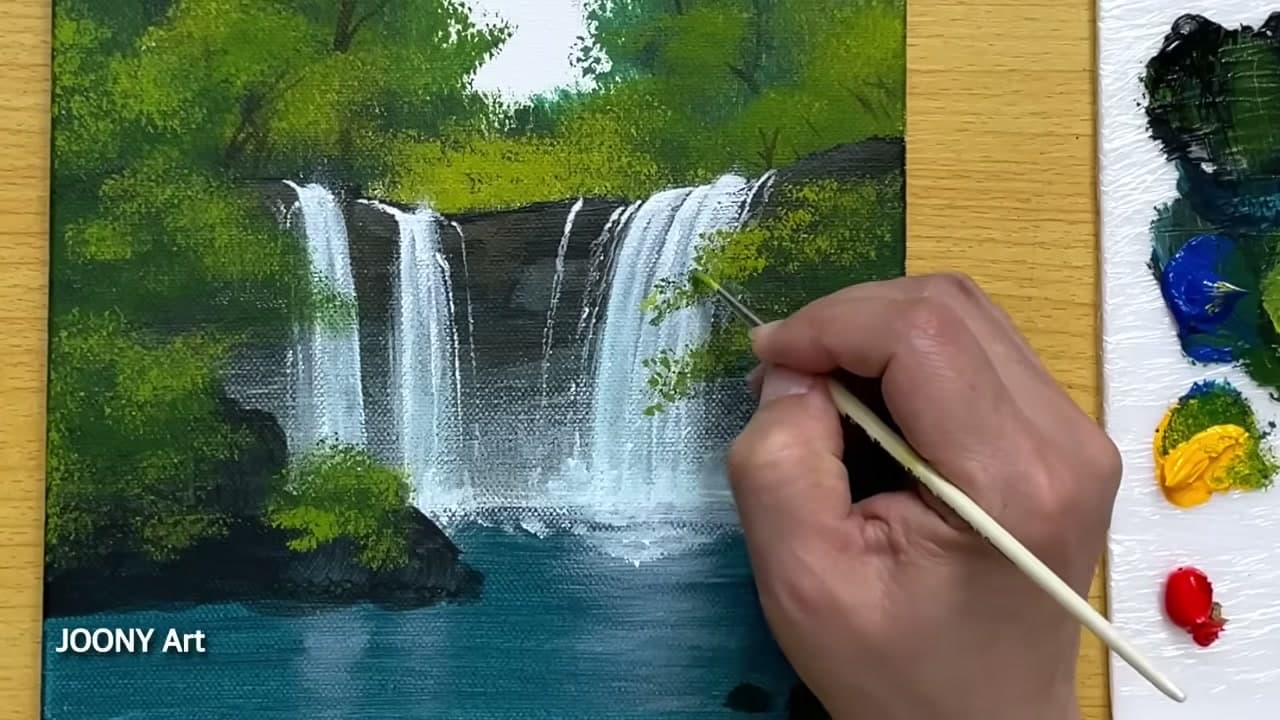
Take pure white on the tip of the round brush and go back over the water to lift it. Add the strongest highlights right where each fall runs fastest, then dab short broken flecks at the base of the falls for spray and mist rising off the pool.

Drop a few small light-green leaf clusters right at the edges of the falls too. Those little touches of foliage overlapping the water pull the whole scene together and stop the white from looking like a cutout.

Tip

Watch this step Load only a tiny bit of white for the spray and tap gently. Heavy blobs look like snow. You want a soft haze where the water hits, not solid dots.

6

Step 6: Frame the Scene with an Overhanging Branch

8:45
Step 6: Step 6: Frame the Scene with an Overhanging Branch

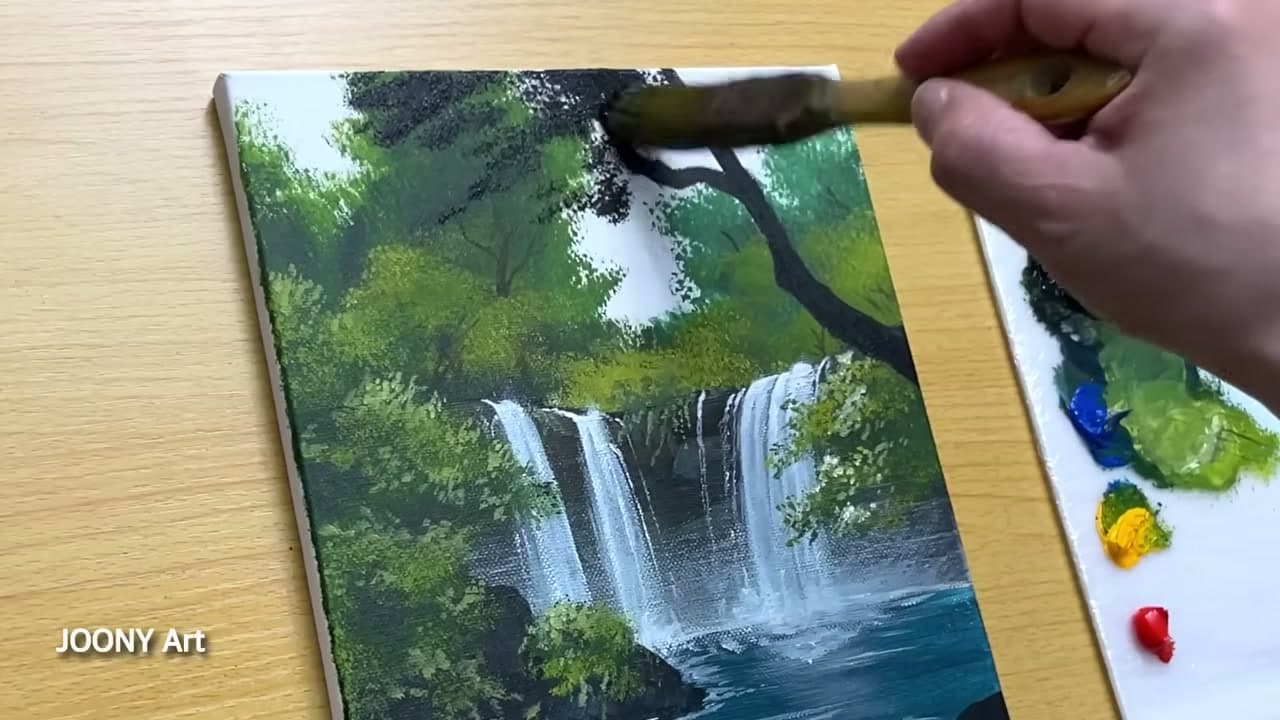
Now frame the top. Drop a dark tree trunk down one side and sweep a curved branch across the upper canvas so it arches over the falls. Keep it dark, almost a silhouette, since it sits closest to you and catches the least light.

Tap clusters of green leaves along the branch with the tip of a round brush. This overhanging frame is what gives the painting depth and that tucked-away, secret-spot feeling, like you are looking at the falls through the trees.

Tip

Watch this step Let the branch run right off the edge of the canvas. A framing branch that stops short in mid-air looks odd. Carrying it off the edge makes the scene feel bigger than the frame.

7

Step 7: Add Foreground Rocks and Wildflowers

9:25
Step 7: Step 7: Add Foreground Rocks and Wildflowers

Finish the foreground. Set a couple of dark rocks at the water's edge, then run a few light ripples across the pool with a fine brush to catch the surface. These small marks give the near water some movement.

Last, tap tiny white and pink dots along the front bank for wildflowers. It is a small thing, but that scatter of color at the bottom is what makes the painting feel warm and alive instead of a flat postcard. Step back and you are done.

Tip

Watch this step Use the wrong end of your brush or a toothpick for the flower dots. A fine point keeps them tiny, and tiny is what reads as far-off wildflowers rather than blobs.

Products Used

☐ The Checklist

How to Paint a Waterfall with Acrylics (Step by Step)

Tools
7
Materials
4
Steps
7
Video
10 min

Tools we recommend

Your Guide

Joony art

As an Amazon Associate we earn from qualifying purchases. Links on this page may be affiliate links - clicking them and buying doesn't change your price, but helps support ShowMeStepByStep.

Tags

Sunday How-To

New painting tutorials, every Sunday

One short email with the week's best step-by-step guides. Free, no spam, unsubscribe anytime.

Did this work for you?

What's next

Related collections

Curated theme pages that include this tutorial.

Weekly Digest

Liked this painting tutorial?

Pick the categories you want to hear about. Weekly digest of new step-by-step tutorials. No spam, easy unsubscribe.

Send me tutorials about

We only email about new tutorials. Easy unsubscribe anytime.