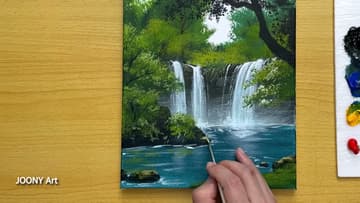
How to Paint a Waterfall with Acrylics (Step by Step)
Source: Joony art • Full tutorial: www.craftingstepbystep.com/painting/how-to-paint-a-waterfall
- Difficulty
- Easy
- Hands-on time
- About 1 hour
- Cost
- About $15 to $22
- Makes
- 1 waterfall painting

Tools
- flat acrylic brush
- round detail brush
- fan brush
- palette
- water cup
- paper towel
- canvas board or easel
Materials
- acrylic paint set (white, cerulean blue, permanent yellow, black, vermilion)
- cotton canvas or canvas board
- palette knife
- masking tape
Steps
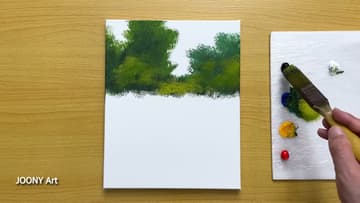
1. Dab In the Green Treeline
Load a flat brush with a dark and a mid green and tap a soft band of trees across the top third of the canvas. Bounce the bristles straight at the surface instead of stroking sideways.
Tip: Watch this step Use two greens, not one. A darker green in the shadows and a lighter yellow-green on top gives the trees instant depth before you add a single detail.
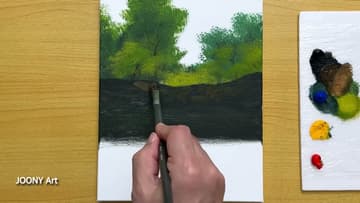
2. Block In the Dark Rock Cliff
Mix black with a touch of blue to get a cool charcoal, then block in a solid band of rock right below the treeline. Drag the flat brush sideways so the band stays flat and dark.
Tip: Watch this step Paint this band good and dark now. If it dries too light, the white water later will barely show up against it and the falls lose their punch.
3. Pull Down the Falling Water
Switch to white on a thin round brush and pull straight vertical strokes down the dark cliff. Start each stream narrow at the top and let the strokes widen and soften as they drop.
Tip: Watch this step Flick the brush off the canvas at the bottom of each stroke. That little lift feathers the water so it fades into mist instead of stopping in a hard line.
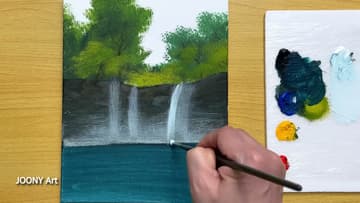
4. Fill the Teal Pool
Mix cerulean blue with a little black for a deep teal and fill the pool along the bottom of the canvas. Lay it in with flat horizontal strokes so the surface reads as still water lying flat, not a wall standing up.
Tip: Watch this step Keep your horizontal strokes level and parallel. Water reflects the world flat, so any diagonal stroke here reads as a tilted pond and breaks the illusion.
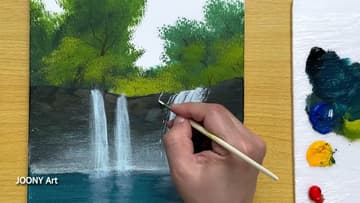
5. Brighten the Water and Add Spray
Take pure white on the tip of the round brush and go back over the water to lift it. Add the strongest highlights right where each fall runs fastest, then dab short broken flecks at the base of the falls for spray and mist rising off the pool.
Tip: Watch this step Load only a tiny bit of white for the spray and tap gently. Heavy blobs look like snow. You want a soft haze where the water hits, not solid dots.
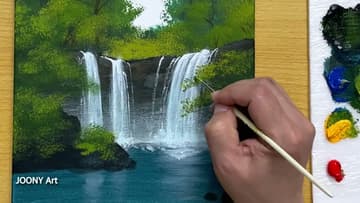
6. Frame the Scene with an Overhanging Branch
Now frame the top. Drop a dark tree trunk down one side and sweep a curved branch across the upper canvas so it arches over the falls.
Tip: Watch this step Let the branch run right off the edge of the canvas. A framing branch that stops short in mid-air looks odd.
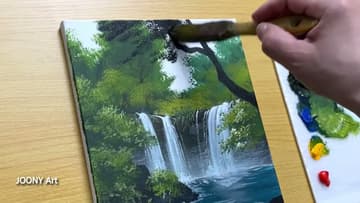
7. Add Foreground Rocks and Wildflowers
Finish the foreground. Set a couple of dark rocks at the water's edge, then run a few light ripples across the pool with a fine brush to catch the surface.
Tip: Watch this step Use the wrong end of your brush or a toothpick for the flower dots. A fine point keeps them tiny, and tiny is what reads as far-off wildflowers rather than blobs.