How to Make a Macrame Feather - Easy Macrame Leaf for Beginners

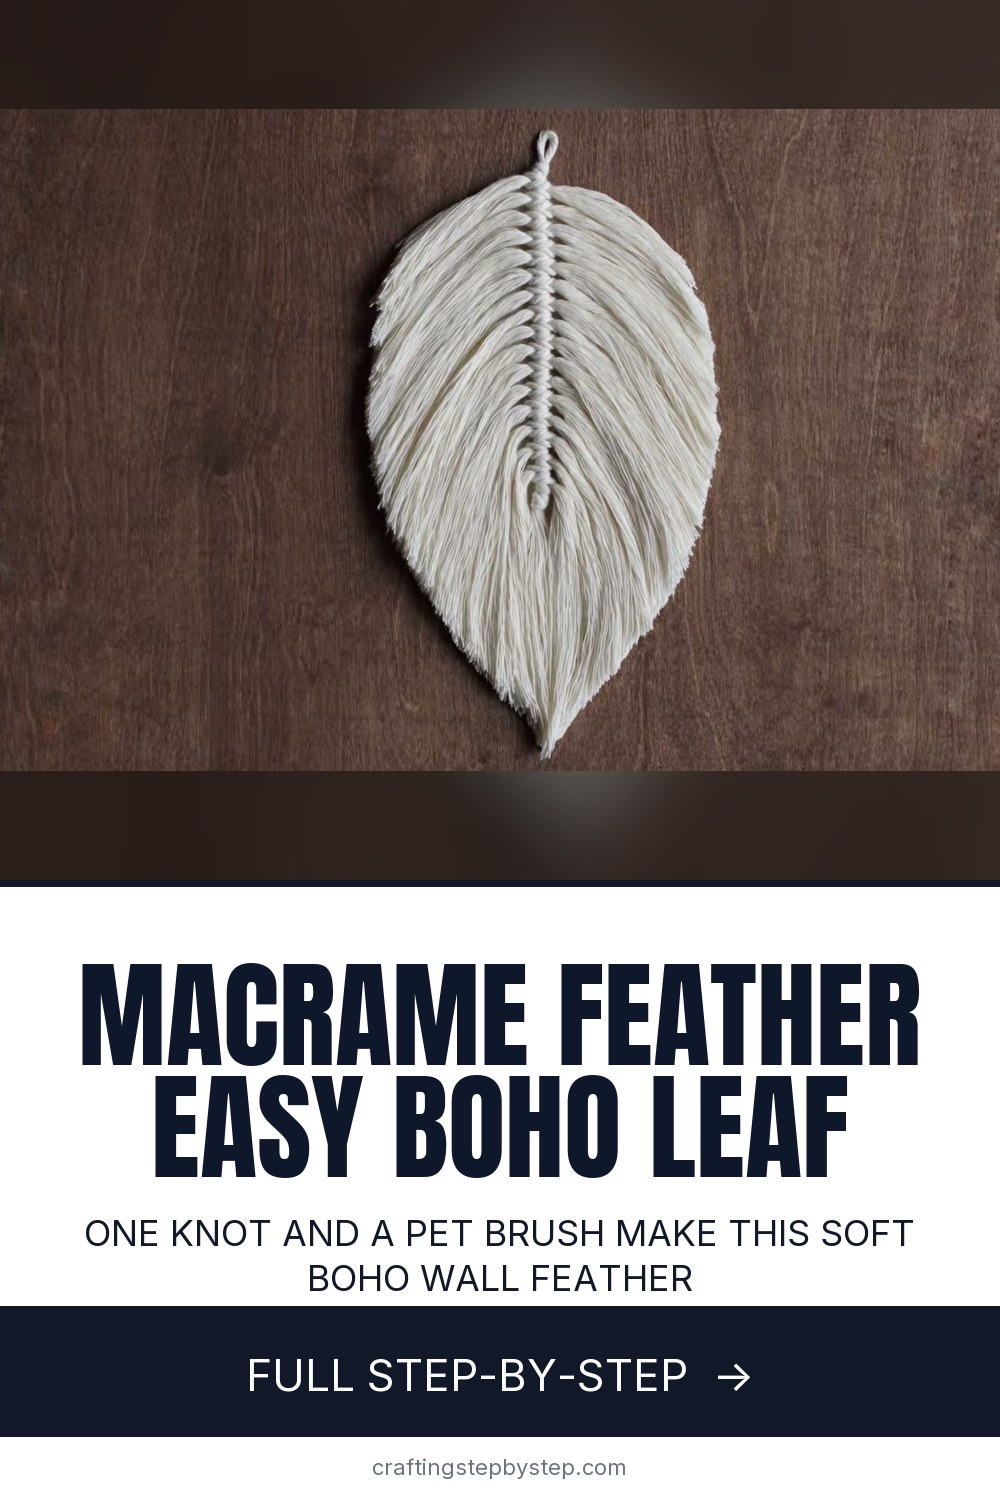
The finished result: How to Make a Macrame Feather - Easy Macrame Leaf for Beginners
  • Difficulty: Easy
  • About 1 hour 30 minutes
  • 10 steps

You tapped Save

Save this project for later

We'll email you a link, no password.

How to Make a Macrame Feather - Easy Macrame Leaf for Beginners

  • Your saved projects in one list
  • Your ticked steps on any device

Check your inbox for an email from us. Not there? Look in your spam folder.

Print

Steps written out by Crafting Step by Step from Lots of Knots Canada's video (opens YouTube) (6:47). Published .

A macrame feather (some people call it a macrame leaf) is one of the quickest wins in fiber art. There is only one knot to learn, and the soft, brushed look comes from a pet brush. Chantel Conlon of Lots of Knots Canada makes a large 15 inch feather with a felt backing that keeps it flat and crisp on the wall.

How to make a macrame feather: the short version

  • Cut a leaf shape from felt to use as a template and backing.
  • Fold a long centre cord in half and knot a loop at the top.
  • Add short cords down the centre with cow hitch knots, left then right.
  • Brush every strand out with a pet brush until it is fluffy.
  • Glue the felt to the back, trim along its edge, and fluff.

Choosing your cord

Use single strand twisted cotton. It unravels and brushes out into soft fibres. Braided cord will not brush out at all, and 3-ply rope brushes out but stays crinkly. Chantel uses 3mm cord for this large feather. A 2mm cord makes a finer feather and is better for small sizes like keychains and earrings.

Sizing a macrame feather

Chantel's felt template is 13 inches long and 7 1/4 inches wide at its widest point, which gives a finished feather about 15 by 8 inches. For that size, cut one 36 inch centre cord and 32 pieces at 17 inches each. To make a smaller feather, shrink the template and cut the side cords about 2 inches wider than the felt at that point. A set of three sizes looks great hung together.

Why the felt backing matters

A brushed feather is floppy on its own. Without support it droops and loses its shape after a week on the wall. The felt keeps it flat and gives you a clean line to trim along. If you would rather skip felt, you can spray the back with fabric stiffener and let it dry flat, then trim.

Getting a smooth brushed finish

Brushing takes longer than knotting, so settle in. Work in short strokes from the spine outward and hold the knots down firmly so you do not pull them loose. If the cord resists, untwist the last inch of each strand with your fingers first. A slightly damp brush tames static on dry days. Stop when the strands look like soft hair with no kinks left.

Keeping it looking fresh

Cotton collects dust over time. Every few months, take the feather down, give it a gentle comb and a shake outdoors. Hang it away from direct sun if you used a coloured cord, since cotton fades.

Ways to use macrame feathers

  • Hang a cluster of three on a piece of driftwood.
  • Add a few to a macrame wall hanging for texture.
  • Dip-dye the tips for a soft ombre.
  • Make tiny ones as gift tags or bag charms.

Common mistakes

  • Uneven sides. Alternate left and right with every knot.
  • Curly strands. Keep brushing, then finish with a fine comb.
  • A ragged edge. Dull scissors chew the fibres. Use your sharpest pair.

New to knots? Start with macrame basics and the lark's head knot, which is the cow hitch flipped over. Then try a macrame plant hanger with leftover cord.

Free printable

Print the steps and supply list for this project

One page you can take to the table. Free with a free account, no password.

Get the free printable

What you'll need

Free, for this project

Get this checklist by email

  • All 8 tools and materials, with tick boxes
  • A link to print all 10 steps on paper, to keep by you while you craft

No password. The whole tutorial stays free on this page.

Quick answer

How to make a macrame feather: tie cow hitch knots down a centre cord, brush the cotton out with a pet brush and back it with felt. An easy project: about 1 hour 30 minutes. Materials cost about $4 to $8. You need 8 things, including stiff felt sheet, fabric glue and pet slicker brush. The 10 steps start with gather Cotton String, Felt, Glue and a Pet Brush for a Macrame Feather and trace a Leaf Template Onto the Felt Backing.

Step-by-step guide

10 steps, about 7 minutes. Tap a picture to jump to that step. Your progress saves automatically.

Tick each step off as you go.

  1. Step 1: Gather Cotton String, Felt, Glue and a Pet Brush for a Macrame Feather

    Watch this step · 0:14

    You need 3mm single strand twisted cotton string, a sheet of felt, fabric glue, a pet slicker brush with a fine comb, and sharp scissors. Chantel uses E6000 glue and a pet brush from the store. The brush is the secret. Its fine wire teeth untwist the cotton into soft fibres, which is what gives the feather its fluffy look.

    Tip:

    Buy a brush you only use for crafts. Cotton fluff clogs it fast.

    Back to all steps

  2. Step 2: Trace a Leaf Template Onto the Felt Backing

    Watch this step · 0:48

    The felt backing holds the feather's shape on the wall, so start there. Chantel cuts a reusable template first, then traces it onto the felt. Hers is 13 inches long and 7 1/4 inches wide at the widest point, which makes a finished feather about 15 by 8 inches. A paper leaf shape folded in half gives you a template that is even on both sides.

    Tip:

    Keep the template. Making a matching set is much easier with one.

    Back to all steps

  3. Step 3: Cut the Leaf Shape Out of the Felt

    Watch this step · 1:10

    Cut along your traced line with sharp scissors. Go slowly around the curves and the pointed tip so the edge stays smooth. This shape decides the final outline of your feather, because you will trim the brushed cord along it later. Set the felt leaf aside for now while you knot the feather itself.

    Tip:

    Stiff felt works better than soft craft felt. It keeps the feather flatter on the wall.

    Back to all steps

  4. Step 4: Tie a Double Knot at the Top of the Macrame Feather Centre Cord

    Watch this step · 1:43

    Cut a piece of cord 36 inches long. This becomes the spine running down the middle of the feather. Fold it in half and tie a double knot near the fold to make a small hanging loop at the top. Lay it on the table with the loop at the top and the two long tails running straight down toward you.

    Tip:

    Make the loop big enough to slip over a nail or a driftwood branch.

    Back to all steps

  5. Step 5: Attach the First Cords With a Cow Hitch Knot

    Watch this step · 2:08

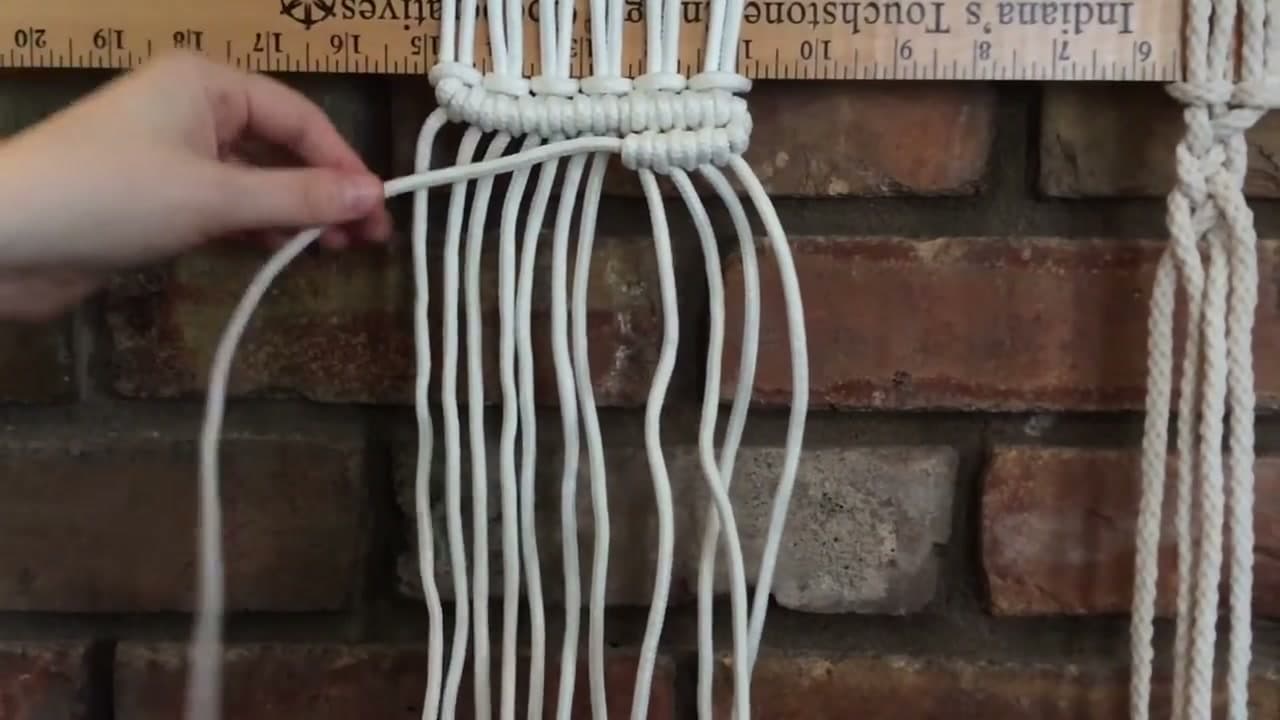
    Cut 32 pieces of cord at 17 inches each. Fold one in half, slide the loop under the centre cords, and pull the ends through the loop. That is a cow hitch knot. It is the reverse of a lark's head knot. Flip a lark's head over and you see a cow hitch. Push it up snug under the top knot.

    Tip:

    Lay the felt under your work now and then to check you are covering it edge to edge.

    Back to all steps

  6. Step 6: Stack Cow Hitch Knots Left and Right Down the Feather

    Watch this step · 3:05

    Add the next cord from the other side, then keep alternating. One on the left, one on the right, all the way down until all 32 pieces are on. Push each knot up tight against the one above so the spine looks neat. When you are done, tie the two middle strands in a double knot at the bottom to lock everything in place.

    Tip:

    Leave about an inch of cord past the felt on each side so no felt shows from the front.

    Back to all steps

  7. Step 7: Brush Out the Macrame Feather Strands With a Pet Brush

    Watch this step · 4:05

    Move the feather to a board you do not mind scratching. Hold the spine down with one hand and brush the strands outward with the pet brush, working from the spine to the tips. Clear the cotton out of the brush as it builds up. Then go over it again with a fine comb so no curls are left. Flip it over and brush the other side.

    Tip:

    Expect a pile of fluff. Brush over a towel or outdoors to save on cleanup.

    Back to all steps

  8. Step 8: Glue the Felt Backing to the Back of the Macrame Feather

    Watch this step · 5:40

    Decide which side looks best and use it as the front. Turn the feather over. Run glue down the centre spine and spread a little over the felt as well. Press the felt leaf onto the back so it is centred under the spine. Flip the feather back over and add a dab of extra glue at the top for a strong hold.

    Tip:

    Let the glue set before trimming so the felt does not slide out of place.

    Back to all steps

  9. Step 9: Trim the Macrame Feather Along the Felt Edge

    Watch this step · 6:02

    With the felt on the back, cut along its edge to shape the feather. Chantel's regular scissors were a bit dull, so she used her sewing scissors. Sharp shears give a crisp edge, while dull ones chew the fibres. Cut one side, then the other, and flip the feather over to tidy any stray bits you missed.

    Tip:

    Trim a little at a time. You can always take more off, never put it back.

    Back to all steps

  10. Step 10: Tidy the Macrame Feather Tip and Fluff the Fringe

    Watch this step · 6:16

    Give the front a final comb so the strands lie straight, and snip any that stick out past the outline, especially around the tip. Then fluff the fringe lightly with your fingers to give the feather a little more depth. Hang it by the top loop on its own, or group a few on a branch.

    Tip:

    A light mist of fabric stiffener holds the shape longer in a humid room.

    Back to all steps

How to Tie a Half Hitch (Horizontal Double Half Hitch, 2 Methods)

Keep going

How to Tie a Half Hitch (Horizontal Double Half Hitch, 2 Methods)

7 steps · about 10 minutes

Keep going with macramé

More on this topic, picked for this macrame feather.

You reached the last step

Save this project to come back to it

Your ticked steps, the free printable and your other saved makes, together in My Projects. Free, no password.

You tapped Save

Save this project for later

We'll email you a link, no password.

How to Make a Macrame Feather - Easy Macrame Leaf for Beginners

  • Your saved projects in one list
  • Your ticked steps on any device

Check your inbox for an email from us. Not there? Look in your spam folder.

Free printable

Printable sheet for this project

The bonus is hidden until you sign up.

Free with a free account, no password. Every step above stays open to everyone.

Products Used

The Checklist

How to Make a Macrame Feather - Easy Macrame Leaf for Beginners

Tools
5
Materials
3
Steps
10
Video
7 min

Tools we recommend

As an Amazon Associate we earn from qualifying purchases. Links on this page may be affiliate links - clicking them and buying doesn't change your price, but helps support Crafting Step by Step.

Tags

The Crafter's Weekly

New macramé tutorials, every Sunday

One short email with the week's best step-by-step guides. Free, no spam, unsubscribe anytime.

Did this work for you?

What's next

Related collections

Curated theme pages that include this tutorial.

Similar tutorials

Hand-picked next reads based on the one you just finished.

Liked this macramé tutorial?

Pick the crafts you want to hear about. One email every Sunday with new step-by-step tutorials. No spam, easy to unsubscribe.

Get more like this in your inbox

Weekly digest. Pick the categories you want. Unsubscribe anytime.

Send me tutorials about

We only email about new tutorials. Easy unsubscribe anytime.