How to Make a Macrame Curtain (Square Knot Window Curtain)

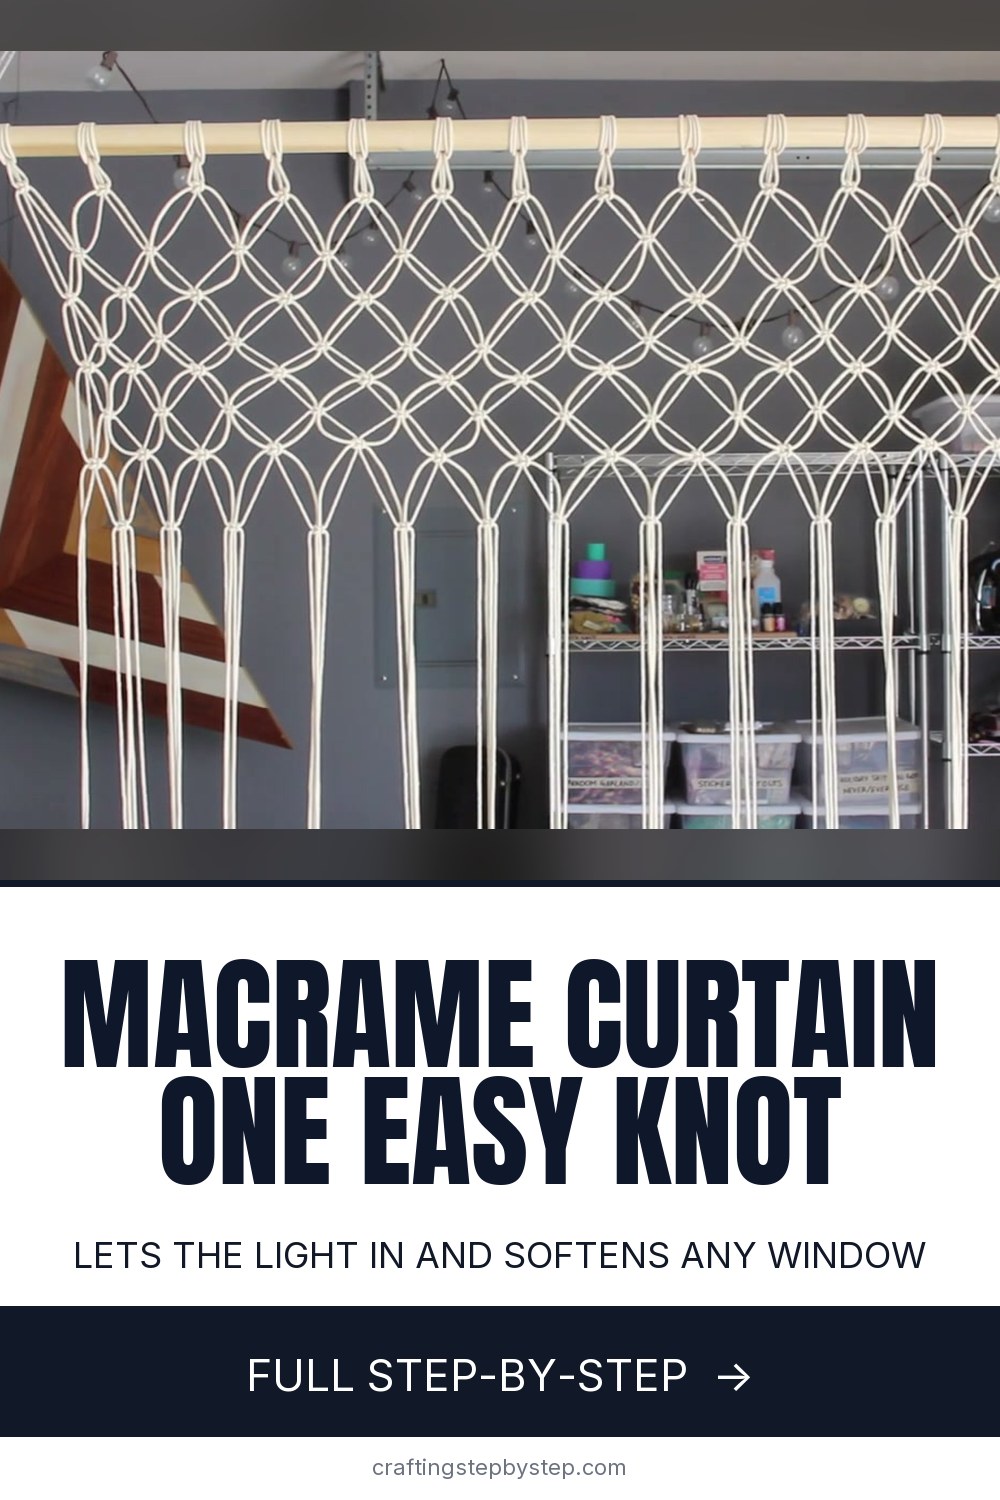
The finished result: How to Make a Macrame Curtain (Square Knot Window Curtain)
  • Difficulty: Medium
  • About 5 hours
  • 10 steps

You tapped Save

Save this project for later

We'll email you a link, no password.

How to Make a Macrame Curtain (Square Knot Window Curtain)

  • Your saved projects in one list
  • Your ticked steps on any device

Check your inbox for an email from us. Not there? Look in your spam folder.

Print

Steps written out by Crafting Step by Step from Living to DIY with Rachel Metz's video (opens YouTube) (5:52). Published .

A macrame curtain lets light in and still softens a window. Rachel Metz of Living to DIY made this one for her office: 15 groups of cotton cord on a wooden dowel, eight rows of alternating square knots and long loose ends that fall past the sill. It uses one knot, repeated. If you can tie a square knot, you can make the whole curtain.

How to make a macrame curtain: the short version

  • Measure your window and cut cords a little more than twice the drop.
  • Fold cords in pairs and tie each group to a hanging dowel with a lark's head knot.
  • Tie one row of square knots, then alternate the cords for each row after.
  • Finish the last row with simple overhand knots.
  • Hang the dowel from ceiling hooks and trim the ends.

How much cord you need

Rachel's window is 52 inches wide and 52 inches high. She cut 30 cords about 120 inches long and used roughly 200 yards in all, four big spools. Knots eat cord, so always buy more than you think and return what you do not open. To size your own: measure the drop from the dowel to where you want the fringe to end, double it, and add a third for the knots. Use a dowel a few inches wider than the window frame.

Choosing your cord

Single strand cotton cord in 4 or 5mm is soft, easy on the hands and gives the knots a rounded look. Three-ply rope works too and unravels into a fluffy fringe if you comb the ends. Natural cream suits most rooms. You could add beads, a band of colored cord or dye the fringe once it is hanging.

Hang the dowel while you work

Work with the dowel hanging at eye level, not lying flat. Rachel tied hers up in the garage with scrap yarn. The cords hang straight, so you can see the pattern as it grows and keep the rows even. A clothes rail or two hooks on a door frame work too.

Keeping the rows straight

Alternating square knots drift if you do not check them. Keep a tape measure close and measure from the dowel to each knot as you finish a row. Leave the same gap between rows every time. A gap of about 3 inches gives the open, lacy net you see here.

More than a curtain

The same panel works as a room divider, a headboard or a backdrop for a party photo booth. Rachel left hers plain white and hangs small potted plants and seasonal decorations off the spare dowel at each end, so the look changes through the year without retying a knot.

Common problems

  • Knots twist into a spiral. You tied the same half knot twice. Alternate the starting side each time.
  • The curtain slopes. Measure each row from the dowel, not from the row above.
  • Cords come up short. Knot a spare piece on with an overhand knot and hide it in the fringe.

More macrame

New to knotting? Start with how to macrame, then practice the lark's head knot and the square knot. The same knots make a macrame wall hanging and a plant hanger to hang beside your curtain.

Free printable

Print the steps and supply list for this project

One page you can take to the table. Free with a free account, no password.

Get the free printable

What you'll need

Free, for this project

Get this checklist by email

  • All 9 tools and materials, with tick boxes
  • A link to print all 10 steps on paper, to keep by you while you craft

No password. The whole tutorial stays free on this page.

Quick answer

Make a macrame window curtain from cotton cord and a dowel. A medium project: about 5 hours. Materials cost about $45 to $80. You need 9 things, including 2 small nails, jute rope and 2 ceiling hooks. The 10 steps start with measure and Cut the Macrame Curtain Cords, pair and Fold the Macrame Cords in Half, tie the Cord Groups Onto the Dowel With a Lark's Head Knot and start the First Square Knot Under the Dowel.

Step-by-step guide

10 steps, about 6 minutes. Tap a picture to jump to that step. Your progress saves automatically.

Tick each step off as you go.

  1. Step 1: Measure and Cut the Macrame Curtain Cords

    Watch this step · 0:46

    Drape a piece of cord over your existing curtain rod and let it hang to where you want the curtain to end. Fold it in half to find the length, then add extra for the knots. Cut that first piece and use it as your guide for the rest. Rachel cut 30 cords for a 52 inch window.

    Tip:

    Cut long. A curtain that ends too high is much harder to fix.

    Back to all steps

  2. Step 2: Pair and Fold the Macrame Cords in Half

    Watch this step · 0:54

    Pick up two cords and hold them together as one. Fold the pair in half to find the middle. That fold is the loop that goes over the dowel. Two cords folded in half give you four hanging strands, which is what each square knot needs. Make 15 of these groups for a curtain the size of Rachel's.

    Tip:

    Lay the groups out in a row so they do not tangle.

    Back to all steps

  3. Step 3: Tie the Cord Groups Onto the Dowel With a Lark's Head Knot

    Watch this step · 1:18

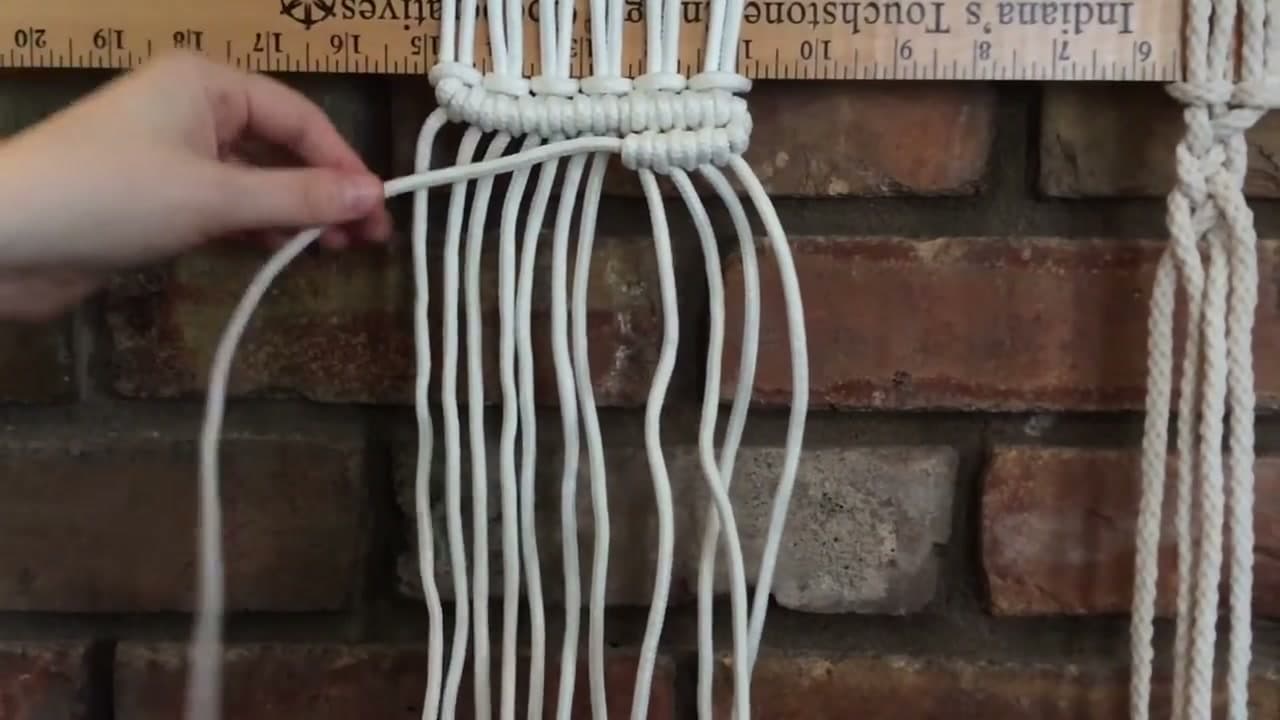
    Hang the dowel at a comfortable height first. Put the folded loop of a group over the dowel from the front, then pull all four cord ends down through the loop and tighten. That is a lark's head knot. Repeat for every group, then slide them along the dowel until the spacing is even.

    Tip:

    Space the groups first, then tighten each one firmly.

    Back to all steps

  4. Step 4: Start the First Square Knot Under the Dowel

    Watch this step · 1:48

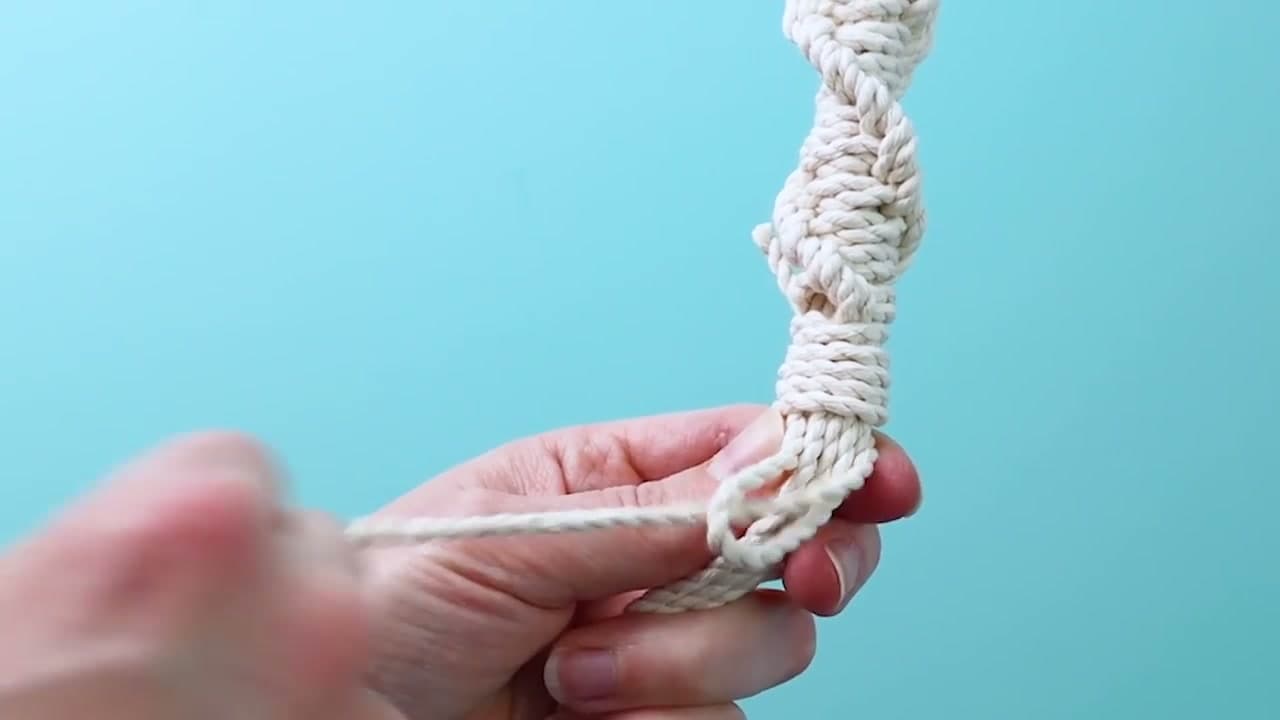
    Take one group of four cords. The two middle cords stay still. Put the left outer cord behind the two middles. Bring the right outer cord under the left cord, over the two middles and through the loop on the left side. Pull both outer cords to snug this first half of the knot up under the dowel.

    Tip:

    Keep the middle cords taut with your fingers while you tie.

    Back to all steps

  5. Step 5: Finish the Square Knot on the Other Side

    Watch this step · 2:06

    Now mirror the move. Put the right outer cord behind the middles. Bring the left cord under it, over the two middles and through the loop on the right. Pull tight. The two halves lock together into a flat square knot. Tie one on every group across the dowel to finish the first row.

    Tip:

    Always switch sides. Two halves on the same side make a spiral.

    Back to all steps

  6. Step 6: Tie the Second Row of Alternating Square Knots

    Watch this step · 2:36

    For row two, leave the first two cords alone. Take the two right cords of one group and the two left cords of the next group, and tie a square knot with those four. The outer cords of the old groups become the middles of the new knot. Work across the whole row. This is what makes the open net.

    Tip:

    Row three goes back to the original groups, so the rows alternate.

    Back to all steps

  7. Step 7: Measure the Rows to Keep the Macrame Curtain Level

    Watch this step · 3:14

    Keep alternating rows down the curtain. After each row, hold a tape measure against the work and check the distance from the dowel to the knots. Rachel noticed her rows starting to slope and caught it this way. Nudge any knot up or down before you tighten it hard. She tied eight rows in all.

    Tip:

    Measure from the dowel every time so small errors do not add up.

    Back to all steps

  8. Step 8: Tie Overhand Knots on the Last Row of the Curtain

    Watch this step · 4:04

    For the final row, Rachel took the outer cords of neighbouring groups and joined them with a single overhand knot. It closes each diamond at the bottom and it is quicker than a square knot. You could use this simpler knot for the whole curtain if square knots feel fiddly. Below it, leave the cords hanging loose.

    Tip:

    Stop knotting about two thirds down so the fringe can fall free.

    Back to all steps

  9. Step 9: Add Nails and a Rope Loop to the Dowel Ends

    Watch this step · 4:23

    Hammer a small nail into each end of the dowel, leaving the heads sticking out. Fold a piece of rope in half to make a loop and slip it over each nail. The rope lets the dowel float in front of the window instead of sitting on brackets. Jute rope or more macrame cord both look good here.

    Tip:

    Pre-drill a small hole if your dowel is hardwood so it does not split.

    Back to all steps

  10. Step 10: Hang the Macrame Curtain From Ceiling Hooks

    Watch this step · 4:41

    Screw two ceiling hooks above the window, one over each end of the dowel. Loop the ropes onto the hooks and let the curtain settle. Then trim the fringe straight across. Rachel saved the offcuts, knotted them together and hung them from the bare ends of the dowel to fill the gaps at each side.

    Tip:

    Trim the fringe once it hangs. Cords stretch a little at first.

    Back to all steps

How to Make a Macrame Snowflake Ornament

Keep going

How to Make a Macrame Snowflake Ornament

Keep going with macramé

More on this topic, picked for this macrame curtain.

You reached the last step

Save this project to come back to it

Your ticked steps, the free printable and your other saved makes, together in My Projects. Free, no password.

You tapped Save

Save this project for later

We'll email you a link, no password.

How to Make a Macrame Curtain (Square Knot Window Curtain)

  • Your saved projects in one list
  • Your ticked steps on any device

Check your inbox for an email from us. Not there? Look in your spam folder.

Free printable

Printable sheet for this project

The bonus is hidden until you sign up.

Free with a free account, no password. Every step above stays open to everyone.

Products Used

The Checklist

How to Make a Macrame Curtain (Square Knot Window Curtain)

Tools
4
Materials
5
Steps
10
Video
6 min

Tools we recommend

As an Amazon Associate we earn from qualifying purchases. Links on this page may be affiliate links - clicking them and buying doesn't change your price, but helps support Crafting Step by Step.

Tags

The Crafter's Weekly

New macramé tutorials, every Sunday

One short email with the week's best step-by-step guides. Free, no spam, unsubscribe anytime.

Did this work for you?

What's next

Related collections

Curated theme pages that include this tutorial.

Similar tutorials

Hand-picked next reads based on the one you just finished.

Liked this macramé tutorial?

Pick the crafts you want to hear about. One email every Sunday with new step-by-step tutorials. No spam, easy to unsubscribe.

Get more like this in your inbox

Weekly digest. Pick the categories you want. Unsubscribe anytime.

Send me tutorials about

We only email about new tutorials. Easy unsubscribe anytime.