How to Draw a Menorah

Save it for later. We'll email you a link, no password.

Find it again on your phone or computer, with your finished steps ticked.

You tapped Save

Save this project for later

We'll email you a link, no password.

How to Draw a Menorah

  • Your saved projects in one list
  • Your ticked steps on any device

Check your inbox for an email from us. Not there? Look in your spam folder.

  • 10 steps
  • 6:49 video
  • Difficulty: Easy
  • About 30 minutes
  • Drawing

Based on a video by Art for Kids Hub

Opens their YouTube channel

Steps written out by Crafting Step by Step · Published · Updated

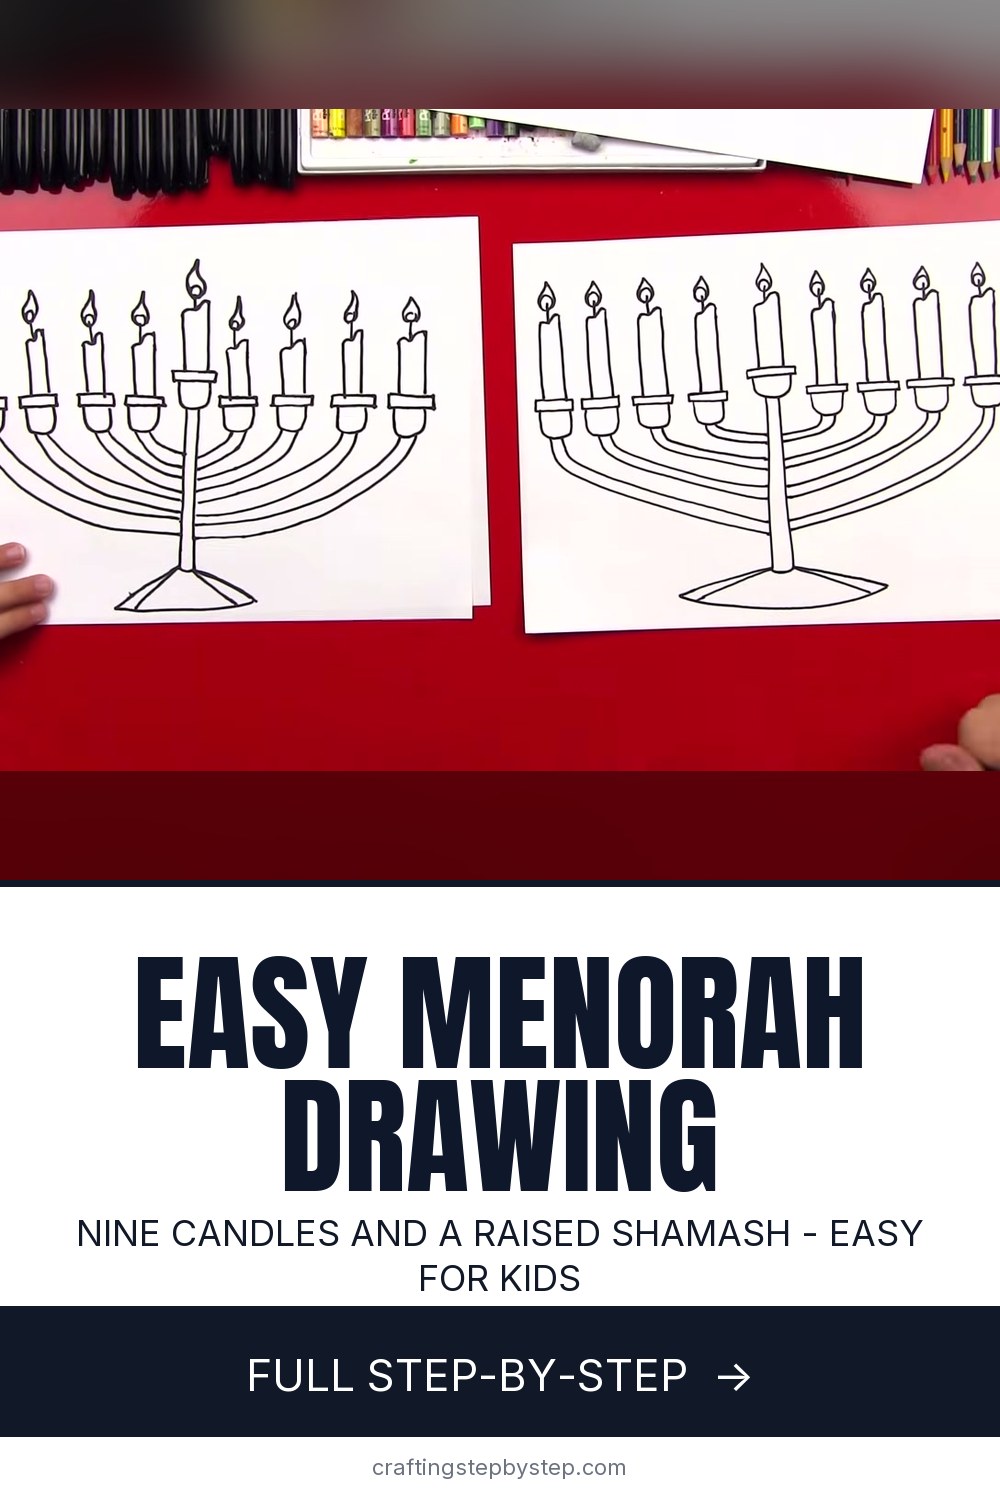
The finished result: How to Draw a Menorah

This menorah drawing comes from Art for Kids Hub, where Rob and his son draw side by side with black markers. You start with the tall candle in the middle, add eight more candles in a row, then build the stem, the base and the curved arms that hold it all together. It takes about seven minutes and uses only lines, cups and curves.

You need a black marker, a sheet of paper turned sideways, and colored pencils if you want to add color at the end.

What makes a Hanukkah menorah drawing look right

A Hanukkah menorah has nine branches. Eight candles stand for the eight nights of Hanukkah. The ninth is the shamash, the helper candle, and it sits higher than the others, usually in the middle. It is used to light the rest. On the first night you light the shamash and one candle, then add one more candle each night until all eight burn on the last night.

Many families call this nine-branch lamp a hanukkiah. The seven-branch menorah is a different object from the ancient Temple. If your drawing has nine candles with one raised, people will read it as a Hanukkah menorah right away.

Spacing the nine menorah candles

Spacing is the hard part. Rob's son started over once because his first candle landed too far left and the last ones ran off the page. That is normal. Start the shamash in the exact middle of the paper. Then mark four small rectangles on each side before you draw any more candles. Moving a rectangle is easy. Moving a whole candle is not.

Keep the eight side candles the same height and in a straight line. Only the center one goes up.

Coloring ideas for your menorah

The video leaves the menorah as a clean line drawing, which looks great. If you want color, try a gold or yellow menorah with blue and white candles, the classic Hanukkah colors. Orange and yellow flames with a little red at the base look warm. A dark blue background around the menorah makes the flames pop.

Hanukkah cards and window art

Hanukkah 2026 begins at sundown on December 4. Draw the menorah on folded cardstock for a Hanukkah card, or tape a colored one to a window. For a fun twist, draw eight copies on one sheet and light one more candle in each picture, one for every night.

Menorah drawing ideas to try next

  • Draw one candle on its own with our candle drawing guide.
  • Add a dreidel and some gelt coins under the menorah.
  • Frame the page with a snowflake in each corner for a winter scene.
  • Draw a wrapped present with a blue and white bow next to it.

Common menorah drawing problems

  • The candles do not fit. Mark the holder rectangles first, then draw candles.
  • The arms cross each other. Draw from the outside of each candle cup in toward the stem, and keep the gap between each pair of lines the same.
  • The two sides look different. Put small dots on the stem where each arm joins, then copy those spots on the other side.
  • The base wobbles. Turn your paper so your hand curves the bottom line naturally.

New to drawing? Start with how to draw for the basics.

Free printable

Print the steps and supply list for this project

One page you can take to the table. Free with a free account, no password.

Get the free printable

What you'll need

Free, for this project

Get this checklist by email

  • All 4 tools and materials, with tick boxes
  • A link to print all 10 steps on paper, to keep by you while you craft

No password. The whole tutorial stays free on this page.

Quick answer

Draw a Hanukkah menorah in 10 easy marker steps: nine candles with flames, a raised shamash, curved arms and a sturdy base. An easy project: about 30 minutes. You need 4 things, including colored pencils, black fine point permanent marker and pencil and eraser. The 10 steps start with draw the Center Candle Holder of the Menorah, draw the Menorah's Shamash Candle With a Melting Top and add the Wick and Flame to the Menorah's Center Candle.

Step-by-step guide

10 steps, about 7 minutes. Tap a picture to jump to that step. Your progress saves automatically.

Tick each step off as you go.

  1. Step 1: Draw the Center Candle Holder of the Menorah

    Watch this step · 1:26

    Turn your paper sideways. Find the middle of the page and draw a skinny rectangle that is wide but not tall. This is the top of the cup that holds the center candle. Under it, draw a little U shape so the cup has a rounded bottom. Start this a bit above the middle of the paper. You need room below for the stem, the arms and the base.

    Tip:

    Draw lightly in pencil first if you want to check the spot before you use marker.

    Back to all steps

  2. Step 2: Draw the Menorah's Shamash Candle With a Melting Top

    Watch this step · 1:42

    On top of the rectangle, draw two straight lines going up, right next to each other. They should be parallel, which means they run side by side the whole way. Make the right one a little longer. Connect the tops with a wavy line so the candle looks like it is melting. This is the shamash, the helper candle, and it is the tallest one on the menorah.

    Tip:

    A wavy top looks more like a real wax candle than a flat line does.

    Back to all steps

  3. Step 3: Add the Wick and Flame to the Menorah's Center Candle

    Watch this step · 2:00

    Draw a short line up from the top of the candle for the wick. Above the wick, draw a small circle. That circle is the inside of the flame. Around it, draw a raindrop shape that comes to a point at the top. That is the outside of the flame. Your first menorah candle is done. Every other candle uses these same steps.

    Tip:

    Keep the flames small. Big flames crowd each other once all nine candles are lit.

    Back to all steps

  4. Step 4: Space Out Eight Candle Holders on the Menorah

    Watch this step · 2:30

    Before you draw more candles, plan the spacing. Draw four small rectangles in a row on each side of the center candle. Put them a little lower than the center cup, all at the same height. Leave even gaps between them. These are the tops of the other eight candle holders. Check that the last one on each side still fits on the paper.

    Tip:

    Count as you go: four on the left, four on the right, nine candles in all.

    Back to all steps

  5. Step 5: Draw All Nine Menorah Candles With Flames

    Watch this step · 2:44

    Now repeat the candle steps on every rectangle. Add the U-shaped cup, the two parallel lines, the wavy melted top, the wick and the raindrop flame. The video speeds this part up, so pause it whenever you need. When you finish, you have eight candles in a straight row with the shamash standing taller in the middle.

    Tip:

    Draw all the cups first, then all the candles, then all the flames. It keeps them even.

    Back to all steps

  6. Step 6: Draw the Menorah's Center Stem

    Watch this step · 3:25

    From the bottom of the center cup, draw two lines straight down, close together. This is the stem of the menorah. Do not take it all the way to the bottom of the paper. Leave some room, because the base goes under it. Connect the bottom of the two lines with a small curve.

    Tip:

    Keep the stem lines parallel, like the candle sides. A stem that leans makes the menorah look tipsy.

    Back to all steps

  7. Step 7: Draw Diagonal Lines for the Menorah Base

    Watch this step · 3:46

    At the bottom of the stem, draw two diagonal lines that go out and down, one to each side. Try to make them match. Rob adds an extra line coming out of each side to make a fancier base, and you can do the same. Draw the top lines out a little longer than the lower ones so the base looks wide and steady.

    Tip:

    Small mistakes can turn into design details. That is how the fancy base in the video happened.

    Back to all steps

  8. Step 8: Finish the Menorah Base With a Curved Line

    Watch this step · 4:20

    Turn your paper so you can draw comfortably. Draw a curved line along the bottom to connect the ends of the diagonal lines. Now the base looks like a flat dish that the menorah stands on. Look at the whole drawing. You have nine candles, a stem and a base. Only the arms are left.

    Tip:

    Turning the paper is a trick artists use all the time. Your hand curves best in one direction.

    Back to all steps

  9. Step 9: Draw the Curved Menorah Arms on One Side

    Watch this step · 5:00

    Start with the candle next to the center. Draw a curved line from the bottom of its cup, down and in, until it meets the stem. Then draw a second curve on the outside of it, keeping the gap about the same. Do the next candle out the same way, with a longer curve that joins the stem lower down. Keep going until all four candles on that side connect.

    Tip:

    The outer candles need the longest arms. Each arm should sit inside the one below it.

    Back to all steps

  10. Step 10: Draw Matching Menorah Arms on the Other Side

    Watch this step · 5:58

    Now copy the arms on the other side. Rob puts two small dots on the stem where each arm should join, matching the first side. Then he draws each curve from the candle cup down to those dots. Take your time here. When both sides are done, your menorah is finished. Leave it as a line drawing or color it in.

    Tip:

    If the sides look a little different, that is fine. Hand-drawn menorahs are never exact.

    Back to all steps

How to Draw a Gnome

Keep going

How to Draw a Gnome

You reached the last step

Save this project to come back to it

Your ticked steps, the free printable and your other saved makes, together in My Projects. Free, no password.

You tapped Save

Save this project for later

We'll email you a link, no password.

How to Draw a Menorah

  • Your saved projects in one list
  • Your ticked steps on any device

Check your inbox for an email from us. Not there? Look in your spam folder.

Free printable

Printable sheet for this project

The bonus is hidden until you sign up.

Free with a free account, no password. Every step above stays open to everyone.

Products Used

The Checklist

How to Draw a Menorah

Tools
2
Materials
2
Steps
10
Video
7 min

Tools we recommend

As an Amazon Associate we earn from qualifying purchases. Links on this page may be affiliate links - clicking them and buying doesn't change your price, but helps support Crafting Step by Step.

Tags

The Crafter's Weekly

New drawing tutorials, every Sunday

One short email with the week's best step-by-step guides. Free, no spam, unsubscribe anytime.

Test your knowledge

Did the lesson stick? Start with this one.

5 questions covering what you just read. No signup, no score saved, and you can stop after this one.

Question 1 of 5

How many candles does a Hanukkah menorah hold?

Quick reference

Key takeaways from How to Draw a Menorah

5 questions, answers, and one-line explanations. Tap to expand.

  1. 1.How many candles does a Hanukkah menorah hold?

    Answer: Nine

    Eight candles for the eight nights, plus the shamash helper candle.

  2. 2.What is the center candle, the shamash, used for?

    Answer: Lighting the other candles

    The shamash is the helper candle used to light the others.

  3. 3.How is the shamash usually set apart in the drawing?

    Answer: It sits higher

    The shamash is raised above the other eight so it stands out.

  4. 4.Why place all eight holders before drawing any candles?

    Answer: To get even spacing

    Planning the spacing first keeps four candles evenly on each side.

  5. 5.What helps the curved arms match on both sides?

    Answer: Dots on the stem for the joins

    Marking where each arm meets the stem lets you mirror the first side.

Did this work for you?

What's next

Related collections

Curated theme pages that include this tutorial.

Similar tutorials

Hand-picked next reads based on the one you just finished.

Liked this drawing tutorial?

Pick the crafts you want to hear about. One email every Sunday with new step-by-step tutorials. No spam, easy to unsubscribe.

Get more like this in your inbox

Weekly digest. Pick the categories you want. Unsubscribe anytime.

Send me tutorials about

We only email about new tutorials. Easy unsubscribe anytime.