How to Draw a Candle

Save it for later. We'll email you a link, no password.

Find it again on your phone or computer, with your finished steps ticked.

You tapped Save

Save this project for later

We'll email you a link, no password.

How to Draw a Candle

  • Your saved projects in one list
  • Your ticked steps on any device

Check your inbox for an email from us. Not there? Look in your spam folder.

  • 10 steps
  • 12:27 video
  • Difficulty: Easy
  • About 30 minutes
  • Drawing

Based on a video by Cartooning Club Focus

Opens their YouTube channel

Steps written out by Crafting Step by Step · Published · Updated

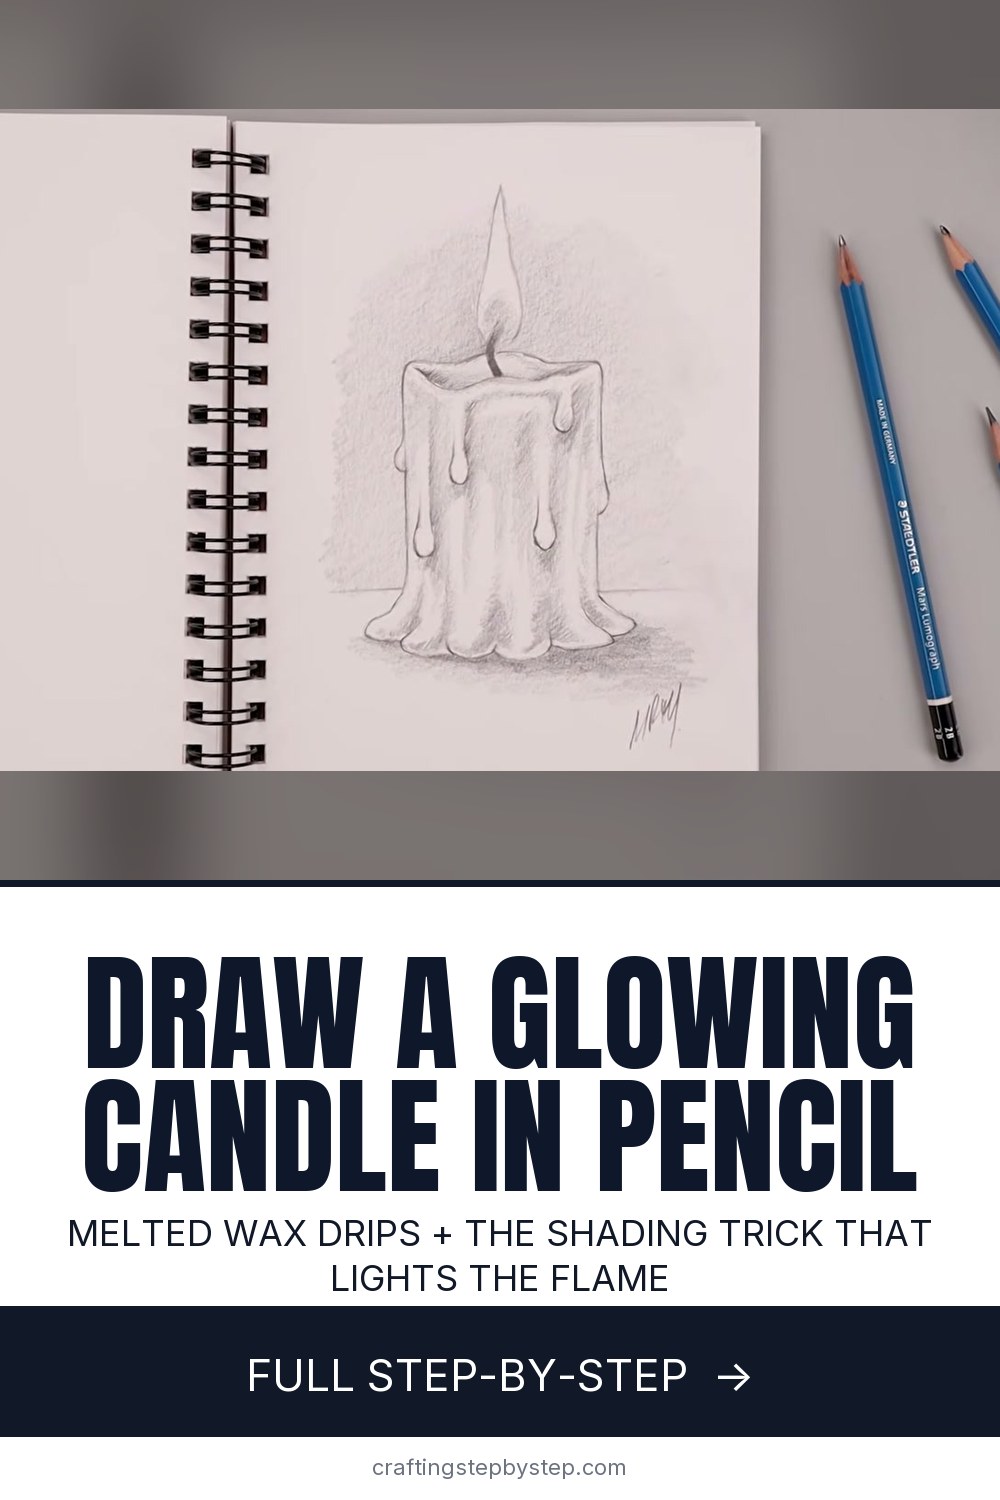
The finished result: How to Draw a Candle

A lit candle is a great first realistic drawing. The shape is a plain cylinder, the drips add character, and the flame teaches you the oldest shading trick there is. This lesson from Cartooning Club Focus builds a melted pillar candle in graphite, from a light rectangle to a glowing flame on a shaded table. Plan on 15 to 30 minutes.

Supplies for a pencil candle drawing

You need a sketchbook, a soft pencil and an eraser. The video uses a Staedtler Mars Lumograph 2B, which is dark enough for shadows and still light enough for guidelines if you press softly. A kneaded eraser helps you clean up guidelines and lift highlights without smearing. A paper blending stump is optional. It smooths the background tone into a soft haze.

Shading a candle as a cylinder

A pillar candle is a cylinder, so treat it like one. The light comes from the flame above, which means the top rim is the brightest part. Each side darkens as it turns away from you. Keep the middle of the front lighter and build tone along both edges. Curve every shading stroke to follow the round body. Straight strokes flatten it.

New to tone? Our how to shade guide covers pressure, hatching and blending.

How to draw wax drips that look melted

Real wax runs, slows down and pools. So each drip is a thin run that ends in a rounded bead. Stagger the lengths. Drips that end at the same height look like a fence. Shade under each bead and leave a sliver of white on top, and it pops off the candle. At the base, the scalloped puddle makes the candle look heavy and settled.

Drawing a candle flame glow

You never draw the glow. You draw the dark around it. Keep the flame mostly white paper with a little gray at its base near the wick. Then use the side of your pencil to shade the background, darkest right next to the flame and fading out. If you shade too close, dab the edge with a kneaded eraser to bring the light back.

Common candle drawing problems

  • The candle leans. Keep the center guideline until the end. Check both sides against it.
  • The top looks flat. The rim is an oval, not a line. Curve the front edge down.
  • The flame looks gray. Shade the background darker, not the flame.
  • The drawing smudges. Rest your hand on a scrap of paper.

Candle drawing ideas to try next

Once the pillar works, change the candle. Draw a thin birthday candle with stripes on a slice of cake. Make a cartoon candle for kids with a face and a bouncy flame. For Halloween, set your candle inside a pumpkin drawing and turn it into a jack-o-lantern. For December, draw four candles in a ring of greenery for an advent wreath, or make a real one with our Christmas wreath guide. Try a colored-pencil flame in yellow and orange too. A candle sketch also makes a nice card to pair with a handmade gift like a concrete candle holder. For more beginner basics, start at how to draw.

Free printable

Print the steps and supply list for this project

One page you can take to the table. Free with a free account, no password.

Get the free printable

What you'll need

Free, for this project

Get this checklist by email

  • All 5 tools and materials, with tick boxes
  • A link to print all 10 steps on paper, to keep by you while you craft

No password. The whole tutorial stays free on this page.

Quick answer

Draw a realistic candle in 10 pencil steps: a cylinder, melted wax drips, a flame, then background shading that makes it glow. An easy project: about 30 minutes. You need 5 things, including sketchbook or drawing paper, graphite drawing pencil and kneaded eraser. The 10 steps start with sketch a Center Guideline and Rectangle for the Candle Body, round the Rectangle Into a Candle Cylinder, draw the Candle Wick and Flame Outline and draw Melted Wax Puddle Drips Around the Candle Base.

Step-by-step guide

10 steps, about 12 minutes. Tap a picture to jump to that step. Your progress saves automatically.

Tick each step off as you go.

  1. Step 1: Sketch a Center Guideline and Rectangle for the Candle Body

    Watch this step · 0:44

    Draw a light vertical line down the middle of your page. It keeps the candle straight. Then draw a straight line across near the top for the top of the candle. Bring a line straight down on each side and close the bottom. You now have a tall rectangle. Press softly. Most of these lines get erased or reshaped later, so keep them faint.

    Tip:

    Make the rectangle a bit taller than it is wide. That proportion reads as a pillar candle.

    Back to all steps

  2. Step 2: Round the Rectangle Into a Candle Cylinder

    Watch this step · 1:04

    Turn the box into a cylinder. From the top corners, draw a curve that dips slightly in the middle and comes back up. Flip that curve to draw the back edge, so the top becomes a thin oval. Do the same at the bottom, but make that curve a little steeper. The bottom sits lower than your eye, so you see more of its roundness.

    Tip:

    Keep the top oval thin. A fat oval makes the candle look like you are looking down on it.

    Back to all steps

  3. Step 3: Draw the Candle Wick and Flame Outline

    Watch this step · 1:27

    At the top center, draw a short bent wick leaning a little to one side. Then draw the flame. Start high on the center guideline, at the tip. Curve down and out to each side, then round off the bottom so it wraps around the wick. The flame looks like a teardrop pointing up. Keep it narrow and tall.

    Tip:

    A slight lean in the wick and flame looks more natural than a dead straight one.

    Back to all steps

  4. Step 4: Draw Melted Wax Puddle Drips Around the Candle Base

    Watch this step · 2:15

    Erase some guidelines first. Then add a puddle of wax at the bottom. From each bottom corner, step up a little and curve the line down and out onto the table. Round it off and tuck it back in. Across the front, draw a row of small bumps along the bottom. These scallops look like wax that pooled and hardened.

    Tip:

    Vary the size of the bumps. Even scallops look like lace, not wax.

    Back to all steps

  5. Step 5: Melt the Top Rim of the Candle Into a Wavy Edge

    Watch this step · 2:35

    A burning candle never keeps a sharp rim. Start at the left side of the front edge and bend it down. Add a few small curves as you move across toward the right. Then do the same along the back edge, dipping down and back up. Clean up the old straight top line. The candle now looks like it has been burning for a while.

    Tip:

    Let the rim dip lowest near the flame. That is where wax melts first.

    Back to all steps

  6. Step 6: Add Wax Drips Running Down the Front of the Candle

    Watch this step · 3:40

    Draw a few small ovals down the front of the candle. These are the tips of the drips. Stagger their heights so no two line up. From the top of each oval, draw two lines going up to the rim, fading them out as you go. Add a couple of drips on the sides too, bulging out past the edge. They give the candle a melted outline.

    Tip:

    Three or four drips on the front is plenty. Too many and the candle looks busy.

    Back to all steps

  7. Step 7: Darken the Candle Wick and Soften the Flame Edge

    Watch this step · 4:40

    Now add contrast. Trace the wick to make it a bit thicker and darker, darkest at the base. Fade it out as it goes up into the flame. Then go lightly around the flame outline, starting at the bottom and working up to the point. Soften the edges as you go. A hard, dark outline makes the flame look like a cutout.

    Tip:

    Use light pressure on the flame. You can always add tone, but graphite is hard to lift from a white flame.

    Back to all steps

  8. Step 8: Darken the Candle Outline Around the Wax Drips

    Watch this step · 5:35

    Shade a little gray inside the bottom of the flame, near the wick, and fade it up. Then work around the whole perimeter of the candle. Darken the outer edge and blend it in toward the drips. Go down each side and around every drip at the base. This firms up the shape before you start the background.

    Tip:

    Turn the sketchbook as you go so your hand always moves in a comfortable curve.

    Back to all steps

  9. Step 9: Shade the Background So the Candle Flame Glows

    Watch this step · 7:30

    Here is the trick. Use the side of your pencil and shade the background along the top of the candle and around the flame. Make it darkest next to the flame and fade it out as you move away. The white paper inside the flame now looks bright. Work all the way around the flame and down the sides of the candle.

    Tip:

    Blend the background with a paper stump for a smooth, soft glow.

    Back to all steps

  10. Step 10: Add the Table Line and Cast Shadow Under the Candle

    Watch this step · 10:00

    Draw a light horizontal line behind the candle for the back of the table. Then plant the candle. Shade a shadow across the base and under the puddle of wax, and stretch it out toward the right. The shadow gets lighter as it moves away. Finish by darkening the shadows under the drips and along the sides, then sign your candle drawing.

    Tip:

    Leave a thin white line where the wax puddle meets the shadow. It keeps the edge crisp.

    Back to all steps

How to Draw a Snow Globe

Keep going

How to Draw a Snow Globe

You reached the last step

Save this project to come back to it

Your ticked steps, the free printable and your other saved makes, together in My Projects. Free, no password.

You tapped Save

Save this project for later

We'll email you a link, no password.

How to Draw a Candle

  • Your saved projects in one list
  • Your ticked steps on any device

Check your inbox for an email from us. Not there? Look in your spam folder.

Free printable

Printable sheet for this project

The bonus is hidden until you sign up.

Free with a free account, no password. Every step above stays open to everyone.

Products Used

The Checklist

How to Draw a Candle

Tools
4
Materials
1
Steps
10
Video
12 min

Tools we recommend

As an Amazon Associate we earn from qualifying purchases. Links on this page may be affiliate links - clicking them and buying doesn't change your price, but helps support Crafting Step by Step.

Tags

The Crafter's Weekly

New drawing tutorials, every Sunday

One short email with the week's best step-by-step guides. Free, no spam, unsubscribe anytime.

Test your knowledge

Did the lesson stick? Start with this one.

5 questions covering what you just read. No signup, no score saved, and you can stop after this one.

Question 1 of 5

What do you sketch first so the candle stays straight?

Quick reference

Key takeaways from How to Draw a Candle

5 questions, answers, and one-line explanations. Tap to expand.

  1. 1.What do you sketch first so the candle stays straight?

    Answer: A center guideline

    A light vertical line down the middle keeps the whole candle upright.

  2. 2.How does the rectangle become a round pillar candle?

    Answer: Curve the top and bottom into ovals

    Curved top and bottom edges turn a flat box into a cylinder.

  3. 3.Why stagger the lengths of the wax drips?

    Answer: Drips at one height look like a fence

    Real wax runs unevenly, so mixed lengths look melted instead of fenced.

  4. 4.Which way should shading strokes run on the candle body?

    Answer: Curved around it

    Curved strokes follow the round body; straight ones flatten it.

  5. 5.How do you make the flame look like it glows?

    Answer: Shade the background dark around it

    You never draw the glow; the dark around the white flame creates it.

Did this work for you?

What's next

Related collections

Curated theme pages that include this tutorial.

Similar tutorials

Hand-picked next reads based on the one you just finished.

Liked this drawing tutorial?

Pick the crafts you want to hear about. One email every Sunday with new step-by-step tutorials. No spam, easy to unsubscribe.

Get more like this in your inbox

Weekly digest. Pick the categories you want. Unsubscribe anytime.

Send me tutorials about

We only email about new tutorials. Easy unsubscribe anytime.