How to Make an Egg Carton Butterfly Suncatcher

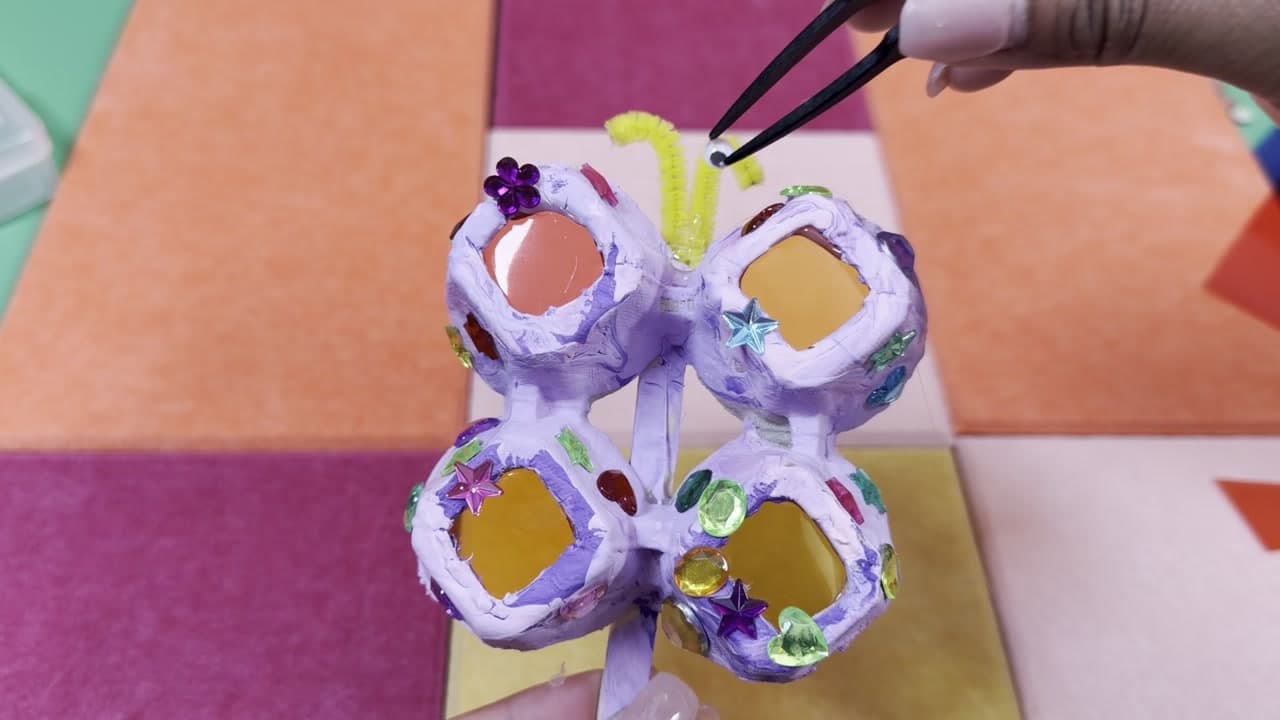
The finished result: How to Make an Egg Carton Butterfly Suncatcher
  • Difficulty: Easy
  • About 45 minutes, plus 30 minutes to dry or set
  • 9 steps

You tapped Save

Save this project for later

We'll email you a link, no password.

How to Make an Egg Carton Butterfly Suncatcher

  • Your saved projects in one list
  • Your ticked steps on any device

Check your inbox for an email from us. Not there? Look in your spam folder.

Print

Steps written out by Crafting Step by Step from Ms. Campbell Teach's video (opens YouTube) (5:01). Published .

An egg carton butterfly is one of the best things you can make from the recycling bin. Four egg cups become the wings. Little windows cut in the bottom of each cup are filled with colored acetate, so when the sun shines through, the butterfly throws patches of colored light on the floor. Ms. Campbell of Ms. Campbell Teach makes it with a preschooler at her side, which tells you how forgiving it is. A grandchild can paint and decorate while you handle the scissors and the hot glue.

What you need

  • A cardboard egg carton (paper pulp, not foam or plastic)
  • Acrylic or tempera paint and a brush
  • Colored acetate sheets or cellophane
  • White school glue and flat back rhinestones
  • A craft stick, a yellow pipe cleaner and two googly eyes
  • Scissors, a hot glue gun and craft tweezers

No acetate? Colored cellophane from a gift basket works. So does tissue paper, though it lets less light through.

Who does what

Cutting the windows and hot gluing are grown-up jobs. Egg carton is tough to pierce, and the scissor tip can slip. Children can do the painting, the glue dots, the gems, choosing acetate colors and sticking on the eyes. Low-temp glue guns are safer if an older child wants to help with the body.

Making the light show work

Cut the windows big, nearly the full bottom of each cup. A tiny hole makes a tiny spot of color. Cut the acetate a little larger than the window and glue it inside the cup so the edges hide. Use different colors in each wing for a rainbow effect. Hang the finished butterfly in a sunny window, or carry it outside on its stick and hold it up to the sun like the young crafter in the video does.

What kids practice while they make it

Ms. Campbell is a teacher, and this craft packs in a lot of early learning. Picking up gems with tweezers builds the small finger muscles children need for writing. Naming and mixing paint colors and sorting the acetate squares is color practice. Following the steps in order is a lesson in itself. Ask what color the light will be before you hold it up to the sun.

Troubleshooting

  • Paint will not cover: the carton is soaking it up. Let the first coat dry and add a second.
  • Gems keep sliding off: the glue dot is too big. Use a small dot and wait a minute before pressing.
  • Acetate pops out: cut the square bigger so it overlaps the window edge on all sides.
  • Wings flop: the craft stick needs more hot glue along its full length.

Ideas and variations

  • Two-cup butterfly: use a pair of cups for a smaller, quicker version for toddlers.
  • Paint patterns: dots, stripes or a monarch orange with black edges.
  • Garden stake: glue it to a longer dowel and stand it in a flower pot.
  • Hanging mobile: skip the stick, add a loop of string and hang several together.

More butterfly and suncatcher crafts

Try paper butterflies or an origami butterfly for a whole swarm. For more light catching, see how to make a suncatcher. Add a garden of pipe cleaner flowers for your butterflies to sit on.

Free printable

Print the steps and supply list for this project

One page you can take to the table. Free with a free account, no password.

Get the free printable

What you'll need

Free, for this project

Get this checklist by email

  • All 12 tools and materials, with tick boxes
  • A link to print all 9 steps on paper, to keep by you while you craft

No password. The whole tutorial stays free on this page.

Quick answer

Make an egg carton butterfly suncatcher with colored windows and rhinestones. An easy project: about 45 minutes, plus 30 minutes to dry or set. You need 12 things, including cardboard egg carton, acrylic paint and colored acetate sheets. The 9 steps start with gather the Egg Carton Butterfly Supplies, cut a Block of Four Cups From the Egg Carton, cut a Window in Each Egg Carton Cup, paint the Egg Carton Butterfly Wings and glue Rhinestones Onto the Egg Carton Wings.

Step-by-step guide

9 steps, about 5 minutes. Tap a picture to jump to that step. Your progress saves automatically.

Tick each step off as you go.

  1. Step 1: Gather the Egg Carton Butterfly Supplies

    Watch this step · 1:00
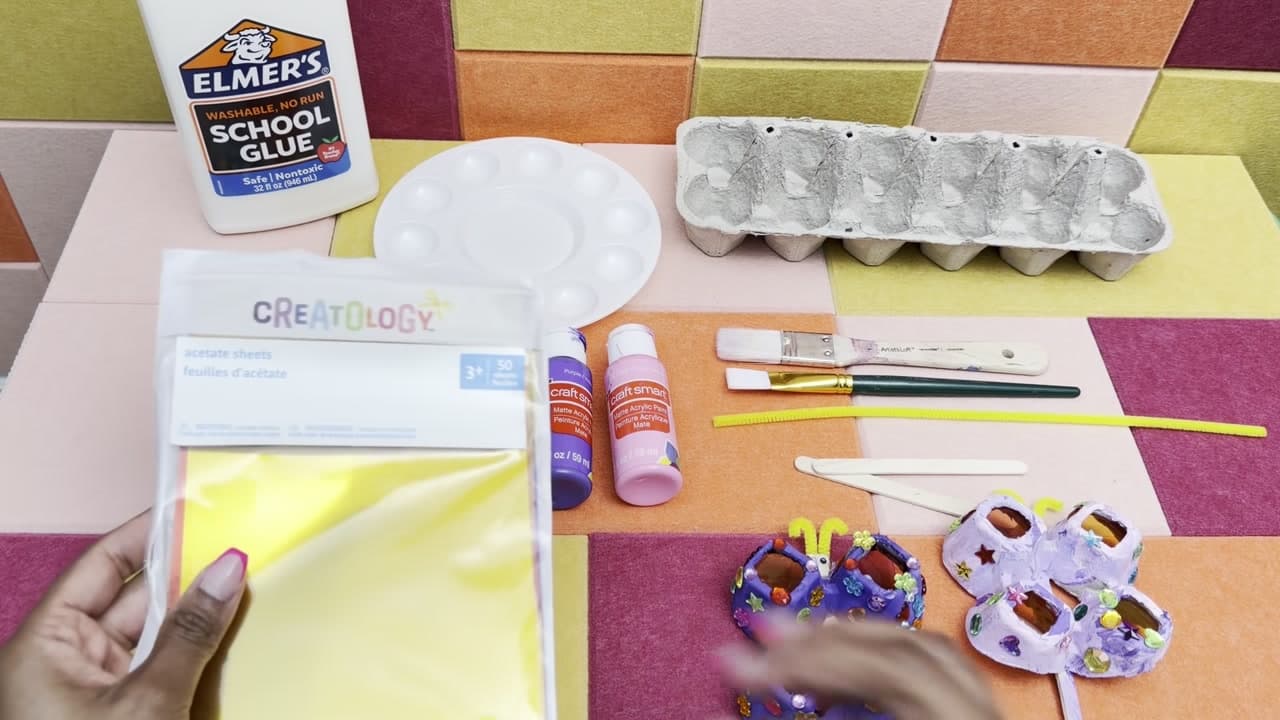
    Lay everything out before you start, so little hands are not waiting. You need a cardboard egg carton, white school glue, paint and brushes, a pipe cleaner, craft sticks and a pack of colored acetate sheets. Add rhinestones, googly eyes, scissors, craft tweezers and a hot glue gun. Cover the table first. Paint and glue get everywhere with young helpers.

    Tip:

    Pulp egg cartons take paint best. Foam cartons will not hold the glue.
    Back to all steps

  2. Step 2: Cut a Block of Four Cups From the Egg Carton

    Watch this step · 1:32

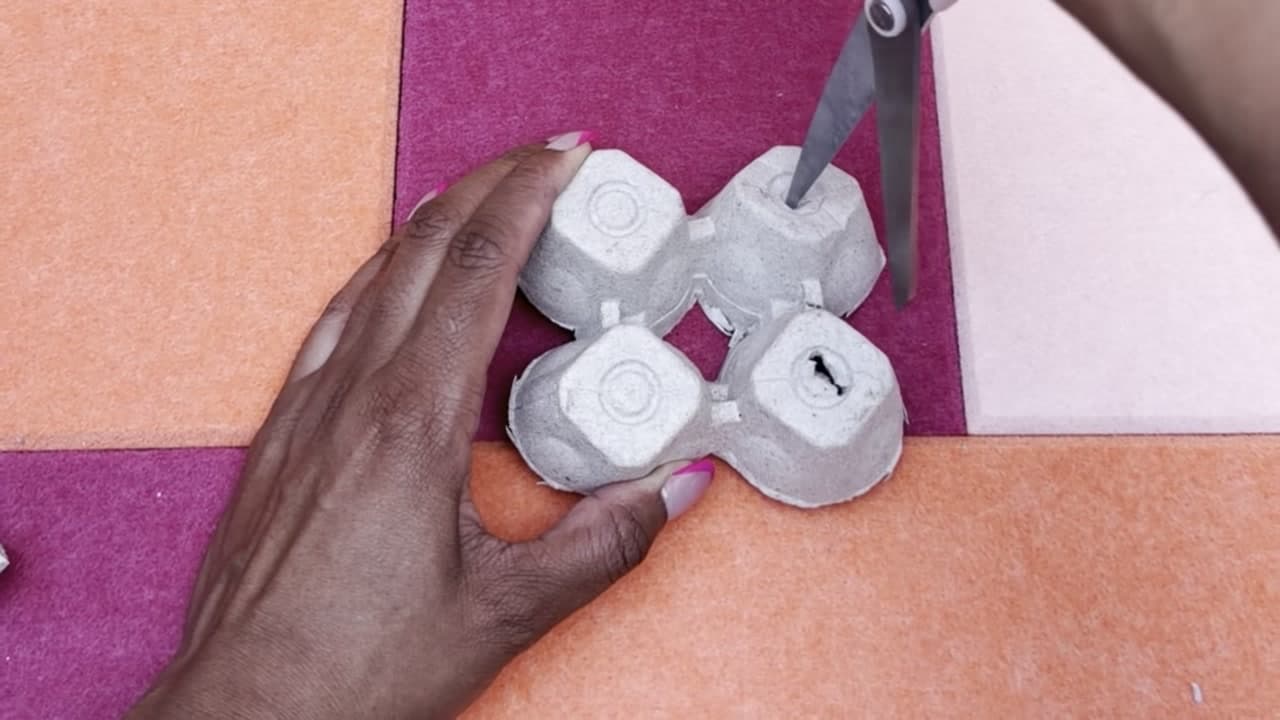
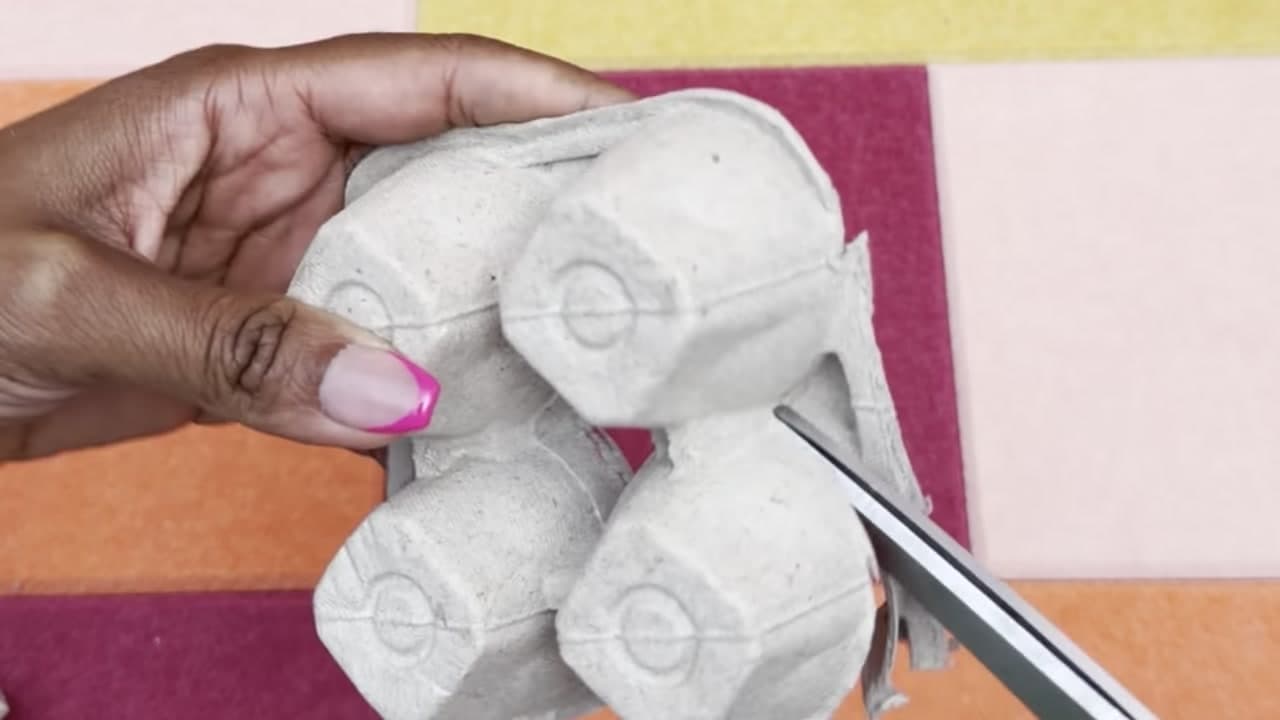
    Cut a square block of four joined cups out of the carton, two across and two down. Leave the cardboard between the cups in place so the block holds together. These four cups become the four wings of the butterfly. Trim off any ragged edges around the outside so the wing shape looks neat.

    Tip:

    One dozen-size carton gives you three butterflies, enough for siblings or cousins.

    Back to all steps

  3. Step 3: Cut a Window in Each Egg Carton Cup

    Watch this step · 1:42

    Turn the block upside down. Push the scissor tip into the bottom of one cup, then cut out a square or round window. Make it fairly large, since this is where the colored light will shine through. Repeat on all four cups. This part is for a grown-up. Egg carton is tough and the scissors can slip.

    Tip:

    A craft knife on a cutting mat gives cleaner windows, if you have one.

    Back to all steps

  4. Step 4: Paint the Egg Carton Butterfly Wings

    Watch this step · 1:52

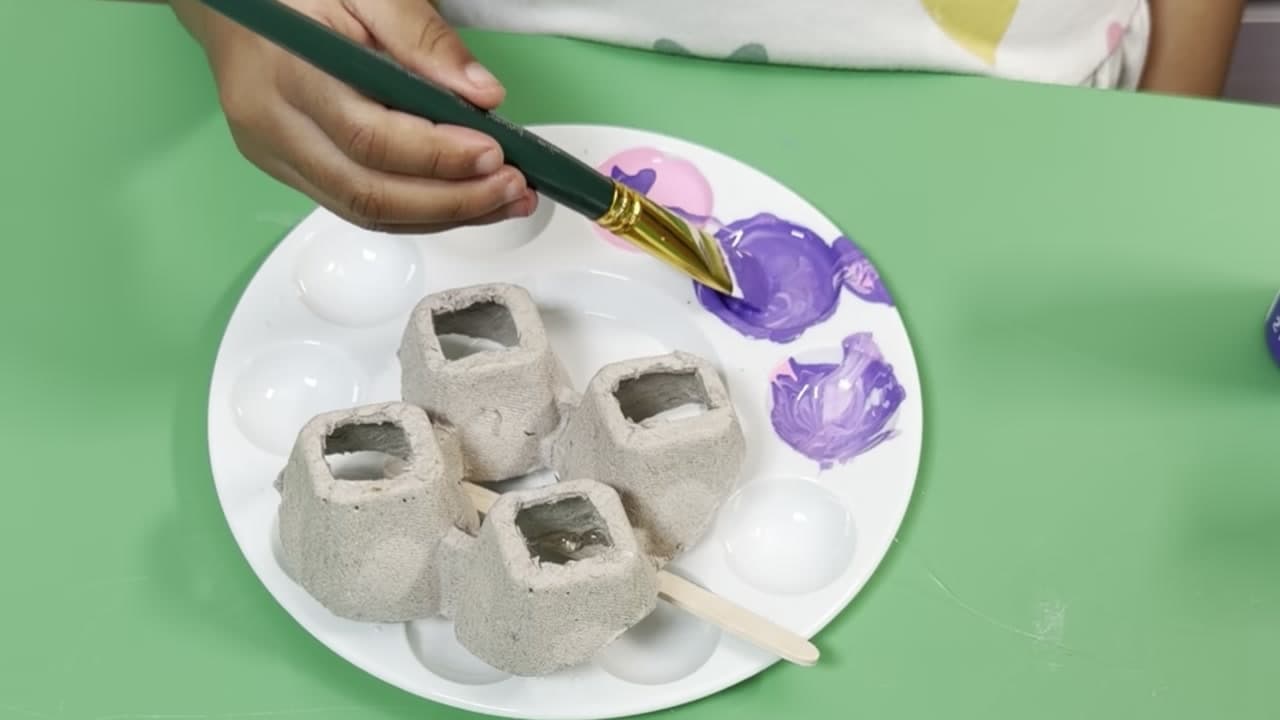
    Paint the whole block, inside and out, in any color you like. Ms. Campbell uses purple, and her little helper mixes in pink. Load the brush well, because egg carton soaks up paint. Get into the corners between the cups. Let it dry before decorating, about 20 minutes for acrylic. Set it on a paper plate while it dries.

    Tip:

    Two thin coats cover better than one thick one and dry faster.

    Back to all steps

  5. Step 5: Glue Rhinestones Onto the Egg Carton Wings

    Watch this step · 3:06

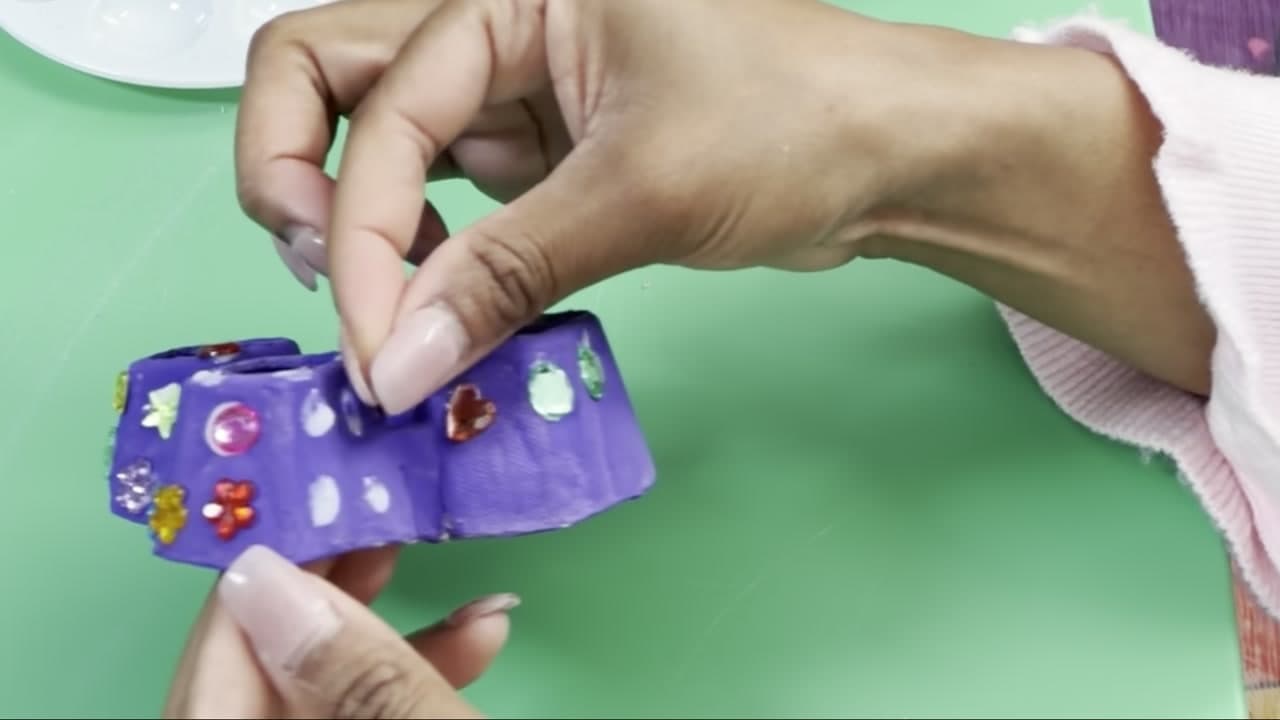
    Squeeze small dots of white glue on the painted wings. Press a rhinestone onto each dot. Hearts, stars, flowers and round gems all work. This is a good job for small fingers, and craft tweezers help with tiny gems. Cover the outside of the cups as much or as little as you like, then let the glue set.

    Tip:

    A cotton swab dipped in glue makes neat dots for little ones.

    Back to all steps

  6. Step 6: Hot Glue a Craft Stick Body to the Butterfly

    Watch this step · 3:21

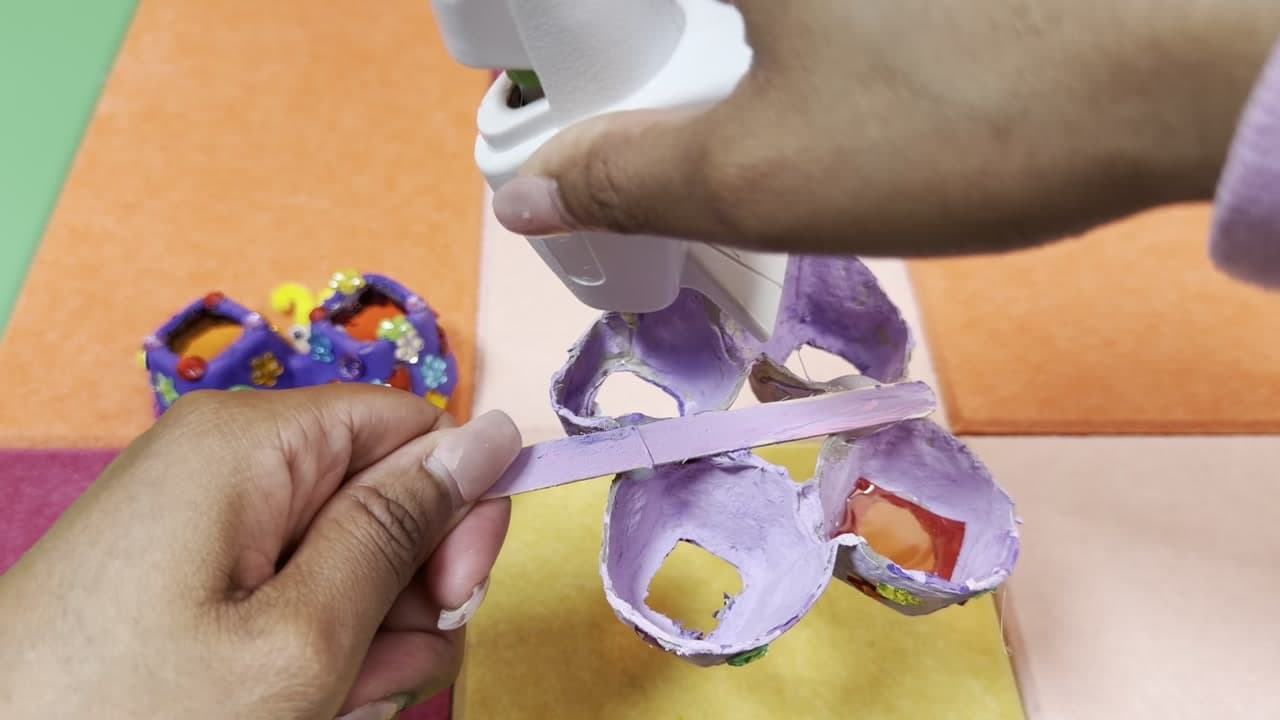
    Turn the butterfly over. Run a line of hot glue down the middle, between the two pairs of cups, and press a craft stick into it. Leave the end of the stick hanging below the wings as a handle. The stick is the butterfly's body and lets you hold it up to the sun. Paint the stick to match if you like.

    Tip:

    Hot glue is a grown-up job. Hold the stick until the glue cools, about 30 seconds.

    Back to all steps

  7. Step 7: Fill the Egg Carton Windows With Colored Acetate

    Watch this step · 3:30

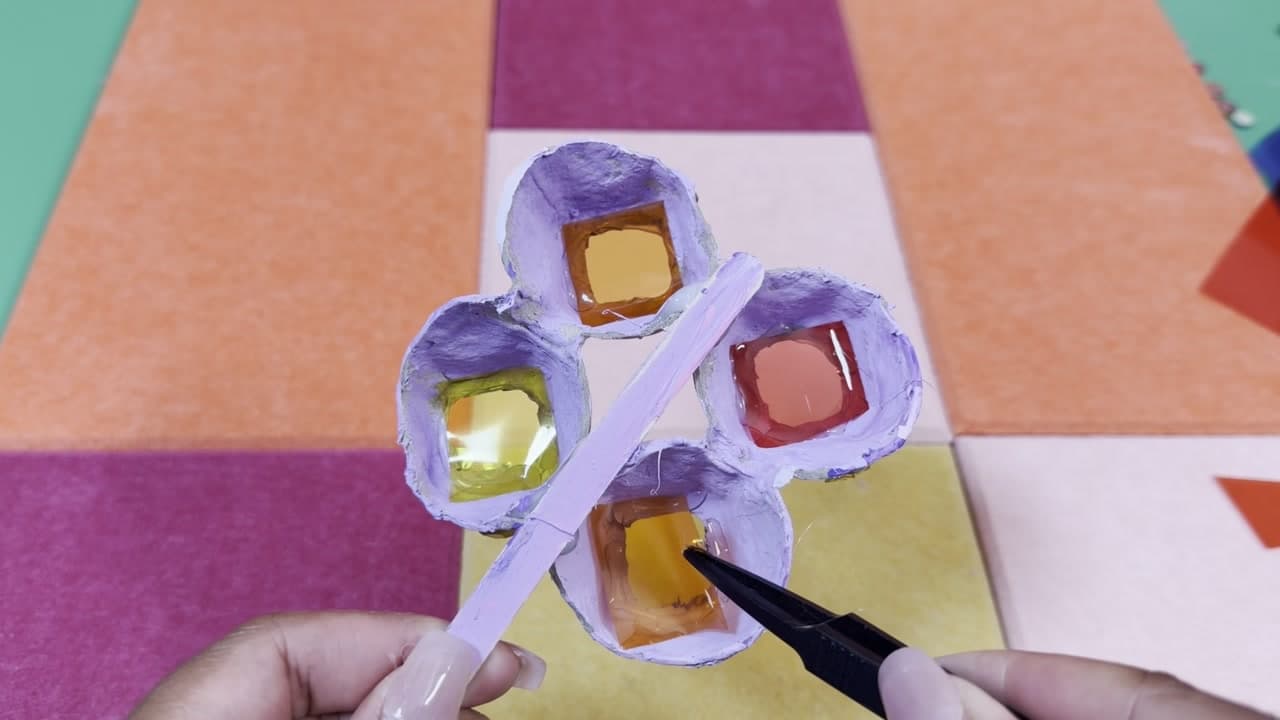
    Cut squares of colored acetate a little bigger than each window. Add a thin line of glue around the window inside the cup. Press an acetate square over it with tweezers so it lies flat and covers the hole. Mix the colors: orange, yellow, red, blue. Hold it up to the light to check every window is covered.

    Tip:

    Glue the acetate on the inside so the cut edges stay hidden.

    Back to all steps

  8. Step 8: Add Pipe Cleaner Antennae to the Egg Carton Butterfly

    Watch this step · 3:56

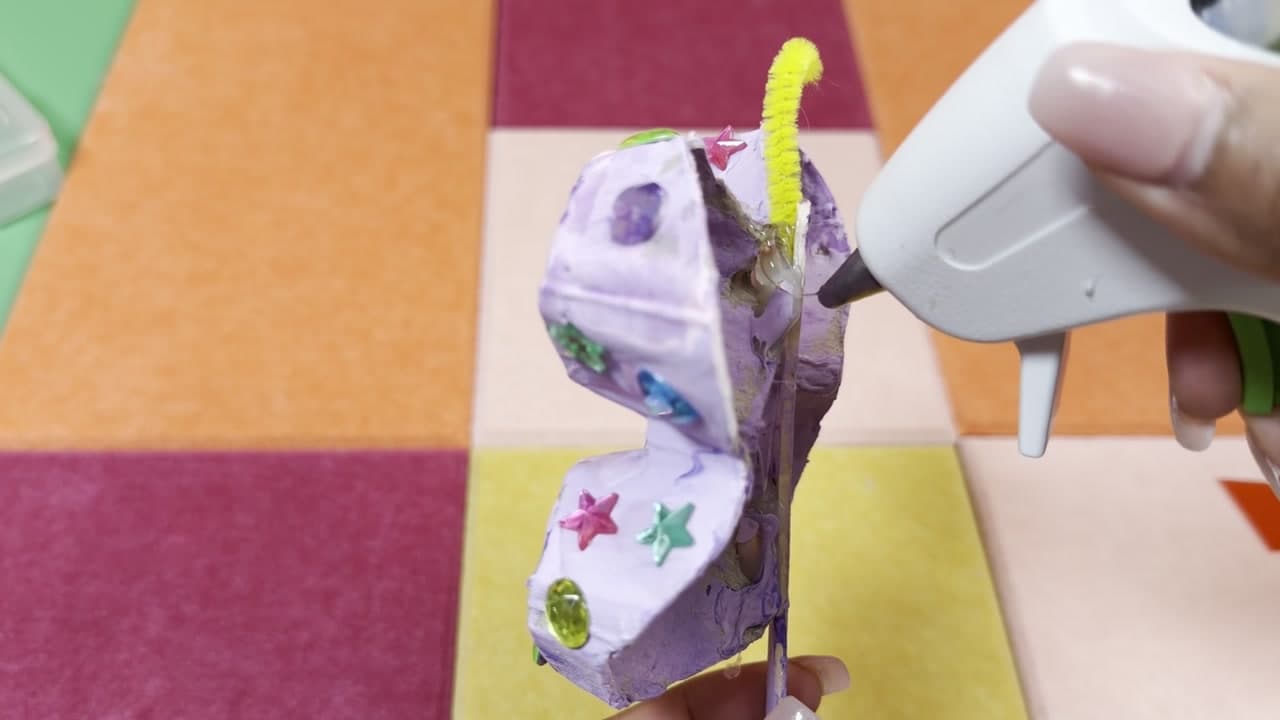
    Fold a yellow pipe cleaner in half and curl the two ends into little hooks. Put a dot of hot glue at the top of the craft stick, between the top two wings, and press the fold of the pipe cleaner into it. Hold it a few seconds so the antennae stand up straight. Bend them out into a V once the glue sets.

    Tip:

    Wrap the pipe cleaner around a pencil to get springy curled tips.

    Back to all steps

  9. Step 9: Stick Googly Eyes on the Egg Carton Butterfly

    Watch this step · 4:12

    Put a tiny dot of glue on the top of the stick, right under the antennae. Use tweezers to set two googly eyes in place. Self-adhesive eyes make it even easier for kids. That is the last step. Take your butterfly into the sunshine and watch the colored light it casts on the floor or a wall.

    Tip:

    Hang it in a south-facing window for the brightest colors.

    Back to all steps

How to Apply Mosaic Tile Adhesive (Weldbond and E6000)

Keep going

How to Apply Mosaic Tile Adhesive (Weldbond and E6000)

Keep going with crafts

More on this topic, picked for this egg carton butterfly suncatcher.

You reached the last step

Save this project to come back to it

Your ticked steps, the free printable and your other saved makes, together in My Projects. Free, no password.

You tapped Save

Save this project for later

We'll email you a link, no password.

How to Make an Egg Carton Butterfly Suncatcher

  • Your saved projects in one list
  • Your ticked steps on any device

Check your inbox for an email from us. Not there? Look in your spam folder.

Free printable

Printable sheet and shopping list for this project

The bonus is hidden until you sign up.

Free with a free account, no password. Every step above stays open to everyone.

Products Used

The Checklist

How to Make an Egg Carton Butterfly Suncatcher

Tools
4
Materials
8
Steps
9
Video
5 min

Tools we recommend

As an Amazon Associate we earn from qualifying purchases. Links on this page may be affiliate links - clicking them and buying doesn't change your price, but helps support Crafting Step by Step.

Tags

The Crafter's Weekly

New crafts tutorials, every Sunday

One short email with the week's best step-by-step guides. Free, no spam, unsubscribe anytime.

Did this work for you?

What's next

Related collections

Curated theme pages that include this tutorial.

Similar tutorials

Hand-picked next reads based on the one you just finished.

Liked this crafts tutorial?

Pick the crafts you want to hear about. One email every Sunday with new step-by-step tutorials. No spam, easy to unsubscribe.

Get more like this in your inbox

Weekly digest. Pick the categories you want. Unsubscribe anytime.

Send me tutorials about

We only email about new tutorials. Easy unsubscribe anytime.